• SUBSCRIBE TO SHIPS IN SCALE TODAY!

    The beloved Ships in Scale Magazine is back and charting a new course for 2026!
    Discover new skills, new techniques, and new inspirations in every issue.

    NOTE THAT OUR NEXT ISSUE WILL BE MARCH/APRIL 2026
  • Win a Free Custom Engraved Brass Coin!!!
    As a way to introduce our brass coins to the community, we will raffle off a free coin during the month of August. Follow link ABOVE for instructions for entering.

BALDER, Vlaardingen Herring Lugger from 1912, scratch build scale 1:50 Plate-On-Frame

Always better than the ‘Hanta’- and ‘Noro’-virus nowadays on cruise ships ….
PS: The 'PeVo'-virus is one of the few viruses that can be transmitted just by ‘looking’. There are some more here on the SoS.:)
That's right.

Thank you for sharing such wonderful work. The bit about neodymium magnets really touched me, without meaning to diminish the rest. Incredible work.

Cheers

Adry
 
That's right.
Thank you for sharing such wonderful work. The bit about neodymium magnets really touched me, without meaning to diminish the rest. Incredible work.
Cheers
Adry
Thanks for you post with the compliments and nice words, Adry. Watch out for those little nasty Neodymium buggers ........:rolleyes: They jump onto anything magnetic. While making the 2nd of the double spreader bar and attaching those buggers, I suddenly lost the small bar of just under 10 mm. I searched everywhere three times and eventually found it on the inside of one of the tweezers. Gggggrrrrr ..........Speechless
Regards, Peter
 
Now that the mizzenmast has been fixed in place, I started on the mizzen sail and its boom and gaff.
The boom and gaffs sawn to length and turned on the lathe to size:
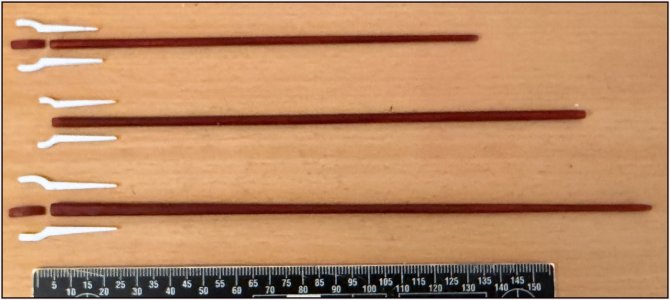
1063 Boom en Gaffels.jpg
Take the gaff for the mainsail with you at the same time. The 6 claw parts sawn out and given their first coat of white paint. Also the 2 clappers that go between the claws at the inner end of both gaffs.

Glued to the respective ends.
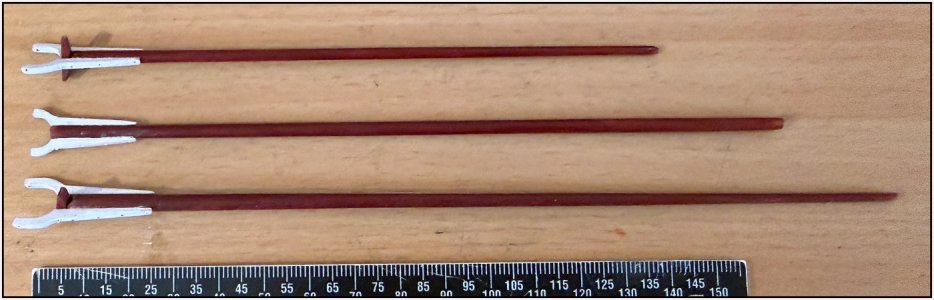
1064 Boom en Gaffels.jpg
The shafts inserted through the clappers as well as the reinforcing pins in the jaws.

Because all parts need to be aligned, I also started on the gaff sail.
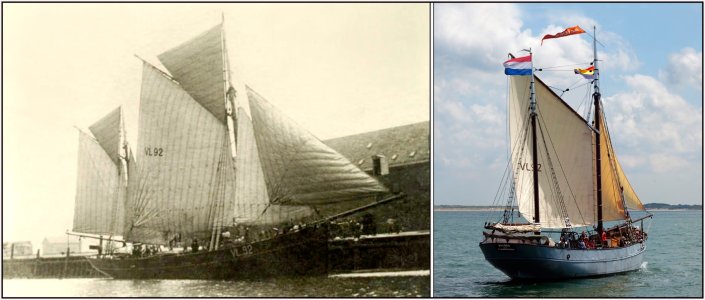
Both in its first years and now, the Balder has light sails. A sort of off-white.
1066 Zeil.jpg
Last month I spoke extensively with Ab Hoving @Ab Hoving about making sails in scale. Also about his experience working with the thin canvas: 'Havarra Fine Lawn'.
On the Bluenose, I made a few sails from 1 layer of tissue and a few from Japanese paper.
1065 Japans.jpg
For the Bluenose in 1:72 scale, I had used the thin 11-gram Kashmir. That was very fragile to work with.

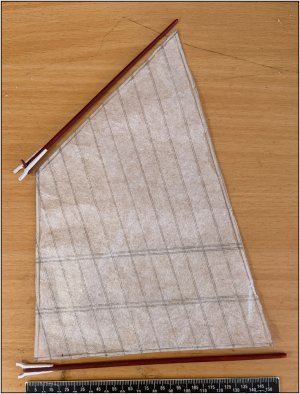
For the Balder, I am now making the gaff sail from the 18-gram Tengujo as a first test.
1067 Bezaanzeil.jpg
I have drawn the stitching and secured the folded leach with diluted glue. This sail has 2 reefing panels.
The next steps involve applying:
-'doubled' corner reinforcements;
-the bolt rope along the edge;
-eyelets at the corners as well as reinforcements and reefing eyelets at the end of the reefing panels;
-an eyelet at the top in every seam for the fitting seizing with which the sail is attached to the gaff;
-10 hoop lines on the luff;
-at the intersections of all the seams of the panels and both reef panels, all reef lines are secured with a small knot on both sides.

As it stands now, I am also going to make a 2nd test sail from the Navarra fabric. Presumably all seams have been drawn in as well, on Ab's advice. But possibly also an attempt to make them using my Admiral's sewing machine.
For now, plenty of work left.
Regards, Peter

 
Last edited:
Hello, Peter. If you want to take a look I used the Navarra Fine Lawn on the Vasa. I stitched the seams on a sewing machine but didn't really know what I was doing so they strike me as out-of-scale (despite my mom's guidance). If I were to do the stitching again I would use lighter thread but I simply didn't know any better at the time...

Final outcome: https://shipsofscale.com/sosforums/threads/vasa-1-65-deagostini-completed-build.5904/post-287632

The actual build report begins here: https://shipsofscale.com/sosforums/threads/vasa-1-65-deagostini-completed-build.5904/post-244280
 
Hello, Peter. If you want to take a look I used the Navarra Fine Lawn on the Vasa. I stitched the seams on a sewing machine but didn't really know what I was doing so they strike me as out-of-scale (despite my mom's guidance). If I were to do the stitching again I would use lighter thread but I simply didn't know any better at the time...

Final outcome: https://shipsofscale.com/sosforums/threads/vasa-1-65-deagostini-completed-build.5904/post-287632

The actual build report begins here: https://shipsofscale.com/sosforums/threads/vasa-1-65-deagostini-completed-build.5904/post-244280
Of course I know your Navarra-sails on your Vasa, Paul. The ‘Search’ option of the site gives also a nice list of your posts as well as Ab Hoving’s. And Maarten @Maarten used it to.
IMG_4893.png
For sure I will give it a try.
Regards, Peter
 
Hi Peter,
Magnificent work, seems cutting a hull with rigging in half vertically over its entire lenght brings quite some issues. Guess if you will ever do it again. ROTF
Thanks, Maarten. Don't challenge me ……..;)
You mean: the masts, the ropes and blocks of the peak and claw halyards, the fore and front stays ……. All in half?
Then I first ask Stephan @Steef66 if he could make ‘half-spun thread/half geslagen draad’. RH as well as LH ……….:rolleyes:
Splicing a 1/2 x 0,25 mm thread would be the challenge.
Perhaps a option for my 1:160 Enterprise stern and mid-section, still waiting on the shelf.
PS: splicing the sails would be no problem, I still have a piece of the other thin Japanese paper.:)
Regards, Peter
 
Last edited:
Thanks, Maarten. Don't challenge me ……..;)
You mean: the masts, the ropes and blocks of the peak and claw halyards, the fore and front stays ……. All in half?
Then I first ask Stephan @Steef66 if he could make ‘half-spun thread/half geslagen draad’. RH as well as LH ……….:rolleyes:
Splicing a 1/2 x 0,25 mm thread would be the challenge.
Perhaps a option for my 1:160 Enterprise stern and mid-section, still waiting on the shelf.
PS: splicing the sails would be no problem, I still have a piece of the other thin Japanese paper.:)
Regards, Peter
But you have to do it with half tools on half of a workbench sitting on half of a chair. We have standards to uphold on this forum.
 
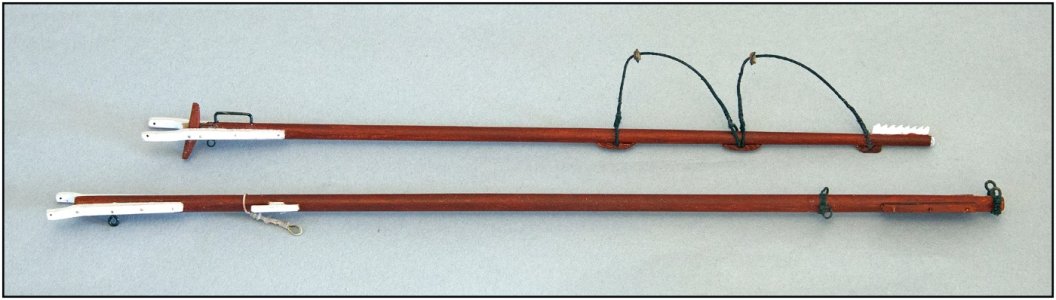
The gaff and boom for the mizzen sail are ready:
1068 Gaffel en Boom.jpg
I will explain all the parts later when attaching the sail and the corresponding blocks and lines.

I had to determine a sequence for making both bridles (spacious covered steel wire slings). They have a covered spliced loop on both sides that sits around the gaff. A timble runs over each of the sling: a spacious lignum vitae eye with an outer fitting. This fitting forms a spacious upward-facing bracket into which the single-sheave hook blocks of the peak halyard are hooked. The hole in the thimble was too small to slide over the covered loop.
The procedure:
1069 Hanepoten.jpg
A: the base wire of 0.25 mm covered over a length of 12 mm. Both ends of the covered part pulled together and tied off to form a loop. The loose part was cut off and the strands were frayed apart and cut to different lengths. These strands were tied together to form an imitation splice.
B: Starting from the binding, the imitation splice was made and the wire was covered over a further 3 cm. The line was released, the timble was slid over the wire, the wire was tensioned again, and a 10 mm section was covered a little further along for the 2nd loop.
C: Both ends were tied together for the 2nd loop and the line was tensioned again.
D: Starting from the binding, the 2nd imitation splice was made and the rest of the line was covered.
E: Filing the wooden ring of the thimble around which the bracket was later placed.

I was able to verify the fit of the bridle on a photo of the Balder that I had enlarged to the correct dimensions on my iMac screen:
1070 Hanepoten.jpg
-bottom left: the 5 cm bridle.
-bottom right: attached to the gaff.
For the observant viewer: the comb at the end is upside down ...... later turned ......;)

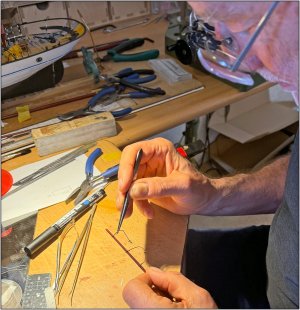
My Admiral thought it was nice how concentrated I was working:
1071 Werken.jpg
Attaching both bridles to the gaff. The comb had to be removed briefly because the shortest loops could not fit over it.
Regards, Peter
 
The gaff and boom for the mizzen sail are ready:
View attachment 606865
I will explain all the parts later when attaching the sail and the corresponding blocks and lines.

I had to determine a sequence for making both bridles (spacious covered steel wire slings). They have a covered spliced loop on both sides that sits around the gaff. A timble runs over each of the sling: a spacious lignum vitae eye with an outer fitting. This fitting forms a spacious upward-facing bracket into which the single-sheave hook blocks of the peak halyard are hooked. The hole in the thimble was too small to slide over the covered loop.
The procedure:
View attachment 606866
A: the base wire of 0.25 mm covered over a length of 12 mm. Both ends of the covered part pulled together and tied off to form a loop. The loose part was cut off and the strands were frayed apart and cut to different lengths. These strands were tied together to form an imitation splice.
B: Starting from the binding, the imitation splice was made and the wire was covered over a further 3 cm. The line was released, the timble was slid over the wire, the wire was tensioned again, and a 10 mm section was covered a little further along for the 2nd loop.
C: Both ends were tied together for the 2nd loop and the line was tensioned again.
D: Starting from the binding, the 2nd imitation splice was made and the rest of the line was covered.
E: Filing the wooden ring of the thimble around which the bracket was later placed.

I was able to verify the fit of the bridle on a photo of the Balder that I had enlarged to the correct dimensions on my iMac screen:
View attachment 606867
-bottom left: the 5 cm bridle.
-bottom right: attached to the gaff.
For the observant viewer: the comb at the end is upside down ...... later turned ......;)

My Admiral thought it was nice how concentrated I was working:
View attachment 606868
Attaching both bridles to the gaff. The comb had to be removed briefly because the shortest loops could not fit over it.
Regards, Peter
Very delicate and precise work, well done my dear friend, Peter
 
Very delicate and precise work, well done my dear friend, Peter
Such precision at scale! Bravo, Peter!
I agree with Paul and Shota, precise, delicate and patience too.
What they said :).
Very nice :-)
Thanks for all this compliments and nice words, Shota, Paul, Stephan, Roger en Dirk. Every part has his own challenges to find the right materials and construction issues. That is why building from scratch is so rewarding when the result is satisfying. Especially because the original is still present and can be compared to it.
Regards, Peter
 
Back
Top