



The paving stones look like a good idea; I wonder if they would have used 3 sizes during that period or just one basic size.

 |
The beloved Ships in Scale Magazine is back and charting a new course for 2026! Discover new skills, new techniques, and new inspirations in every issue. NOTE THAT OUR NEXT ISSUE WILL BE July/August 2026 |
|
 |
As a way to introduce our brass coins to the community, we will raffle off a free coin during the month of August. Follow link ABOVE for instructions for entering. |
|


That was also in my mind, Daniel. Thanks for poi. A piece of normal paving is under construction.The paving stones look like a good idea; I wonder if they would have used 3 sizes during that period or just one basic size.
Thanks, Bill. It will be ‘inspired’ by the old yard. But have time enough to make my plan.Those pavers are really cool and I love your vision for the diorama!
Thanks for watching with me for the detail, Bill.Hello Peter,
Looking at the picture of the dock yard, at the end of the slipway closest to the water, there appear to be flat stones. I think your choice of stones is perfect.
Bill



True storyAny one who wants to improve their model making only has to look at your builds Peter.
Truly magnificent!
JJ..


Any one who wants to improve their model making only has to look at your builds Peter.
Truly magnificent!
JJ..
Thanks for this compliments, Jack and Grant. It makes me quite for a moment …..True story

Thanks for you reply, Johan. The basic issue in those days was: earning money with the building of ship. The nowadays ‘clean area’ policy was totally unknown. I’ll thinking about a combination of stones snd wood. And some small wooden walls as quay walls.Hey Peter,
I think your picture of the shipyard in Vlaardingen gives you a brilliant starting point for your presentation of the finished model.
On the internet I found some evidence wooden flooring was used (Spakenburg), but that's not necessarily commonly used.
What's also quite interesting is to see the rather chaotic appearance of the yard, possible money was not a commodity in abundance.
Johan

Thanks, Marco. You are right about the messy shipyard. But starting with soot, rust and oil .....Good idea to set her on a shipyard. One thought: shipyards are messy and any pavement or other ground surface will be dark with soot, rust and oil.
 First the basic elements.
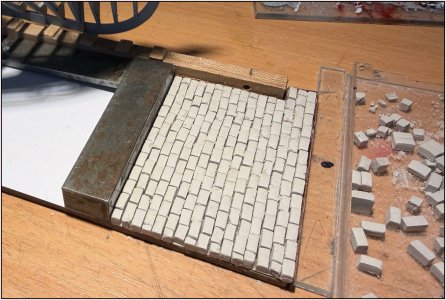
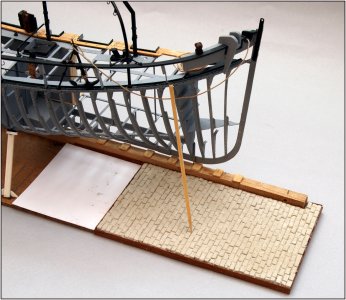
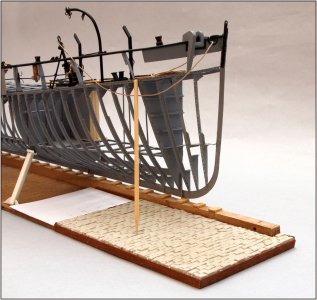
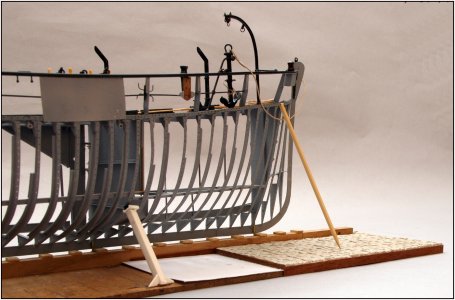 Then I will soon be rid of the old Evergreen supports as well.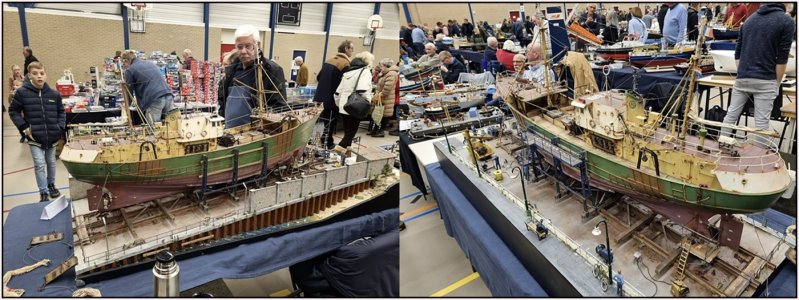
Yes, Thanks for your point to keep me sharp, Daniel.Yes, the look is now at least what I imagine the yard would look like during the early 1900's.

The starboard side is like a new build, till now they only made the structure (and will never compleet it ……). It would be not ok when is was already ‘aged’. So you are right, Paul. And there is a difference between a messy and a dirty yard. I would say: the Vlaardingen shipyard is ‘messy’.Personally I would want the aged look of the scene to match the aging on the model (which isn't much).


Hi Peter, I've been slowing catching up on my favorite build logs. I'm not quite up to date on your Balder build, but had to acknowledge your work here. This build first caught my eye due to your innovative and creative approach. Honestly, initially, I wasn't sold on it, no longer! Wow, what a beauty!!The gaff and boom for the mizzen sail are ready:
View attachment 606865
I will explain all the parts later when attaching the sail and the corresponding blocks and lines.
I had to determine a sequence for making both bridles (spacious covered steel wire slings). They have a covered spliced loop on both sides that sits around the gaff. A timble runs over each of the sling: a spacious lignum vitae eye with an outer fitting. This fitting forms a spacious upward-facing bracket into which the single-sheave hook blocks of the peak halyard are hooked. The hole in the thimble was too small to slide over the covered loop.
The procedure:
View attachment 606866
A: the base wire of 0.25 mm covered over a length of 12 mm. Both ends of the covered part pulled together and tied off to form a loop. The loose part was cut off and the strands were frayed apart and cut to different lengths. These strands were tied together to form an imitation splice.
B: Starting from the binding, the imitation splice was made and the wire was covered over a further 3 cm. The line was released, the timble was slid over the wire, the wire was tensioned again, and a 10 mm section was covered a little further along for the 2nd loop.
C: Both ends were tied together for the 2nd loop and the line was tensioned again.
D: Starting from the binding, the 2nd imitation splice was made and the rest of the line was covered.
E: Filing the wooden ring of the thimble around which the bracket was later placed.
I was able to verify the fit of the bridle on a photo of the Balder that I had enlarged to the correct dimensions on my iMac screen:
View attachment 606867
-bottom left: the 5 cm bridle.
-bottom right: attached to the gaff.
For the observant viewer: the comb at the end is upside down ...... later turned ......
My Admiral thought it was nice how concentrated I was working:
View attachment 606868
Attaching both bridles to the gaff. The comb had to be removed briefly because the shortest loops could not fit over it.
Regards, Peter


The mizzen mast and boom structure is a project on its own. So well done.Making the 2-sheave blocks with sister hooks took quite a bit of time:
View attachment 610012
The 4 mm blocks have a becket, the other 2 are 3.5 mm blocks.
After making all the other blocks, I could start rigging the mizzen boom:
View attachment 610013
From back to front:
A: 4 mm 1-sheave hook blocks for both topping lifts.
B: the hook with 0.45 mm line for tightening the clew of the sail. The line runs over a sheave at the end of the boom and runs along the bottom to the front.
B1: the line has a sling with a metal eye at the end into which a 4 mm 1-sheave hook block with a becket is hooked. A sling has been fitted around the 2 white cleats. Also with a metal eye. Inside is a 4 mm 1-sheave hook block. A 0.35 mm line runs through the blocks.
C: 2 blocks on either side of the boom with 2 sheaves on each side through which the 2x2 reefing lines run.
D: the 4 mm 2-sheave blocks with sister hooks and becket for both sheets. These run to the eyes on the bulwark on either side level with the lifeboat.
E: a 3.5 mm 2-sheave block with sister hooks for the downhaul of the boom claw. This runs to an eye on the deck to prevent the boom from being lifted.
The boom mounted on the mast. In the following pictures, most of the light comes from behind to bring out the details and the fine fabric of the sail.
View attachment 610014
A to E, the same as in the previous photo.
F: 3.5 mm 2-sheave block with sister hooks for the tack of the sail. This is secured on the starboard side to an eye on the deck just behind the mast.
G: the throat halyard, as described in the previous post.
H: the peak halyard, same as described earlier.
I: both 'bak stagen/bulwark stays.
J: the line for the monkey halyard.
PS: Hooking the blocks with sister hooks is a skill in itself. It took quite a bit of time and energy .......
A bit more zoomed in on the gaff and and both bottom angles:
View attachment 610015
View attachment 610016
View attachment 610017
A: the 3,5 mm 2-sheave block with sister hooks for the tack. It will be secured on the starboard beside the mast.
B: the 3,5 mm 2-sheave block with sister hooks for the downhaul, secured on the port side beside the mast.
All hook openings have been lashed shut. The lashed slings have metal eyelets. On the Balder itself they are made of plain metal. I thought the brass looked quite nice.
I would like to take this opportunity to thank Ab @Ab Hoving warmly for his advice on making this sail in this way. The Navarra is a wonderful fabric to work with.
Before I can start placing the mast and securing the rigging, I first need to install some eyes and blocks on the deck.
Regards, Peter
Hi Peter, I've been slowing catching up on my favorite build logs. I'm not quite up to date on your Balder build, but had to acknowledge your work here. This build first caught my eye due to your innovative and creative approach. Honestly, initially, I wasn't sold on it, no longer! Wow, what a beauty!!
I chose this post, as the effort and precision you show on the bridles is so very impressive as it is inspirational. Thank you for sharing your work. Now, I need to keep reading.
Oh, and I recall Grant's words, "crazy or genius". I don't think those two are necessarily mutually exclusive.
Hi Ken. I want to thanks you for taking time to go through the pages and for your specific replies with nice words and compliments. Sharing and helping on this SoS and also in person, are certainly aspects that provide a great deal of satisfaction, in addition to building the model.The mizzen mast and boom structure is a project on its own. So well done.

