• SUBSCRIBE TO SHIPS IN SCALE TODAY!

    The beloved Ships in Scale Magazine is back and charting a new course for 2026!
    Discover new skills, new techniques, and new inspirations in every issue.

    NOTE THAT OUR NEXT ISSUE WILL BE July/August 2026
  • Win a Free Custom Engraved Brass Coin!!!
    As a way to introduce our brass coins to the community, we will raffle off a free coin during the month of August. Follow link ABOVE for instructions for entering.

Bluenose Schooner 1921 - Model Shipways 1:64 by TexBilly

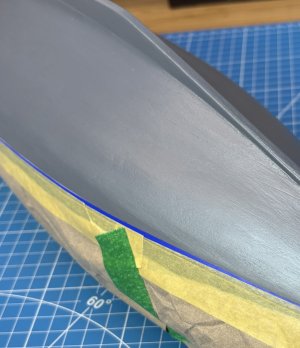
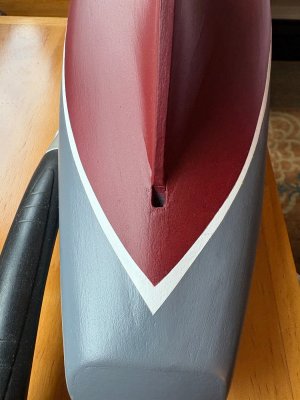
A few days later, I sprayed the lower hull and with overall good results. More detail soon on my method but the stripe as shown is still (intentionally) wide and will be narrowed to the 1mm final width when I spray the upper blue/black.

View attachment 618805
So far so good with a nice recovery of that little white part, Bill.
Regards, Peter
 
This is all new to me but I've found a number of ways to attack stripes and get clean color transitions, including of course pin stripe tape as a few have noted. I was originally planning to lay out the final 1mm stripe in the middle of the wider stripe (to avoid any gaps created by masking up to/on edges) but I was very impressed by the nice edge produced by the 3M vinyl tape.

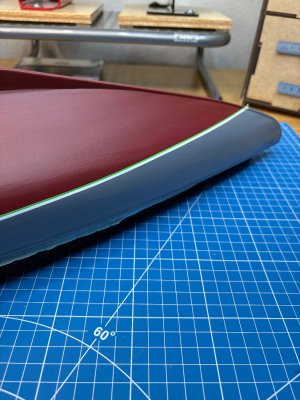
So, I decided to use the bottom (keel) side of the wide stripe as the datum for the final pin stripe. That edge is also my approximate waterline, determined earlier by my laser level exercise. Placing my 1/8" tape at the edge of the stripe was fairly easy as the contrast of the blue tape and white paint helped. Had I been using the same tape over blue paint, this might have been a little more difficult. You can see the blue tape under my masking.

IMG_1286 V2.jpeg
 
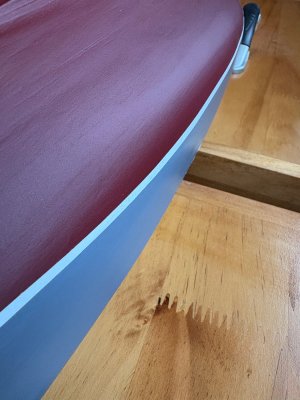
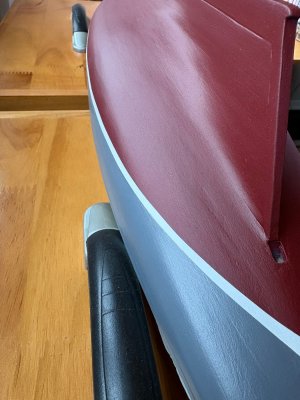
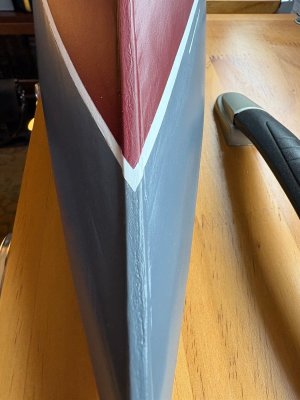
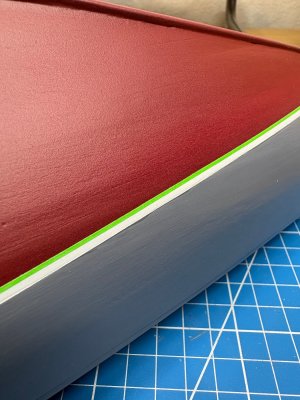
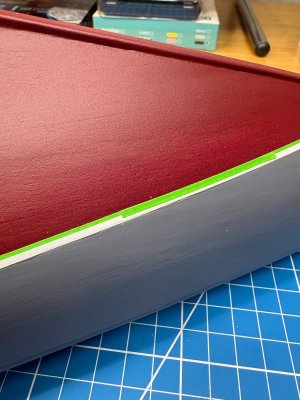
I didn't take a picture but the first step was to spray a light mist of my white paint over the tape edge. I let that sit for as long as it took to prep for the red. I probably applied 6-7 light coats of red and let each coat dry for as long as it took to paint the opposite side. Once I was happy with my coverage, I waited maybe 10 min before removing all masking and slowly removing the blue tape. Came out pretty nice, with only a few tiny spots that I might touch up. The overall paint finish was a little more matte than I expected but I'm going to apply a clear finish anyway.

IMG_1298.jpeg IMG_1301.jpeg

IMG_1299.jpeg IMG_1300.jpeg
 
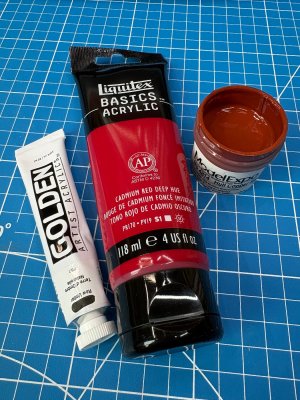
Forgot to mention - I did use the Liquitex Cadmium Red but decided I wanted to make it a little less bright. I added a bit of Golden Raw Umber and the result was a more brown red. Turns out it's fairly close to Model Expo Hull Copper Red.

IMG_1302.jpeg
 
I didn't take a picture but the first step was to spray a light mist of my white paint over the tape edge. I let that sit for as long as it took to prep for the red. I probably applied 6-7 light coats of red and let each coat dry for as long as it took to paint the opposite side. Once I was happy with my coverage, I waited maybe 10 min before removing all masking and slowly removing the blue tape. Came out pretty nice, with only a few tiny spots that I might touch up. The overall paint finish was a little more matte than I expected but I'm going to apply a clear finish anyway.

View attachment 618868 View attachment 618867

View attachment 618865 View attachment 618866
Very nice paint job, ‼️
 
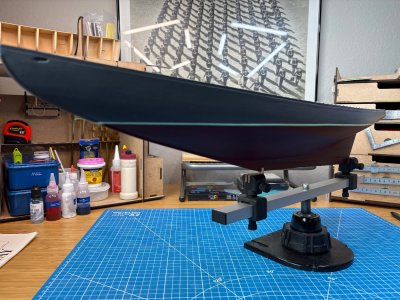
Played a bit with the upper deck color. I decided the Liquitex Payne's Gray I shared recently is for for all intents and purposes...black. A very slight hint of blue and only under the right lighting.

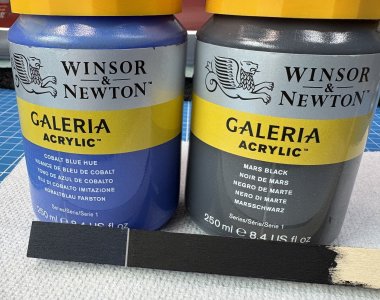
I had picked up these two jars of Winsor & Newton on clearance at a local art store so I decided to give them a try. On the right of my sample board is straight Mars Black. On the left, about a 9-10:1 mix of Cobalt Blue: Mars Black. I can see the desired bluish tint here so this has possibilities. I may even back off on the black and spray some samples while I wait for the hull to cure.

IMG_1303.jpeg
 
Before I launch into spraying the upper hull I realized I need to change course in order to create a solid 1mm stripe.

I could mark a faint pencil line 1mm below the waterline (keel pointed up), place the 1/8" tape's bottom edge along along the pencil line, then mask upward over the red lower hull. Not ideal as that line would need to be very accurate and the bottom edge of my tape will be placed on/above that line, covering the future 1mm stripe. This leaves no opportunity to sight down the hull and check for consistency. Which brings me to what now seems obvious: use 1mm vinyl tape :rolleyes:. I couldn't find any 3M 1mm tape so I had to order a different brand. Here's to hoping its adhesive is no stronger than that of 3M.

Hopefully this "obvious plan" doesn't come back to bite me! ROTF
 
I didn't take a picture but the first step was to spray a light mist of my white paint over the tape edge. I let that sit for as long as it took to prep for the red. I probably applied 6-7 light coats of red and let each coat dry for as long as it took to paint the opposite side. Once I was happy with my coverage, I waited maybe 10 min before removing all masking and slowly removing the blue tape. Came out pretty nice, with only a few tiny spots that I might touch up. The overall paint finish was a little more matte than I expected but I'm going to apply a clear finish anyway.

View attachment 618868 View attachment 618867

View attachment 618865 View attachment 618866
Very slick! It looks great!

Rob
 
This skinny 1mm tape led me to think about the acceptable stripe width. Some brief research points to something wider - somewhere between 2-3mm at 1:64 scale. Contention is many old photos had shadowing, water reflection, etc, making the stripe appear thinner that it was. A 1mm stripe represents only 2.5" on the real ship. I tested a short piece of 2mm tape and to my eyes, it still "looks narrow" but maybe I've biased myself. :p

IMG_1327.jpeg
 
Last edited:
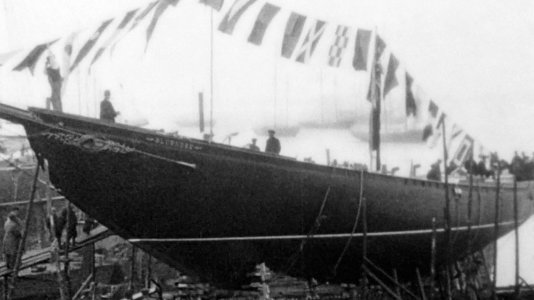
You know this picture:
It’s ‘thin’….
Regards, Peter
Peter, thanks for the great (and helpful) picture!

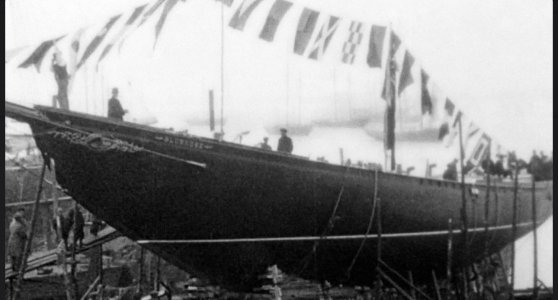
I had some fun and asked one of my AI models to "measure" the stripe in that photo, which used known dimensions of the hull at midships, from waterline to deck. This resulted in 6-7” wide or 2.5-2.8mm at 1:64 scale. If I consider the size of the men on deck, this seems about right.

However, the model also found the Model Shipways' waterline position (which I used) generally sits higher than the real thing (seems fair if you compare the photos). Once I gave it a picture and my hull measurement, the proportional result was 1.3-1.5mm (actual 3.25-3.75") for the stripe. This seems consistent with the common use of really narrow stripes.

However, I'm also considering your advice for widening the stripe at its ends (esp. at the stern) to help the visual. So, I'll likely lay down a 2mm wide stripe and take advantage of 2mm tape. In my humble and newbie opinion, this is safely inside the range of “historically correct”. :)

OK, this concludes today's class on 'how to over analyze". ROTF . Thank you for tagging along.

IMG_1328.jpgIMG_1329.jpeg
 
Last edited:
Peter, thanks for the great (and helpful) picture!

I had some fun and asked one of my AI models to "measure" the stripe in that photo, which used known dimensions of the hull at midships, from waterline to deck. This resulted in 6-7” wide or 2.5-2.8mm at 1:64 scale. If I consider the size of the men on deck, this seems about right.

However, the model also found the Model Shipways' waterline position (which I used) generally sits higher than the real thing (seems fair if you compare the photos). Once I gave it a picture and my hull measurement, the proportional result was 1.3-1.5mm for the stripe. This is consistent with the common use of really narrow stripes.

However, I'm also considering your advice for widening the stripe at its ends (esp. at the stern) to help the visual. So, will likely lay down a 2mm wide stripe and take advantage of 2mm tape. In my humble and newbie opinion, this is safely inside the range of “historically correct”. :)

OK, this concludes today's class on 'how to over analyze". ROTF . Thank you for tagging along.

View attachment 619373View attachment 619374

However,
Bill I think the waterline looks great the way it is. Sometime better is the enemy of good.

Rob
 
Last edited:
Peter, thanks for the great (and helpful) picture!

I had some fun and asked one of my AI models to "measure" the stripe in that photo, which used known dimensions of the hull at midships, from waterline to deck. This resulted in 6-7” wide or 2.5-2.8mm at 1:64 scale. If I consider the size of the men on deck, this seems about right.

However, the model also found the Model Shipways' waterline position (which I used) generally sits higher than the real thing (seems fair if you compare the photos). Once I gave it a picture and my hull measurement, the proportional result was 1.3-1.5mm (actual 3.25-3.75") for the stripe. This seems consistent with the common use of really narrow stripes.

However, I'm also considering your advice for widening the stripe at its ends (esp. at the stern) to help the visual. So, I'll likely lay down a 2mm wide stripe and take advantage of 2mm tape. In my humble and newbie opinion, this is safely inside the range of “historically correct”. :)

OK, this concludes today's class on 'how to over analyze". ROTF . Thank you for tagging along.

View attachment 619373View attachment 619374

Better to think twice (or three times) than to be wrong once. It’s all about the details, and here …… the looks. And this is looking good, Bill.
Regards, Peter
 
Back
Top