• Ships of Scale has incorportated an extra level of security when you log In. Please follow on-screen prompts to acknowledge that you are not a robot via a "Check Box" or a "Pictorial Check Box Puzzle". This is needed due to higher level of AI Activity Security.
  • SUBSCRIBE TO SHIPS IN SCALE TODAY!

    The beloved Ships in Scale Magazine is back and charting a new course for 2026!
    Discover new skills, new techniques, and new inspirations in every issue.

    NOTE THAT OUR NEXT ISSUE WILL BE July/August 2026
  • Win a Free Custom Engraved Brass Coin!!!
    As a way to introduce our brass coins to the community, we will raffle off a free coin during the month of August. Follow link ABOVE for instructions for entering.

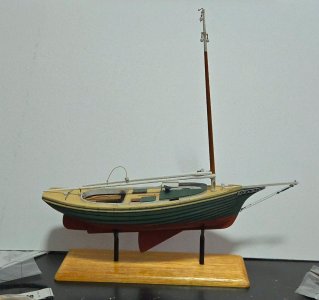
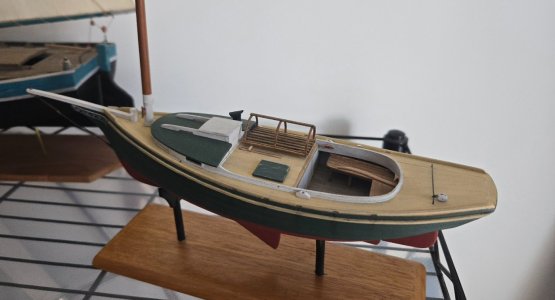
Muscongus Bay Lobster Smack - Kitbashed from Model Shipways

Most of my models have used basswood, with some exceptions. My Bateau de Lanvéoc is in alder, my NRG Capstan build is an experimental piece trying out a lot of different woods (alder, cherry, walnut, manzanillo, xochicuahuitl, and basswood), and my Trajinera was in balsa.

My experience has been that modeling wood, and indeed dimensioned lumber in sizes useful for modeling, is hard to get here. There's a craft supply chain here that is the only place I've found that carries basswood, but only in 1/16-inch thick sheets; they have more variety of balsa, hence why I used it on the trajinera. Most of my modeling wood has been brought from the US in my suitcase.

Interestingly, while Mexico City is not a good location to buy wood (almost nothing but pine, and nicer woods are very expensive), once you leave the city you can find a lot more, although it's very area-dependent as it's usually local stuff. That said, most of what I've found has been more useful for my other woodworking projects than for modeling. Xochicuahuitl (Spanish Elm) is beautiful but grainy, fairly week, and splits very easily. Manzanillo seems ok, although the grain is a little prominent, but may have some issues with toxicity. Parota is beautiful but has really prominent grain. Spanish Cedar and mahogany are very nice but, again, grain is a bit prominent. So, although I want experiment in some upcoming builds, I will probably be sticking more to basswood, alder, and cherry.

Of the woods I've used, I found balsa too soft and crumbly to be very useful. Alder is pretty nice to work with, so far, although maybe it's a little on the soft side. Cherry seems pretty nice, from what I've seen.

But basswood is probably going to be what I use most going forward. It's extremely easy to work, including just with an exacto knife, the grain is very even, and it takes paint well. I also think the pale even color can be quite nice. It has some disadvantages. Some can be dealt with easily--painting it tends to raise the grain, but you can just sand a little more between coats to smooth it out. Others are more serious: it's not great for carving tiny detailed pieces, and because it's not very strong, I'd be worried about it breaking if used for the frames in a framed model. But I think it's a great option for a lot of uses.
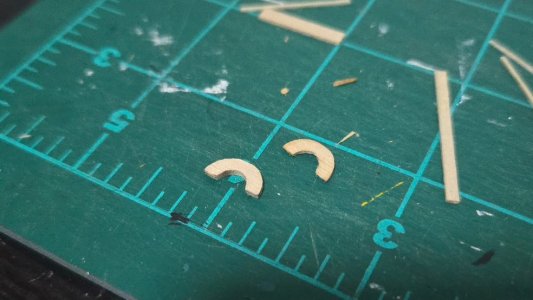
 
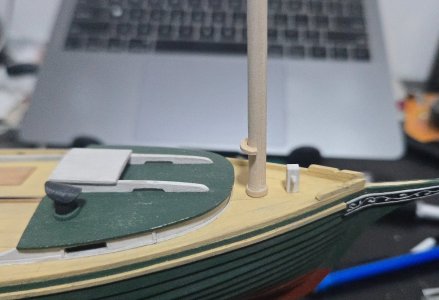
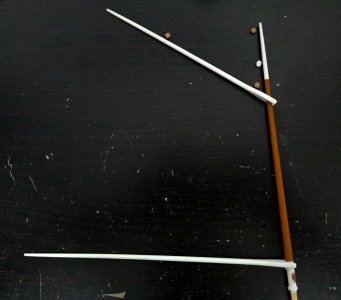
A little more progress. First, I added the boom rest to the mast. It looks too thick compared to the photos I have seen, so I split it in half and sanded it smaller once on the mast. It was located high enough that the boom can clear the chimney.
20260515_203552.jpg
20260515_220031.jpg

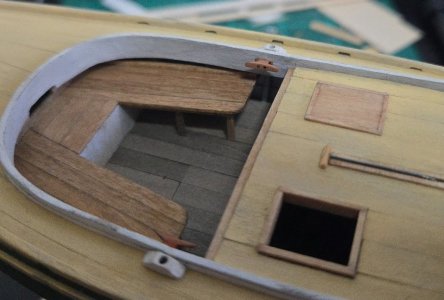
Next up, I began working out cleat locations. The cleat just above the rudder was pretty well-attested to in photos. As I will be using a single gaff halyard arrangement and no downhaul on the jib, I will not need the cleat on the bowsprit. The cleats on the mast will be located below the boom rest, rather than above it as given in the kit design, although I think I see both ways of handling it in photos (definitely below, possibly above). I saw a mix of photos showing cleats on the interior or exterior of the sides of the coamings. I was going to place mine on the exterior, but then I realized that 1) with the trim I added, there isn't much space, and 2) this would awkwardly interfere with the oarlock pads. So, I think I will be placing them inside after all, although following examples, I will be drilling a hole in the coaming for the jib sheet to run into.

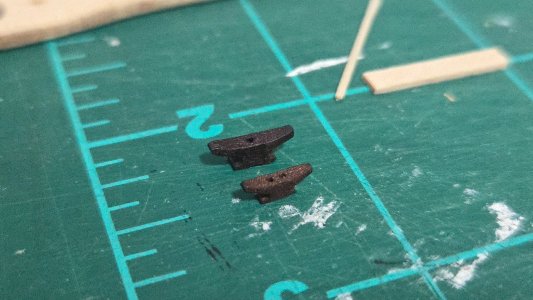
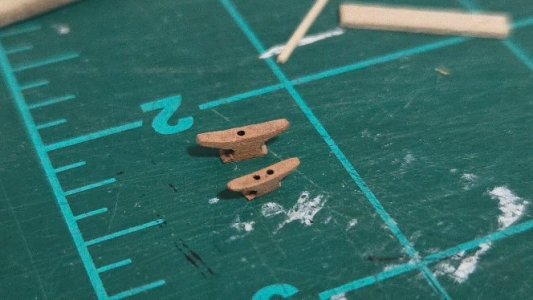
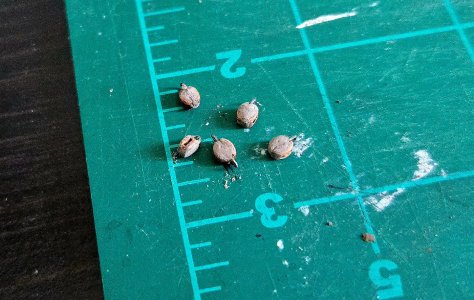
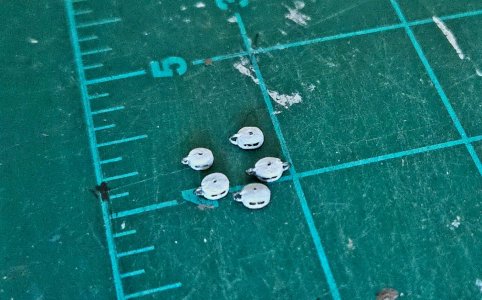
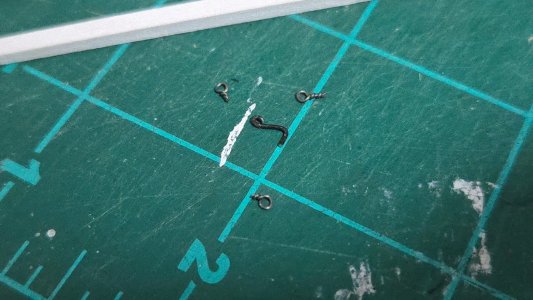
This then brings me to the question of cleat sizes. In the past, I have made my own cleats. However, a long while ago during the Crafty Sailor going-out-of-business sale, I picked up some Falconet cleats in 5, 7.5, and 9mm sizes. They look pretty nice, although there's a lot of laser char to remove.
20260515_213021.jpg
20260515_215727.jpg

My initial thoughts were that the 7.5mm cleats were too tiny, and I would use the 9mm, but in some locations the 9mm look a bit bulky. I looked in Chapelle's Boatbuilding and American Fishing Schooners, but didn't find much beyond an admonition to not use excessively small cleats. Then I thought about how, in many build logs of kit builds, the kit cleats didn't look out of scale to me (if they were, I don't think it was by much). The kit cleats are 10mm long, which, scaling down to 1:32, corresponds to the 7.5mm. So I think I'll be mainly using those.
20260515_215814.jpg

The one spot I may go with the larger cleat is for the mainsheet. I think the larger cleat looks a bit better there, and the mainsheet would have greater forces acting upon it and would need to be adjusted a fair bit (more than the halyards), so maybe a larger cleat there would make sense?
20260515_215858.jpg
 
After some discussion, looking more closely at photos, it seems like the mainsheet cleats were often fairly small. So, all the same size it is.

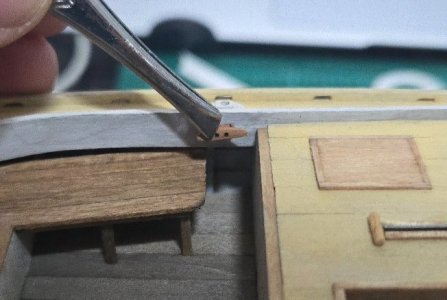
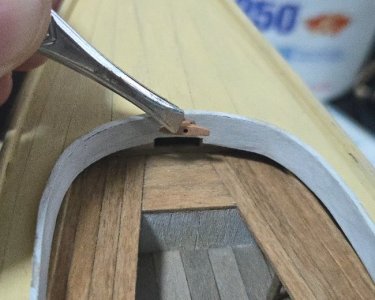
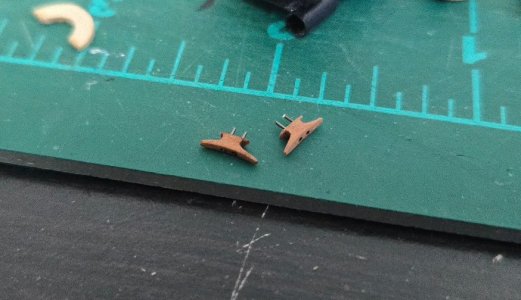
For the cleats, I pinned them with short lengths of wire. It was tricky marking where to drill, as each cleat had two pins.
20260516_122627.jpg
20260516_143018.jpg
I also drilled holes in the coaming to run the jib sheets through. This was a bit nerve-wracking, one coaming split although I was able to glue it back together. I added the eyebolts for the jib sheets, as well.
20260516_122638.jpg
20260517_104419.jpg
20260517_104701.jpg
At this point, I finally felt like I could add the tiller. I propped it up to hold in the proper location until the glue cured.
20260517_153126.jpg
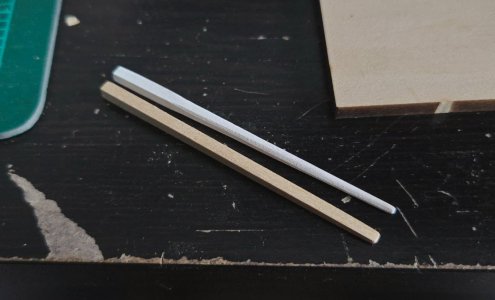
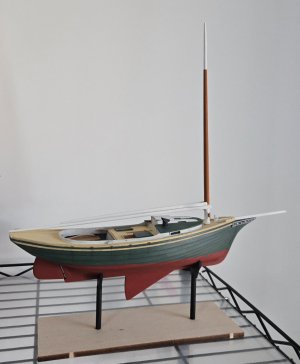
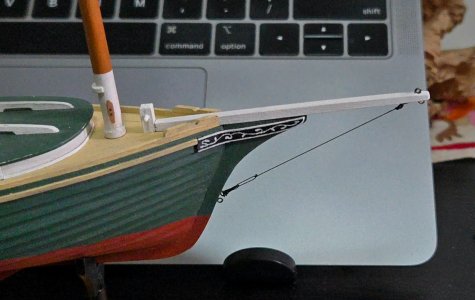
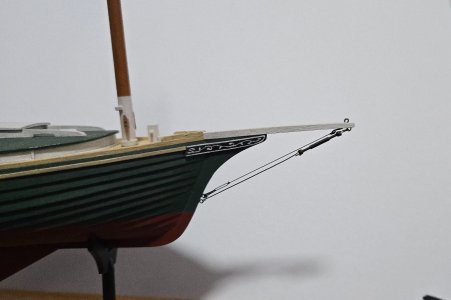
I also worked on painting the mast and yards. While doing this, I realized that my bowsprit was curved. I decided to take the opportunity to make a new one. I decided to make this one rather flat and wide. I seem to remember that another modeler did the same on his, as it would better resist lateral pressure, and I noticed that bowsprits like that appeared in several photos.
20260517_155003.jpg
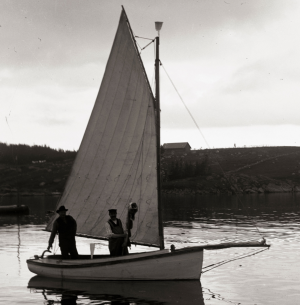
For the mast, I saw that most seemed to be a brownish color, sometimes with white at the top and bottom. The brownish color is presumable oiled or varnished wood, but I wasn't going to leave this mast natural, so I just painted it brown. Here's everything dry-fit together, with the gaff and boom just loosely fit in place.
20260518_074852.jpg
I also painted the pillars on the display base black.
 
Looking at photos, I realized that the blocks used seem to have mostly been internally-stropped, such as those below.
Screenshot2026-05-20at6_39_25AM.png.20606e5a572b5a34cef43d851f6d823a.png
Source

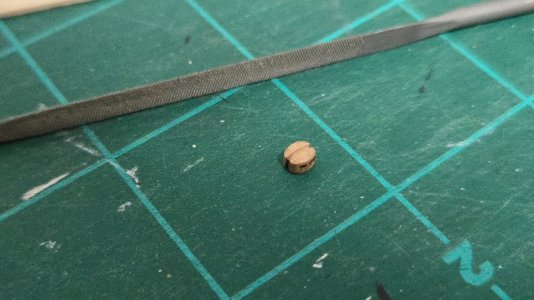
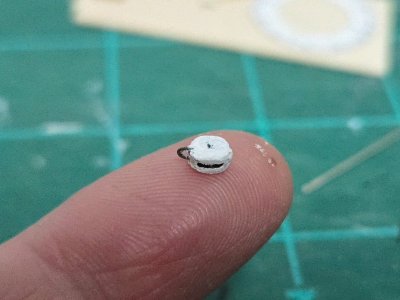
I've never done internally stropped blocks before, so I decided to give it a try. I was inspired by MSW member PaulLeWol's Sharpie build, where I think I remember him more or less doing the following, although with much greater precision than I've managed. First, I took a 4mm block (purchased from Model Expo) and sanded off the laser char. This was tricky, as the thing is tiny. I then filed a gouge in both sides.
20260519_224313.jpg
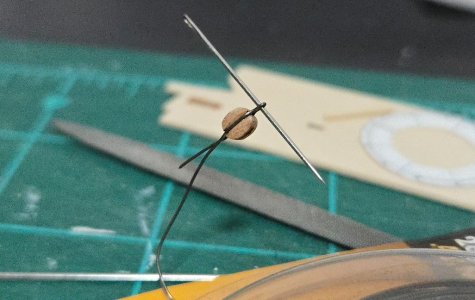
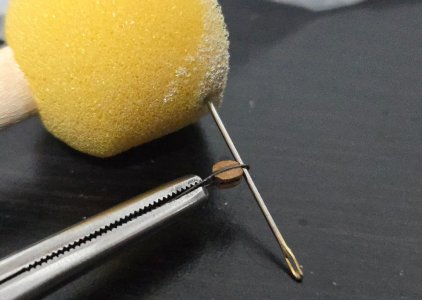
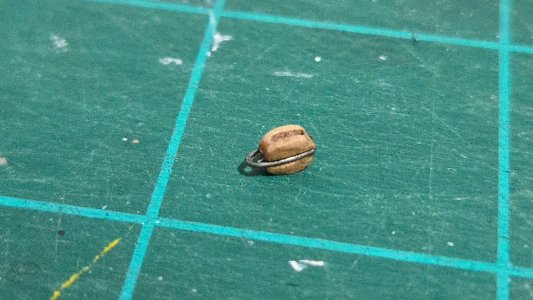
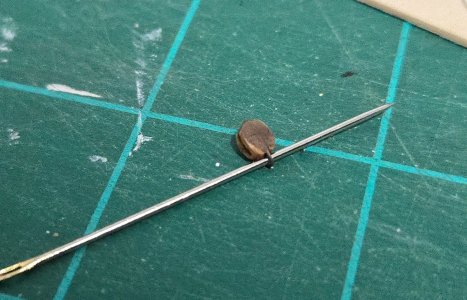
I then tried to use wire to make the internal strops. First, I used 24 gauge, but I found it a little too thick, so I switched to 28 gauge. I tried the arrangement below, using a needle to keep a rounded eye open, but I changed tack soon because I realized that the eye was too big.
20260519_225242.jpg
It was better to place the needle right against the block and bend it right over. I also found that it helped to stick the needle in something so it was less inclined to slide everywhere.
20260519_230119.jpg
I then dabbed superglue on the sides. Once it dried, I trimmed off the excess and bent the nubs over. At this point, close-up photography revealed a lumpy, misshapen little thing.
20260519_231108.jpg
Of course, the strops are supposed to be internal. To hide them, I applied a bit of wood filler.
20260519_231341.jpg
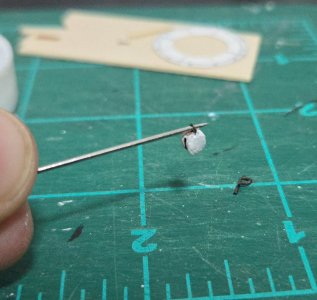
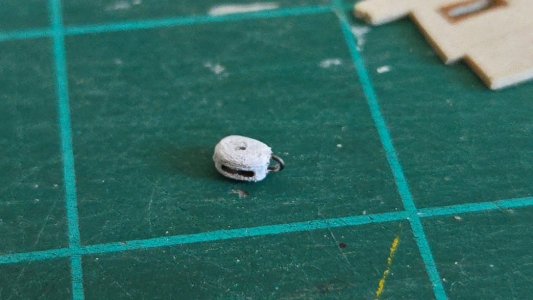
After sanding that to smooth it, I painted the block white, following the example of some photos. As it turns out, the white paint really highlighted how uneven the block was.
20260519_232404.jpg
So, I sanded it lightly with 600-grit sandpaper and added another coat of paint. Once dry, I used a pencil to draw in the axle. Close-up photos really draw out every imperfection, but my sense was that it looks all right from normal viewing distances.
20260519_234010.jpg
Finally, looking at it with fresh eyes the next morning, I remembered that blocks should be a bit more rounded. So, I sanded down the edges even more and repainted. With that, I’m happy with the results.
20260520_102431.jpg
Overall, I think this method worked fairly well, although there are some improvements I could make. First, I should sand and shape the block at a fine grit before stropping, to minimize the lumpy unevenness I've noticed and to improve its shape. Second, I should also file a notch on the bottom so that the ends of the wire can lie flush with the block. Third, if I'm painting these, I don't know if I need to fully remove the char, beyond just rounding the edges and the like.

If the method worked, though, I'm not sure about the size of the block. The 4mm blocks are the smallest I currently have. Seen against the mast, they don't look horrible.
20260520_063512.jpg
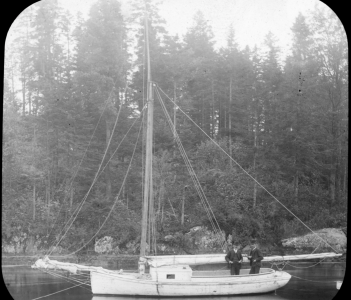
But, looking at photos, I notice that many of the blocks used look extremely small, especially once I start looking for smaller vessels and not Friendship Sloops (which were often around 10 feet or so longer than the boat I'm modeling).
Screenshot2026-05-10at10_07_23PM.png.40b488a619312a5a63d52b73df7939ee.png
Source

Screenshot2026-03-20at9_06_32AM.png.221b8e9ca5b397023dfa836cb4989db5.png
Source

ScreenShot2025-04-16at9_05_42PM.png.72af1fa10e8275e4b87b35c98150fd2d.png
Source

In that last photo, I estimate the blocks to be around 4, maybe 4.5 inches long, corresponding to about 3-3.5mm model blocks. The 4mm block corresponds to about 5 inches in real life. As it turns out, I have some 3mm and 3.5mm blocks that I will be able to pick up when visiting family in the US in about a month, so I'm wondering if it would make sense to wait until I pick those up to make the rest of the blocks.

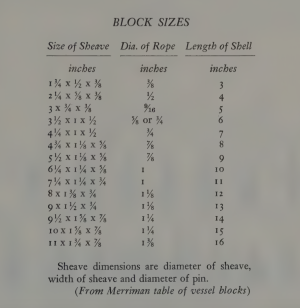
This led me to do some research on the topic. Frustratingly, much of the rigging information out there is for larger ships (Steel, Biddlecomb, etc.), so it's not very relevant to these sorts of small working boats. John Leather's The Gaff Rig Handbook has a lot of interesting details, but nothing on sizes. Looking through my sources, I found that Chapelle's The American Fishing Schooners is focused on far larger vessels, but includes a table relating block size to rigging diameter, seen below. This is useful information, but I'm also not sure what size rigging would be used.
Screenshot2026-05-20at8_16_43AM.png.1267476b2b73eccea819a0bb0198d7ff.png
Source: Chapelle, The American Fishing Schooners, p. 347.

So I began looking for rigging sizes, as well. Chapelle's plan for the Muscongus Bay Sloop in American Small Sailing Craft doesn't say anything about rigging, and the only detail included for the small Friendship Sloop Pemaquid in the same book is to mention that the standing rigging was 1/4-inch wire (p. 275). This is at least useful for my forestay, but doesn't say anything about the blocks or running rigging.

Chapelle's Boatbuilding was more helpful, but with some caveats. In general, he notes that, where the mainsheet is concerned, strength is less of a concern than ease of handling: a 1/2-inch diameter rope is strong enough for a 400-450-square foot mainsail, but a 3/4-inch or larger rope is easier to handle (p. 580). He also mentions that "the size and material of the blocks should suit the ship," and mentions that "fisherman-quality commercial blocks" look rather large compared to "small bronze yacht blocks" (p. 579).

Boatbuilding also contains a number of sail plans for vessels close to the size of the 22.5-foot long sloop I'm modeling. These come with the caveat that 1) they're generally of yachts, not workboats, and 2) only one of them has a gaff rig, with most sporting a leg-of-mutton, bermuda, or spritsail rig, and all are set for smaller sails than on the Muscongus Bay Sloop. Although Chapelle's plan in American Small Sailing Craft doesn't give a sail area for the latter, I estimate from the dimensions provided that the main sail was roughly 250-280 square feet and the jib about 50-60 square feet.

The only gaff-rigged vessel detailed in Boatbuilding is a 22-foot Scow Sloop described as a "utility boat of the Dutch type" (p. 229). It has a proportionally much taller and narrower gaff sail with an area of 130 square feet, with a 56 square foot jib. Block sizes are not stated, but the mainsheet and gaff halyard are 3/4-in, and the jib sheet and halyard 1/2-in diameter, corresponding by the American Fishing Schooners with a 6-7 inch block on the former and a 4-inch block on the latter.

However, these are by far the largest block and rope sizes given. The 23-foot long Bermuda-rigged Tabloid Cruising Sloop (p. 378), with a 175-square-foot mainsail, uses a 5/8-in mainsheet and a 1/2-in jib sheet. The 30-foot Sharpie Cruiser (p. 237), with a two-masted leg-of-mutton rig and sails 203 and 144 square feet in size, uses 3/8-in line for both halyards and sheets. The 24-foot Sharpie (p. 66), also a two-masted leg-of-mutton rig but with 120 and 110 square foot sails, uses 4-inch blocks with 1/2-inch line on the sheets. Finally, the 24-foot Hampton Boat (p. 69) has a two-masted spritsail rig with 180 and 94 square foot sails (puls a 46 square foot jib). The sheets use 3- and 4-inch blocks and 1/2- and 3/8-inch line (the larger on the main and the smaller on the mizzen), with 1/2-inch line used for the spritsail halyards and 3/8-inch line on the jib halyard.

Looking at the photographic evidence, it seems to me like I should use smaller 3.5mm blocks (corresponding to about 4 inches) for most or all of the blocks, possibly even replacing the 4mm block I already made. Looking at Chapelle's Boatbuilding, it does seem like a 1/2-inch jib sheet and halyard (corresponding to about a 0.4mm rope) with a 4-inch block (technically closer to 3mm at scale, although 3.5mm may be acceptable to make it slightly easier to work). For the mainsheet and gaff halyard, the Scow Sloop, the only gaff-rigged workboat discussed, suggests that thicker line and bigger blocks may be acceptable, as does Chapelle's note that a thicker mainsheet is desirable for ease of handling. A 6-inch block would be about 4.7mm at scale, and 3/4-inch line would correspond to 0.6mm rope.

So, I think there are some contradictions here. Chapelle suggests that larger may be appropriate, at least for the mainsheet and possibly main halyard, but photos generally show rather smaller sizes, and in any case it looks like I need to go smaller than 4mm blocks for the jib. Triangulating between sources to compromise, and thinking about relative weights of line, not just dimensions, I feel like it may work to do 4mm blocks and .06mm rope for the mainsheet (corresponding to 5 inch blocks and 3/4-inch rope), 3.5mm blocks and 0.5mm rope for the gaff halyard (4.5 inch blocks and 5/8-inch rope), and a 3mm block and 0.4mm rope (4 inch block and 1/2-inch rope) for the jib. But if anyone has any suggestions, I'm all ears. Are there other useful sources out there on comparable workboat rigging dimensions that I'm unaware of?
 
I haven't had much time for modeling lately, but a very minor update. First, I made the other 4mm internally-stropped block. This is the last block I'll be making until picking up my order of 3.5mm and 3mm blocks later this month.
20260603_082206.jpg

I also noticed that the centerboard pull handle had split.
20260603_092012.jpg

This bothered me, so I replaced it with a new one.
20260603_095151.jpg

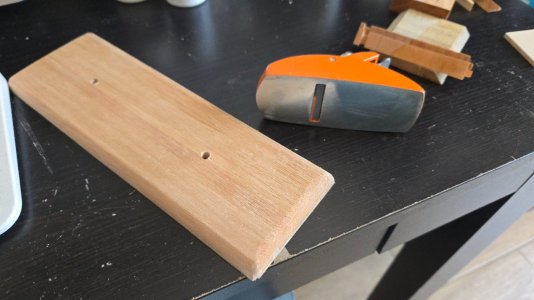
Finally and most importantly, I finished the base. I had been using the laser-cut base, but didn't love how it looked (not to mention that a lasering error marred it a bit). By chance, I was gifted a nice plank of Spanish Cedar with a rounded profile. I decided that it would make the perfect base for the Sloop. First things first, I cut it to size and drilled the holes. In order to round off the ends to match the sides, I used a small block plane I recently purchased (it's not great, but it was cheap and works pretty well after I flattened the sole a bit and sharpened the blade) to rough in the shape, and later sanded it smooth.
20260528_110916.jpg

I finished it with lemon shellac to deepen the color a bit. I also slightly shortened the posts, as I felt the model was a bit high.
20260603_091923.jpg

As I'm trying to finish some gifts I'm making before my trip to visit family, I probably won't be able to do much more modeling this month.
 
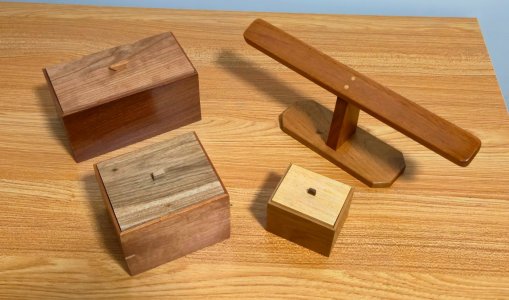
It took quite a while, but I finally finished those boxes and other gifts. After traveling for a bit, I've been able to get back into the build.
20260611_191931.jpg

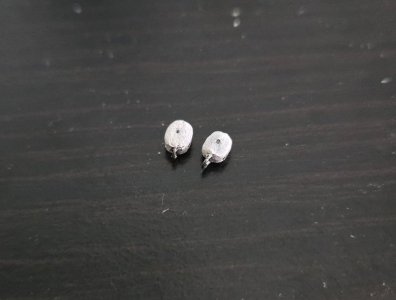
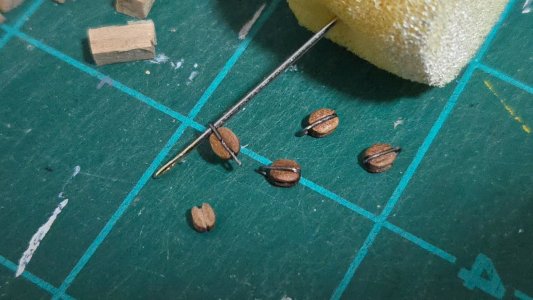
I was able to pick up my order of 3mm and 3.5mm blocks. They're pretty tiny! I set out to convert them all to internally-stropped blocks, following the methods discussed earlier. One needed a metal loop at each end, so instead of closing the loop at the end of the block, I just closed it midway down one side. Below, the blocks in progress.
20260627_225526.jpg

The tiny blocks are pretty fragile, two accidentally got crushed while I was trying to form the wire loops.
20260627_221638.jpg

I then added filler, sanded, and painted.
20260628_092734.jpg
20260628_100347.jpg

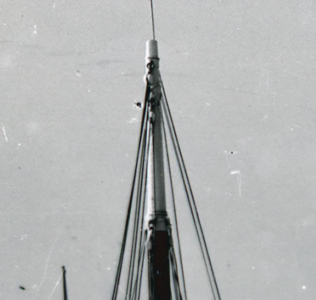
Next up, I began making eyebolts and the metal hook that appears in many photos holding the topping lift off the tip of the mast. The eyebolts are 28-gauge, while the metal hook (as well as the hooks I made next for the eyebolts/blocks) are 24-gauge.
20260628_201912.jpg

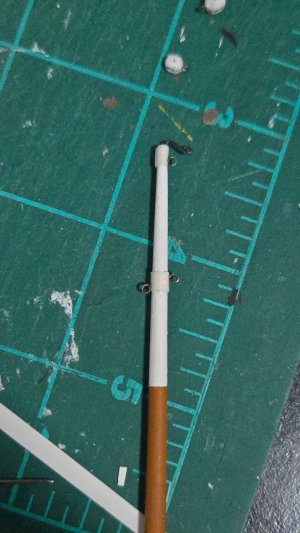
Following photographic evidence, I added some "metal" (actually card) reinforcing bands around the eyebolt locations on the mast.
20260628_222126.jpg

Finally, the hooks were affixed to the blocks, the eyebolts and bands were painted, and the eyebolts were temporarily placed.
20260628_225645.jpg

It's great to be making progress on this build again!
 
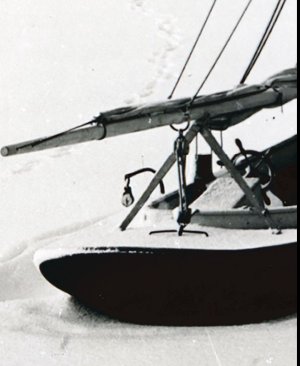
A bit more progress. In the photo below, you can see that the gaff halyard blocks aren't attached directly to the gaff, instead hanging on lengths of rope. (The halyard is a little different than I'm making it, but the idea is the same.)
Screenshot_20260704_173003_Chrome.jpg
Source

So, I began the rigging process by adding a length of rope along the gaff. For the non-wire rigging on this build, I'm using Syren rope, which has a slightly different color than the Ropes of Scale material I've previously used. My first attempt used... some sort of maritime knot that seemed appropriate, unfortunately enough time has passed that I forgot what it was. It seemed sturdy but looked too bulky.
20260701_231518.jpg

So, I went with a smaller knot, I think a buntline hitch? It was smaller and looked better. With the peak block attached to the line, and the throat block also hooked to an eyebolt, the gaff was finished. I also dry-brushed some tan "rust" around the metal fittings, not just on the gaff but on the masthead as well.
20260702_100526.jpg

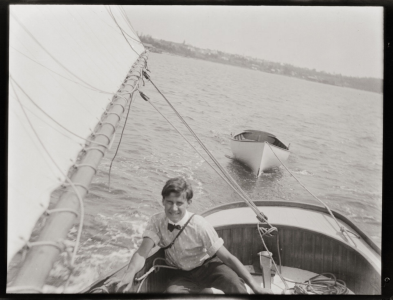
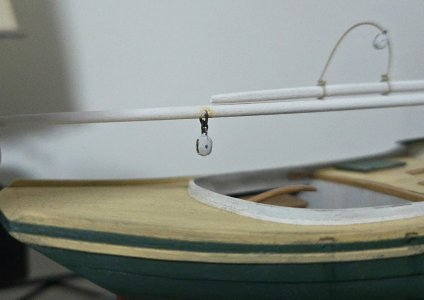
For the mainsheet blocks, I drew inspiration from the photo below of a Friendship Sloop, rather larger than what I'm modeling. You can see that the block on the boom is attached to a sort of metal loop that hooks into the boom. (It also shows a sort of small crane apparently to help lift lobster pots into the cockpit. I thought about including something like that in mine, but my model is a smaller and simpler vessel--the fisherman will have to make do with a gaff hook.)

Screenshot_20260704_172931_Chrome.jpg
Source

As can be seen, I fit the main sheet boom block on with a couple lengths of wire, and added a bit of rust.

20260703_231659.jpg

The Friendship Sloop above also shows a rather small horse, which contradicts Chapelle's assertion that they used large ones as a means of helping to keep the boom from lifting under pressure. I decided to follow Chapelle on this one. The horse was just a length of 24-gauge wire.
20260703_234349.jpg

20260703_235516.jpg

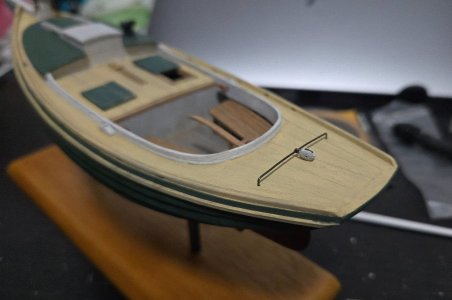
For the bowsprit, I was inspired by the photo below. You can see that the forestay appears to pass through the bowsprit (while also having an eye or something to hold the tack of the jib) and runs back to the stem, while an arrangement of metal hooks and a turnbuckle form a separate bobstay below it. This is a bit different from the kit design.
Screenshot_20260704_173024_Chrome.jpg
Source

First, I added two eyebolts made of 28-gauge wire to the stem.
20260629_105740.jpg

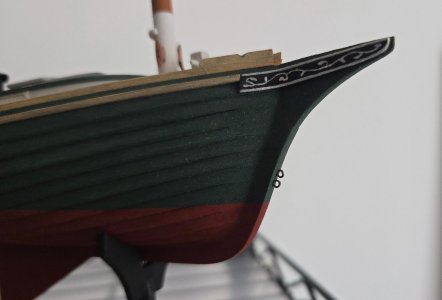
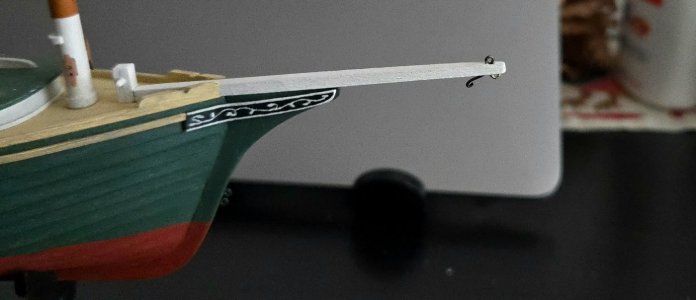
For the bowsprit, I added an eyebolt for the bobstay and drilled a hole for the forestay arrangement. Rather than make it continuous, in order to provide an eye to tie off the jib tack, I made a bent metal hook--a little different than the photo, but something I've seen on other vessels. I then glued the bowsprit in position.
20260702_100236.jpg

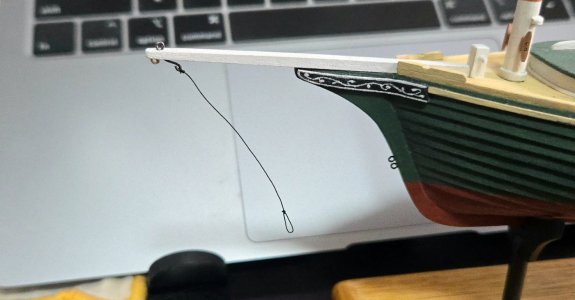
I began rigging the line coming off the forestay hook. I used black Ropes of Scale rope in .25mm thickness, following Chapelle's note that the Friendship Sloop he drew would use 1/4-inch wire standing rigging (which would be .2mm at scale). Looking at the historic photo above, you can see that the wire seems to form a loop close to the stem, then there's some sort of lashing to attach. To represent this, I first tied a length of rope to the hook, then added a bowline at the free end.
20260704_154019.jpg

I then lashed the bowline loop to the eyebolt.
20260704_155433.jpg

For the bobstay itself, I used 28-gauge wire and a Billings turnbuckle I had blackened a long time ago. It was a little tricky getting it taught.
20260704_164851.jpg

So, here's the current state of the model. All blocks are in place. I'm enjoying the build quite a bit. Every time I'm modeling, I finish the hull and wonder if I really want to add rigging. But then I do and I feel like it really brings things to another level.
20260704_164936.jpg

Although I could in theory attach the boom and gaff now, I'm going to wait until I make the sail. I'm starting to make a simple frame to help with sail-making, as I found it frustrating to make the sail on top of plastic wrap on my Lancha Chilota build.
 
Coming along very nicely!

A couple of comments related to these boats. NOT necessarily your model:
Decks:
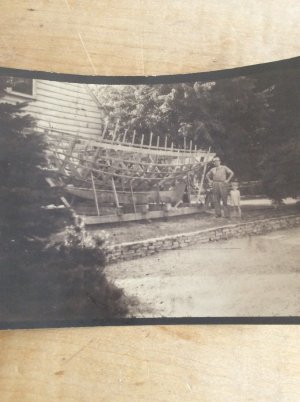
When I was a small child, my father built a small sloop, lines were similar to the Friendship sloop. (Photo below). It had a canvas covered deck. The canvas was applied on top of the wood planking. It was attached by paint brushed down that seeped through the weave. It was nailed down around the edges which were covered by a piece of trim. Traditional boatbuilding books including Chapelle discuss it.

I was surprised to also find a history of canvas covered decks on AI. It seems that canvas began to be used as early as the 1840’s and by the time that these Friendship sloops were built it’s use was common.

Boom attached to jib: Cruising sailboats, including the one built by my father were often fitted with boom footed jibs. The reason was that these jobs were “self tacking”. As you pointed out the tack end of the boom was attached to a pivot point on the deck or bowsprit. The jib sheet on the other end would have been led to a block on the deck beneath and sometimes a traveler. When the boat passed through the eye of the wind while tacking the jib flopped over on the other tack without needed to be tended by the crew.

Roger

IMG_2398.jpeg
 
Last edited:
Thanks, Roger! That's a beautiful sloop your father built, I can see the similarities with the Friendship Sloop. I had heard of the canvas-covered deck, but couldn't tell how widespread this technique was. Although the only photos of Friendship/Muscongus Bay Sloop decks I could find were of later yachts, I did come across photos of other workboats, albeit somewhat larger, with visible deck planks, so I figured it was a plausible option. I've seen some photos of sloops with boom-footed jibs, and it certainly seems like it would make tacking easier, but most Muscongus Bay/Friendship Sloops seem to have not had a jib boom. In any case, I'm planning on furling the jib, as these vessels regularly were worked under mainsail alone (often reefed, although I think I'll leave that off--let's say the winds were a bit light).
 
The sloop in the photo is a 23ft L. Francis Herreshoff designed Prudence. Correspondence between my Father and Herreshoff is preserved and posted on line at Mystic Seaport. I have the originals. Roger Taylor quoted one letter in Volume II of Herreshoff’s biography. I also have the original Herreshoff blueprints used to build The boat. If I live long enough possibly a model.

Roger
 
The sloop in the photo is a 23ft L. Francis Herreshoff designed Prudence. Correspondence between my Father and Herreshoff is preserved and posted on line at Mystic Seaport. I have the originals. Roger Taylor quoted one letter in Volume II of Herreshoff’s biography. I also have the original Herreshoff blueprints used to build The boat. If I live long enough possibly a model.

Roger
Very cool! It sounds like it would make for a great model, especially with ths personal connection.
 
Right now I’m anxious to make some sawdust on my sharpie model. Then we’ll see were I go from there. In the late 1800’s there were several workboat designs that were built as racing machines. These interest me. The sharpie was one of these, sandbagger sloops and log canoes were two others. The log canoes are still raced.

Roger
 
I really haven't had much time for modeling lately. The main thing I need to work on next is the sail, but before I do that, I need to at least briefly get into the carpentry workshop to make a simple frame for it, which hasn't happened yet. What I have done, though, is to begin work on a lobster trap.

This actually will be the fourth lobster trap I've modeled--one for the dory model, one as a Christmas ornament, and one for the peapod model. It is, however, the smallest scale one I've made, 1:32 instead of 1:24 or 1:12. This scale will definitely pose a bit of a challenge, especially with the net openings, which I'm planning to make with tulle as on my other traps.

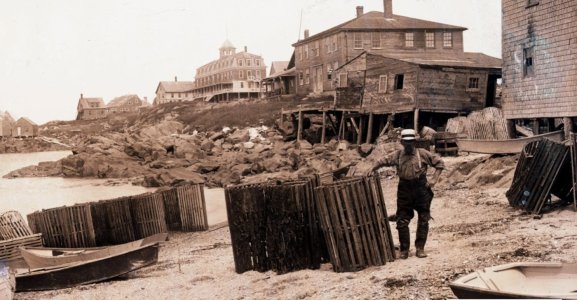
I based my design on two main sources. First, there are a few photos of lobster traps from around the time period in the Penobscot Marine Museum's digitized photo collections, such as the one below from between 1910 and 1922. These photos were useful for giving a sense of the various designs used, and of the scale. I estimated the size through comparison with the figure and began cutting basswood strips to size.
Screenshot_20260720_231841_Chrome.jpg
Source

I then realized that I had a more detailed source at hand: George Brown Goode's "The Fisheries and Fishery Industries of the United States," 1884-1887, is avaliable digitally through the Internet Archive. Section V, Vol. II, pp. 666-667 includes a detailed description of lathe lobster pots. It gives the typical dimensions of semi-cylindrical lathe pots as 4 feet long (although some were as little as 2.5 feet long) by 2 feet wide by 18 inches high. This is similar to the dimensions I worked out from the photo, although mine is slightly shorter (more like 3 foot 9 inches long) and, due to not accounting for the width of the semi-hoops and exterior slats, a few scale inches wider. So, not quite perfect, but I think close enough, especially considering that these were made by hand by fishermen. Goode also discusses a lot of aspects of thr design, including details I hadn’t modeled before like the bait skewer in the center.

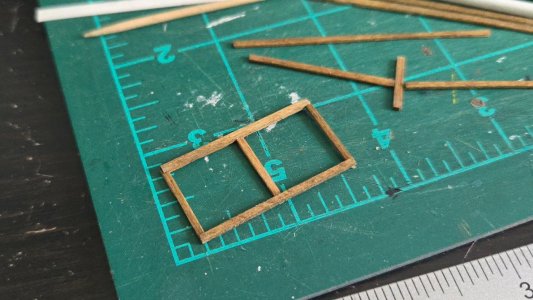
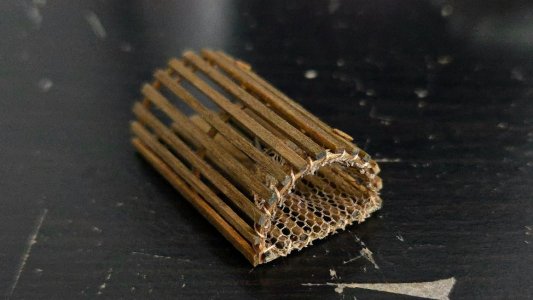
Most of the model trap is made of 1/32-inch thick strips of basswood. I began with the basic bottom framework, which I went a little overboard with and made tiny lap joints. I've learned from my previous trap builds that, with the limited gluing area, it's very easy to undo the glue if you try to color the wood after assembly, so all parts are given golden oak stain and a dark acrylic wash before being glued together.
20260719_120245.jpg

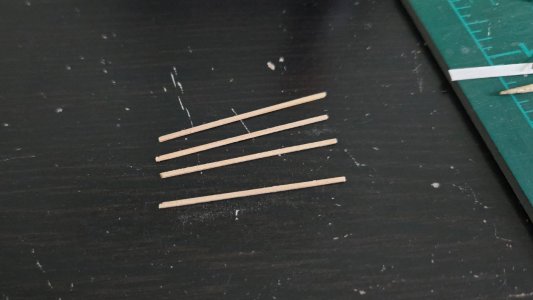
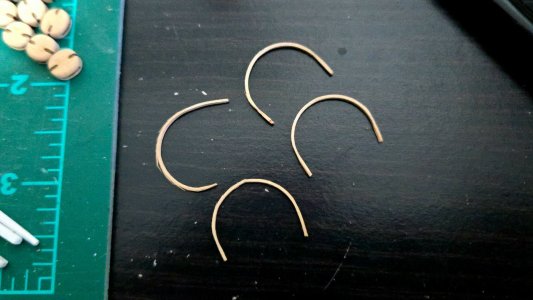
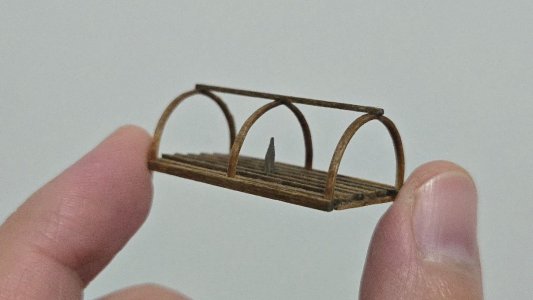
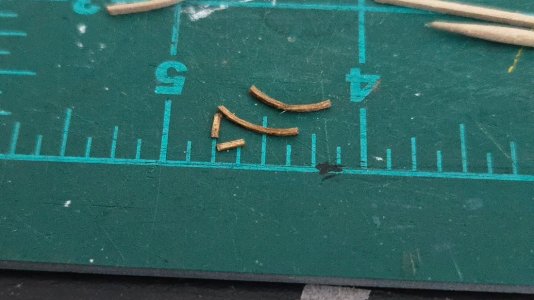
The hoops are challenging, as they need to be bent to a fairly tight half-circle. I used thin strips of alder cut from a 3/64-inch sheet for this. I made four in order to have an extra.
20260719_120939.jpg

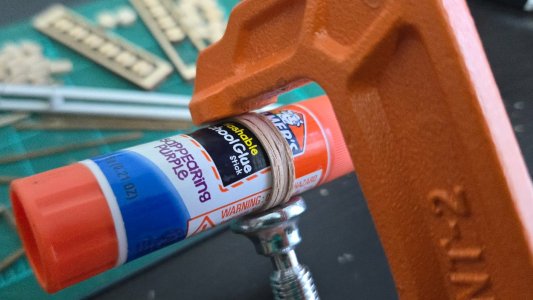
I then soaked in hot water and clamped to dry around a glue stick.
20260719_181841.jpg

And the results: two were all right, one pinched a bit, and one had a lot of splitting.
20260719_181936.jpg

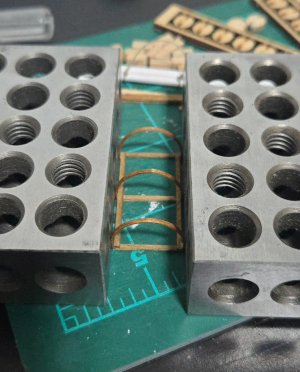
As it turns out, the hoops weren't quite tight enough to be fitted inside the framework, so I had to glue them to the exterior. 3-2-1 blocks were useful to "clamp" them into position.
20260719_203045.jpg

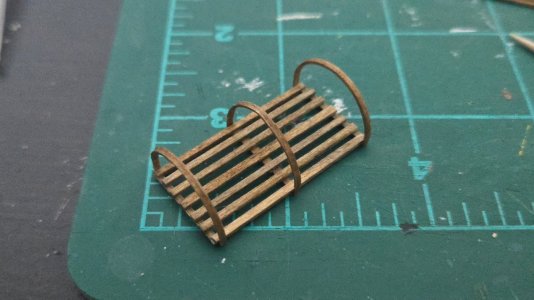
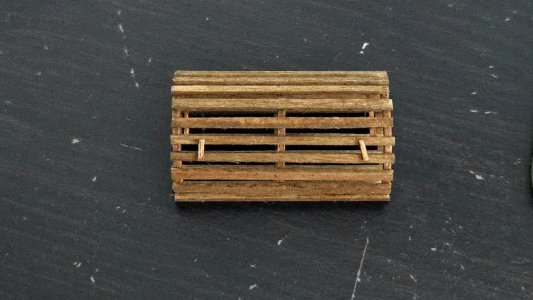
I then began adding the slats. According to Goode, the bottom slats could be attached to either the interior or exterior. I went with interior.
20260720_221533.jpg

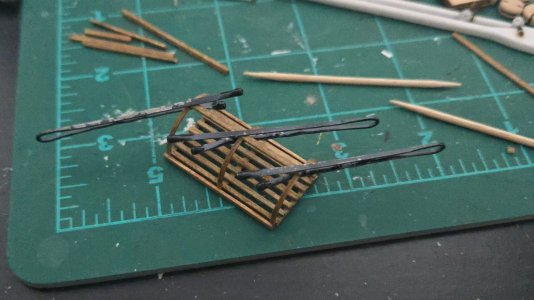
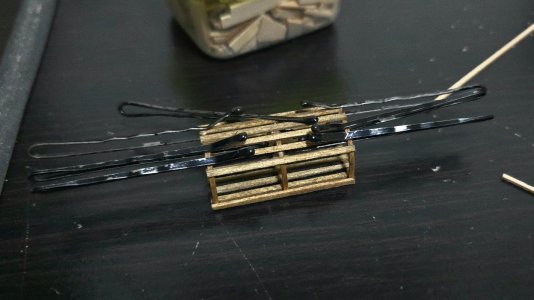
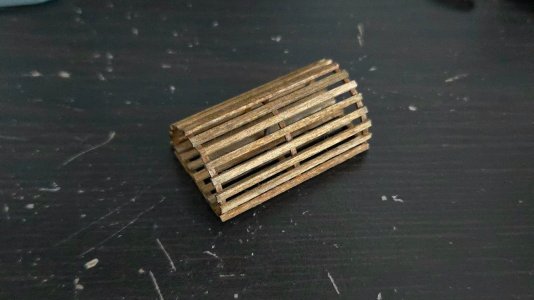
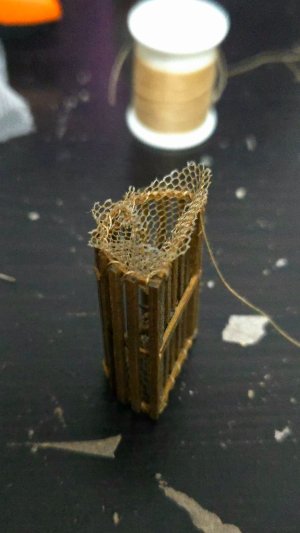
For the slats around the hoops, I started with one on each side and one running down the middle on top. Splitting the length in half will make it easier to evenly place the remaining slats. Bobby pins made for useful clamps.
20260720_223753.jpg

My plan is to have an entrance on each side, a design which shows up in many photos and which Goode says is the most common type. I'm adding the slats first so that I can more easily sew around them when I add the tulle netting. Unlike on the peapod's trap, this one will be closed, not open. I'm hoping that the tulle works out for the netting.

One question: how did they store these things in the boat? A single trap takes up a decent portion of the deck space, as can be seen below. According to Goode, these were often laid in trawls of anywhere from 8 to 40 pots. I have a hard time seeing how they could fit even, say, 10 pots on a boat at once, let alone 40, and still have it sailable. I guess some would have to be crammed into the cuddy, but even so.
20260721_085131.jpg
 
Work has been really busy lately, with a lot of deadlines one after the other, but I made time to advance a little on modeling. The lobster trap is a tricky little thing at this scale. Unlike previous traps I've made, I decided to include the bait hook/spike, following Goode's description.
20260722_222455.jpg

I then finished the covering.
20260722_230908.jpg

20260724_120644.jpg

I thought the exterior looked a little boring, so I made some buttons and the door framework and added those.
20260725_101029.jpg

20260725_105004.jpg

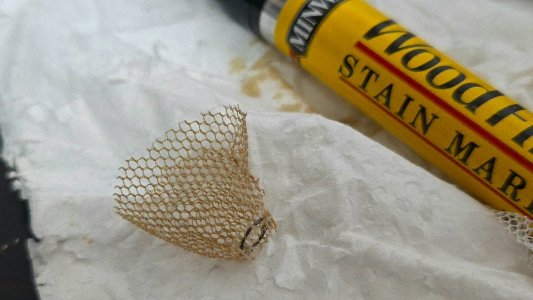
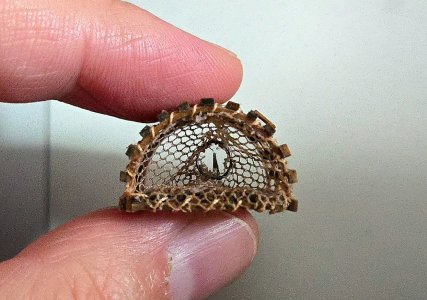
The net funnels at each end are challenging. As in the past, I'm using wire for the ring and tulle fabric for the netting. I started by making the ring, then weaving the tulle onto it. I then tied off one end in a funnel shape, and sewed the seam together to complete the funnel. Finally, I stained the tulle with a stain pen and trimmed the excess at the ring end and along the seam. Trimming is difficult at this scale: the tulle breaks fairly easily and it's all too easy to trim too close and end up opening the hole that the wire or thread passes through. I had to repair a spot at the wire ring.
20260808_105531.jpg

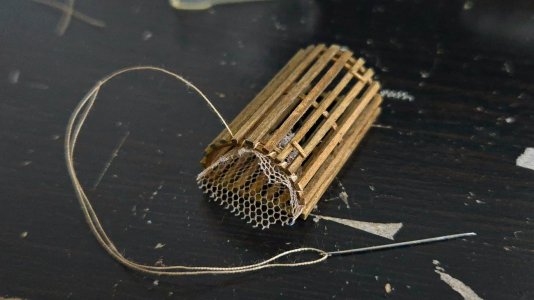
I then position the funnel in the pot's open side and use a bit of thread to tie it to the framework in three places. This really helps hold it in place later while sewing the whole thing in place, which is the next step. The funnel is still oversized for now as I start sewing.
20260808_162249.jpg

Finally, the whole thing is sewn, the knots are secured with a drop of superglue, and the excess tulle is trimmed.
20260808_163435.jpg

The ring is pretty messy, but it will be hard to see on the model. In theory, the funnel should slant upward, but I have yet to do that properly.
20260808_163451.jpg

One funnel down, one to go!
 
Work has been really busy lately, with a lot of deadlines one after the other, but I made time to advance a little on modeling. The lobster trap is a tricky little thing at this scale. Unlike previous traps I've made, I decided to include the bait hook/spike, following Goode's description.
View attachment 625247

I then finished the covering.
View attachment 625248

View attachment 625249

I thought the exterior looked a little boring, so I made some buttons and the door framework and added those.
View attachment 625250

View attachment 625251

The net funnels at each end are challenging. As in the past, I'm using wire for the ring and tulle fabric for the netting. I started by making the ring, then weaving the tulle onto it. I then tied off one end in a funnel shape, and sewed the seam together to complete the funnel. Finally, I stained the tulle with a stain pen and trimmed the excess at the ring end and along the seam. Trimming is difficult at this scale: the tulle breaks fairly easily and it's all too easy to trim too close and end up opening the hole that the wire or thread passes through. I had to repair a spot at the wire ring.
View attachment 625252

I then position the funnel in the pot's open side and use a bit of thread to tie it to the framework in three places. This really helps hold it in place later while sewing the whole thing in place, which is the next step. The funnel is still oversized for now as I start sewing.
View attachment 625253

Finally, the whole thing is sewn, the knots are secured with a drop of superglue, and the excess tulle is trimmed.
View attachment 625254

The ring is pretty messy, but it will be hard to see on the model. In theory, the funnel should slant upward, but I have yet to do that properly.
View attachment 625255

One funnel down, one to go!
JacquesCousteau - Your work is impressive, methodical and well rendered, as usual! Kudos to you for such beautiful lobster traps. On my Maine Peapod, my traps were likely a bit easier than yours since they were a bigger scale, but were still quite a challenge.
1786281117277.png
 
Thanks! The scale definitely adds some difficulty, although having done it three times already by now, it's doable. It's ironic that I've by now made four lobster traps, as I'm allergic to shellfish. Very nice work on your peapod's traps!
 
The lobster pot is now finished! The second net funnel was a bit quicker than the first.
20260809_230849.jpg

Unfortunately, I screwed up a little on the alignment while sewing it in place, so it isn't quite as nice looking into it as the first funnel.
20260809_231251.jpg

Ah well, it can be positioned on the model to minimize that view.
20260809_231331.jpg

20260809_231612.jpg

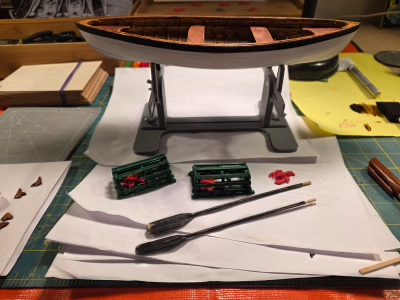
Next steps: I suppose I could fiddle around with a few more tools and fittings. I'm not yet sure if I'll be adding the oars and/or oarlocks. I suppose they would probably be used or at the ready while fishing, but I feel like the oars will really clutter the model, and the oarlocks will be a bit of a challenge to model. What I really need to do is work on the sail, for which I first need to slap together a simple frame to support the material during painting and gluing. Hopefully I can get into the carpentry workshop this week to make it. I have to admit, this model has been rewarding, but has taken far more time to make than I had planned. Especially since May or so, it feels like my progress has really been at a snail's pace. I would really like be done soon, there are some other models I'd like to move on to--it's been too long since I've been working on a Latin American workboat. So, hopefully I can get to work on the sail sooner rather than later.
 
Just a thought. Hopefully someone who lives Down East will join this discussion as there are no lobsters in Lake Superior where I live.

It’s hard to see how this boat could have been sailed with one of these cumbersome lobster pots aboard. I wonder if they were in another boat that was towed by the sloop that you are building. It’s notable that modern lobster boats have a wide open working area aft where the lobster pots can be stacked.

Roger
 
Just a thought. Hopefully someone who lives Down East will join this discussion as there are no lobsters in Lake Superior where I live.

It’s hard to see how this boat could have been sailed with one of these cumbersome lobster pots aboard. I wonder if they were in another boat that was towed by the sloop that you are building. It’s notable that modern lobster boats have a wide open working area aft where the lobster pots can be stacked.

Roger
It's a good question that I've wondered myself, especially as I know that fisheries elsewhere used tenders to haul gear. The scow sloops of the Laguna Madre on the Tamaulipas coast, for instance, carried gear in towed boats. But I haven't seen any evidence of their use in Maine. Goode doesn't describe the use of any sort of tender for lobster fishing in the 1884-1887 fisheries report (except briefly when talking about the much larger, usually schooner-rigged, well-smacks used to ship lobsters to major markets). Perhaps the often rough weather made towing a complicated proposition. The fishermen may have taken multiple trips to add pots to their trawls at the start of each season, adding new pots as they went, or perhaps they did tow extra pots for that day only. It seems that, once a trawl was set, they usually wouldn't be carrying that many pots, as most fishing consisted of hauling and replacing each set pot one at a time working down the trawl (if I understand Goode's description correctly, that is).
 
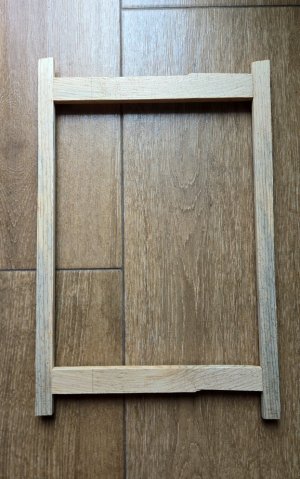
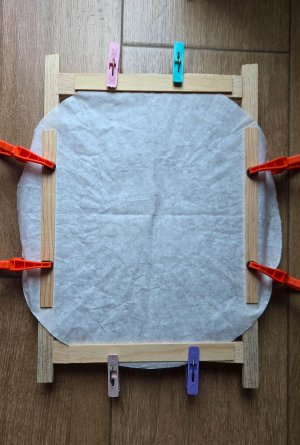
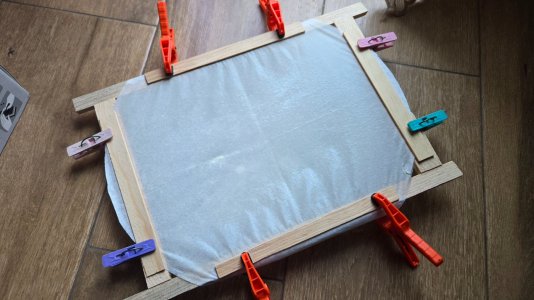
The next step in this model was to make the sails. As in my previous builds, I'll be using a large coffee filter for the sail material. In the past, I've made my sails on top of a tile or on plastic wrap, neither of which was really an ideal base, leading to rather wrinkled sails and some sticking. This time, taking a leaf from the sail-making supplement from David Antscherl's The Fully Framed Model: HMS Swan, I decided to make a frame for sail-making, although so long has passed since I read the supplement that I forgot all the actual frame instructions. The frame was thrown together with scrap wood left over from learning how to use my new ryoba saw--turns out there's a slight learning curve, hence the jagged cuts on the top and bottom pieces. I did better on the longer side parts. The frame is ugly, but works. The butt jointed corners are reinforced with pieces behind, so it's sturdy enough.
20260822_113953(1).jpg

I used some thin strips of scrap pine and clamps to hold the coffee filter in place.
20260822_115418(1).jpg

Then I dampened the filter and stretched it a bit tighter on the frame. Next, I painted it with a mix of water, acrylics, and white glue. While painting, it still looked fairly loose. To keep the paint from pooling, I regularly flipped the frame and propped it on different sides. A small rip opened up along a fold while painting, but the sail is small enough it doesn't get in its way.
20260822_123727(1).jpg

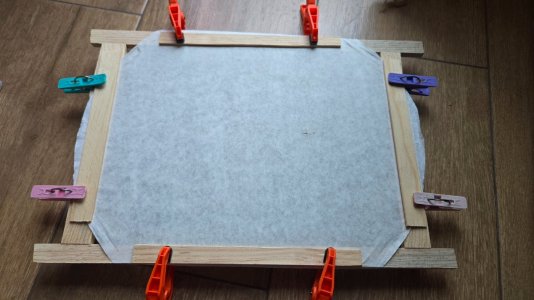
As can be seen, it dried drum-tight.
20260822_135953(1).jpg

A few more layers built up more of a cream canvas color.
20260822_201935(1).jpg

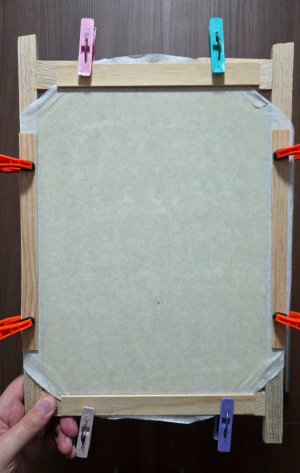
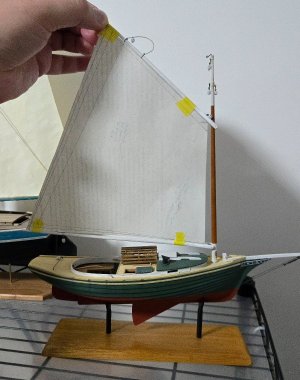
Next, I cut out my sail template and taped it to the spars to double-check that it would work. Looks good to me. (As can be seen, I tried a lot of different shapes before settling on this one.)
20260822_220340(1).jpg
 
Back
Top