Thanks, Grant. A ‘like’ or just a visit is more then enough.True story…..I too am lost for words with this build.
Regards, Peter

 |
The beloved Ships in Scale Magazine is back and charting a new course for 2026! Discover new skills, new techniques, and new inspirations in every issue. NOTE THAT OUR NEXT ISSUE WILL BE July/August 2026 |
|
 |
As a way to introduce our brass coins to the community, we will raffle off a free coin during the month of August. Follow link ABOVE for instructions for entering. |
|
Thanks, Grant. A ‘like’ or just a visit is more then enough.True story…..I too am lost for words with this build.
Thanks for the sail-compliments, Maarten. After the ‘Japanese-paper sails’, it’s nice to work with the Navarra.Hi Peter,
Amazingly realistic these sails. Looking forward to Hamburg.
But first coming Saturday in Amsterdam.
You also thanks for the compliments, Shota. Counting of the days for departure to Hamburg ….I'm absolutely agree with Grant, it's a masterpiece!!!
I look forward to seeing it up close and meeting you, dear friend, in Hamburg.

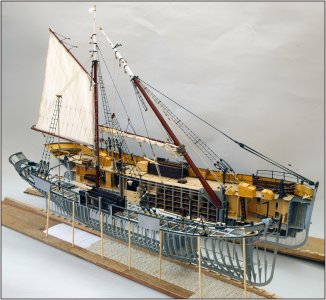
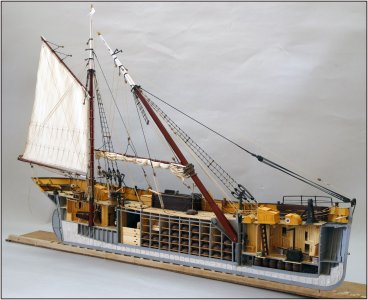
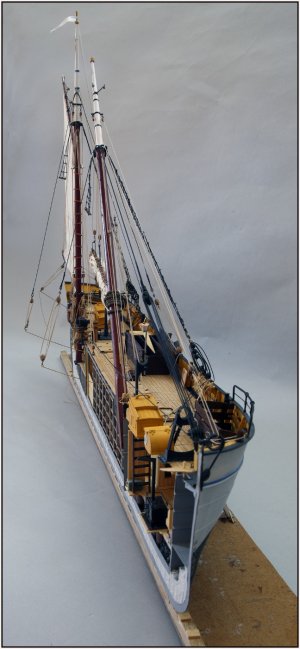
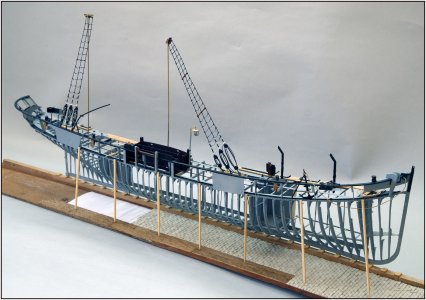


Neat! The sail arrangement looks amazing. I have just started to make the fairleads using your method, but so far my efforts are not so good! Try and try again!The next step was making the support with small magnets to hold up the split shrouds of the mainmast:
View attachment 638572
This was the result. Detaching everything and positioning it takes a little time, but it still works.
I use the three skylights and the forecastle entrance to clamp the two sections together. However, I can also place them back onto the port-side half-section, where they fit neatly over the seam and held in the correct position by a bit of friction:
View attachment 638573
Visible a bit more clearly here:
View attachment 638574
Also shown are the three springy brass rod supports for the mizzen sheet and ‘bak’stay, as well as the mainmast backstay. These ensure there is still some tension on the rigging.
And finally, the detached starboard section with its own supported shrouds:
View attachment 638575
Including a few extra wooden supports to hold this section standing on the building berth.
Regards, Peter
Thanks, Dom. The furled jib has to come and luckely the 3 others are in de hold (not yet …).Neat! The sail arrangement looks amazing. I have just started to make the fairleads using your method, but so far my efforts are not so good! Try and try again!
Dom

Thanks, Stephan. The rigging is 'just a bit different' from what is commonly seen here on the SoS. It also conveys the impression that quite ‘more then a few pairs of hands’ were needed to adjust all the lines whenever the mast was lowered and raised again.Again, just amazing what you show us. Also nice explanation of the rigging.


That's why it was interesting to see, you know I love study rigging. And a lot of the modern rigging is not that modern at all.Thanks, Stephan. The rigging is 'just a bit different' from what is commonly seen here on the SoS. It also conveys the impression that quite ‘more then a few pairs of hands’ were needed to adjust all the lines whenever the mast was lowered and raised again.
Regards, Peter

The next step was making the support with small magnets to hold up the split shrouds of the mainmast:
View attachment 638572
This was the result. Detaching everything and positioning it takes a little time, but it still works.
I use the three skylights and the forecastle entrance to clamp the two sections together. However, I can also place them back onto the port-side half-section, where they fit neatly over the seam and held in the correct position by a bit of friction:
View attachment 638573
Visible a bit more clearly here:
View attachment 638574
Also shown are the three springy brass rod supports for the mizzen sheet and ‘bak’stay, as well as the mainmast backstay. These ensure there is still some tension on the rigging.
And finally, the detached starboard section with its own supported shrouds:
View attachment 638575
Including a few extra wooden supports to hold this section standing on the building berth.
Regards, Peter
Thanks for your visit and the compliments, Dean. It’s great fun to build her up in this fishing configuration.Yet another amazing accomplishment Peter! I commend your efforts and work to get to this point.
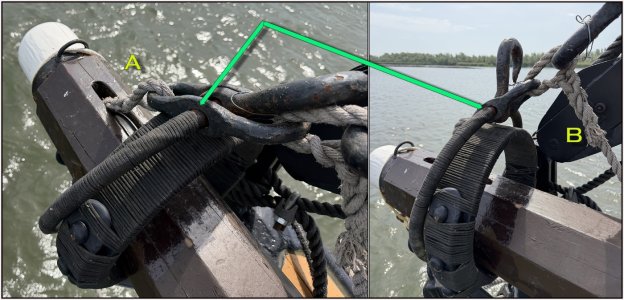
Great work as ever Peter. I would have really liked to go to the IMM for the model exhibition, it's the best maritime museum I have ever visited. Your Balder will be in the right place to show it off. I hope that there will be some pictures from the exhibition posted in the SOS after. Have a great time.Just a quick update on the 1:50 model before it is transported to Hamburg.
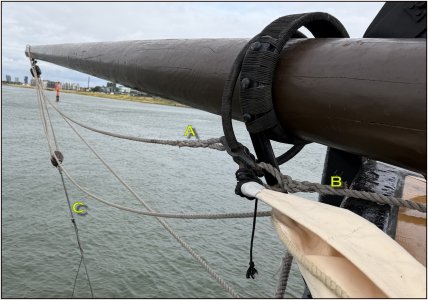
Before I could permanently install the outer jib boom, I first had to construct the traveler.
View attachment 642078
It serves two functions.
First, it is used when the boom is extended. The outer jib halyard is hooked onto the traveler's hinged hook and tensioned. As the boom extends further, the traveler is simultaneously pushed forward using outhaul line 'A'. This end 'A' attaches to the front of an elongated bracket that also pivots around the traveler. This supports the boom, preventing its weight from constantly pulling it downward. Once in position, the rear of the boom is secured in the saddle. I will show that later when I perform the step on the model.
Outhaul line 'A' is a continuous line of sufficient length; its other end 'B' is secured to the rear of the elongated bracket on the traveler. This allows the traveler to be hauled back in:
View attachment 642079
The waterstay 'C' is hooked onto the end of the boom, placing the boom under slight tension.
On the photo you can see the tack of the outer jib is hooked onto the traveler's hinged hook.
When setting the outer jib, the traveler is pulled toward the tip of the boom using the outhaul line and tensioned via the outer jib halyard.
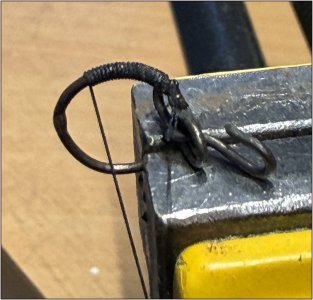
I made the three parts of the traveller from 0.8 mm brass wire:
View attachment 642080
Just like on the 1:1 version, I also served the large ring on the 1:50 model, using 0.25 mm wire.
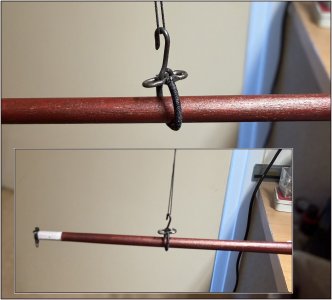
This is what the setup would look like when the boom is supported by the traveller and the outer jib halyard during deployment:
View attachment 642081
(Now that I see this photo, I’ll shorten the hook a little.)
Something else to show off in Hamburg.
Regards, Peter
Thanks for the compliment and nice words, Dom. I am really curious to see what it will be like at the IMM with all the fellow builders and the museum staff. Photos will certainly be taken and posted.Great work as ever Peter. I would have really liked to go to the IMM for the model exhibition, it's the best maritime museum I have ever visited. Your Balder will be in the right place to show it off. I hope that there will be some pictures from the exhibition posted in the SOS after. Have a great time.
Dom


Thanks for the compliments and very nice words, Johan.An absolutely stunning model with little or no competition.
The planning and the build require so many capabilities that it's kind of scary.
At the early stages of the build I implicitly challenged fellow builders to pick up the gauntlet, but, and maybe I missed something, I haven't seen anything similar coming along, (and before fellow builders start challengeing me, this is way above my paygrade).
Have fun in Hamburg, Peter.
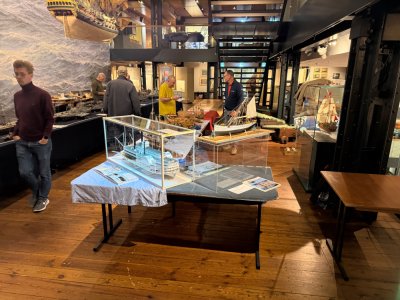


Thanks, Shota. For our conversations as neighbors on the 2nd floor on the IMM and your compliments and pictures.Peter, my dear friend,
I saw your amazing model at the exhibition with my own eyes;
it is the work of a true master creating a masterpiece!
It was also an honor to meet you—you are a wonderful person.View attachment 642488View attachment 642489
View attachment 642490