• Ships of Scale has incorportated an extra level of security when you log In. Please follow on-screen prompts to acknowledge that you are not a robot via a "Check Box" or a "Pictorial Check Box Puzzle". This is needed due to higher level of AI Activity Security.
  • SUBSCRIBE TO SHIPS IN SCALE TODAY!

    The beloved Ships in Scale Magazine is back and charting a new course for 2026!
    Discover new skills, new techniques, and new inspirations in every issue.

    NOTE THAT OUR NEXT ISSUE WILL BE July/August 2026
  • Win a Free Custom Engraved Brass Coin!!!
    As a way to introduce our brass coins to the community, we will raffle off a free coin during the month of August. Follow link ABOVE for instructions for entering.

Oseberg V3 Build Log by Ashley

Tapering the Stems of the Keel.

The written instructions for tapering the keel ends are given on page 9 of the instruction manual. I had watched the videos supplied by Pavel and from them, I knew that there were some incorrect dimensions given. If memory serves correct, the taper is at 15mm from the tip of the keel top.

Instruction Manual

The idea from the manual, is that the tapering is undertaken after the joining of the keel halves to form a single unit. I was not happy to undertake this at this stage because I felt the keel was very delicate. Also, the videos show the operation carried out much later and to a different dimension. I decided, later than sooner.
1.jpg
Incorrect Dimension

The Videos

2.jpg
Correct Dimension to just Above 2nd Dowl

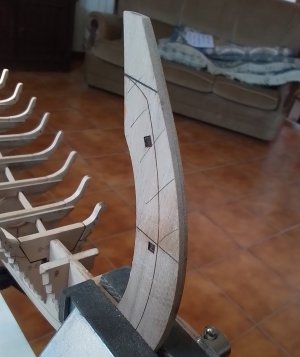
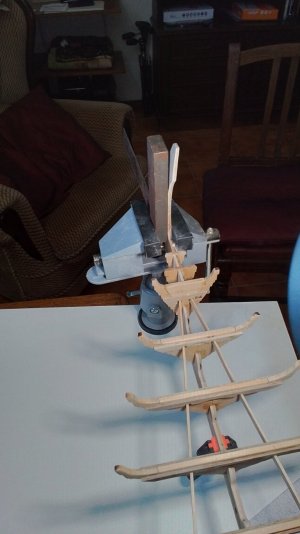
Pavel attaches the keel to the side of the ship frame and works on it from there. I was not happy with this idea and undertook the chamfering whilst the keel was supported in two vices. This permitted me to work on a much more rigid structure. Not in the instructions, but in the video, the chamfering is across a distance of 60mm. Here the video does not in my mind alight with the said dimension of 60mm takes the chamfer to the second joining dowel. I did use the 60mm.

Undertaking the Chamfering

The chamfering did take a fair length of time and I noticed that if I was not careful, along the 60mm length of the chamfer, I could easily create either a concave or convex shape and slightly round the keel tip. To help aid in shaping, I used a small steal rule to check flatness. Eventually, the tip needs to be chamfered down to .5mm. This must be between the two sides individually. I shall not provide full details here. They are clear in Pavel’s video.

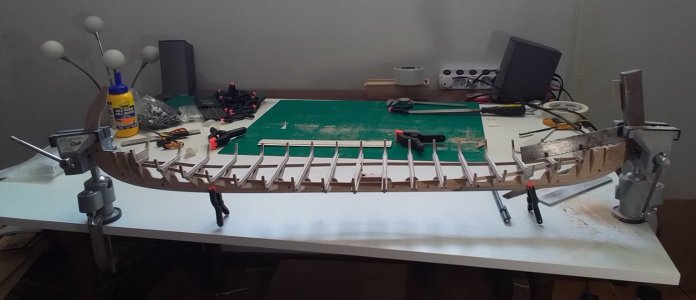
The chamfering process is a delicate operation if to be undertaken with precision and I found that by clamping the keel between two vices. At the end I was working on, I used an old set square to give additional vertical support. Also, once one side had been completed, and the other worked on, an additional wedge piece between the set square and keel tip provided greater rigidity, therefore aiding in precision.
4.jpg
Supported in Two Vices

11.jpg
Well Supported for Chamfering


Chamfering Completed

Earlier while constructing the second slipway building jig, I was not satisfied with the way the Oseberg skeleton was being supported and I made some slight alterations where things improved.

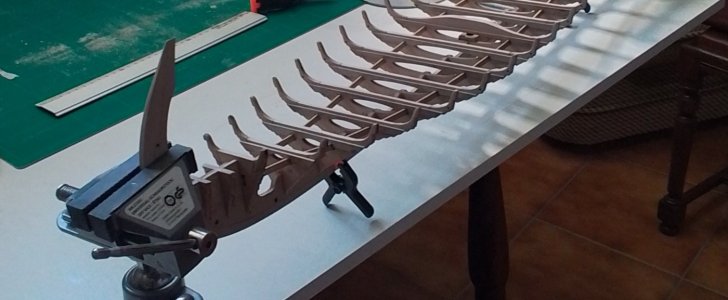
Not shown in the instruction manual, but in the video are supports for the keel tips when placed in the holding jig. Pavel shows these additions incorporated before the tip is created. I incorporated the additional supports once the tapering operation had been carried out and the temporary cheeks had been attached, this allowed for great accuracy in the holding ability of these parts. In the case of the cheek pieces, the instruction manual says 1/10 glue. This means, just a little. This detail vital.
20250706_152645.jpg
Completed Bow & Stern

Keel Veneers

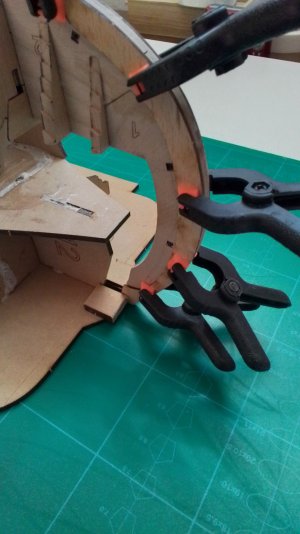
I’m not sure what any of the pieces would be called in reality. I’m building a model not a complete ship. The keel veneers as I call them, are attached in six pieces along the Oseberg length and four parts I called cheeks. Each of the parts I dry fitted first, and found them to fit just about perfectly when I kept all outer edges level with the keel. At this point, I also ensured that the planking would fit reasonably accurately and snug between the keel veneers and the ship frames. They did.
20250706_181547.jpg
Upper Keel Supports

100.jpg
Checking Planking Fits


20250706_181604.jpg
Side Veneers Applied


Conclusion

To this point, all has gone smoothly and I am happy with the results. Often ship models are listed with a difficulty rating. I think that difficulty rating will greatly depend on the individuals abilities, degree of build accuracy and more. In the case of this model, I feel it is well within the scope of the confident beginner should they thoroughly study the plans and videos. I would also suggest that any potential builder takes the time to follow the build logs of others. They can be very beneficial. I have fallen short on this a little at times and where I may have been confused, is when I’ve not followed my own advice.
 
Last edited:
Your build log is very thorough and detailed, Ashley - well done! My Oseberg keeps calling me, but the yard work and the lake call even louder! ROTF
 
Hi all, I'm back. It's been some time since I last posted. Some has happened but not a huge amount with my beautiful Oseberg.

Near on 50 years ago I used to build model boats from plans I'd bought through magazines. In those times, I seemed to have more time, then a working life got in the way and I lost track of my favoured hobby. Upon retiring, I had more time and money and I discovered how the hobby of model ship building had changed where, I was set for an entry into the laser cut world of ship building.

I've always been a very precise person and if I feel a project is not going as I'd imagined it could or ought to, it tends to take a back seat until I resolve the issues and feel I can improve on the task in hand. Generally through more research and study. This became the case with the Oseberg.

I initially aimed to share my experiences in building the Oseberg, to hopefully aid others in their build as others have been kind enough to do both here and other forums.

Back soon.

So This is What You're Doing - Is It

P1090232.JPG
 
Last edited:
Hi all, I'm back. It's been some time since I last posted. Some has happened but not a huge amount with my beautiful Oseberg.

Near on 50 years ago I used to build model boats from plans I'd bought through magazines. In those times, I seemed to have more time, then a working life got in the way and I lost track of my favoured hobby. Upon retiring, I had more time and money and I discovered how the hobby of model ship building had changed where, I was set for an entry into the laser cut world of ship building.

I've always been a very precise person and if I feel a project is not going as I'd imagined it could or ought to, it tends to take a back seat until I resolve the issues and feel I can improve on the task in hand. Generally through more research and study. This became the case with the Oseberg.

I initially aimed to share my experiences in building the Oseberg, to hopefully aid others in their build as others have been kind enough to do both here and other forums.

Back soon.

View attachment 638627
I'm looking forward to your build updates!

My Oseberg has been sitting for over a year, hopefully your log will inspire me to start back up on mine!!!

Steve
 
I Said I'd be Back and Here I am.

This may become a longer post where I'm writing it in the hope of aiding others through my experiences.

I'm getting back into the swing of building the Oseberg. I have had a few problems along the way and I appear to, and hope it is the case, learnt a good few thing on this journey. The Oseberg is my first ship in very many years and the first with clinker built planking.

P1090228.JPG

The Problems Start

All appeared to be going well until I discover the planks were not fitting as well as I had first anticipated. Turning to forums such as this and others for tips on my problem, I discovered an assortment of comments ranging from the planks as supplied were too short to the ship being of a faulty design or even, the instructions were incorrect. Few people list builder error as the major cause. I will admit, in my case, builder error has caused some issues.

If I consider the works of Pavel Nikitin I would say that there have been errors, but those as far as I'm concerned have been rectified by him before I purchased his Oseberg. I would also say, this is most likely the case with each of his kits. I feel that Pavel creates beautiful ships that with a greater understanding of the shipbuilding process, can result in truly beautiful masterpieces. The fact that people do report pieces missing on occasion, is a different matter.

It's My Fault - I Can't Blame Others

Getting back to myself, I would say that a lack of experience has been my major issue. Prior to purchase, I watched all the videos provided once or twice. Upon the delivery of the kit, I was eager to start and again followed the build logs of others. I was doing this as I built. Here, I discover that some had issues with the keel of the Oseberg appearing to have differing lengths between the two sides. I did not experience this and found that the keel assembled perfectly. In the case of the keel and all other parts, there is great discussion over the char. Initially, I was very concerned about this. I believe, overly so. It seems many people have difficulties with knowing what to do with it. I did read a comment that Pavel wrote where he said, "there is little need to worry about char on areas such as the keel as the butt joint does not need to be strong as the left and right glued side proved the strength". This can be said for many parts. I feel that the excessive removal of char may create inaccuracies on dimensions.

During my reading by what appeared a very capable builder, I read the following in building the Santa Maria by Pavel. "The difficulty comes in due to the great accuracy in the kit design and laser cutting. This means that a great deal of precision is required and a high understanding of the information the plans provide. There is very little room for error in construction". I feel this is the case. Had I read the plans, which I am capable of doing, followed the instructions and watched the videos all with greater attention to detail. I would almost certainly achieved a better finish at the bow and stern. In fact, Pavel says on many occasions, watch the videos.

Laser Char

In the case of cleaning laser cut parts of char, I think it is all too easy to create dimensional inaccuracies where over enthusiastic on char removal. An example is where I became over worried about join strength in the planking, potentially caused by char. Consequently, I felt that the parts were too short. I was about 2mm short in one case. The rest were fine. It would have been nice if these planks were a little longer. Ultimately, I feel it was my own fault. Also, join strength will also be determined by adhesive used. An appropriate adhesive I suspect can achieve greater strength even with char than a poor adhesive without char. Since I became less concerned with the char on plank joins, I can honestly say that I have had no issues with join failure even on the most delicate of planking parts.

Keep those Dimensions

Still on the subject of part cleaning. When I first started sanding the assembled frames, thinking I disliked the visible burned in part numbers and trying to remove them, I realised I was over thinning them and stopped. It was just as well because it would have caused the decking plank lengths to be too short. I'm okay there but only just. Accuracy really is hugely important on these models if we are to complete with good results.

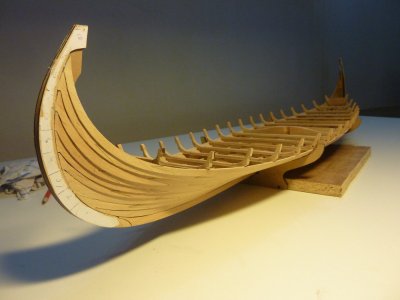
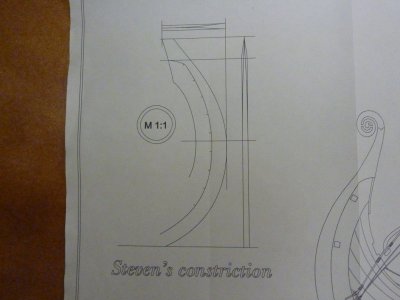
One area where I do think Pavel could have aided the less experiences builder is if he were to have displayed the system, on the video, to mark the levels up the Bow and Stern for each of the planks. You will see the remains of a piece of paper stuck to my Bow and Stern in the photograph. It's not clear on the photo as I've sanded it some. The second image from the plans displays what I'm taking about better. Olha Batchvarov displays this in her Youtube videos. They are worth watching. Her Oseberg is an earlier version.

P1090246.JPG


Another area where I had just slight problems was in the frame chamfering for the planking. When I first saw what I had to do, I shaped as instructed. I had no idea if it should have been up to the marked line, remove the line completely or within its thickness. Again, this will make a difference. If I were to be doing that same job again, I would under chamfer and perfect the shape whilst planking. Pavel does this to some extent. However, if too much has already been removed, that will lead to problems.

In Conclusion

l shall continue later. But first, I shall say that so far I have enjoyed every moment spent on the Oseberg. I have learnt a lot from the experience and as I strive for perfection it my creativity, I can remain a little disappointed when I know I could have done better. For anyone building any ship. My advice would be take it easy, read and study as much as possible and then, you should achieve a better result than had you not done so. Check out the work of Willbor237 on the forum. He has created a beautiful Oseberg at 1/25. To me, his planking looks perfect.
 
Last edited:
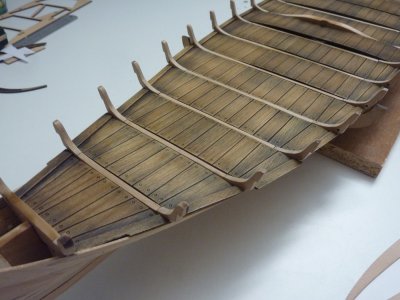
A Challenge in the Decking

A little short on the width! The decking of the Oseberg has been, boring, challenging, fun and rewarding in that order. The laser cut parts have been cut, not allowing for cleanup of the parts.

P1090200.JPG
The Challenge

Let Me Check the Dimensions

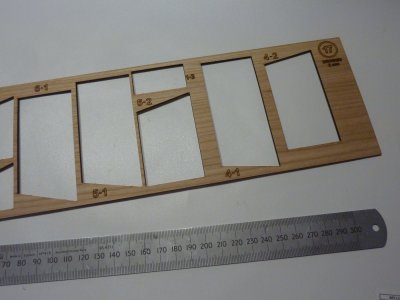
Before writing this post, I did an experiment and measured the dimension in the widths of the remaining cut-outs of plates eighteen and nineteen. These are marked on the drawings where I used sections 6-2 and 6-1. Between them the measurement is 133mm. This is the exact measurement required for the decking width of the 4th section from bow or stern. When the parts are cleaned, even slightly, the remaining width is 128mm. 133mm is Required for full coverage.


P1090250.JPG

Drawing and Pavel Video

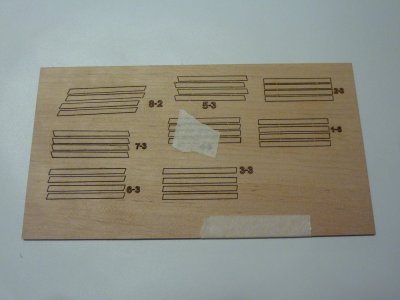
Though not noted in the supplied drawings of the accompanying booklet, the discrepancy is seen in the video as supplied by Pavel. In the video, Pavel added a small piece of wood to each side of the decking sections. An additional small plate as seen is supplied with the kit for this purpose. Unfortunately, the supplied wood plate, was not matching in the case of my kit. Further, I felt that the laser cut parts were also too small.

P1090249.JPG

Workaround and Potential Model Improvement

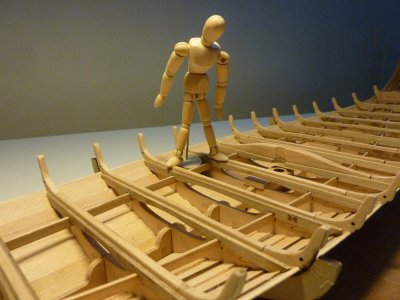
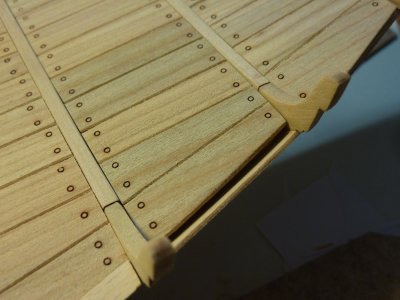
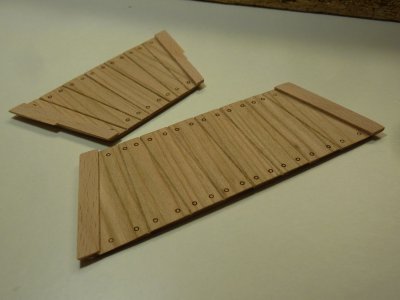
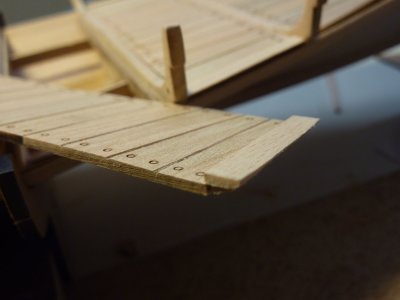
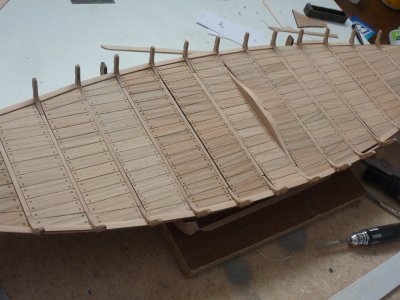
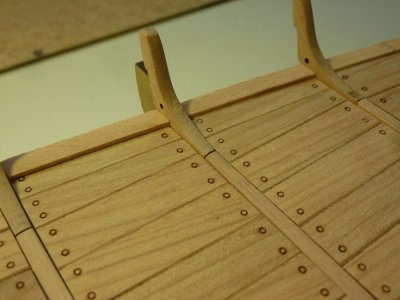
It's unfortunate that I did not take photographs of my actions here. However, basically, what I did was to fit the too narrow decking section in place on the Oseberg and then fit a temporary strake at level eight. This gave me the exact positions required for the widening of each deck section. With the temporary strake in place I made a template of the width and shape/s required. In the case of the original Pavel design idea, the deck remains flat to the very edge of the decking. Photographs of the preserved remains of the Oseberg, give me the impression that the deck took a small step up on the very last board on Port and Starboard sides. I recreated this upon increasing the decking widths.

P1090203.JPG
Part of the system showing level how I achieved the widths required

The End Result


P1090215.JPG
Two finished parts

P1090206.JPG
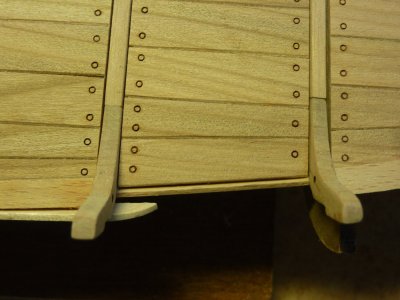
The step as mentioned

P1090207.JPG

P1090211.JPG


In Conclusion

Creating and using the paper templates, plus chamfering the underside of the board extensions permitted me to be able to achieve a perfect join between strake eight and the decking. The boring part was cleaning up each deck section. The challenging part was figuring out how to fix the problem. The fun park was knowing how to achieve my goal and the rewarding part was becoming a better model ship builder.

All in all, I'm more than delighted with the results.
 
Fun with Colours and the Decking

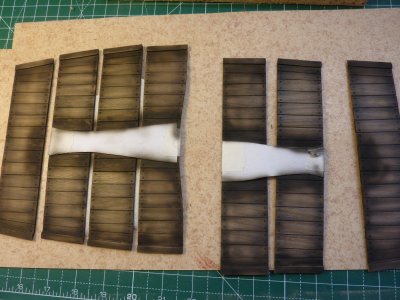
It seems I'm really making progress on the Oseberg with the rate of my postings. That is not the case as I'm simply playing catch up on the progress of my build. I have however very recently stained the deck boards. It is the first time I have used wood stain through my .35mm airbrush and I learned the difference between acrylic paint on polystyrene and stain on wood. I was also concerned that the amounts as supplied by Pavel would not be enough. I'm now sure, adequate is supplied. Below is the result of the first attempt. Far too dark and especially soon in dull light.

The Desired Effect

I did not want the Oseberg to appear as if it had just arrived from a ship building company looking pristine. I did not want it to appear as a preserved ship, as is now the case with the Oseberg. The look I wanted was as if it had been used for many a year and aged well with time. This is not what I see on Pavels videos for the decking. They look very clean and regular in stain and discolouration via patina in my view. The Oseberg as seen on Pavel's website is truly beautiful.

The below image left side was the result of sanding some of the stain as seen on the left of the image. You can see the paper template I used.

P1090237.JPG

After some more stain was removal things looked a little better. Then I decided to add a little patina stain to below the bench position, cooking area and areas where it would receive less foot traffic and likely to become dirty.

P1090241.JPG

Below, more patina is added. Now it's getting too dark again. Oops.

P1090243.JPG
Some removal of stain did a little to improve the situation. Now I'm getting worried and feel I need to make a complete new deck. Or strip it right back to almost no stain.

I tried to consider where the main foot traffic would occur. Where the sailor seats would be positioned and where cooking of food would have taken place. Generally areas when wear might be more likely to keep boards cleaner and difficult area to maintain, appearing more grimed.


I Though I Had Screwed Up - Initially

I almost had the Flying Dutchman dead look. What would have been helpful is if I'd worked with dyes and an airbrush on a ship before. Even trial and error on spare pieces of identical wood scrapes would have helped and been more sensible. Below are the results in order of trial.

Horrible

Nothing more to say.

P1090244.JPG

Start Again

Ok Ashley, I said to myself. Lets start again. Experiment. If I have to recreate the complete deck, I'll do that. Below is experimenting between bow and stern. I sanded back with 180 grit, then 240. It started to improve with a huge lessoning of contrast.

P1090254.JPG


P1090256.JPG


P1090260.JPG


P1090261.JPG

In conclusion.

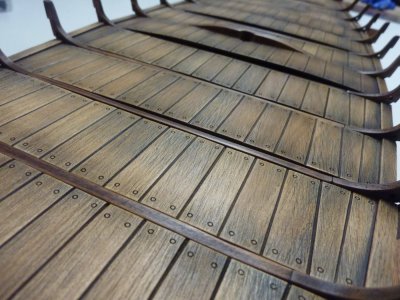
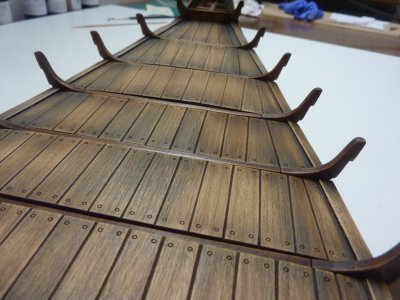
I started the staining of the decking with just a few concerns over the end result. I over stained with the patina and rubbed it back some. Then I applied the oak stain and that darkened everything up far too much. A complete re-think was required and now I'm delighted with the end result. It's almost exactly as I had desire showing some irregular wear and tear and staining beneath the cooking stove. Possibly the Danish oil upon application will alter the finish I now have. However, I'll experiment on scrap pieces. All in all, some very valuable lessons learnt.
 
Last edited:
Wow Ashley, looking good!
I'm following your build closely, helping me get back into my mine. I've never used this kind of stain before, I love your results!
Steve
Thanks for the comment Steve. It's appreciated to have feedback both good and bad. It makes one look at their own work from another perspective when needed. I found that the air brush needed to be set to near on the bare minimum. Black dye really needs a lot of control. That was my main mistake in it becoming too dark in the first place. I hope it encourages you to get going on your Oseberg. Do you mind me asking why yours ended up on the shelf?
 
More Stain - I'm Improving

P1090279.JPG

Overall Image

P1090267.JPG


I have became more confident in my staining ability and the staining of the Oseberg. Feeling this way, and whilst the wife was chipping away to create a new masterpiece of wood carving, I undertook the staining. It was in fact a much more involved job than I'd anticipated, not that I had given it much thought.

Patina - Ageing

P1090268.JPG

P1090269.JPG

P1090270.JPG

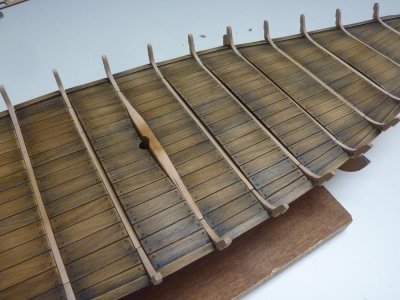
I airbrushed the patina colouration with a very fine spray setting so as not to soak the wood to much. Still to achieve a more convincing aged look. I applied so the effect was dark grey, not that of light.

Following application, I rubbed down the beams as seen in Pavels videos and discovered how involved it was. Following, I felt the results were pleasing and in keeping with the already completed deck timbers. I discovered that if not careful, a noticeable difference between beams could become obvious.

Real Colours

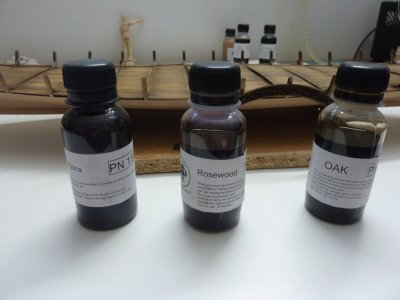
A second application of rosewood stain was applied and following, rubbed down lightly. On completion, I inserted the decking parts to see the result. I felt that the were not as I desired due to the fact that the rosewood has a distinct red colour. This was not really in matching with the deck timbers. To rectify this, I rubbed down the rosewood colouration but not completely. Following this, I applied a light covering of oak stain. The result, to me were very acceptable.

P1090273.JPG

P1090274.JPG

Conclusion

I am delighted with the results so far. In the images, it can been seen how I finished the final slightly stepped deck boards to achieve a nice join between deck and hull planking. I'm thinking a lot about the Santa Maria by Pavel.
 
Last edited:
More Stain - I'm Improving

View attachment 641789

Overall Image

View attachment 641778


I have became more confident in my staining ability and the staining of the Oseberg. Feeling this way, and whilst the wife was chipping away to create a new masterpiece of wood carving, I undertook the staining. It was in fact a much more involved job than I'd anticipated, not that I had given it much thought.

Patina - Ageing

View attachment 641779

View attachment 641780

View attachment 641781

I airbrushed the patina colouration with a very fine spray setting so as not to soak the wood to much. Still to achieve a more convincing aged look. I applied so the effect was dark grey, not that of light.

Following application, I rubbed down the beams as seen in Pavels videos and discovered how involved it was. Following, I felt the results were pleasing and in keeping with the already completed deck timbers. I discovered that if not careful, a noticeable difference between beams could become obvious.

Real Colours

A second application of rosewood stain was applied and following, rubbed down lightly. On completion, I inserted the decking parts to see the result. I felt that the were not as I desired due to the fact that the rosewood has a distinct red colour. This was not really in matching with the deck timbers. To rectify this, I rubbed down the rosewood colouration but not completely. Following this, I applied a light covering of oak stain. The result, to me were very acceptable.

View attachment 641782

View attachment 641784

Conclusion

I am delighted with the results so far. In the images, it can been seen how I finished the final slightly stepped deck boards to achieve a nice join between deck and hull planking. I'm thinking a lot about the Santa Maria by Pavel.
Very nice job! Hopefully I'll be able to get as good of results on mine, whenever I get there. LOL

Steve
 
Thanks for the comment Steve. It's appreciated to have feedback both good and bad. It makes one look at their own work from another perspective when needed. I found that the air brush needed to be set to near on the bare minimum. Black dye really needs a lot of control. That was my main mistake in it becoming too dark in the first place. I hope it encourages you to get going on your Oseberg. Do you mind me asking why yours ended up on the shelf?
Hi Ashley.

The biggest reason I haven't started back on mine is time, life has been crazy...work work work. I haven't put her away, just haven't made time to get back at it. This is the first clinker style hull I've worked on, admittedly I found it frustrating at times. I'm happy with my results so far, just have to get back at it.

Thanks for your build updates, they are definitely giving me the urge to sit back down with this beautiful kit.

Steve
 
It Remains Enjoyable

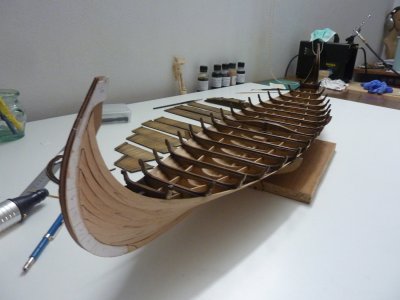
P1090325.JPG

I had been looking forward very much to the following works involved in the Oseberg. It seems it has taken me an absolute age to get to this point. That said, it has not mattered because it's not a race but a very enjoyable hobby.

My Inaccuracies

During the construction of the Oseberg I have learnt a lot in the construction methods required and the accuracy required for a successful finished result. In my case I made a few mistakes. Perhaps, because I failed to take better note of the videos by Pavel or because I needed to spend more time on the plans. In any event, my planking was not perfect, and I believe it could have been, because, this part of the kit will permit that. My planking started with a minor inaccuracy in the placement of the first strake. Also, I feel it's entirely possible that excessive char removal played a part. And following, a slight inaccuracy of the second, and third and so on. It goes on whilst working my way up the ship. Every little half millimetre incorrectness increases the overall effect, the further you proceed.

P1090290.JPG

P1090308.JPG

P1090297.JPG

Bow and Stern

A Little Long-winded But Hopefully of Benefit to Others with a Similar Problem.

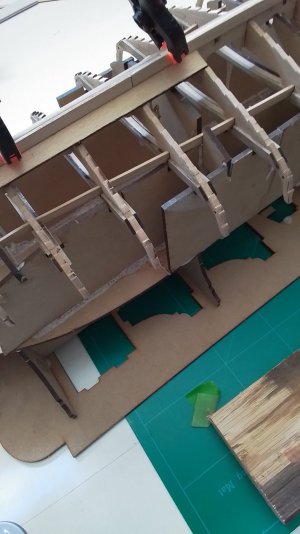
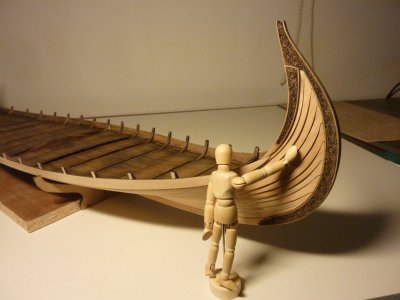
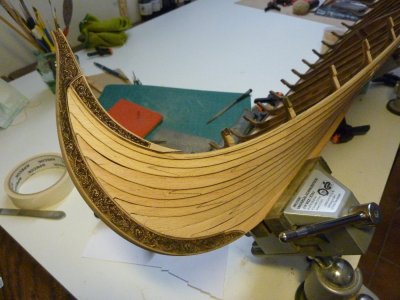
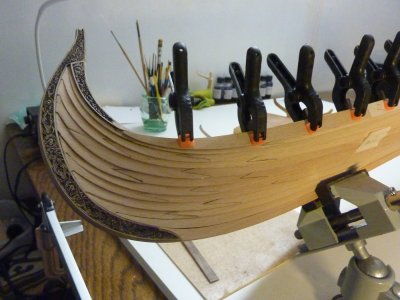
Fortunately, these wooden kits will permit some corrections with a bit of ingenuity and luck. In my case, I developed a poor quality connection between the bow planking and the temporary bow mould piece. The same was the case with the stern. In my previous images, this can be seen. It was only slight. To overcome this, after removing the temporary attachments to the bow and stern, I reshaped the planking join to all four parts, with a small file, so that the ornate mould could be set further in and towards the planking. If this is not clearly written, in short, the top of the bow and stern ornate moulding were moved in and towards the ship centre by about 2 millimetres each. This results, in my case, in a closing of the gap, and an almost perfect visual connection between ornate mould and planking.

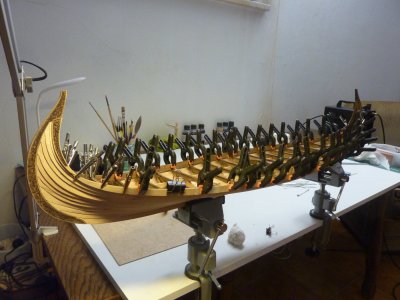
Strake Ten

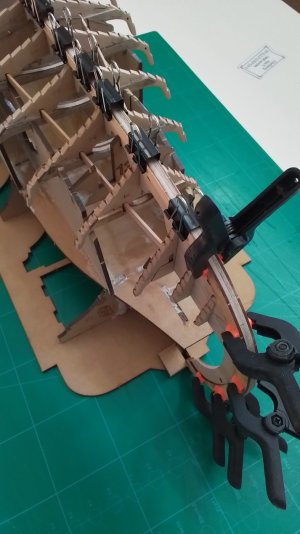
Shaping and attaching the tenth strake was relatively simple but initially, I could not understand why the instruction request tapering by 60mm. After some time, I realised that the thickness of the ornate moulded section needed to be taken into account. On watching Pavels video, he joins sections of strake ten and then chamfers the bow end. I shaped and then joined. Attaching this part was straight forward.

P1090304.JPG
Strake Eleven

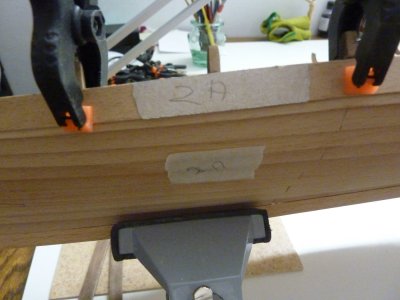
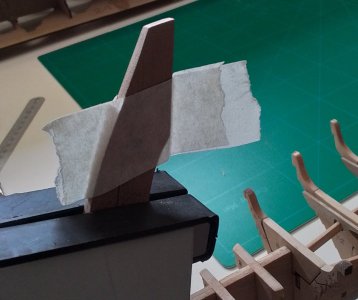
"Easy Peasy" as the Saying Goes. Not really so. I found that making the join between strake eleven and the ornate moulding to be a very delicate job because out of the four sections, three chipped off at the very tip due to the grain of the wood. Perhaps, it would have been beneficial if I had reinforced, temporarily, with masking tape, the very delicate end tips. The four sections: bow, stern, port and starboard, I numbered so I did not confuse each of these parts. Staining of all, finished these parts.

Conclusion

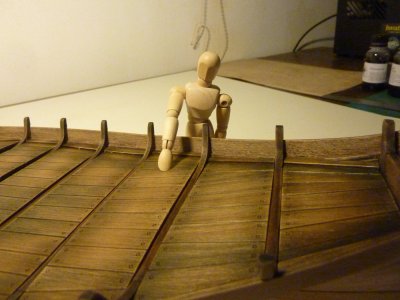
In the case of building the Oseberg, I feel one of the great joys is discovering that you are learning new things and improving as a model ship builder. I may be at an early stage here, but it's a true thrill as is sharing the build process.

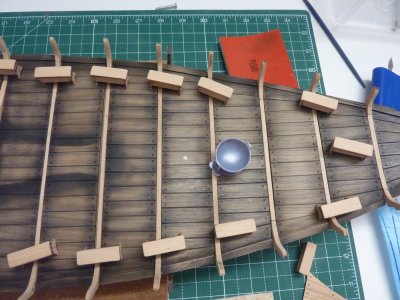
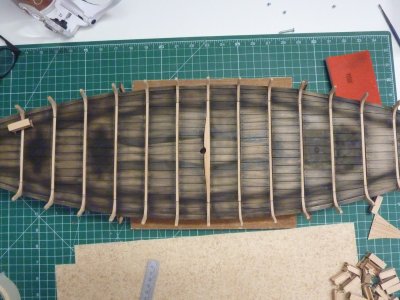
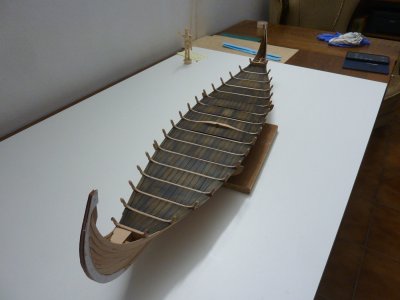
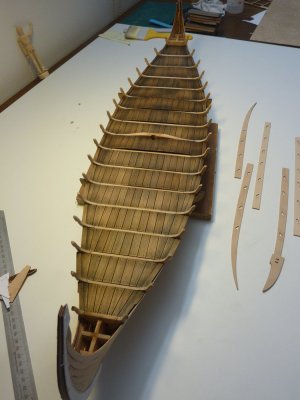
In the process of fitting the above mentioned parts, a considerable amount of time and accuracy and I really looked forward to this part. After removing the clamps, I dry fitted the deck boards and now, I can really see the beauty of this model. Pavel has done really well here. BUT and there is a BUT.


P1090324.JPG

Conclusion Two - SOS

An abandon ship moment has come. TBC
 
Last edited:
It Remains Enjoyable

View attachment 643260

I had been looking forward very much to the following works involved in the Oseberg. It seems it has taken me an absolute age to get to this point. That said, it has not mattered because it's not a race but a very enjoyable hobby.

My Inaccuracies

During the construction of the Oseberg I have learnt a lot in the construction methods required and the accuracy required for a successful finished result. In my case I made a few mistakes. Perhaps, because I failed to take better note of the videos by Pavel or because I needed to spend more time on the plans. In any event, my planking was not perfect, and I believe it could have been, because, this part of the kit will permit that. My planking started with a minor inaccuracy in the placement of the first strake. Also, I feel it's entirely possible that excessive char removal played a part. And following, a slight inaccuracy of the second, and third and so on. It goes on whilst working my way up the ship. Every little half millimetre incorrectness increases the overall effect, the further you proceed.

View attachment 643261

View attachment 643262

View attachment 643263

Bow and Stern

A Little Long-winded But Hopefully of Benefit to Others with a Similar Problem.

Fortunately, these wooden kits will permit some corrections with a bit of ingenuity and luck. In my case, I developed a poor quality connection between the bow planking and the temporary bow mould piece. The same was the case with the stern. In my previous images, this can be seen. It was only slight. To overcome this, after removing the temporary attachments to the bow and stern, I reshaped the planking join to all four parts, with a small file, so that the ornate mould could be set further in and towards the planking. If this is not clearly written, in short, the top of the bow and stern ornate moulding were moved in and towards the ship centre by about 2 millimetres each. This results, in my case, in a closing of the gap, and an almost perfect visual connection between ornate mould and planking.

Strake Ten

Shaping and attaching the tenth strake was relatively simple but initially, I could not understand why the instruction request tapering by 60mm. After some time, I realised that the thickness of the ornate moulded section needed to be taken into account. On watching Pavels video, he joins sections of strake ten and then chamfers the bow end. I shaped and then joined. Attaching this part was straight forward.

View attachment 643265
Strake Eleven

"Easy Peasy" as the Saying Goes. Not really so. I found that making the join between strake eleven and the ornate moulding to be a very delicate job because out of the four sections, three chipped off at the very tip due to the grain of the wood. Perhaps, it would have been beneficial if I had reinforced, temporarily, with masking tape, the very delicate end tips. The four sections: bow, stern, port and starboard, I numbered so I did not confuse each of these parts. Staining of all, finished these parts.
Conclusion

In the case of building the Oseberg, I feel one of the great joys is discovering that you are learning new things and improving as a model ship builder. I may be at an early stage here, but it's a true thrill as is sharing the build process.

In the process of fitting the above mentioned parts, a considerable amount of time and accuracy and I really looked forward to this part. After removing the clamps, I dry fitted the deck boards and now, I can really see the beauty of this model. Pavel has done really well here. BUT and there is a BUT.


View attachment 643267

Conclusion Two - SOS

An abandon ship moment has come. TBC
Very nice! I like how you adjusted the strakes to make the carvings fit so well, very good explanation of it as well.
Steve
 
Back
Top