Model Airways-The Wright Flyer-Scale 1/16

Joined
Jul 27, 2018
Messages
268
Points
278

Location
Maryland
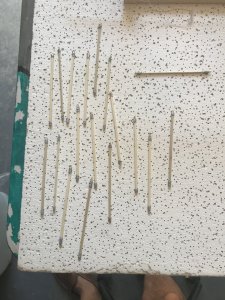
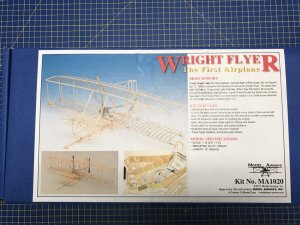
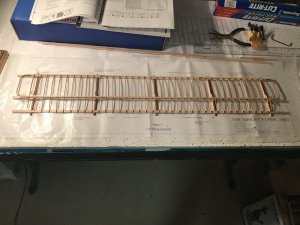
I am now working on the next build, the Wright Brothers airplane. This brings me back to my days building wooden RC airplanes and sailplanes. Two years ago I read historian David McCullough’s great book on the Wright Brothers. I really enjoyed reading about their life and story. They were true pioneer innovators in flight study. I have been working on the project for a couple of weeks bouncing back and forth to my Bluenose project. The kit starts with the two wings. I have assembled about 90% of the top wing. Lots of small wing ribs to carefully sand and align. 4003CA22-47A9-47CF-A1D8-FDFF31749F96.jpeg31E40591-FE02-485D-AB95-75F8B6DD5D17.jpeg4003CA22-47A9-47CF-A1D8-FDFF31749F96.jpeg31E40591-FE02-485D-AB95-75F8B6DD5D17.jpeg
 
I am now working on the next build, the Wright Brothers airplane. This brings me back to my days building wooden RC airplanes and sailplanes. Two years ago I read historian David McCullough’s great book on the Wright Brothers. I really enjoyed reading about their life and story. They were true pioneer innovators in flight study. I have been working on the project for a couple of weeks bouncing back and forth to my Bluenose project. The kit starts with the two wings. I have assembled about 90% of the top wing. Lots of small wing ribs to carefully sand and align. View attachment 85047View attachment 85048View attachment 85047View attachment 85048
That looks like a great kit. I have a Sopwith Pup on the shelf awaiting assembly. I look forward to your build.
 
Excellent build. I will follow this one. I have been wanting to build one of the others like the Newport or the Camel. Although the one you are building came to mind too.
I have got to get my San Felipe off my bench first.
 
I will watch with interest and fancy the idea of building one of these kits myself. It will certainly bring back memories of when a friend and I used to fly control line combat wings on the school field and try and chop the paper streamer off each other's aircraft. Crash 'em, rebuild 'em on the dining room table in the evening and off again the next morning. Happy days!
 
I will watch with interest and fancy the idea of building one of these kits myself. It will certainly bring back memories of when a friend and I used to fly control line combat wings on the school field and try and chop the paper streamer off each other's aircraft. Crash 'em, rebuild 'em on the dining room table in the evening and off again the next morning. Happy days!
I have always been intrigued by gliders and planes. Having built both for RC flight in my younger years I liked the build but the fun was in flying them. Unfortunately the rebuilds on some of my crashes could take several weeks. Budget constraints moved me static models. The Wright Flyer while it looks like a glider was able to sustain controlled flight through its own power. That and it’s history interests me in this build. Thanks for following.
 
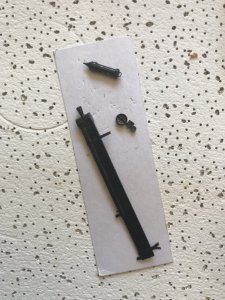
Worked on the engine and magneto yesterday. Lots of very small and delicate parts to this kit. I have decided to paint all the engine and drive train related parts black based on the display of the Wright Flyer at the Smithsonian. I was recently able to visit the Air and Space Museum and found lots of good detail and ideas for the plane. More on that later.
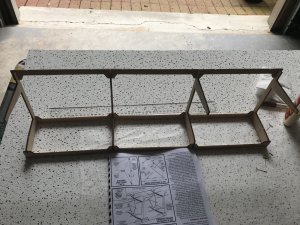
I also assembled the jig to be used to assemble801948CF-67EF-45DC-A34E-FA0E9B206081.jpeg the plane. I jig holds the top and bottom wing so you can more easily add the struts and wires.
C64B65C7-F11D-46FF-BF25-27416F6AD077.jpeg
 
Nice start. I've opened my kit and looked in the box.

Keep up the good work and pics. What glue are you using?

EJ
Both white glue and CA. The wing ribs were all set using Titebond. Then I went over some of the more tenuous joints with a small touch of CA. Metal parts mostly using CA. When I attach the engine I plan to use epoxy. Hope this helps.
 
Both white glue and CA. The wing ribs were all set using Titebond. Then I went over some of the more tenuous joints with a small touch of CA. Metal parts mostly using CA. When I attach the engine I plan to use epoxy. Hope this helps.

Thanks for the info. I'm gonna study the instructions and get started soon.

I'm working on a Guillow's DC-3 kit now. I'm not gonna do the paper skin though. I flew out of Grand Rapids on a DC-3 when the US Navy shipped me out.

EJ
 
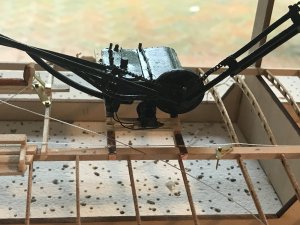
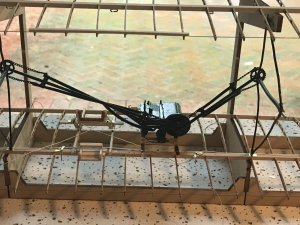
I worked on the bottom wing to add the support for the engine and magneto, built and attached the footrest and pilot cradle. I also assembled the two propeller/wing support arms and added the gears and chain drive to each one. This was very tedious as the chain wraps around the gears on the engine which are hard to access and then attaches to the chain supports. Put some good planning time into this area. The instructions tell you this but until you actually start to do this task it is hard to truly envision. The chain is only visible on the ends as the drive was supported by piping to keep all aligned during flight. While the thread, which serves as wire for the model, is not final attached the pilot cradle could be shifted left or right and this would translate to movement on the left or right wing. This wing warping was a Wright brothers invention. Remember on this plane the pilot was lying down on their stomach while flying.258ADC5E-7A33-4F45-9180-8F24BEDB6F1B.jpeg615E0B20-1BE7-4278-BE3B-CD66734BFC45.jpegBC1F93A0-6A5E-4FBE-82ED-3B83C5F8BA70.jpeg More on that later. I decided to paint all the engine, supports and chain drive black as that is how they are depicted on the Smithsonian plane. I will add pictures from my visit in a later topic. 258ADC5E-7A33-4F45-9180-8F24BEDB6F1B.jpeg615E0B20-1BE7-4278-BE3B-CD66734BFC45.jpegBC1F93A0-6A5E-4FBE-82ED-3B83C5F8BA70.jpeg
 
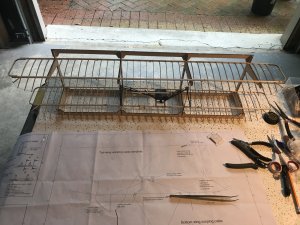
With the wings in the jig and the structures added to the wing bottom next item is to join the wings by the wing struts and add the brace wires(thread serves as wire). A few tips, the brass parts that serve as the hardware for the struts are very small and hard to join together and then to the wing structures. I would suggest some practice and a plan of how you want to do this before starting. Some type of CA or epoxy would be best. I identified where on the wings the struts should go and then added the hardware to the upper wing only. I will add the hardware to the lower wing once the struts are on the upper wing.
The struts can be best attached with the top wing upside down. Once glued they will stay attached but must be able to move a bit to attach to the bottom wing. Also I painted the radiator and fuel tank black. These are attached to two of the center struts. Securing the struts to the lower wing was relatively simple but I would take care when attaching the struts with the fuel tank and radiator they add some weight to the strut and keeping it secured to the upper wing was not possible so I waited to add these two struts until I had secured the rest. This worked for me although I did need to use epoxy for the radiator strut. Next up will be to add the bracing wire.EE62DABA-0173-47AE-888E-E89BB37C10E0.jpeg5668EE98-E6ED-4F5C-91E8-BFF040395033.jpeg38E41F3F-5E5E-4A2C-98F3-B7B4BA5F3C9B.jpeg
 
One other item on the struts. You’ll notice in the pic they are wrapped with thread to simulate the wire securing the brackets to the strut. The thread in kit was a bit to thin for this purpose so I used a thicker beige thread, didn’t have silver, and then painted it silver. The thread is absolutely needed to hold the ends of the struts together to be able to secure the hardware, otherwise the wood will split.
 
This post shows the bracing added to the wings. The thread is secured to the hardware with a small drop of CA. Make sure you drill all the required holes in the struts when building them as instructed. It’s a bit too late once they are on the plane. The instructions aren’t very clear on which struts do not have holes drilled into them so really study the plane pics to get this right. I apologize for this pic, I couldn’t find a handy background where the bracing wire was clearly visible. Lesson learned on this step, you will need more thread than supplied. I found a very close match in Michaels store and the thread was 100%nylon and much better quality than in the kit. Made the work easier.
3EAE87F2-FA2E-4AB9-B97E-3D1A54567F6A.jpeg
 
Back
Top