Trumpeter 1:200 Titanic

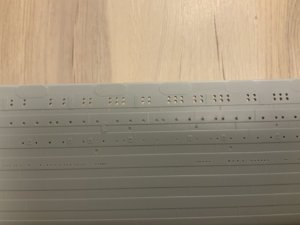
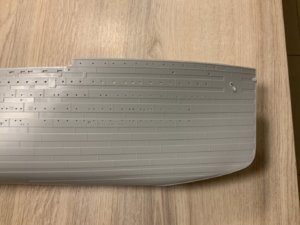
final shot of the hull... starting the main deck work next including LED install preparations!


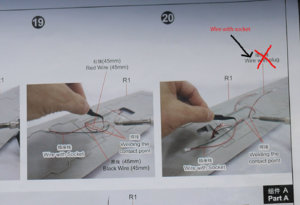
Hi, I have just started this kit, building it for a friend so not too detailed. I have just finished the led lighting, I got it to work well with the kit provided. However part of the instructions/diagrams are wrong and parts of the upper deck lights won't connect as the plugs/sockets are shown incorrect. I have shown how they should be done.

Ken

Titanic lights.jpg
 
Starting the Main Deck (not sure what it was called)
Hi, I have just started this kit, building it for a friend so not too detailed. I have just finished the led lighting, I got it to work well with the kit provided. However part of the instructions/diagrams are wrong and parts of the upper deck lights won't connect as the plugs/sockets are shown incorrect. I have shown how they should be done.

Ken
Thanks man... funny I will starting the wiring tonight so that will ultimately come in handy... the painting instructions are terrible and there are no guides for rigging at all!
 
Starting the Main Deck (not sure what it was called)

Thanks man... funny I will starting the wiring tonight so that will ultimately come in handy... the painting instructions are terrible and there are no guides for rigging at all!
Got to love how they route all the wires up through the Grand Staircase!!! lol
I will be at least using some pcb to join all the electronics like a motherboard... with all the resistors and connections there instead of so messy!
 
I just got the same kit and I'm looking forward to this build. How many cans of the black and red did you use to paint the hull?
I used almost 2 cans Tamiya surface primer in white.... then about 1.5 cans the TS-33 (Dull Red) for the anti-fowling... then about the same for the black in TS-6 (Matt Black) and 1/2 can the TS-27 (Matt White) the small cans are 100ml.
 
Wow thanks, Ken.
it looks really good.

I am not planning to use LED’s if I can avoid them.
Just fibre optic.

Beau.
Hi Beau, Thanks for the like. I’m normally a plank on frame builder but a friend asked me to build this kit for him, it’s a model he’s always wanted. I’m building it straight from the box, as is, no extras as it would be too time consuming and keep me away from my other builds. I’ve never put any lights in a model before, this was a first and I was pleased with the result. I’m quite a way through the kit now and I can tell you it goes together very well, the only issue I really had was that the Hull has no interior braces so when the upper was glued into place on the hull I had to use thin threaded rods which passed through the portholes, screwing them from each side to hold the hull in the right shape until it set. Good luck with your build, I’ll be following.
I know that I should do my own log, I apologise if you think that I’m intruding here, but if it’s ok I’ll occasionally add a comment about things I find on my build. Ken
 
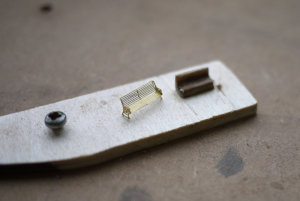
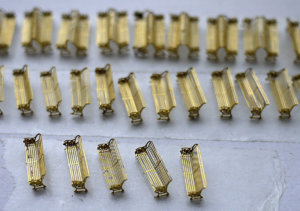
Hi, When I did the PE benches as there were 40 needed I decided to make a small jig so that they would be uniform and much easier to do. I think that the pictures will be self explanitary. I shaped both male and female parts from small pieces of wood, I placed the PE on the mold and pressed it into shape with the plug, I held it there whilst I folded and glued the ends before removing it. This way I was able to consistantly get the curves into the base and seat of the bench. They were done fairly quick with no problems. I made the mold a little narrower than the PE part so that when I glued the sides they wouldn't be touching it and stick. I hope this helps.

Ken

009.jpg010.jpg012.jpg
 
Hi, When I did the PE benches as there were 40 needed I decided to make a small jig so that they would be uniform and much easier to do. I think that the pictures will be self explanitary. I shaped both male and female parts from small pieces of wood, I placed the PE on the mold and pressed it into shape with the plug, I held it there whilst I folded and glued the ends before removing it. This way I was able to consistantly get the curves into the base and seat of the bench. They were done fairly quick with no problems. I made the mold a little narrower than the PE part so that when I glued the sides they wouldn't be touching it and and stick. I hope this helps.

Ken

Great work Ken,
The benches loook quite tricky to make.

I won't be able to do any work on my Titanic model as it's in Germany where I normally work.
I had to returned to England as my family are here and I didn't want to be away from them for a long period of time with the Corona Virus mess which everyone is having to deal with.

Its also difficult to get a grip of what is happening on board the new cruise ship "Odyssey of the seas" which we are currently building in Papenburg, Germany and is due for delivery in October.

Beau.
 
Just a quick update. Just got an Email that my Pontos Upgrade set has just shipped. Hopefully will be here in a week or two. Take care, Stay safe!

Jeff
 
Just a quick update. Just got an Email that my Pontos Upgrade set has just shipped. Hopefully will be here in a week or two. Take care, Stay safe!

Jeff
Hi Jeff,

How did you get hold of the Pontos detail set for the Trumpeter Titanic.
I have been looking for one and haven’t seen anything so far.
please let me know where I can find them and the reference number for the set.

Does the Pontos set include the wooden decks.

Thanks and keep safe.

Beau.
 
Last edited:
Hi Jeff,

How did you get hold of the Pontos detail set for the Trumpeter Titanic.
I have been looking for one and haven’t seen anything so far.
please let me know where I can find them and the reference number for the set.

Does the Pontos set include the wooden decks.

Thanks and keep safe.

Beau.

Hi Beau,

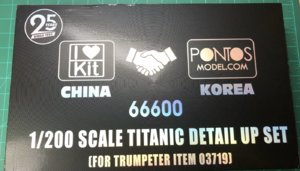
My kit came with a flyer advertising the upgrade set. Wooden decks, brass props, and thousands of PE Parts for $180. USD. My limited understanding is its only available thru this process. Contact William at wg3939@vip.163.com, let him know you want the upgrade set, and give him your shipping address and phone Number. He replied with instructions on Paypal payment. I sent mine on Monday, and received shipping confirmation this morning.

I also saw another company on the web, that is coming out with their own upgrade set in May that had brass masts, wood decks, and 1000's of PE including the folding deck chairs..

I'll update everybody with the contents from Pontos when I receive it.

Jeff
 
Well the upgrade set has arrived :)
I will say it is very nicely done. Packaging is outstanding!!
1.jpg

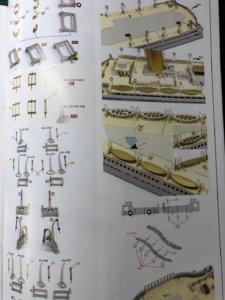
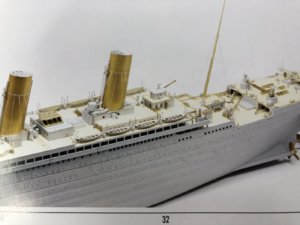
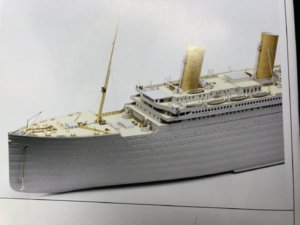
Top layer is the manual, 32 pages gloss color photos
2.jpg3.jpg4.jpg5.jpg6.jpg

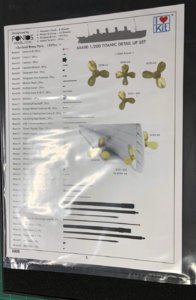
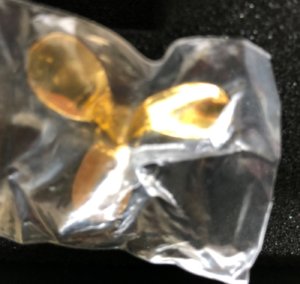
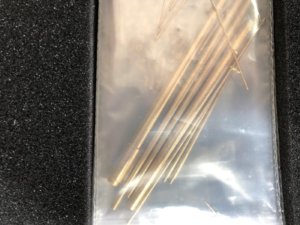
Second layer has the 4 brass props, and the 199 solid brass parts including brass masts
7.jpg8.jpg

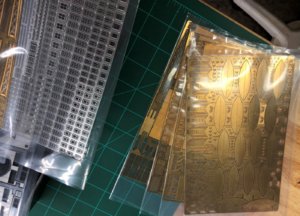
Next layer has 13 sheets of Photo Etch

9.jpg10.jpg11.jpg

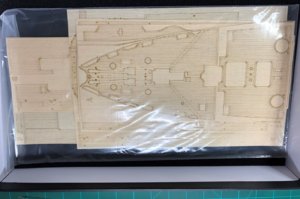
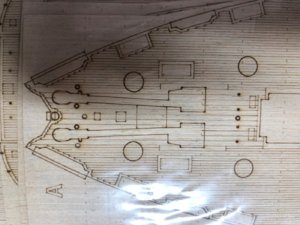
Final layer has the wooden decking
12.jpg13.jpg

Overall I'm impressed.

Sorry for hijacking your build thread but I thought everybody would like to see.

Jeff
 
Hi Jeff,

Thank you so much for posting the images of the Pontos / Trumpeter detail set for the 1/200 Titanic.
Finally we can all have a good look at it.
From what I have seen so far it looks really good.
Did you also get the brass deck fittings i.e capstans, and anchor chains in the set.
Beau.
 
Hi Jeff,

Thank you so much for posting the images of the Pontos / Trumpeter detail set for the 1/200 Titanic.
Finally we can all have a good look at it.
From what I have seen so far it looks really good.
Did you also get the brass deck fittings i.e capstans, and anchor chains in the set.
Beau.

The brass parts bag has 199 items in it from deck fittings to the masts and antenna, The anchor chain came with the main kit. I did see in the photo etch has a bunch of parts for the anchors. There is a lot of pe parts for the cranes to add onto the kits pe cranes as well. The funnels are now encased in PE Sheets instead of the plastic being visible as well. The only thing I didn't see was the folding deck chairs. I think it was MK1 Design that had/has an upgrade kit coming out in May that had the deck chairs.
 
Hi Jeff,
Thank you for the update Info on the Pontos detail set.
I will keep you updated as to progress on mine as soon as I can start work on it again.
I might wait until the MK1 Design set comes out.
Beau.
 
Back
Top