-

Win a Free Custom Engraved Brass Coin!!!
As a way to introduce our brass coins to the community, we will raffle off a free coin during the month of August. Follow link ABOVE for instructions for entering.
-

PRE-ORDER SHIPS IN SCALE TODAY!
The beloved Ships in Scale Magazine is back and charting a new course for 2026!
Discover new skills, new techniques, and new inspirations in every issue.
NOTE THAT OUR FIRST ISSUE WILL BE JAN/FEB 2026
You are using an out of date browser. It may not display this or other websites correctly.
You should upgrade or use an alternative browser.
You should upgrade or use an alternative browser.
HMS Royal Caroline kit ZHL 1/30
- Thread starter Maarten
- Start date
- Watchers 112
-
- Tags
- royal caroline zhl
Vasa is a real time-machine, indeed. I did not know they allow inside already. Great!Vasa
Dear @Maarten, do we have 4 different size anchors at RC? I think mine anchors are all of the same size...The info I have is of 4 different size anchors
Hi Alex, in the kit they are all te same size but this is incorrect. I will modify 3 of them.Dear @Maarten, do we have 4 different size anchors at RC? I think mine anchors are all of the same size...
By is the way vasa is not allowed onboard but the museum is fantastic.
Oh, yes: I checked the book, and the pictures and the text (p26) indicate 2 different sizes (2+2). How sure you are that all 4 of them were different?Hi Alex, in the kit they are all te same size but this is incorrect. I will modify 3 of them.
oh, I thought that they started to allow visitors to get on board...By is the way vasa is not allowed onboard but the museum is fantastic.
Yes, the museum is great. But I had big troubles with them as they had great audio stories recorded, but did not want to put on my free audio guide platform (which is 15 minutes of work). Instead they kept them on the web site and suggested visitors to download and play them as MP3 files. Sometimes museums drive you crazy.
Last week I finished my work on the securing of the anchor cables. All stoppers are finished and fitted, 12 in total.
The hawser holes for the anchors not in service were clogged to avoid additional water on deck.
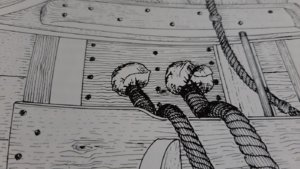
To simulate this I prepared small pieces of viscose cloth, rolled up with PVA glue.
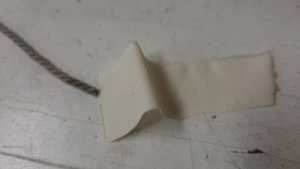
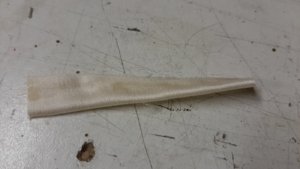
And tied around the anchor cable with rope followed by fitting them into the hawser holes.
To water tighten them I smeared them with stockholm tar dilluted with Turpentine and a droplet of siccative to dry the stockholmer tar.
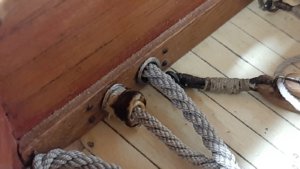
The beautiful thing of the use stockholmer tar is that your model also smells like a real ship of the time, except of course the smell of the 17th century crew, luckily.
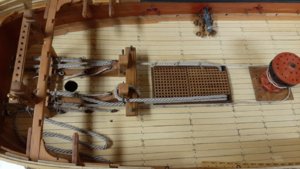
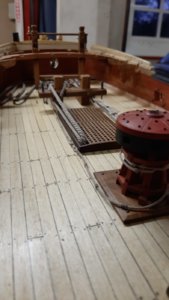
In my layout the PS Bower anchor is ready to drop, it is belayed on the bitt and fitted to the bitt stoppers with some 12 mtrs of anchor cable slack on the side. The SB best bower is fitted to the messenger cable and hauled by the capstan.
The two smaller anchors will be fixed at the channels with the cable fitted and the hawser holes plugged. The cables are fixed to the deck stoppers.
See below the finished cables fitted to their stopper and the messenger.

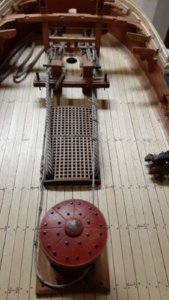
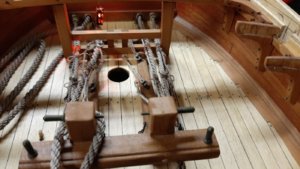
Next time back to wood working
The hawser holes for the anchors not in service were clogged to avoid additional water on deck.

To simulate this I prepared small pieces of viscose cloth, rolled up with PVA glue.


And tied around the anchor cable with rope followed by fitting them into the hawser holes.
To water tighten them I smeared them with stockholm tar dilluted with Turpentine and a droplet of siccative to dry the stockholmer tar.

The beautiful thing of the use stockholmer tar is that your model also smells like a real ship of the time, except of course the smell of the 17th century crew, luckily.
In my layout the PS Bower anchor is ready to drop, it is belayed on the bitt and fitted to the bitt stoppers with some 12 mtrs of anchor cable slack on the side. The SB best bower is fitted to the messenger cable and hauled by the capstan.
The two smaller anchors will be fixed at the channels with the cable fitted and the hawser holes plugged. The cables are fixed to the deck stoppers.
See below the finished cables fitted to their stopper and the messenger.


Next time back to wood working
G'day Maarten, very nice work on the Cables etc, she is looking really busy, I'm enjoying your build,
best regards John,
best regards John,
Hi Alex, in the kit they are all te same size but this is incorrect. I will modify 3 of them.
By is the way vasa is not allowed onboard but the museum is fantastic.
G'day again Maarten, do you have any link to any information about how many anchors the Royal Caroline had, and how they were rigged, I'm getting conflicting references,
best regards John.
Hej Maarten! Honestly, I am in love with your cable ropes and the details you put in. This is what makes the model unique! 

Hi John,G'day again Maarten, do you have any link to any information about how many anchors the Royal Caroline had, and how they were rigged, I'm getting conflicting references,
best regards John.
Most of my sources are 17th century. What I could find on the Royal Caroline is that all 4 anchors were the same or two different sizes.
See below text about the anchors in the aots book.

In the drawing of the aots book they draw two different size anchors a one ton anchor and a 3/4 ton anchor. See the drawing below.
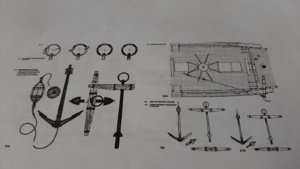
This is the road I take, two different size of anchors.
On the place of the anchors there is also a lot of contradiction to find. In the aots book the say the lighter anchors were stored on the cat head with the bowers on the gun wales. Other sources tell the bowers were always ready to use with the lighter anchors on the gun wales. The latter is the approuch I will follow.
Thank you Maarten, for the quick reply, I think that I will keep all four the same size, I know when I built the HMS Investigator she had two of the largest anchors ready for use and another two slightly smaller lashed to the channels, and also a much smaller one lashed to the main channels, I will rig the cables to the two at the cat heads, but leave the others without there cables, makes it easier for me and members can see two different ways,Hi John,
Most of my sources are 17th century. What I could find on the Royal Caroline is that all 4 anchors were the same or two different sizes.
See below text about the anchors in the aots book.
View attachment 141554
In the drawing of the aots book they draw two different size anchors a one ton anchor and a 3/4 ton anchor. See the drawing below.
View attachment 141555
This is the road I take, two different size of anchors.
On the place of the anchors there is also a lot of contradiction to find. In the aots book the say the lighter anchors were stored on the cat head with the bowers on the gun wales. Other sources tell the bowers were always ready to use with the lighter anchors on the gun wales. The latter is the approuch I will follow.
Best regards John,
This is what makes the model unique!
I hope you have a unique Birthday Jim!!!
Great appearance and a very good eye for the details - Great 

Thx gents for your comments.
I am still working on the focsle to finalize everything there so I can fit the beams, bullwark and deck planking.
So this evening I made the mast step in the main deck for the forward and main mast.
In the kit lasered rings are supplied. I turned these on the lathe to give them a smaller outside diameter and some tapering on top.
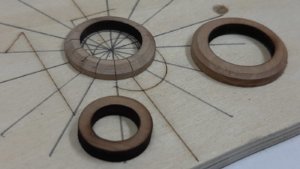
To simulate the individual pieces I first draw a template on a piece of wood and with 2 droplets of ca glued it on top.
With a knive I then cut the lines following the template to simulate the individual blocks.
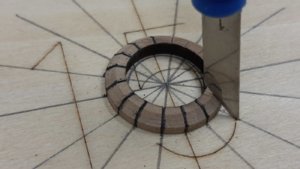
The cuts I fill with pencil before sanding it with steel wool and oil it.
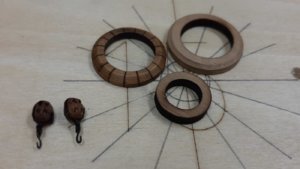
Below all 3 stages together with the double blocks for the gun carriage.
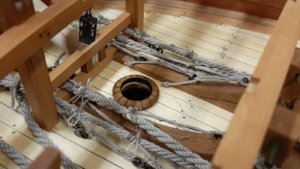
And fitted the fwd mast ring in place
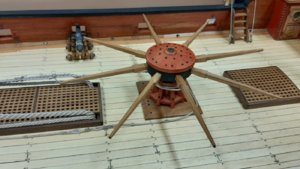
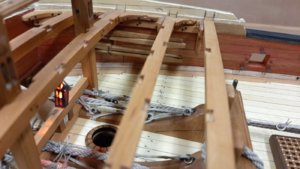
Some time ago I already prepared the windlass booms
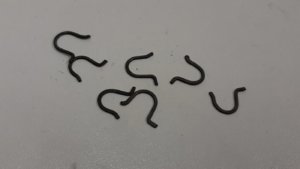
To store these I made some brackets of 0.8 mm brass wire, bend and hammered into shape followed by burnishing them black.
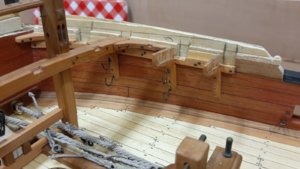
The brackets I fitted into the deck beams, identical on the ps and sb side.
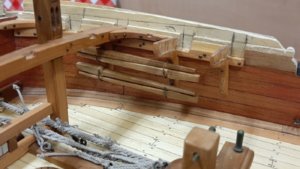
Just to store the booms properly when finished working with the windlass.
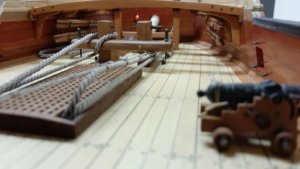
A view over the deck into the focksle.
And with the windlass booms in storage place.
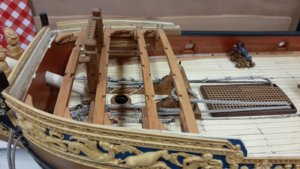
The finishing around the bowsprit will be fitted when placing the bowsprit in a later stage.
I am still working on the focsle to finalize everything there so I can fit the beams, bullwark and deck planking.
So this evening I made the mast step in the main deck for the forward and main mast.
In the kit lasered rings are supplied. I turned these on the lathe to give them a smaller outside diameter and some tapering on top.

To simulate the individual pieces I first draw a template on a piece of wood and with 2 droplets of ca glued it on top.
With a knive I then cut the lines following the template to simulate the individual blocks.

The cuts I fill with pencil before sanding it with steel wool and oil it.
Below all 3 stages together with the double blocks for the gun carriage.

And fitted the fwd mast ring in place

Some time ago I already prepared the windlass booms

To store these I made some brackets of 0.8 mm brass wire, bend and hammered into shape followed by burnishing them black.

The brackets I fitted into the deck beams, identical on the ps and sb side.

Just to store the booms properly when finished working with the windlass.

A view over the deck into the focksle.

And with the windlass booms in storage place.


The finishing around the bowsprit will be fitted when placing the bowsprit in a later stage.
Thx gents for your comments.
I am still working on the focsle to finalize everything there so I can fit the beams, bullwark and deck planking.
So this evening I made the mast step in the main deck for the forward and main mast.
In the kit lasered rings are supplied. I turned these on the lathe to give them a smaller outside diameter and some tapering on top.
View attachment 142185
To simulate the individual pieces I first draw a template on a piece of wood and with 2 droplets of ca glued it on top.
With a knive I then cut the lines following the template to simulate the individual blocks.
View attachment 142186
The cuts I fill with pencil before sanding it with steel wool and oil it.
Below all 3 stages together with the double blocks for the gun carriage.
View attachment 142187
And fitted the fwd mast ring in place
View attachment 142199
Some time ago I already prepared the windlass booms
View attachment 142188
To store these I made some brackets of 0.8 mm brass wire, bend and hammered into shape followed by burnishing them black.
View attachment 142190
The brackets I fitted into the deck beams, identical on the ps and sb side.
View attachment 142191
Just to store the booms properly when finished working with the windlass.
View attachment 142192
A view over the deck into the focksle.
View attachment 142193
And with the windlass booms in storage place.
View attachment 142194
View attachment 142195
The finishing around the bowsprit will be fitted when placing the bowsprit in a later stage.
Fantastic details Maarten, you are an inspiration and an incredible modeller,
Best regards John,
PS I can't wait to see all these details on my PC,
Kurt Konrath
Kurt Konrath
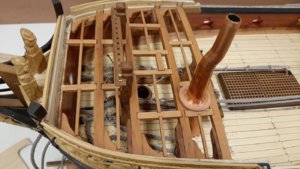
The cooper pipe, is that the kitchen stove vent or what was it used for?


