ROYAL CAROLINE 1:30 by Zhl my version, by Peglegreg

Hi greg,

It is your ship and you can do it as you like and think its right. It will be interesting to see what solution you will go for. I am also building the toilet but the whole thing will be under an angle.

Lots of fun with you project.

Regs Maarten
 
G'day Maarten
It will be very interesting and the fun part is that both our our models will be different.
It's not a production line what we all are doing, John's, yours and mine will be different.
Havagooday
Greg
 
Very interesting this door and window, I believe the gallery windows do slope back, but for the door to not only tilt backwards but also tilt in at the base as well, I think it would have to be of very light construction, because when you open the door it would fall out towards you, and when you were closing it upon entering the toilet you would have to pull it up, I would like to know where the info came and if it showed it this way on a contemporary model.
DSCF9876.jpg
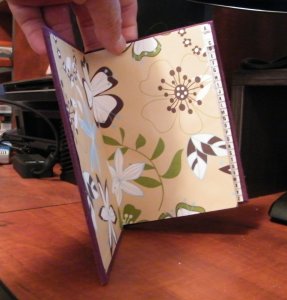
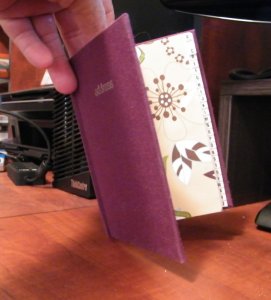
As we all know this is how a normal door hangs


DSCF9877.jpg
And even a child can push it open if it is unlocked


DSCF9878.jpg
This is what they show, the door is tilted back


DSCF9880.jpg
So when you open the door it falls toward you or away from you depending on whether you are entering or leaving the toilet.


DSCF9881.jpg
And when closing it you have to push it up or pull it up, again depending whether you are entering or leaving,
it seems impracticable, unless the door is just a panel of very light construction, like a wardrobe door.

Just my two cents worth,


best regards John.
 
G'day John
Your 2 cents are worth at least $20, if you ask me. That is the reason why I'm going to make my door hinged on a post, in a vertical position in all directions!
Havagooday
Greg
 
Gotta go and make some rope and show you what it is like, will post the results later,

best regards John.

PS in the good books with the Missus after sealing the Verandah this Arvo, she even made me a Sarnie, :D:D:D
 
Greg,
As Maarten said, it is going to be your ship, you build it, you gonna captain it! Having seen your vast preparation it is going to be right!
Janos
 
Greg,
As Maarten said, it is going to be your ship, you build it, you gonna captain it! Having seen your vast preparation it is going to be right!
Janos

Thanks Janos for your vote of confidence! I'll try to live up to it.
I think I know now what to do with the quarter windows section. Time will tell if I'm right.
Havagooday mate
Greg
 
Gotta go and make some rope and show you what it is like, will post the results later,

best regards John.

PS in the good books with the Missus after sealing the Verandah this Arvo, she even made me a Sarnie, :D:D:D

Hmmmm let me guess. A ham sandwich?
 
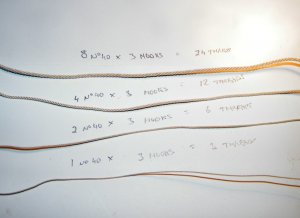
A pic of some of the ropes I made on my rope walk,

The top rope is 8 threads on each three hooks of No 40 size thread, left hand lay.

the next is 4 threads on each three hooks of No 40 size thread, right hand lay.

the next is 2 threads on each three hooks of No 40 size thread, right hand lay.

the next is 1 thread on each three hooks of No 40 size thread, right hand lay.

491.jpg
 
First post:
The keel,
The most important part of my build.

The keel is the first piece of glueing and some sawdustig that I did on this kit. This was weeks and weeks, if not months and months ago, because I have to scan the kit's keel into my Mac so could do the preparation for the alterations, that I'm planning to do.

These steps, we all know, but maybe, I might help someone who is new to model building. Who knows I might have an idea or so, that will help the more advanced shipwrights we have here.
:eek:

The first step in joining the keel together to try to dry mount them together.
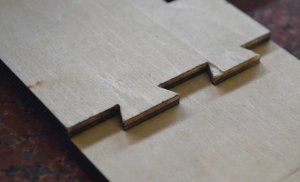
first fitting.jpgThey were slightly too tight, so I got put my favourite sanding plank, my wife's nail sander, and put it to good use.
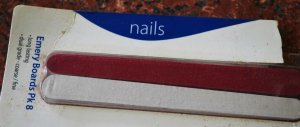
Nail files.jpg
Slowly I progress, taking a few swipes of the sanding stick and try to dry mount them again.
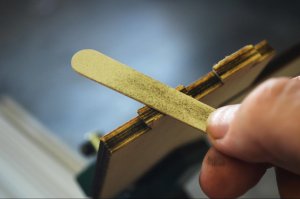
one more sand.jpg
I was carefull to keep the angles the same, by only doing very light passes. I didn't care if this section took me a lot longer, all I wanted was to get it right without taking too much of the plywood.
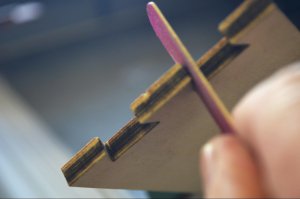
now the angle bits.jpgNIK
I Think it took my 4 or 5 attempts to get a good fit. As my father always said, time has no cost, if you are enjoying yourself doing what you love
I put a straight edge under the keel to check if it was level.
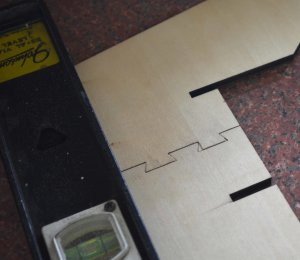
Drie fitting with straight edge.jpg

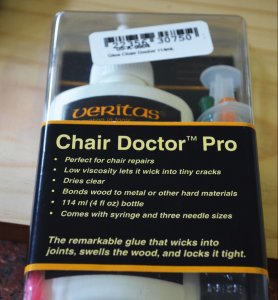
Then I used 'CHAIR DOCTOR PRO' (Thank you Janos for posting this glue in one of your logs) to glue the two pieces together when it was dry mounted. I must say this glue is brilliant, it was sucked into the tiny spaces between the join and I believe that the glue 'swells' up the wood slightly to get a extremely strong join.
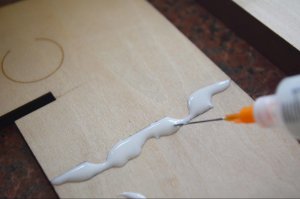
 applyong Chair doctor.jpg

Chair Doctor Pro.jpg
I place some non stick oven paper over the join and clamped them together with 2 external pieces of wood to make it stay draught.
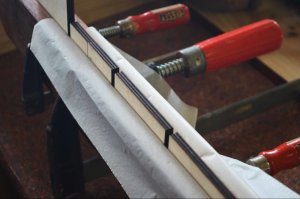
Clamping keel with non stick paper.jpg
Non stick paper.jpg
After the glue was dry and out of the clamps, I checked it for straighteners by running my eye down the length of the keel. It was straight as an arrow.
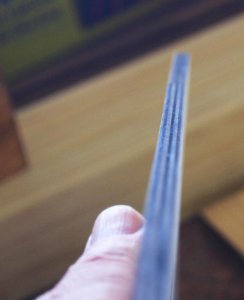
looking down yhe lenght for straightness.jpg
I repeated this process again for the other end and when it was completed I again, but this time the whole keel, was place in clamps for a day or so.
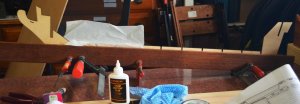
Clamping Keel togeter while glie dries.jpg
Now all I have to do now is to scan the keel into my Mac.
:)
Havagooday and thanks for watching
Greg
 
Nice close up photos Greg.

Thanks Brian
Most of the difficult photos that showed my hand etc was shot on I'm phone. I've got a Samsung Note 8, and it's nrillsnt for me. I can use my right hand, that shakes a lot to hold things, and using my left hand holding my phone as a camera. All I've to say is 'smile' and a photo is taken. I've got as much control over the camera's setting as my Nikon camera in the professional mode on the phone's csmera.
Havagooday mate
Greg
 
So finally the start is done. Wish you a good journey......I will follow and thanks for sharing
 
Back
Top