-

Win a Free Custom Engraved Brass Coin!!!
As a way to introduce our brass coins to the community, we will raffle off a free coin during the month of August. Follow link ABOVE for instructions for entering.
-

PRE-ORDER SHIPS IN SCALE TODAY!
The beloved Ships in Scale Magazine is back and charting a new course for 2026!
Discover new skills, new techniques, and new inspirations in every issue.
NOTE THAT OUR FIRST ISSUE WILL BE JAN/FEB 2026
- Home
- Forums
- Ships of Scale Build Logs
- Super Detailing Static Models / Other Genres
- Historical Trailways, Guns, Aircraft, and Cars
You are using an out of date browser. It may not display this or other websites correctly.
You should upgrade or use an alternative browser.
You should upgrade or use an alternative browser.
1/12 scale Alfa Romeo 8c 2300 roadster build log [COMPLETED BUILD]
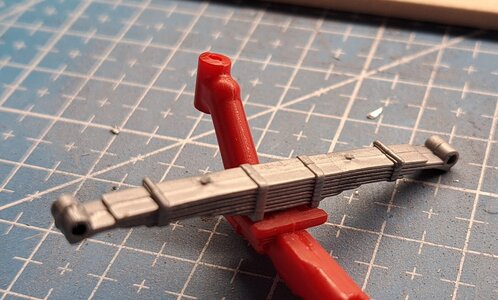
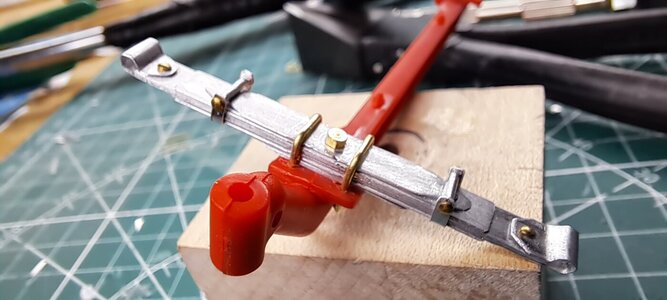
Your own build spring-set looks good, François. Perhaps painting the kit springs for a good comparison?Here is the kits spring set compared to the new one.View attachment 348365View attachment 348366
Regards, Peter
some more work done
The kit's leaf spring mounting brackets are split in 2 (probably for ease of moulding). I modified them so that they are now 1 piece which permits me to incorporate a small hex head bolt as a grease point.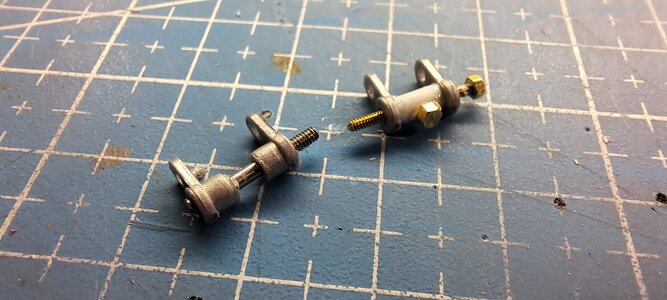
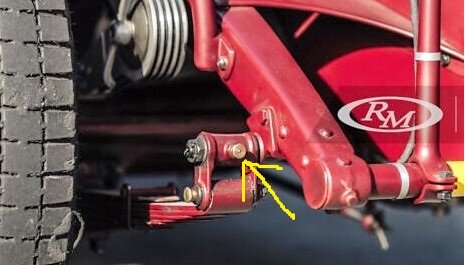
All 4 spring sets are done and painted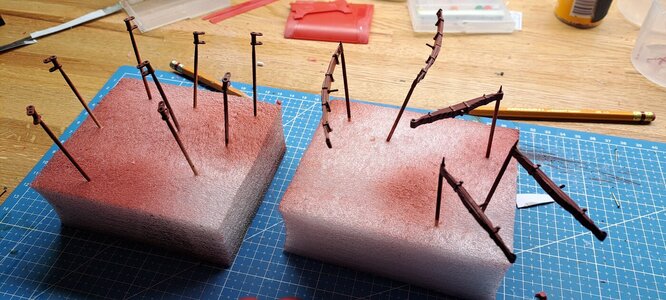
Predrilled the frame and body parts for the lockwire bolts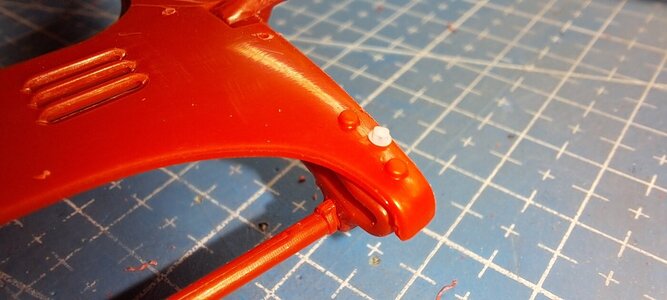
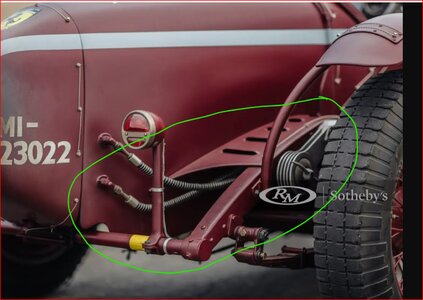
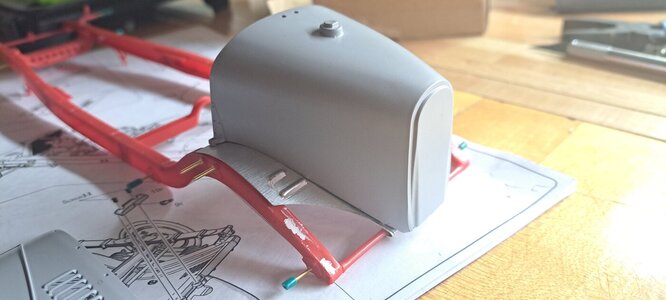
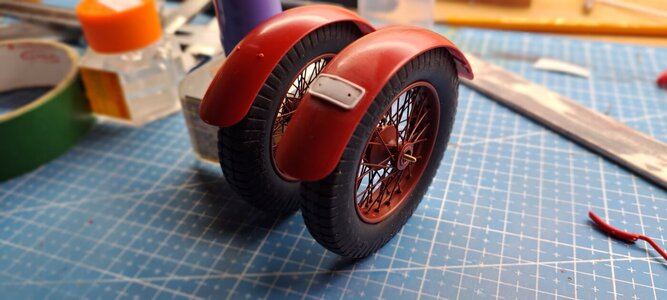
Modified the fenders to look a bit more like the ref car (still needs some sanding)
The kit's leaf spring mounting brackets are split in 2 (probably for ease of moulding). I modified them so that they are now 1 piece which permits me to incorporate a small hex head bolt as a grease point.


All 4 spring sets are done and painted

Predrilled the frame and body parts for the lockwire bolts

Modified the fenders to look a bit more like the ref car (still needs some sanding)


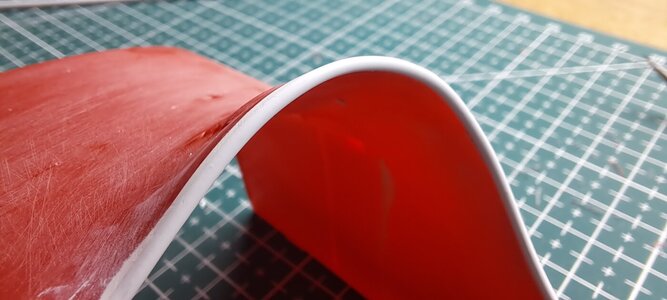
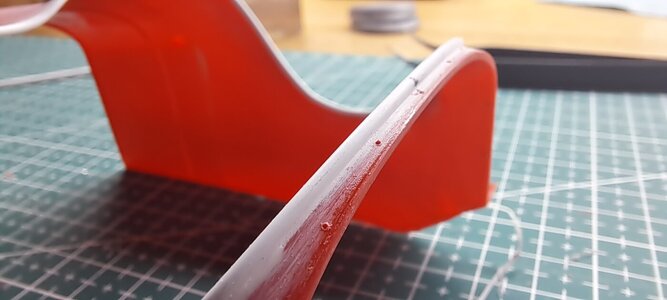
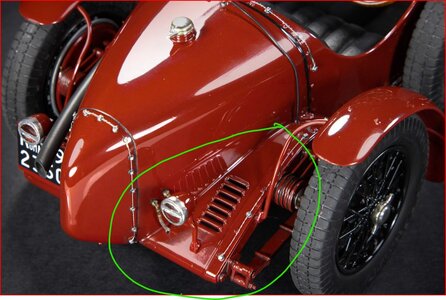
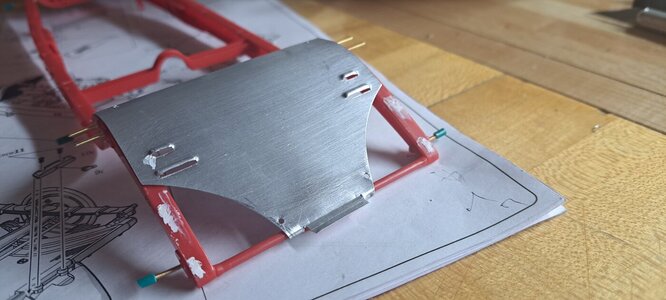
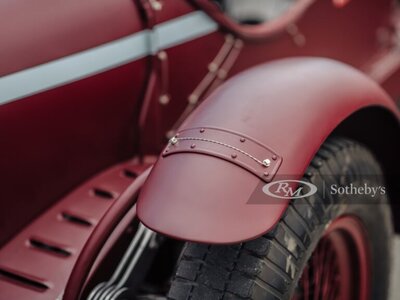
Well ok, the fender thing isn't really working. The real fender has a stamped aluminium rivet plate (last photo in previous post) , that's what I was trying to do with the white plastic but I didn't like it so It was back to the drawing board. I decided to make my own stamped alum rivet plate, just like on the ref car but 12 times smaller.
I first made a stamping die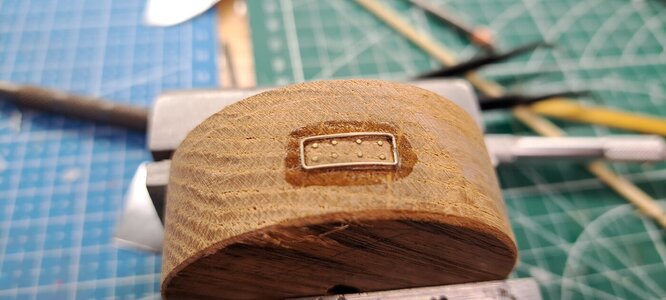
I then roll formed a .005in alum sheet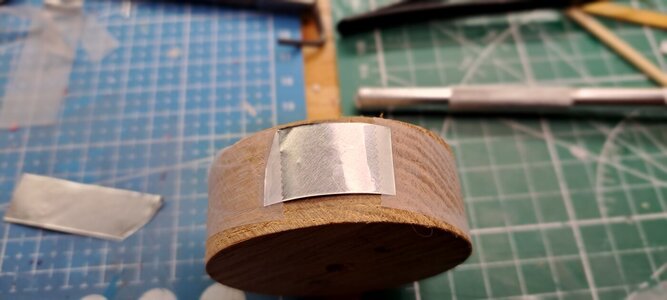
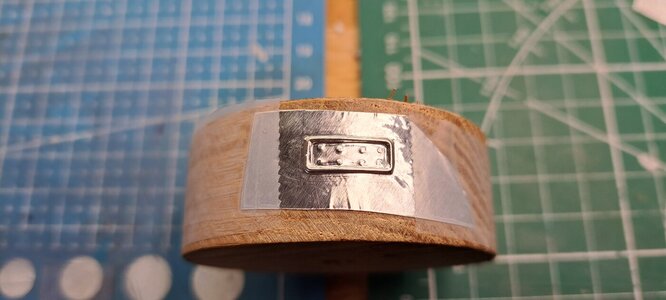
and voila, 8 stamped alum rivet plates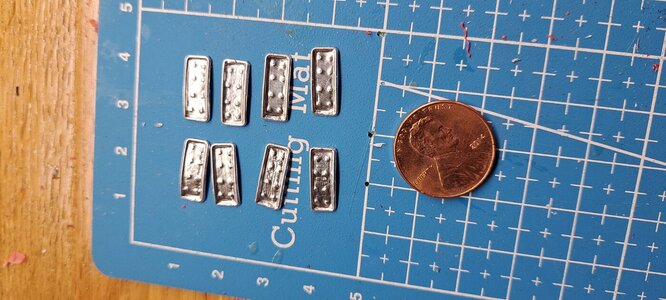
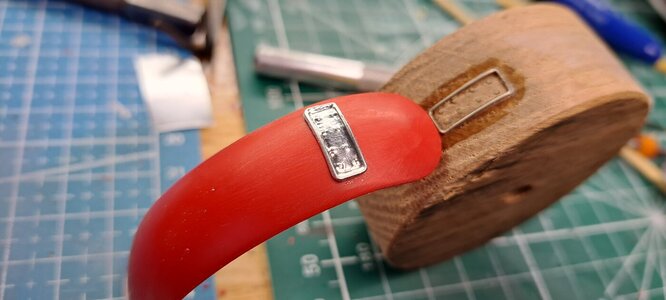
The lock wire will be installed once the paint is done.
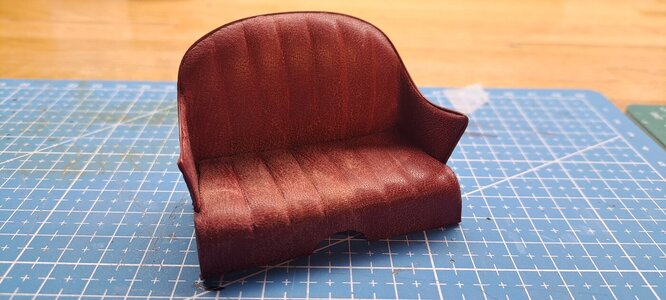
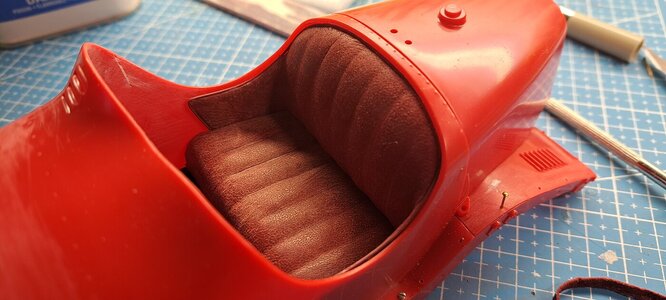
I aslo did the seat back in red leather, still needs some fitting but it should look good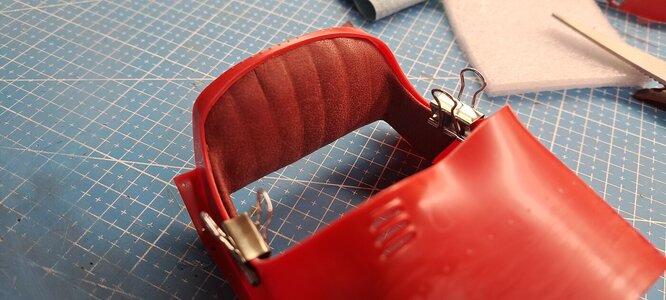
I first made a stamping die

I then roll formed a .005in alum sheet


and voila, 8 stamped alum rivet plates


The lock wire will be installed once the paint is done.
I aslo did the seat back in red leather, still needs some fitting but it should look good

Very well done model,Started a new build today. As stated somewhere in another post, I was awaiting for my birthday gift which I got last saturday. It's an Italeri 1/12 scale Alfa Romeo. A very nice kit that, from the get go, is pretty well detailled. I could build it straight out of the box and it would look real fine. But me being me, that's not what I want to do. I'll try to super detail it till the sun don't shine. Once again, the operative word being 'try'. Here are some mods that I would like to do.
1- replace plastic spokes with metal spokes
2- replace plastic leaf springs with brass
3- upholster seat in leather
4- add missing nuts and bolts
5- create a fuel tank (the kit doesn't have one)
6- super detail engine by replacing certain plastic parts with metal ones and adding as much details as possible
7- ....
So I decide to start with what will probably be the toughest part of the build, the respoking of the wheels.
My first impression of the taskView attachment 344163
After a few minutes of pondering, I set out to make a jig that will locale and index the different parts of the wheel (the hub and the rims) once the plastic spokes are cut off. I will then have to drill 80 0.5mm dia holes per wheel while respecting a determined pattern and insert 40 metal spokes while respecting the lacing pattern. There are 5 wheels. Yeah, right...View attachment 344164View attachment 344165
More to come...
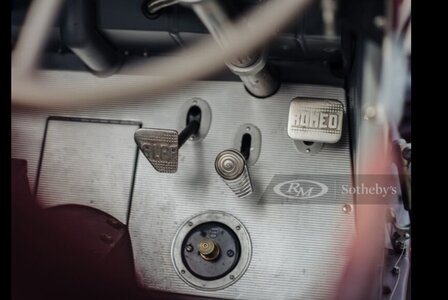
The Alfa 8C-2300 Monza is the car I would purchase if I ever win the Lotto. I have several close up photos 8C 2300 that show parts of the suspension, wheels, Interior and the timing advance on the car. I also have some photos of the factory drawings for the car. if you send me your email address via the forums message system I would be happy to send them to you.
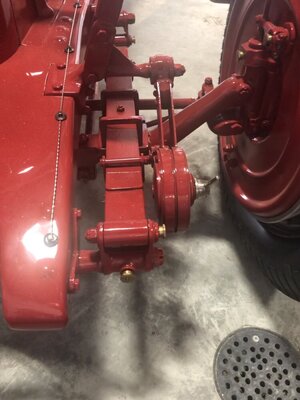
Jim Nunn
Thank you Jim. I totally agree with you. I restored a Triumph TR6 back in 2006 and said at the time, "never again". But I definitely would restore an 8c 2300. I sent you my email.
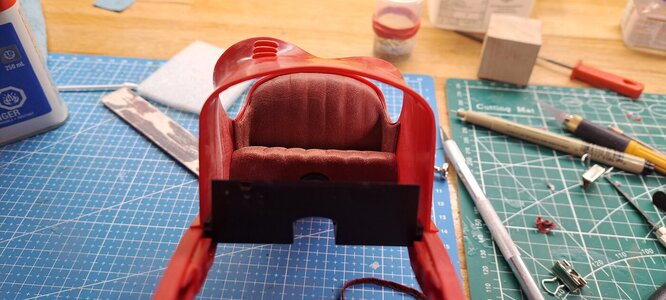
Finished the seat today, very pleased with the result.


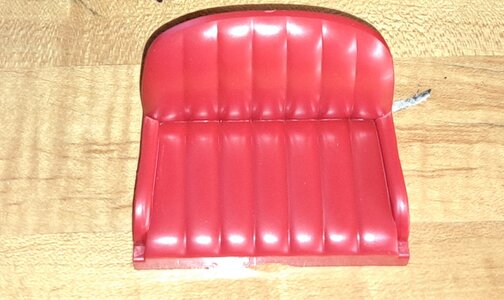
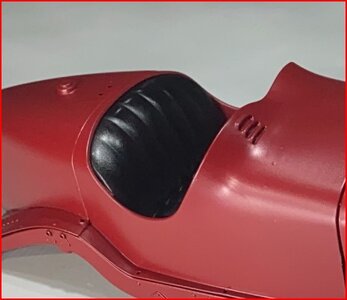
The kit seat
François
The seat is stunning.
What did you use to cover the seat, bookbinding Leather?
The kit seat
François
The seat is stunning.
What did you use to cover the seat, bookbinding Leather?
Thanks
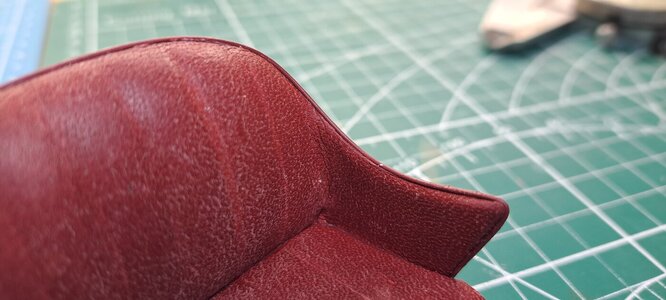
An old pair of leather gloves my wife didn't une anymore. For the piping I used a 0.05in dia styrene rod that I color matcher.
An old pair of leather gloves my wife didn't une anymore. For the piping I used a 0.05in dia styrene rod that I color matcher.
Last edited:
Excellent.
Did a bit more work today.
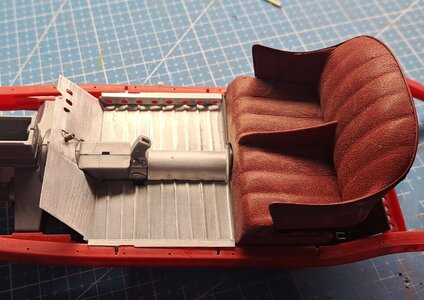
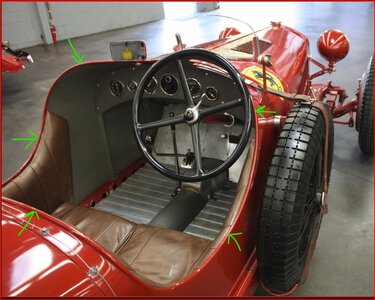
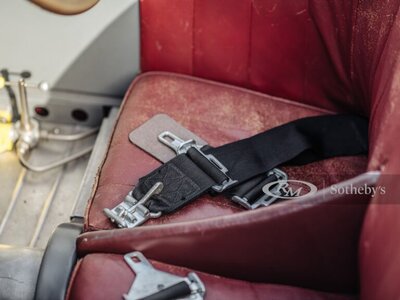
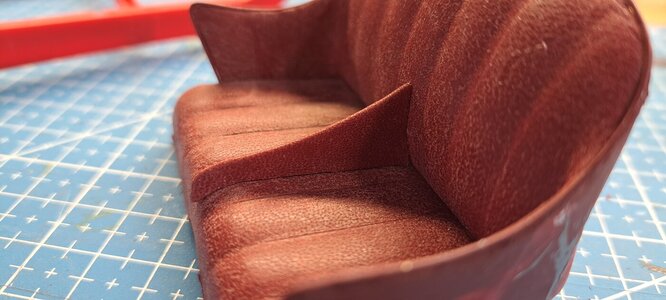
1- The seat on my ref car has a divider in the middle and, since it's a race car, it also has racing belts. So I made the divider but I'm not sure if I'll but it on yet. As for the belts, I'll see if I want them or not later on.
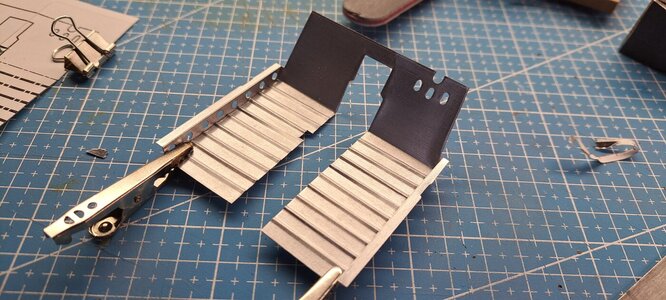
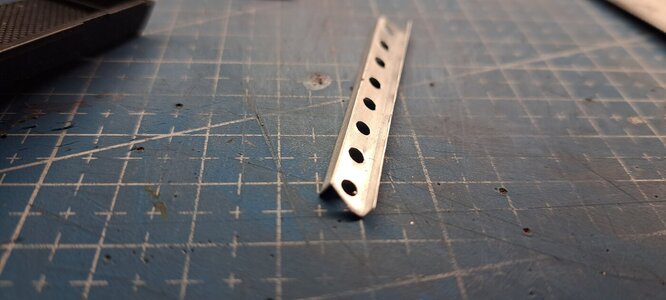
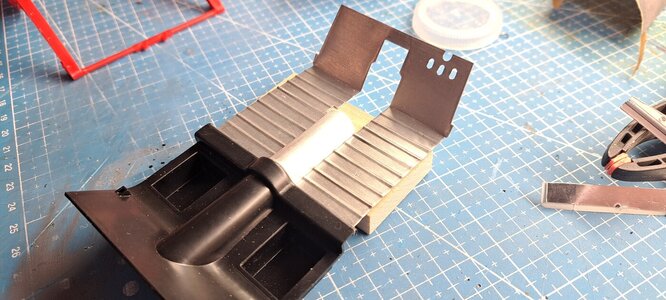
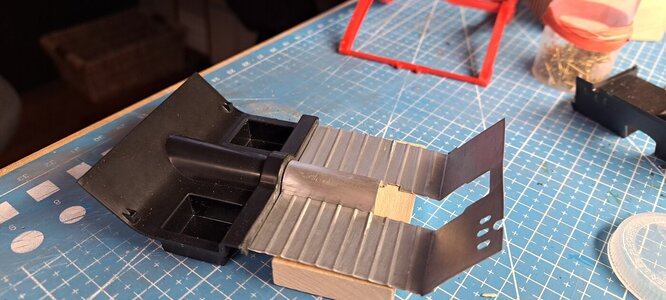
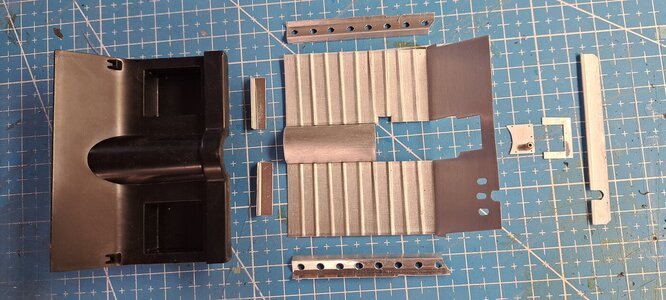
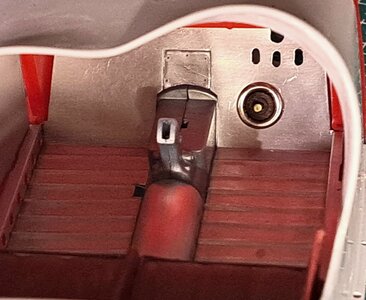
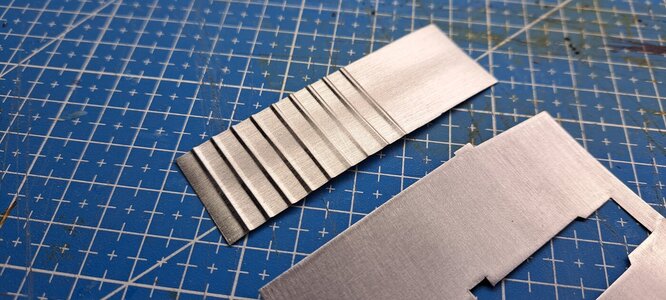
2- I also decided to redo the floor pan. The kit's pan is a not so good with wierd checker texture of some sort. The idea is to replace the front portion of the pan along with the 2 side stiffening rails which will be made as 2 separarte parts. I'll keep the plastic rear portion where the seat sits.
The kit's floor pan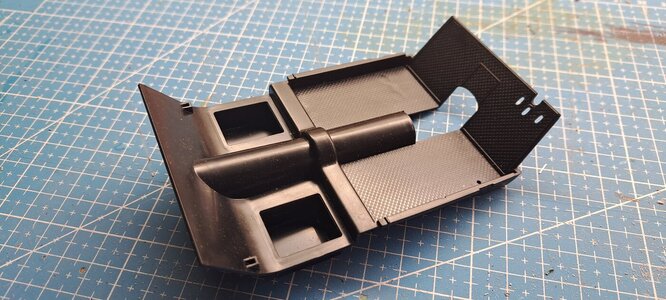
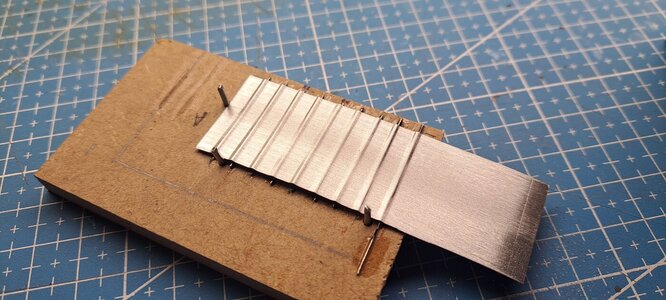
The first rib test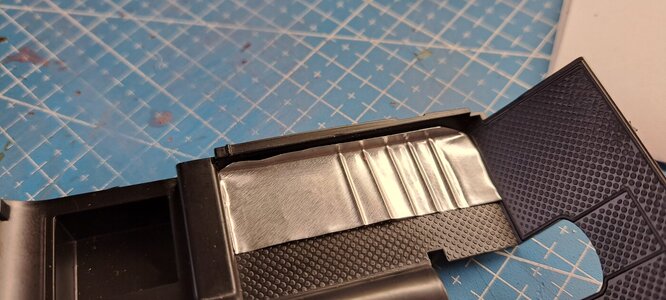
The rib press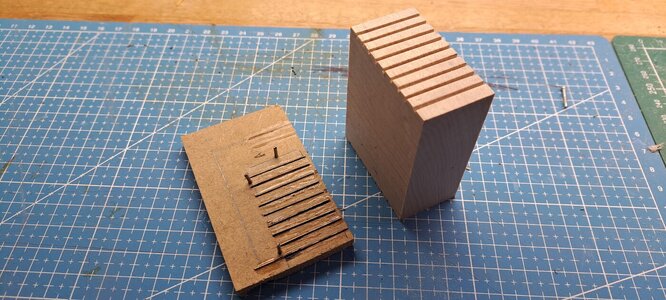
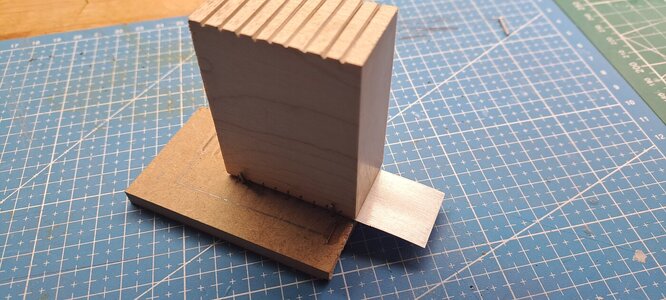
The second rib test
The floor pan blank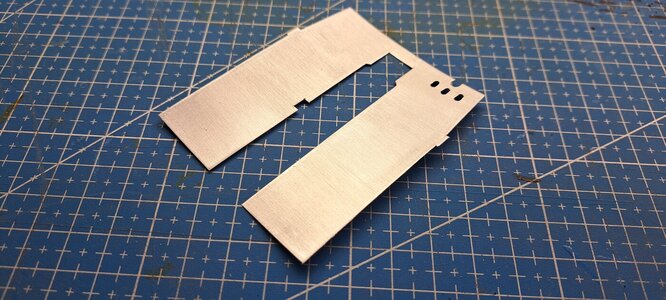
What I'm aiming for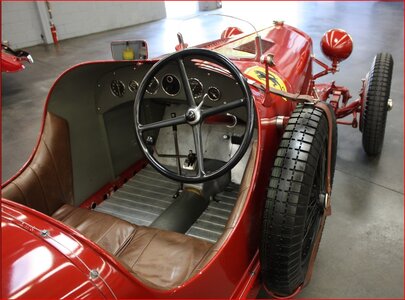
What I've got so far (the plastic front portion will be totaly removed, including the axle tunnel which will be redone in alum)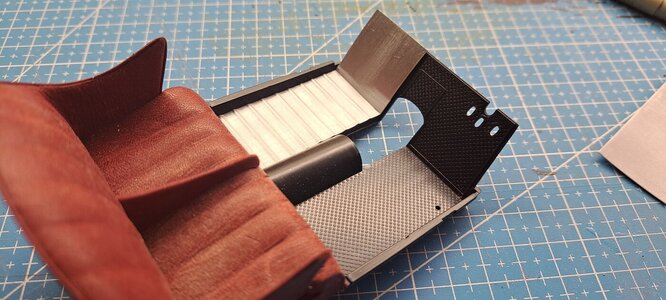
1- The seat on my ref car has a divider in the middle and, since it's a race car, it also has racing belts. So I made the divider but I'm not sure if I'll but it on yet. As for the belts, I'll see if I want them or not later on.


2- I also decided to redo the floor pan. The kit's pan is a not so good with wierd checker texture of some sort. The idea is to replace the front portion of the pan along with the 2 side stiffening rails which will be made as 2 separarte parts. I'll keep the plastic rear portion where the seat sits.
The kit's floor pan

The first rib test

The rib press


The second rib test

The floor pan blank

What I'm aiming for

What I've got so far (the plastic front portion will be totaly removed, including the axle tunnel which will be redone in alum)


All adjustments and changes are approved by myself - Great work and approvements
I like the leather seat very much - authentic appearance
I like the leather seat very much - authentic appearance
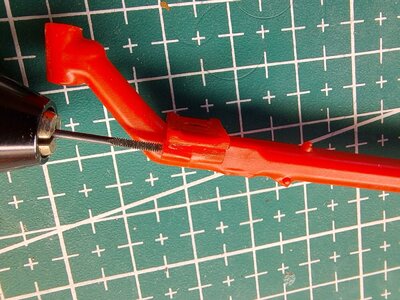
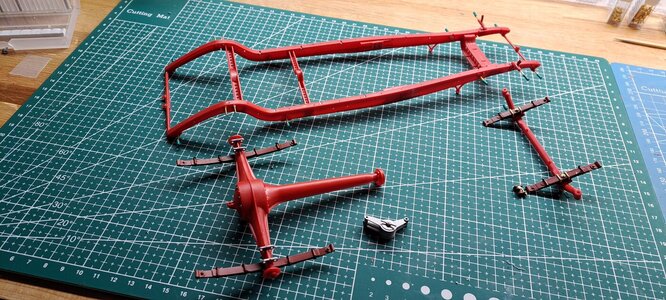
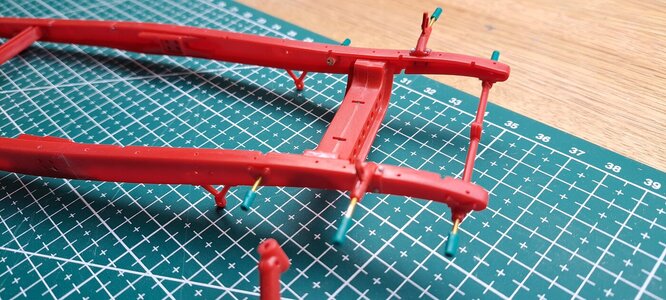
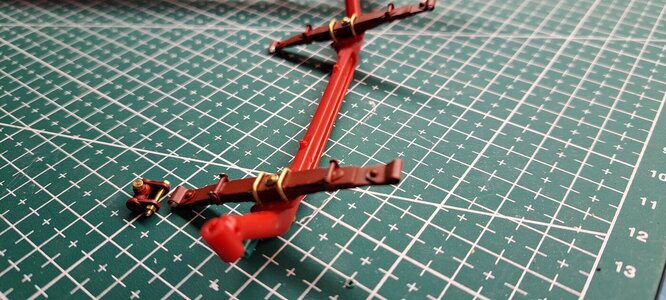
I'm still at it!! Doing a lot of prep work before priming. The kit uses a lot of slotted head screws that I really don't like. They are manly used to assemble the different suspension components, both to the front and rear axels and to the frame. The real car did not use slotted screws for this. It was mostly threaded studs sticking out of the frame or hex head bolts and nuts. I'm replacing these screw either with brass studs that are threaded into the frame or with hex head bolts. I aslo added grease points on the leaf spring pivot bracket and replaced many small plastic blobs that are supposed to represent bolts by nicer 3d printed bolt heads and nuts. Here are a few pics.
Tapping holes for studs
frame components pretty much ready for primer
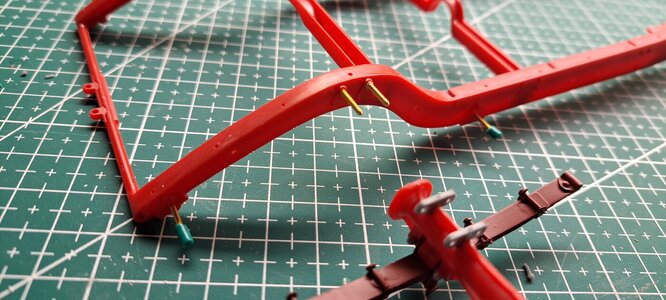
front axel where you can see the grease point on the leaf spring pivot bracket
rear axel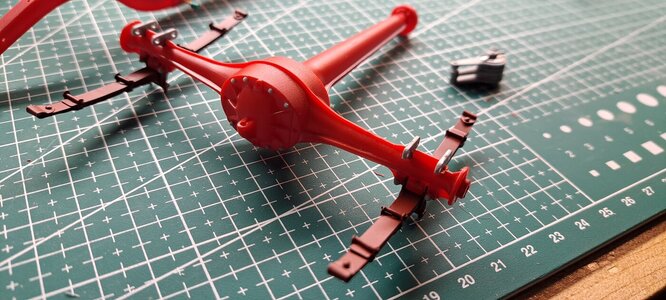
some 3d printed nuts and bolts added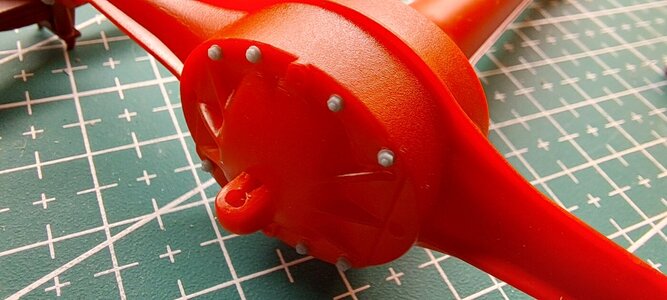
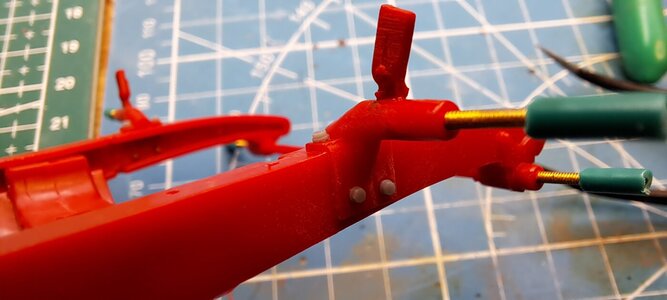
Still a lot more do do and still having lots of fun doing it!!
Tapping holes for studs

frame components pretty much ready for primer


front axel where you can see the grease point on the leaf spring pivot bracket

rear axel

some 3d printed nuts and bolts added


Still a lot more do do and still having lots of fun doing it!!
Great detailing, François. Loved to see your pictures.I'm still at it!! Doing a lot of prep work before priming. The kit uses a lot of slotted head screws that I really don't like. They are manly used to assemble the different suspension components, both to the front and rear axels and to the frame. The real car did not use slotted screws for this. It was mostly threaded studs sticking out of the frame or hex head bolts and nuts. I'm replacing these screw either with brass studs that are threaded into the frame or with hex head bolts. I aslo added grease points on the leaf spring pivot bracket and replaced many small plastic blobs that are supposed to represent bolts by nicer 3d printed bolt heads and nuts. Here are a few pics.
Tapping holes for studs
View attachment 351520
frame components pretty much ready for primer
View attachment 351522
View attachment 351523
View attachment 351524
front axel where you can see the grease point on the leaf spring pivot bracket
View attachment 351525
rear axelView attachment 351526
some 3d printed nuts and bolts addedView attachment 351527View attachment 351521
Still a lot more do do and still having lots of fun doing it!!
Rergards, Peter
I noticed one of your reference photos showed seat belts. A race car from the '30s would definitely NOT have seat belts. Of course, a restored one driving around today would have them installed just to keep the valuable windscreen protected if you rear-ended someone...
I'm also dubious of all of the bolt safety-wiring of your reference as well as the dead-flat ("frozen") paint finish, but it's your choice.
I'm also dubious of all of the bolt safety-wiring of your reference as well as the dead-flat ("frozen") paint finish, but it's your choice.


