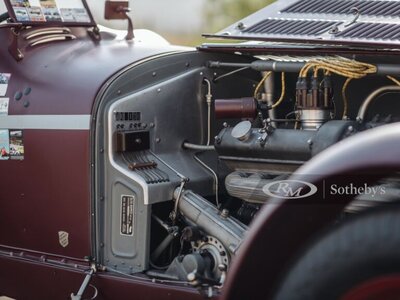
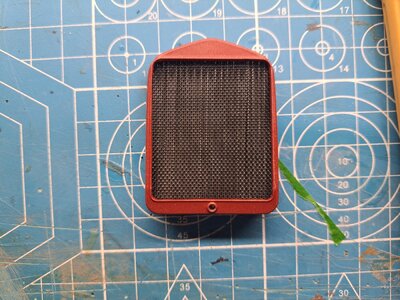
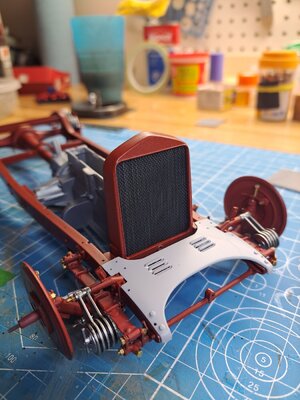
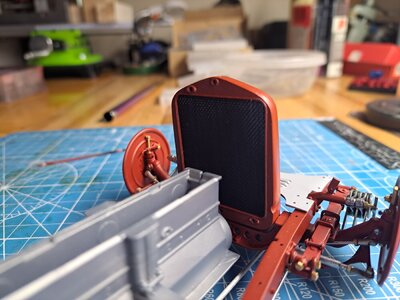
In several perspectives we can not recognize, that this is a model - looks like a real 1:1 car
-

Win a Free Custom Engraved Brass Coin!!!
As a way to introduce our brass coins to the community, we will raffle off a free coin during the month of August. Follow link ABOVE for instructions for entering.
-

PRE-ORDER SHIPS IN SCALE TODAY!
The beloved Ships in Scale Magazine is back and charting a new course for 2026!
Discover new skills, new techniques, and new inspirations in every issue.
NOTE THAT OUR FIRST ISSUE WILL BE JAN/FEB 2026
- Home
- Forums
- Ships of Scale Build Logs
- Super Detailing Static Models / Other Genres
- Historical Trailways, Guns, Aircraft, and Cars
You are using an out of date browser. It may not display this or other websites correctly.
You should upgrade or use an alternative browser.
You should upgrade or use an alternative browser.
1/12 scale Alfa Romeo 8c 2300 roadster build log [COMPLETED BUILD]
Looking great Francois!
Did the rear brake linkage this week-end. From the start, I new I didn't want to keep the kit's plastic parts since they did not move and were pretty flimsy. So I set out to make my own. It took me 3 tries. First I made the small pillow bloc (that's the pivot for the horizontal rod that goes to the brake drum), that was easy.
Then I made the rod that pivots on the pillow bloc, also easy.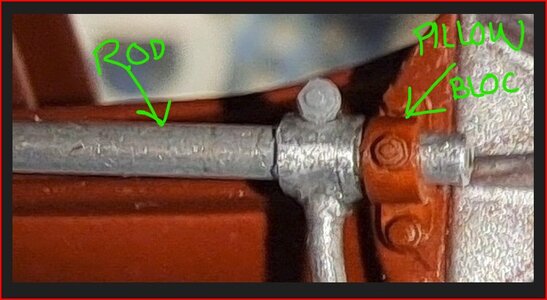
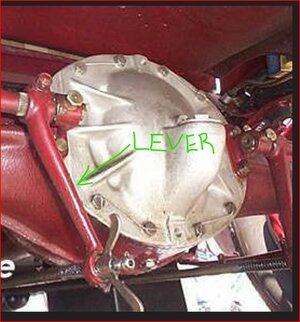
Next, came the actuating lever. This is what it should look like (real car).
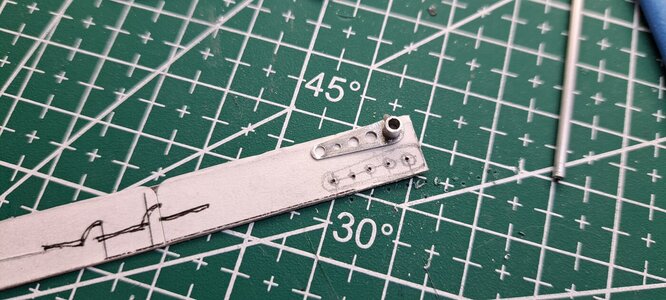
This was my first try.
First try mounted on the car (right) next to my second try (left)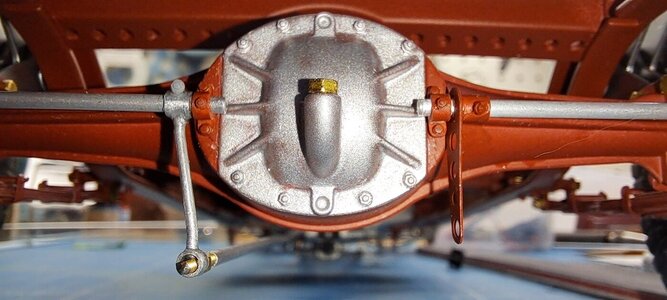
I didn't like either one so, again, I decided to go hybrid and use the kit's lever (on the right) shown here before modification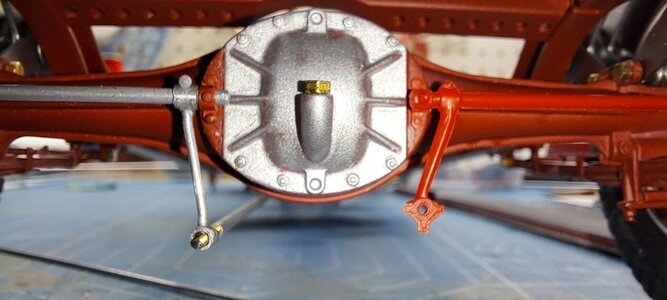
and modify it so it could fit on my new rod and also pivot properly.
So here's the result along with some wingnuts I made.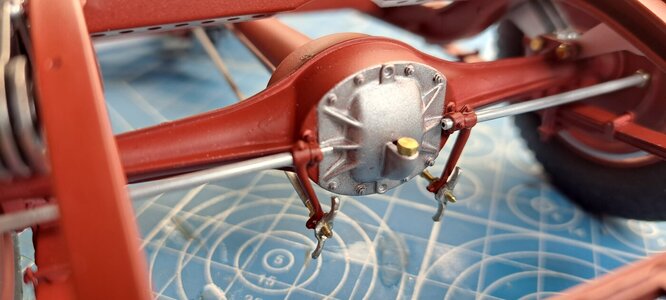
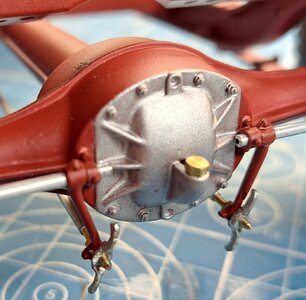
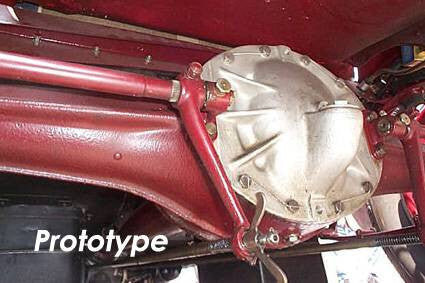
A under side view of both front and rear brake linkage (the center portion is not final)
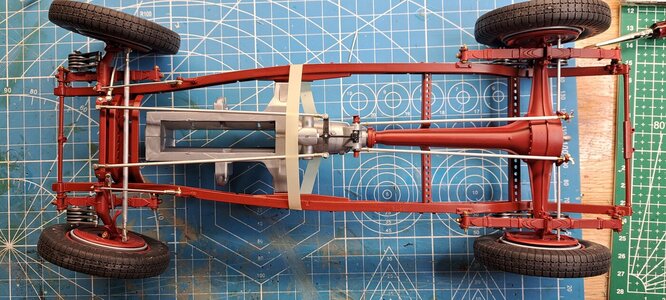
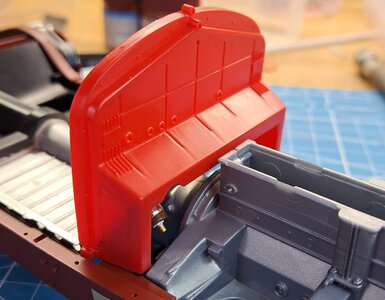
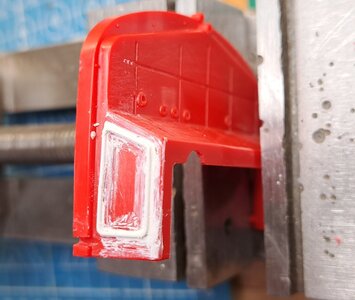
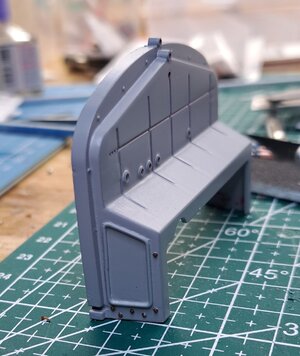
Next up the fire wall.
Then I made the rod that pivots on the pillow bloc, also easy.

Next, came the actuating lever. This is what it should look like (real car).

This was my first try.

First try mounted on the car (right) next to my second try (left)

I didn't like either one so, again, I decided to go hybrid and use the kit's lever (on the right) shown here before modification

and modify it so it could fit on my new rod and also pivot properly.
So here's the result along with some wingnuts I made.


A under side view of both front and rear brake linkage (the center portion is not final)

Next up the fire wall.
Amazing work !
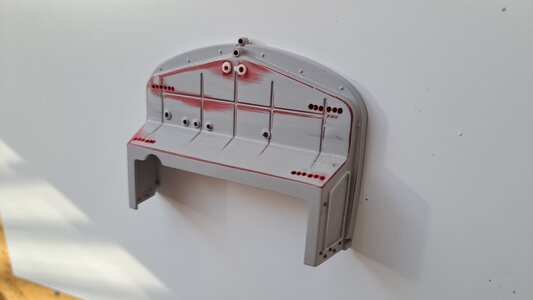
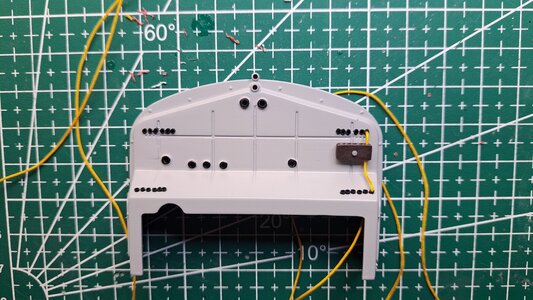
Finished the firewall today, the wiring was a bit of a pain but I got it done. I found an electrical diagram for this car and used it as a guide as to what wire could go where. Let's just say that I used a lot of 'builder's leeway' for lack of a better term. Here is the diagram I found.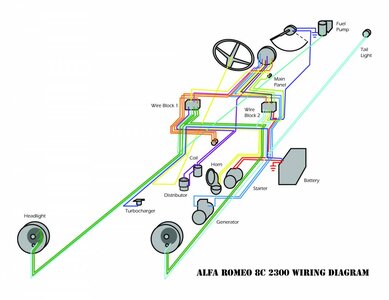
And how I decided to do it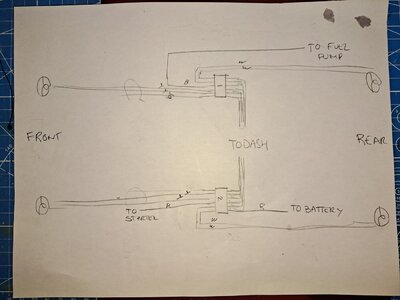
And a few pictures of the completed job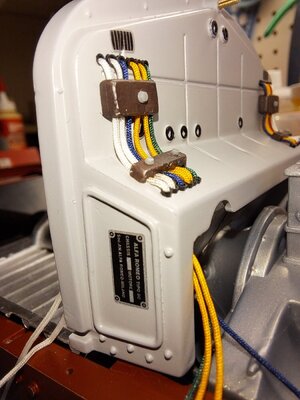
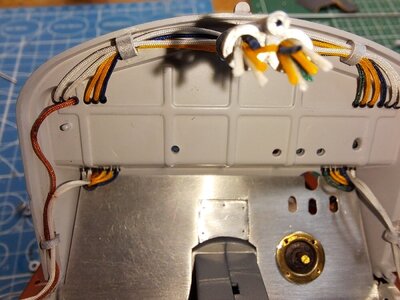
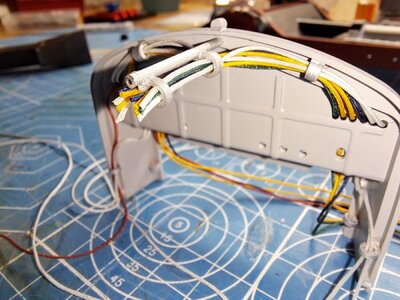
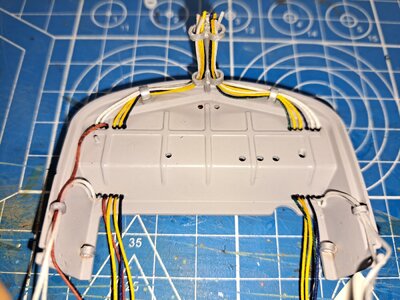
And again, what I was aiming for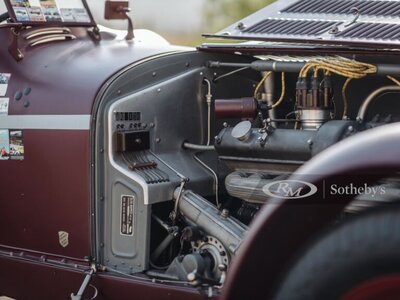
Think I'lI start the dash next.

And how I decided to do it

And a few pictures of the completed job


And again, what I was aiming for

Think I'lI start the dash next.
WOW - I am pretty sure, that the model at the end will be able to drive
Great work! I am wondering why you used colored ropes that are large diameter verses smaller diameter black wire, similar to the photos of the actual car?
I actually bought the thread for the spark plus câbles. At .5mm dia, it represents à 6mm câble which is ok fot the plugs I figured it would also be ok for for the wiring but now that I look ar the pictures more closely, I must admit it is a bit too big. I guess I knew it all along but just didn't want to admit it. I have a heavy sewing thread that could do but I only have it in black. I'lI try to find some colored. Well, it's back to the wiring board! Thanks for lights up Dean.
Sorry, not trying to be critical...just making an observation. I think you are doing great work!I actually bought the thread for the spark plus câbles. At .5mm dia, it represents à 6mm câble which is ok fot the plugs I figured it would also be ok for for the wiring but now that I look ar the pictures more closely, I must admit it is a bit too big. I guess I knew it all along but just didn't want to admit it. I have a heavy sewing thread that could do but I only have it in black. I'lI try to find some colored. Well, it's back to the wiring board! Thanks for lights up Dean.
Another thought would be to try actual wire which will hold the shape you want. You can paint it to the color you wish. If you need it really small, look for enameled transformer wire. You can get that at amazingly small diameter!I actually bought the thread for the spark plus câbles. At .5mm dia, it represents à 6mm câble which is ok fot the plugs I figured it would also be ok for for the wiring but now that I look ar the pictures more closely, I must admit it is a bit too big. I guess I knew it all along but just didn't want to admit it. I have a heavy sewing thread that could do but I only have it in black. I'lI try to find some colored. Well, it's back to the wiring board! Thanks for lights up Dean.
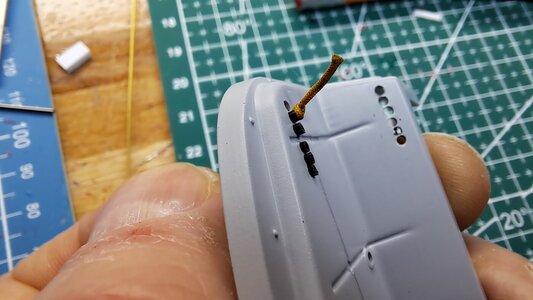
So, I decided to redo the wiring. The .5mm thread I used was effectively too big. Instead, I used a .25mm nylon thread that, once scaled up, come to a 1/8 in dia wire. Another change I made is the color choice. On my first try, I was trying too hard and the result came out too busy. My ref car only has one color, looks like a dark grey. I could not find a gray thread of the proper dia so I went with black. I also decided to eliminate the multi leads going from the firewall to the back and front of the car. After a little bit of research on google, I found a few pictures that show how a 1930's wire harness has a braided cover over the wires. So that's what I did. The small .25mm threads are glued to a larger .8mm braided thread. I have 4 braided lines in total, 2 per side, 1 going to the front and 1to the rear. I'll eventually add a few colored wires sticking out of the braided cover at specific areas to connect electrical componants such as the fuel pump, the battery, the starter....
A 1930's wire harness showing the braided cover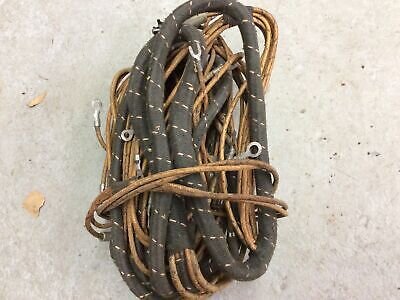
My take on the braided cover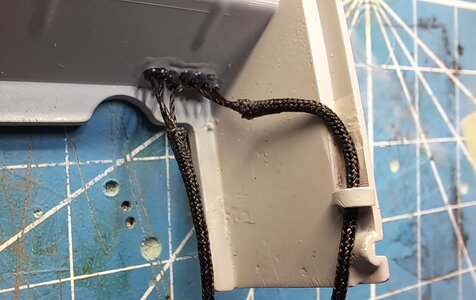
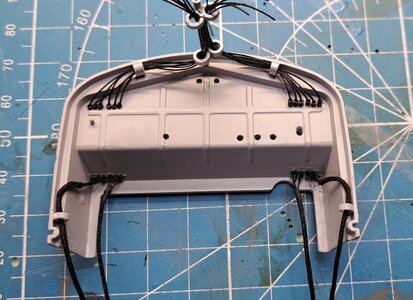
The result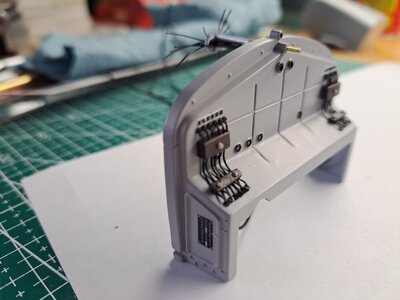
And again the ref car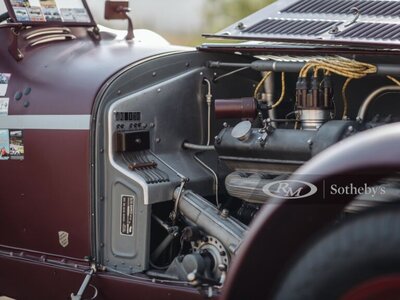
A 1930's wire harness showing the braided cover

My take on the braided cover


The result

And again the ref car

A definite improvement!So, I decided to redo the wiring. The .5mm thread I used was effectively too big. Instead, I used a .25mm nylon thread that, once scaled up, come to a 1/8 in dia wire. Another change I made is the color choice. On my first try, I was trying too hard and the result came out too busy. My ref car only has one color, looks like a dark grey. I could not find a gray thread of the proper dia so I went with black. I also decided to eliminate the multi leads going from the firewall to the back and front of the car. After a little bit of research on google, I found a few pictures that show how a 1930's wire harness has a braided cover over the wires. So that's what I did. The small .25mm threads are glued to a larger .8mm braided thread. I have 4 braided lines in total, 2 per side, 1 going to the front and 1to the rear. I'll eventually add a few colored wires sticking out of the braided cover at specific areas to connect electrical componants such as the fuel pump, the battery, the starter....
A 1930's wire harness showing the braided cover View attachment 355626
My take on the braided cover View attachment 355632View attachment 355630
The result View attachment 355629
And again the ref carView attachment 355633
I finaly started the dashboard today. You'd think it would be a simple job but, like everything else on this project, I tend to go the complicated route because that's the way I like it.
So the kit's dash is made of one piece, with the gage bezels (thats the ring around the gage), bolts and certain knobs already moulded. The modeler would need to paint all these features to get the proper look. The dashboard on my ref car is a bit different from the others I've seen. The paint is old and cracked. I can't tell if the paint is trully old (even if the car) or if it's a choice of the restorer. Nevertheless, I'll try to reproduce the crackled look. Doing a crackle finish at a 1 to 1 scale is hard enough. At 1/12.... I'll need a flat surface to do the crackeled finish so that's why I first sanded down the protruding features from the face of the dash. Then I set out to fabricate a new flat dash facia out of styrene which will be crackeled and glued to the kit's dash. I also made new polished bezel out of aluminium tubing. I'll be reusing the kit's gage lenses and decals but l'll have to fabricate new knobs and levers and add new bolts since all these features were sanded down. So here are a few pictures.
As usual, here's what I'm aiming for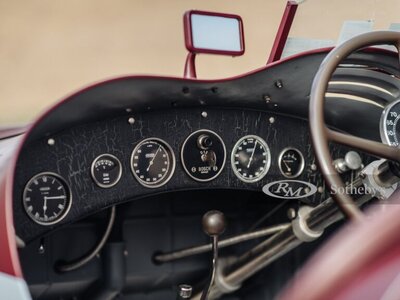
Here you can see the crackeled paint
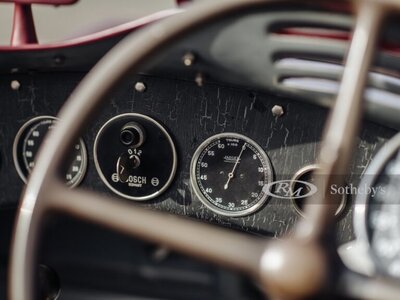
I'll also be adding the large tachometer that you see thru the steering wheel, it's not in the kit. This gage is actually mounted on the steering columm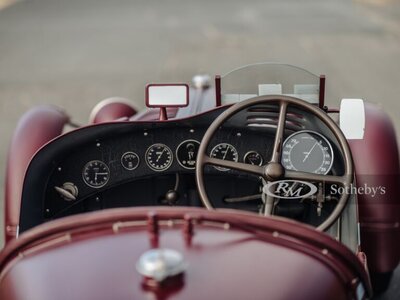
The kit's dash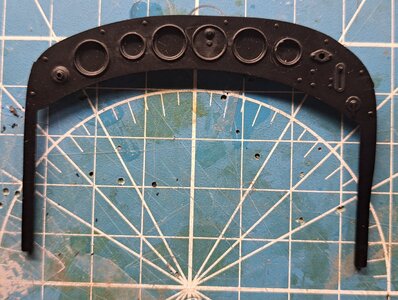
The sanded down dash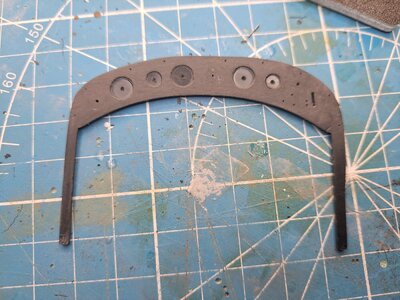
The crackeled effect is achived in 4 stops. First a base coat is applied. This coat is what will be seen thru the cracked paint, in my case it's white. Then a thick coat of crackel media. I'm using a product made by Vallejo paints. Then comes the main color that will crack, i'm using black. And finally, a clear coat to protect the surface because one drop of water on the crackeled finish will disolve it.
Here is a test I did.
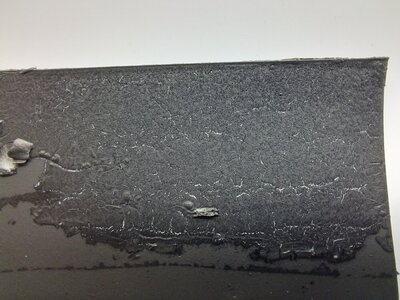
The new facia with the white base coat applied.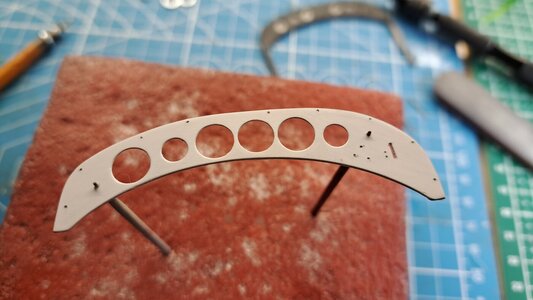
The polished aluminium tubings to make the bezels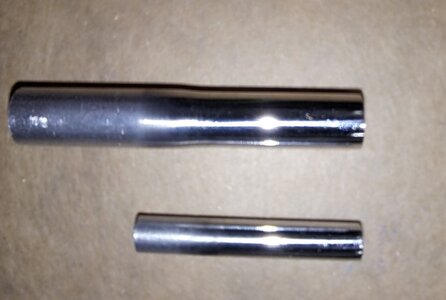
The finished bezels. The larger ones measure 9/32 dia, the smaller ones 3/16.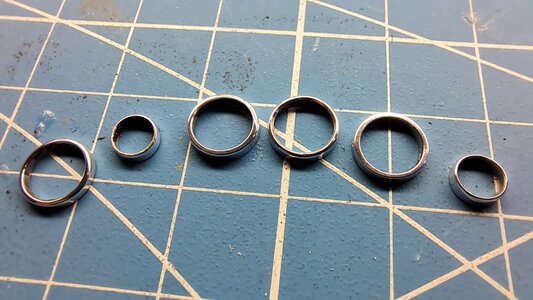
A test bezel with lense installed in the test crackeled panel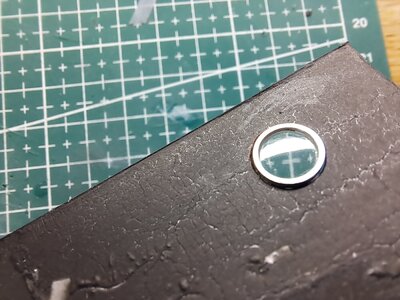
More to come
So the kit's dash is made of one piece, with the gage bezels (thats the ring around the gage), bolts and certain knobs already moulded. The modeler would need to paint all these features to get the proper look. The dashboard on my ref car is a bit different from the others I've seen. The paint is old and cracked. I can't tell if the paint is trully old (even if the car) or if it's a choice of the restorer. Nevertheless, I'll try to reproduce the crackled look. Doing a crackle finish at a 1 to 1 scale is hard enough. At 1/12.... I'll need a flat surface to do the crackeled finish so that's why I first sanded down the protruding features from the face of the dash. Then I set out to fabricate a new flat dash facia out of styrene which will be crackeled and glued to the kit's dash. I also made new polished bezel out of aluminium tubing. I'll be reusing the kit's gage lenses and decals but l'll have to fabricate new knobs and levers and add new bolts since all these features were sanded down. So here are a few pictures.
As usual, here's what I'm aiming for

Here you can see the crackeled paint

I'll also be adding the large tachometer that you see thru the steering wheel, it's not in the kit. This gage is actually mounted on the steering columm

The kit's dash

The sanded down dash

The crackeled effect is achived in 4 stops. First a base coat is applied. This coat is what will be seen thru the cracked paint, in my case it's white. Then a thick coat of crackel media. I'm using a product made by Vallejo paints. Then comes the main color that will crack, i'm using black. And finally, a clear coat to protect the surface because one drop of water on the crackeled finish will disolve it.
Here is a test I did.

The new facia with the white base coat applied.

The polished aluminium tubings to make the bezels

The finished bezels. The larger ones measure 9/32 dia, the smaller ones 3/16.

A test bezel with lense installed in the test crackeled panel

More to come
Well, I tried to do the crackel effect on the dash panel and it didn't work even dough it did on my test piece. I'll go get some primer and white paint of the same brand as the crackel medium and try again, I'm confident that I'll get it rigt... eventualy. In the mean time, I 3D modeled a diverter of some sort that I think switches the gas supply from main to reserve tank and the large tachometer support bracket. I'm waiting for a 3D print quote, maybe the quote will push me to get a printer of my own.
The real diverter
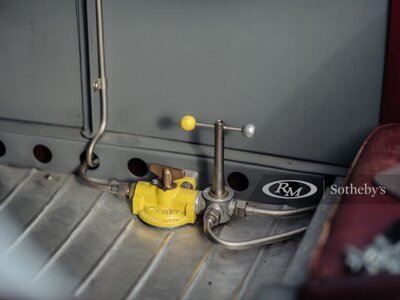
3d model (the vertical spigot with the 2 round knobs will be added after, I think they would be to fragile for 3d print)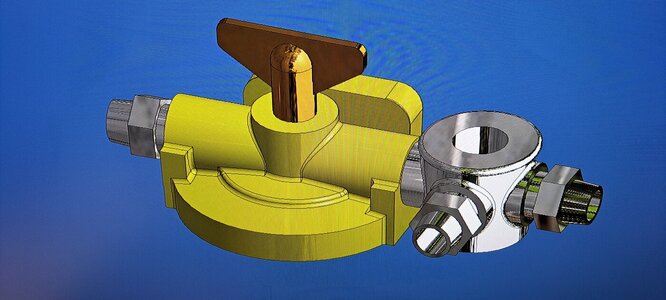
The real tach bracket
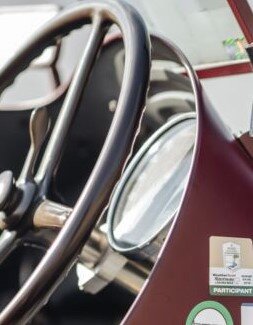
3D model (the bezel, tach face and lenze will be added to the 3D printed part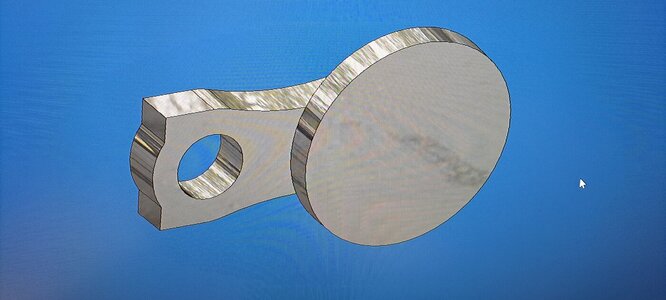
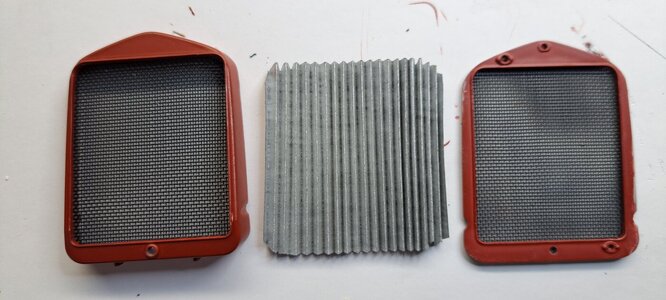
Also, I started the radiator modification.
What I'm aiming for
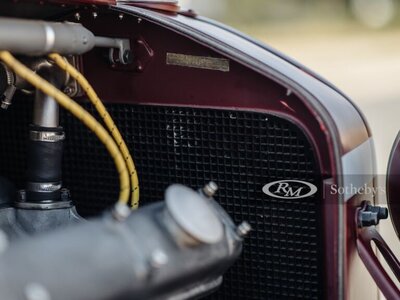
What the kit provides, the wire mesh is moulded in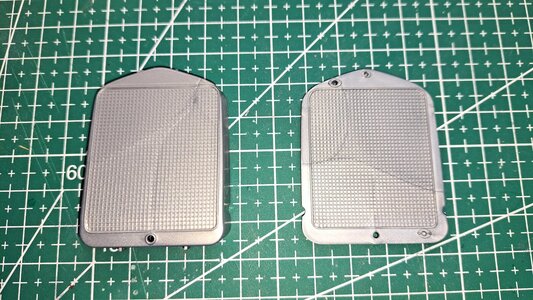
So I cut out the plastic mesh and will be replacing it with a real mesh of the correct size. I might even but a pleated paper core between the 2 meshes.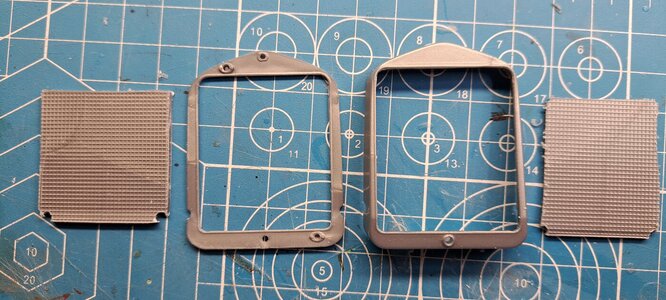
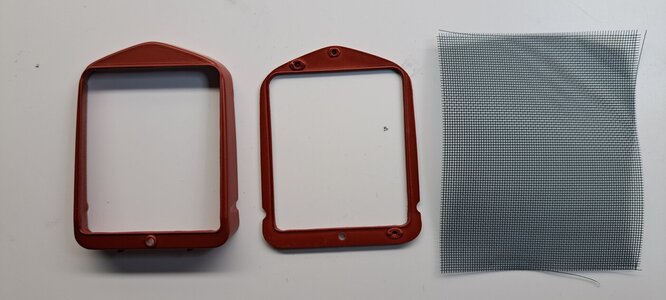
to be continued...
The real diverter

3d model (the vertical spigot with the 2 round knobs will be added after, I think they would be to fragile for 3d print)

The real tach bracket

3D model (the bezel, tach face and lenze will be added to the 3D printed part

Also, I started the radiator modification.
What I'm aiming for

What the kit provides, the wire mesh is moulded in

So I cut out the plastic mesh and will be replacing it with a real mesh of the correct size. I might even but a pleated paper core between the 2 meshes.


to be continued...
OK. So, I was rather dismissive of your car build on a ship-building forum. But this is some first-class modeling. Respect.
Thank you dockattner, I know cars are not everyone's thing so it means a lot that you can still appreciate the work done. I first started on this forum with boats projets (and a plane) but I must admit that, being a car guy, I'm finding this particular build very satisfying. I do have the scratch built Fay and Boyen boat project that will be done eventually.


