1/12 scale Alfa Romeo 8c 2300 roadster build log [COMPLETED BUILD]

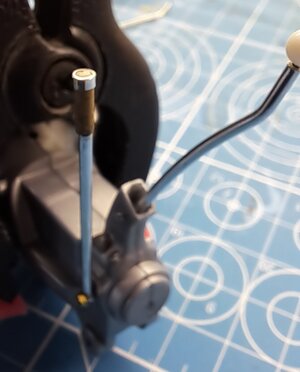
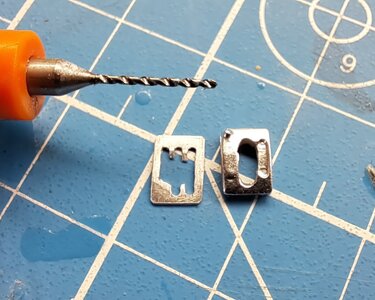
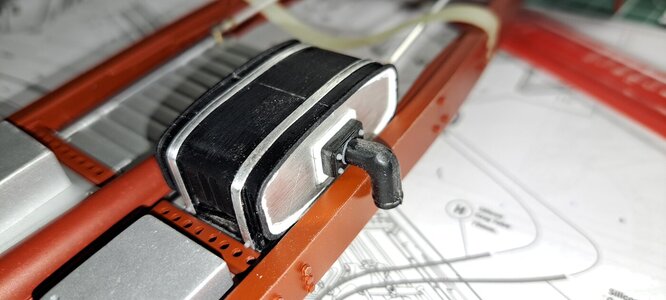
Redid the shifter and hand brake lever. The kit parts were very fragile so I made them out of aluminium tubing. The hand brake handle is made of real wood, the shifter knob is a needle head that I will eventualy give a wood look. I also redid the shifter gate with the 4 requierd positions plus reverse. Also made the oil reservoir. I changed the front end of the reservoir from plastic to aluminium and added a weld bead. Also added 2 aluminium straps.

Kit shifter and brake lever20230307_075536.jpg
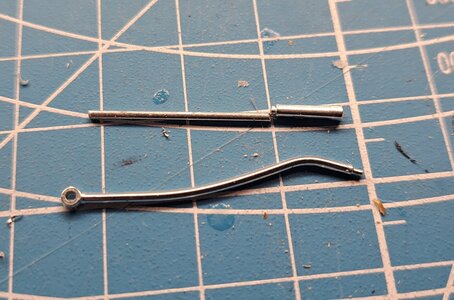
My take on it 20230307_075618.jpg

My shifter gate next to the kit's 20230307_113524.jpg

Oil reservoir20230308_212407.jpg

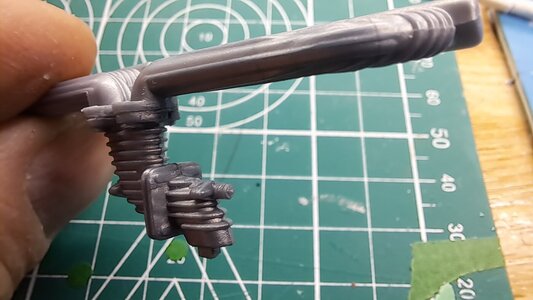
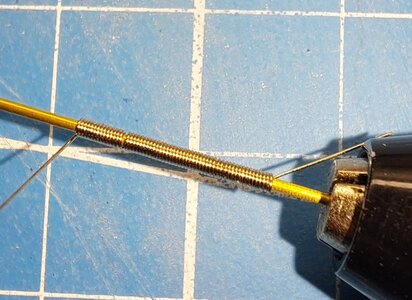
Also started on some mini extension springs that will be used at the jonction of the header and tail pipe. (More on that later)20230309_120744.jpg
 
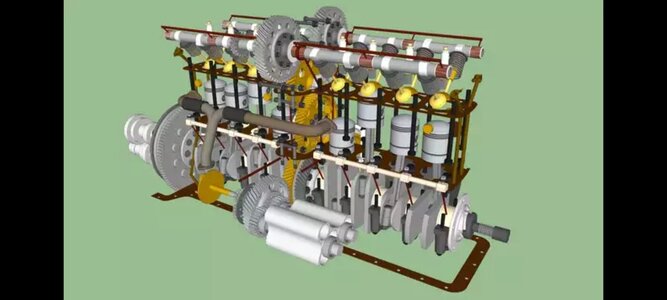
Thank you Corsair. I did think about adding a cam shaft and I might still do it on one side only depending how easy it would be to remove the cam cover for display. I know that the drivers side cover if full on small linkage so that one will stay put. Fun fact, this 1930's engine did not have timing chains to drive the cam shafts but a rather complex set of gears running from the center of the crank shaft all the up to drive both cam shatfs. It also pick up the oil pump along the way. Only the Italians... great designers...Screenshot_20230310_084557_Gallery.jpg
 
Thank you Corsair. I did think about adding a cam shaft and I might still do it on one side only depending how easy it would be to remove the cam cover for display. I know that the drivers side cover if full on small linkage so that one will stay put. Fun fact, this 1930's engine did not have timing chains to drive the cam shafts but a rather complex set of gears running from the center of the crank shaft all the up to drive both cam shatfs. It also pick up the oil pump along the way. Only the Italians... great designers...View attachment 362162
Now that you mention it, I do remember seeing a camshaft with a gear in the middle. I think it was on the Pocher kit of the Alfa Romeo. Regardless, I love your work that you are doing and I'm totally in awe !
 
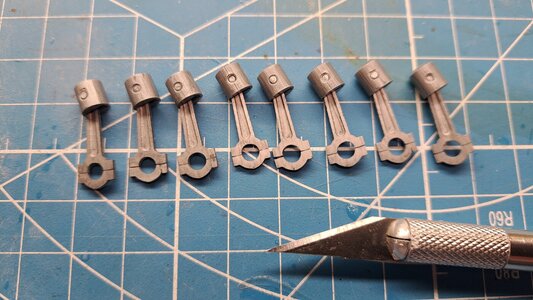
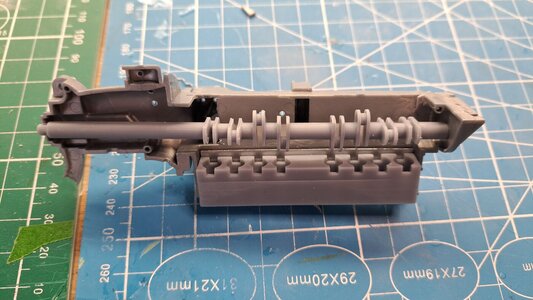
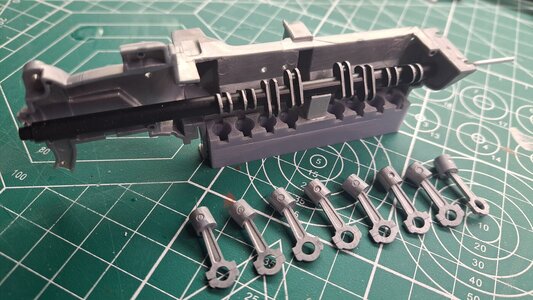
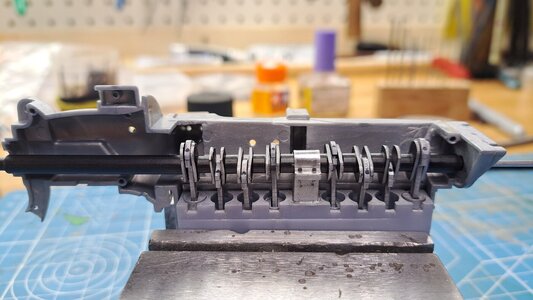
Ok, so I completed the engine's internal parts assembly (the parts that I drew up and 3d printed). For those of you who are familiar with the 1/8 scale Pocher kits, you might know that the engine in those kits have working pistons. The 1/12 scale Italeri kits do not. Until now that is!! I'm very happy to say (and somewhat surprised) that the my pistons and crank shaft work. Althougt not in the smoothest way, but once fully assembled on the frame with the crank handle shaft fully supported, I think it will be smoother. Here are a few pictures and videos.

Pistons and connecting rods20230311_071008.jpg

Cylinder bloc and crank shaft fitted in the kit's engine 20230311_073627.jpg

All components ready for assembly
20230311_193746.jpg


All components in place along with added crank shaft center support. The material that was used to 3d print the parts is very fragile not flexible. I had to incorporate the support in order prevent the crank shaft from breaking. Ask me how I know...it's a good think I had more than one of each parts.20230311_220451.jpg
Working pistons viewed from top (this will not be visible once engine is fully assembled)
View attachment 20230311_220737.mp4

Working pistons and crank shaft viewed from bottom (this will be visible by removing the oil pan)
View attachment 20230311_221104.mp4
 
Ok, so I completed the engine's internal parts assembly (the parts that I drew up and 3d printed). For those of you who are familiar with the 1/8 scale Pocher kits, you might know that the engine in those kits have working pistons. The 1/12 scale Italeri kits do not. Until now that is!! I'm very happy to say (and somewhat surprised) that the my pistons and crank shaft work. Althougt not in the smoothest way, but once fully assembled on the frame with the crank handle shaft fully supported, I think it will be smoother. Here are a few pictures and videos.

Pistons and connecting rodsView attachment 362456

Cylinder bloc and crank shaft fitted in the kit's engine View attachment 362457

All components ready for assembly
View attachment 362455


All components in place along with added crank shaft center support. The material that was used to 3d print the parts is very fragile not flexible. I had to incorporate the support in order prevent the crank shaft from breaking. Ask me how I know...it's a good think I had more than one of each parts.View attachment 362454
Working pistons viewed from top (this will not be visible once engine is fully assembled)
View attachment 362453

Working pistons and crank shaft viewed from bottom (this will be visible by removing the oil pan)
View attachment 362452
Nicely added details, François. And when they are not visible ……… you (and we) know they are there!
Regards, Peter
 
Ok, so I completed the engine's internal parts assembly (the parts that I drew up and 3d printed). For those of you who are familiar with the 1/8 scale Pocher kits, you might know that the engine in those kits have working pistons. The 1/12 scale Italeri kits do not. Until now that is!! I'm very happy to say (and somewhat surprised) that the my pistons and crank shaft work. Althougt not in the smoothest way, but once fully assembled on the frame with the crank handle shaft fully supported, I think it will be smoother. Here are a few pictures and videos.

Pistons and connecting rodsView attachment 362456

Cylinder bloc and crank shaft fitted in the kit's engine View attachment 362457

All components ready for assembly
View attachment 362455


All components in place along with added crank shaft center support. The material that was used to 3d print the parts is very fragile not flexible. I had to incorporate the support in order prevent the crank shaft from breaking. Ask me how I know...it's a good think I had more than one of each parts.View attachment 362454
Working pistons viewed from top (this will not be visible once engine is fully assembled)
View attachment 362453

Working pistons and crank shaft viewed from bottom (this will be visible by removing the oil pan)
View attachment 362452
Beautiful work as always Francois !
The movement of the pistons and crankshaft will smooth out once you put oil in the crankcase... ROTF
 
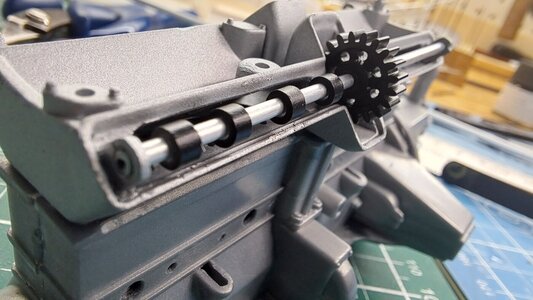
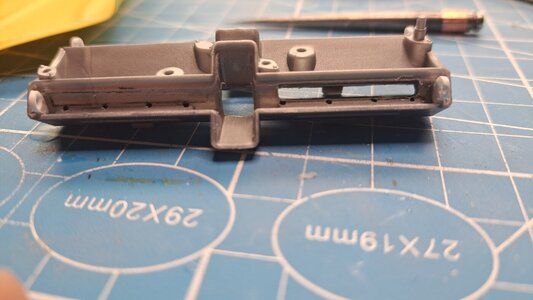
So I decided to make a cam shaft complet with gear (found a bagfull for 10$ on Amazon) and cams (well, they're not really cam shaped). I'm waiting for delivery of some micro springs that will serve as valve springs. All this will be visible when the cam cover is removed. I also made some small windows in the head casting so that the piston mouvement can be seen (a little) when the crank handle is turned.

Cam shaft20230313_151600.jpg

Viewing window20230313_091555.jpg
 
Here's what was done today.
Painted the engine bloc, head and oil pan.
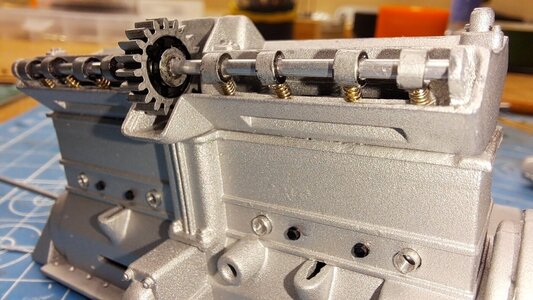
Finished the cam shaft. I received the micro springs but even at only 2.3mm OD and with a .3mm wire dia, they were too big. So I made my own using a .5mm dia rod as a mandrel and a. 2mm dia wire. I'll need to give it a oily/dirty look eventually.
20230314_172922.jpg

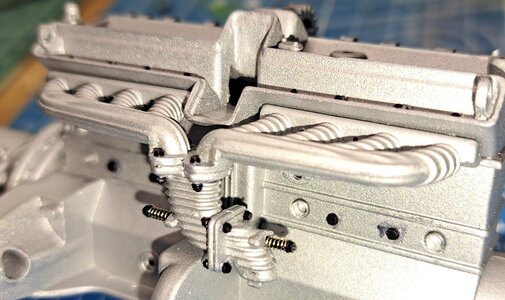
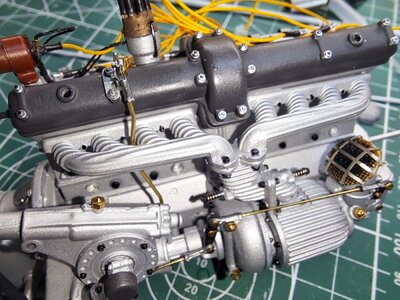
Detailed the intake manifold by adding some nuts and bolts and replacing 2 moulded plastic springs/blobs with real springs.
Here is the manifold from the kit
20230314_090738.jpg
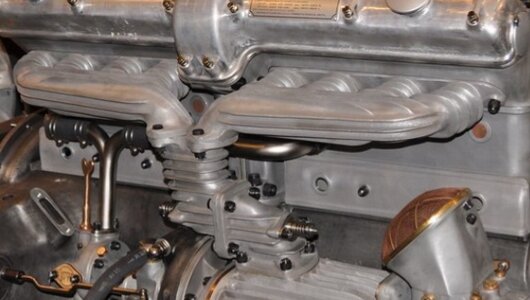
here is a real manifoldScreenshot_20230314_212913_Chrome.jpg
And my take on in20230314_173240.jpg

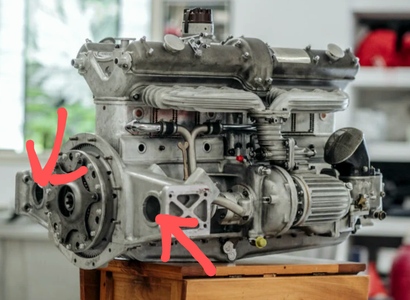
I added some passthrus on the engine bloc cross membre. They're used to pass the throtle linkage on the drivers side and cables and hoses on the passanser side.

The bloc before modification20230314_075959.jpg
A real bloc with the passthrus
Alfa-Romeo-8C-Engine-768x562~2.png
My bloc modified20230314_083603.jpg

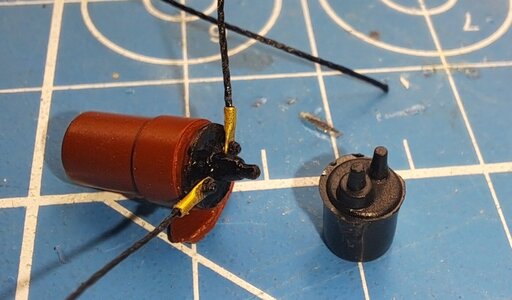
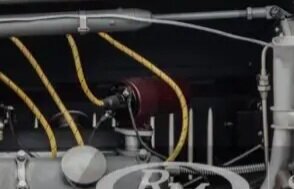
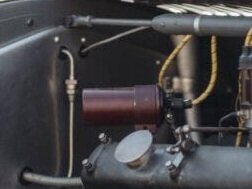
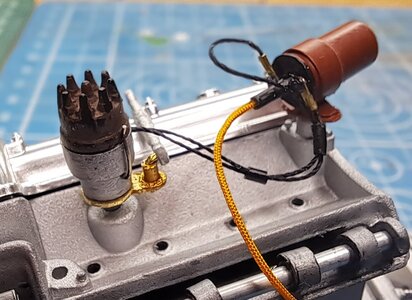
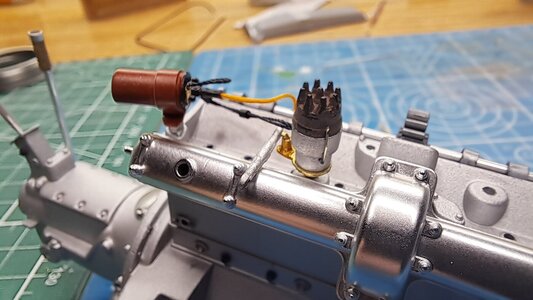
Originaly, these cars had what I think were magneto ignitions. My ref car has a more modern ignition coil, probably added on one of it's restoration. So my last job for today was to make a coil with the connecting leads.
The black cylinder on the right is the kit's part. On the left, my coil. 20230314_200541.jpg
And the ref car's coilAlfa-Romeo-8C-2300-Monza-1932-asta-2-1122x842.jpgAlfa-Romeo-8C-2300-Monza-1932-asta-69-768x576 (2).jpg
 
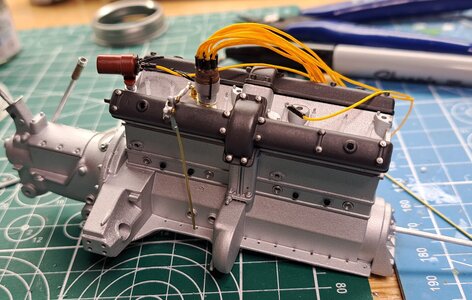
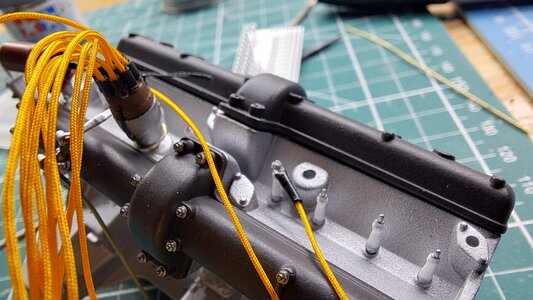
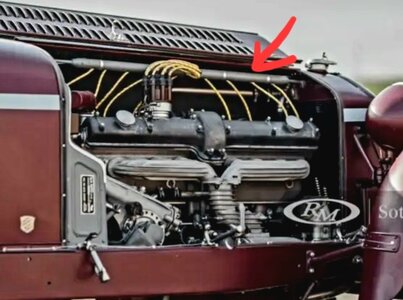
Finished the advance/retard linkage and it actually works!! I pull down on the small vertical rod and the distributer rotates. Also started the distributer and spark plug wiring. Normaly, the plug wires would go directly to the distributer and from the distributer to the coil. But on these cars, they routed all the wires thru a horizontal tubular strut. I guess it had something to do with keeping the engine bay nice and clean.

Advance/retard linkage 20230316_214710.jpg
Plug wiring 20230316_214045.jpg
Tubular passthru strut on my ref car Alfa-Romeo-8C-2300-Monza-1932-asta-16-768x576(1).jpg
 
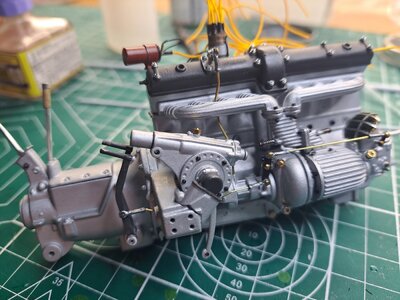
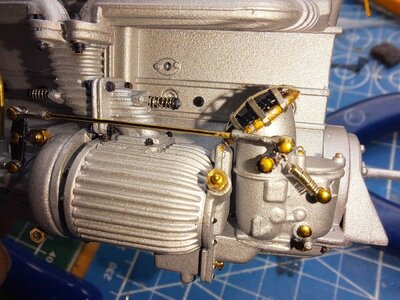
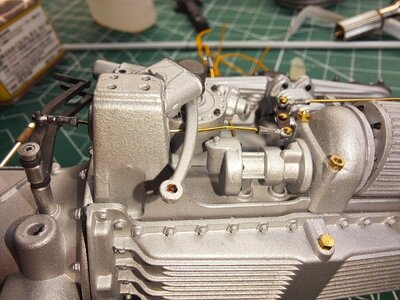
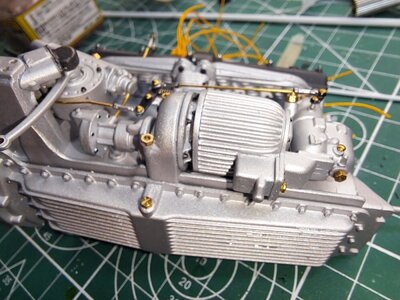
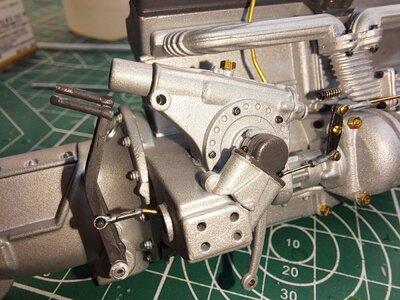
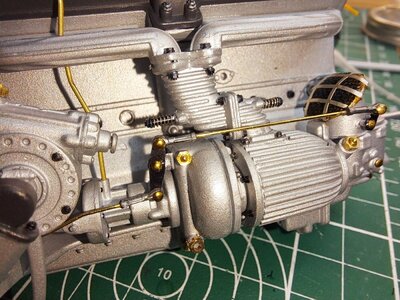
Pretty much completed the engine on the drivers side including a working throttle linkage. I added many brass fittings and bolts to the base kit. All that is left to do on this side is to install 2 hoses and to add some oil lines and the gas feed line.

20230319_201943.jpg

notice the mini extension spring made out of .008 wire
20230319_204459.jpg20230319_202030.jpg20230319_202024.jpg20230319_202014.jpg20230319_202009.jpg20230319_202004.jpg

And a little video of the working throtle
View attachment 20230319_202503~2.mp4
 
Pretty much completed the engine on the drivers side including a working throttle linkage. I added many brass fittings and bolts to the base kit. All that is left to do on this side is to install 2 hoses and to add some oil lines and the gas feed line.

View attachment 363903

notice the mini extension spring made out of .008 wire
View attachment 363901View attachment 363904View attachment 363905View attachment 363906View attachment 363907View attachment 363908

And a little video of the working throtle
View attachment 363914
wow, that looks great !
 
I like the motor very much - and fits in quality (execution) to your chassis
 
so you have a "wedding" next week
to explain..... in Germany we say "Hochzeit" (translated wedding) when the chassis is getting the motor ----- I do not know if it the same in english ?
 
Back
Top