
-

SUBSCRIBE TO SHIPS IN SCALE TODAY!
The beloved Ships in Scale Magazine is back and charting a new course for 2026!
Discover new skills, new techniques, and new inspirations in every issue.
NOTE THAT OUR NEXT ISSUE WILL BE July/August 2026 -

Win a Free Custom Engraved Brass Coin!!!
As a way to introduce our brass coins to the community, we will raffle off a free coin during the month of August. Follow link ABOVE for instructions for entering.
You are using an out of date browser. It may not display this or other websites correctly.
You should upgrade or use an alternative browser.
You should upgrade or use an alternative browser.
1/30 HMS Royal Caroline Build
- Thread starter modelshipbuilder65
- Start date
- Watchers 74
-
- Tags
- royal caroline


WIP UPDATE-
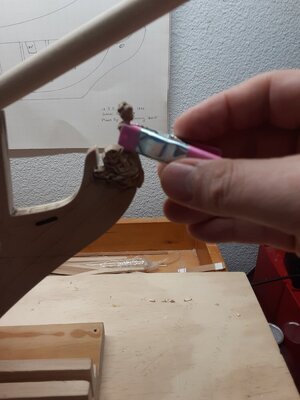
Slow Going with the Tree Nailing......... Will be posting a update & Pics very soon as I am finishing up the outer Hull Tree Nailing, YAAAAAAAAA
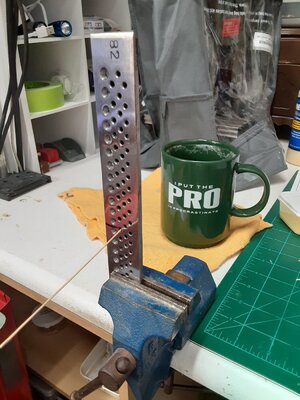
I am using a Draw Plate to ensure the 1mm Dowel is round as possible and sized down to the scale 1mm thickness as well. I am using 1mm Ramin Dowels and unfortunately takes some time pulling approximately 21ft through a Draw Plate.
(My Old Hot Cocoa mug says it all, hehehehehehehehe)
Slow Going with the Tree Nailing......... Will be posting a update & Pics very soon as I am finishing up the outer Hull Tree Nailing, YAAAAAAAAA
I am using a Draw Plate to ensure the 1mm Dowel is round as possible and sized down to the scale 1mm thickness as well. I am using 1mm Ramin Dowels and unfortunately takes some time pulling approximately 21ft through a Draw Plate.
(My Old Hot Cocoa mug says it all, hehehehehehehehe)
Attachments
Last edited:

WIP---
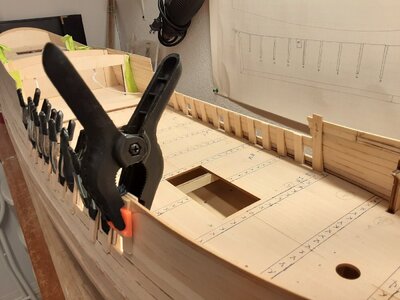
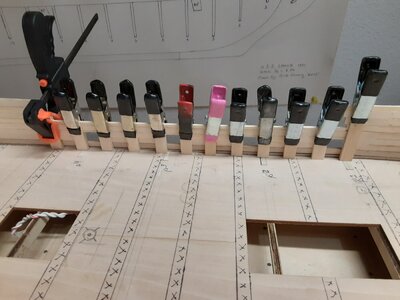
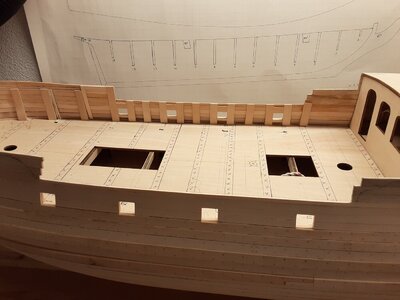
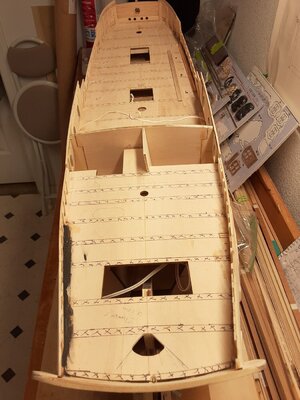
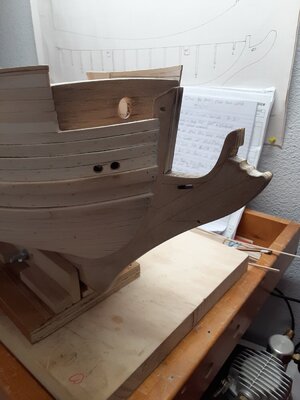
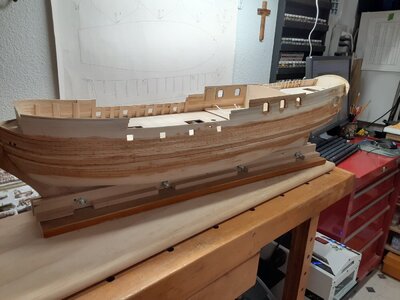
Hello everyone, sorry for the long delay. Here's where I'm at currently on the build. Here is a picture of the starboard side showing approx. frame locations for marking out the Tree nails..jpg")
Hello everyone, sorry for the long delay. Here's where I'm at currently on the build. Here is a picture of the starboard side showing approx. frame locations for marking out the Tree nails.
Last edited by a moderator:
WIP----
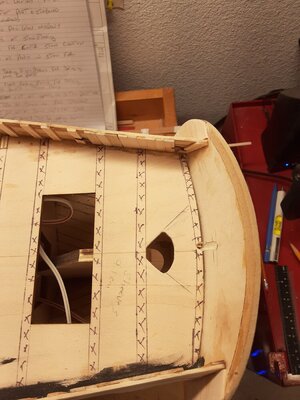
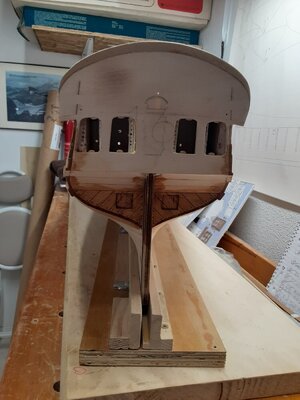
A few pics showing the process I used for cutting out and framing in the Cabin/Stern windows. I will be using DVD acrylic cases for the glass portion. The cases are the perfect thickness and gives the look of 1749 Glass. The nice thing to is the cases are UV resistant and will not discolor over time..jpg")
.jpg")
.jpg")
.jpg")
.jpg")


A few pics showing the process I used for cutting out and framing in the Cabin/Stern windows. I will be using DVD acrylic cases for the glass portion. The cases are the perfect thickness and gives the look of 1749 Glass. The nice thing to is the cases are UV resistant and will not discolor over time.
Last edited by a moderator:
WIP---
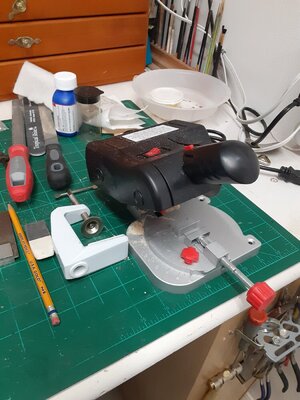
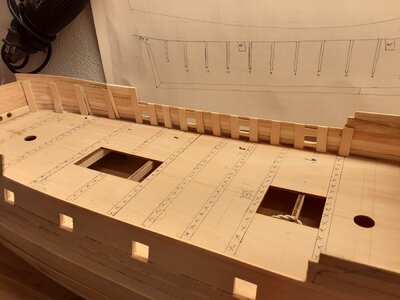
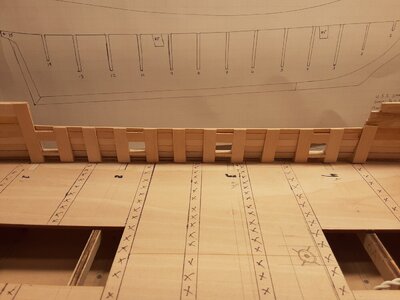
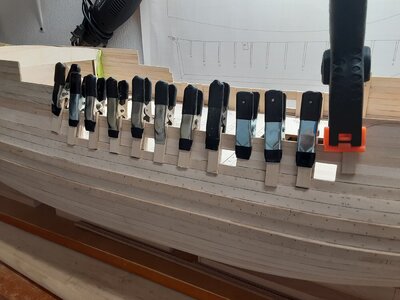
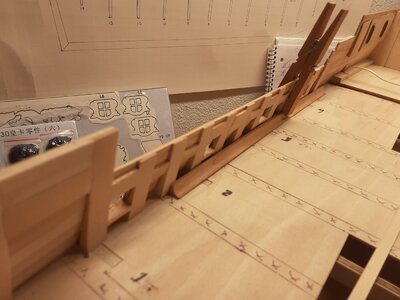
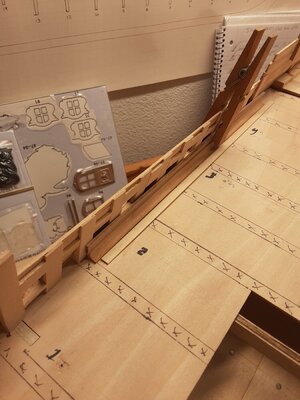
Bulwarks Frames and my electric chopper saw (what a Life Saver!!!)
Bulwarks Frames and my electric chopper saw (what a Life Saver!!!)
Attachments
-
 20210823_230623 (1).jpg227.1 KB · Views: 106
 -
 20210830_003137 (1).jpg209.2 KB · Views: 94
 -
 20210829_014130.jpg198.7 KB · Views: 92
 -
 20210829_014121 (1).jpg168.5 KB · Views: 85
 -
 20210829_014146 (1).jpg166.3 KB · Views: 93
 -
 20210823_230707 (1).jpg195.8 KB · Views: 92
 -
 20210823_230647 (1).jpg205 KB · Views: 93
 -
 20210906_235435.jpg272.9 KB · Views: 88
 -
 20210909_203837.jpg159.8 KB · Views: 98
 -
 20210921_231715.jpg193.3 KB · Views: 99
 -
 20210921_231707.jpg197.9 KB · Views: 99
 -
 20210921_231652.jpg188.2 KB · Views: 93
 -
 20210920_005824.jpg152.3 KB · Views: 94
 -
 20211017_183934.jpg259.2 KB · Views: 98
 -
 20211017_184116.jpg241 KB · Views: 99
 -
 20211017_184442.jpg260.5 KB · Views: 105
Last edited:
WIP--
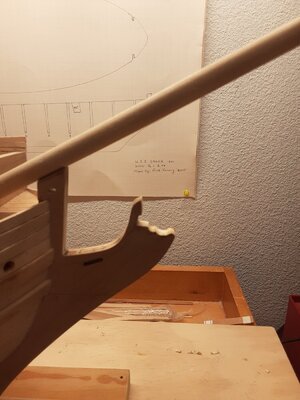
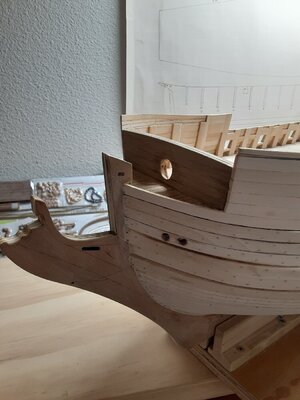
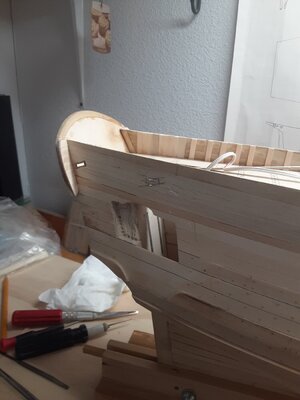
Stem Cut & Shaped for the Figurehead. Stem post holes completed. I wanted to get this done because a portion of the Stem will be painted Black.
Stem Cut & Shaped for the Figurehead. Stem post holes completed. I wanted to get this done because a portion of the Stem will be painted Black.
Attachments
WIP---
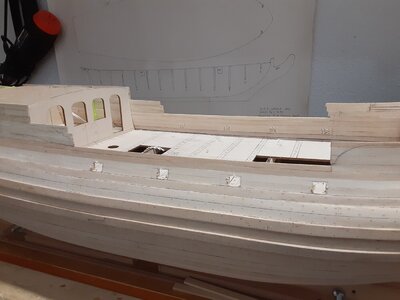
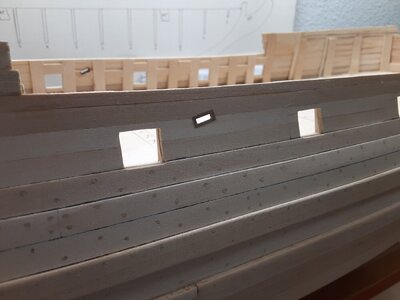
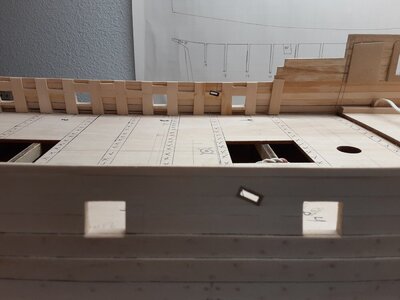
Outer Hull Sheave Plates completed. A big misconception with these. On most ships (not always), these plates that held the Bulwark sheaves were set flush to the Bulwarks (Inside & Outside) to prevent rope chaffing. It is also so much easier to install these at this point of the build versus after the carvings are already placed. HOWEVER----You must make 1000000000% sure these are installed in the correct place or the carvings will cover them up and then something gets destroyed in aggravation, LOL, hehehehehehehehehehe
Outer Hull Sheave Plates completed. A big misconception with these. On most ships (not always), these plates that held the Bulwark sheaves were set flush to the Bulwarks (Inside & Outside) to prevent rope chaffing. It is also so much easier to install these at this point of the build versus after the carvings are already placed. HOWEVER----You must make 1000000000% sure these are installed in the correct place or the carvings will cover them up and then something gets destroyed in aggravation, LOL, hehehehehehehehehehe
Attachments
- Joined
- Jan 9, 2020
- Messages
- 10,722
- Points
- 938

Rick I am so chuffed to see this posting and to see your progress. I wish I could alert every single member on SOS to this build. I know when something special is in the making and this is it! Now I just need to convince you to start building Dutch ships! That electric chopper saw seems like a gem!
WIP----
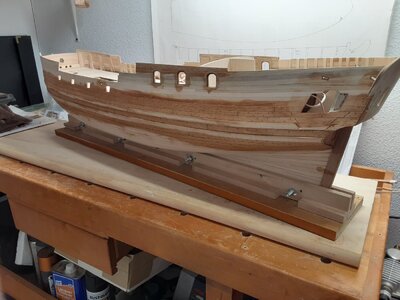
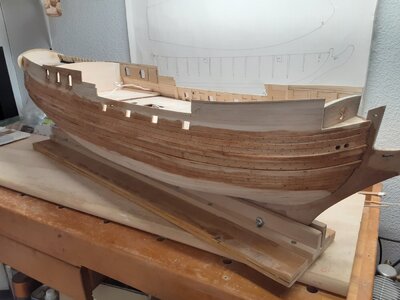
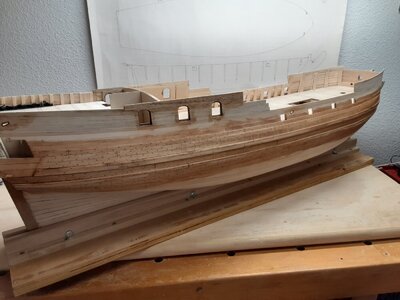
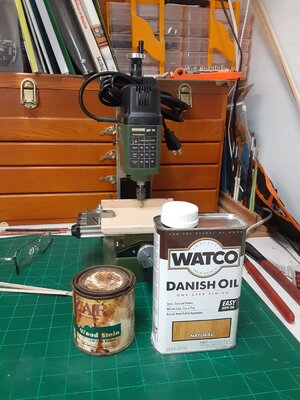
After a complete Hull sand down it was finally time to get a coat of stain!!!! After so many test with multiple colors of stains, I used a mix of Watco Natural Danish Oil mixed with ZAR Teak Natural Wood Stain. Anyone who builds model ships using Basswood should always do some test first!!! Technically Basswood is listed as a hardwood but it is VERY, VERT SOFT!!!!!!! Basswood is one of those woods that is hard to get a correct Hull color using stains. According to references, the Royal Caroline's Hull was a natural oak color (more of a light yellowish color) which tended to darken over time due to coatings of protective mix used on the Hull. I decided to go with the latter. From here, I will let the Stain/Oil mix dry for a week and then rub out the entire Hull with 0000 steel wool and start the painting process of Black Wales & Stem and the Bluish Turquoise upper Hull works.
After a complete Hull sand down it was finally time to get a coat of stain!!!! After so many test with multiple colors of stains, I used a mix of Watco Natural Danish Oil mixed with ZAR Teak Natural Wood Stain. Anyone who builds model ships using Basswood should always do some test first!!! Technically Basswood is listed as a hardwood but it is VERY, VERT SOFT!!!!!!! Basswood is one of those woods that is hard to get a correct Hull color using stains. According to references, the Royal Caroline's Hull was a natural oak color (more of a light yellowish color) which tended to darken over time due to coatings of protective mix used on the Hull. I decided to go with the latter. From here, I will let the Stain/Oil mix dry for a week and then rub out the entire Hull with 0000 steel wool and start the painting process of Black Wales & Stem and the Bluish Turquoise upper Hull works.
Attachments
-
 20211017_235202.jpg202.8 KB · Views: 145
 -
 20211017_203408.jpg215.7 KB · Views: 135
 -
 20211017_203439.jpg189.2 KB · Views: 121
 -
 20211017_203424.jpg223.5 KB · Views: 119
 -
 20211017_203446.jpg183.1 KB · Views: 126
 -
 20211017_234032.jpg194.1 KB · Views: 123
 -
 20211017_234017.jpg210.7 KB · Views: 137
 -
 20211017_234321.jpg272.4 KB · Views: 143
Thanks Heinrich.Rick I am so chuffed to see this posting and to see your progress. I wish I could alert every single member on SOS to this build. I know when something special is in the making and this is it! Now I just need to convince you to start building Dutch ships! That electric chopper saw seems like a gem!
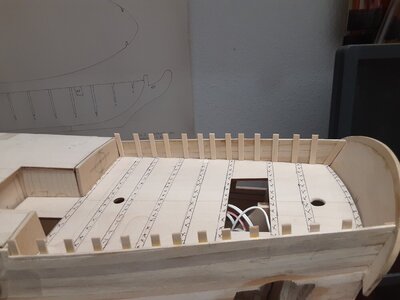
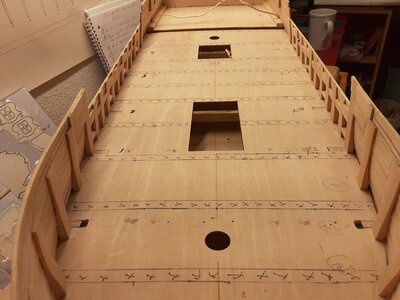
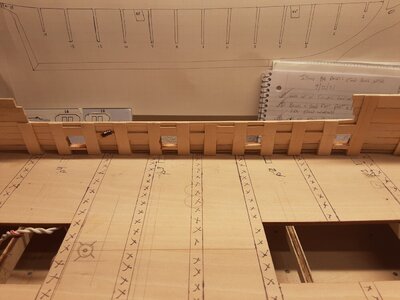
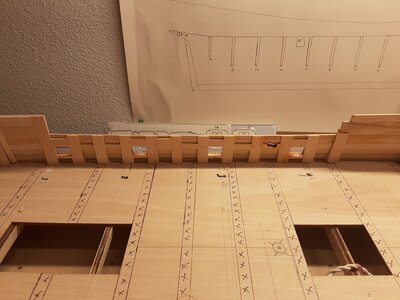
I installed extra backing on the inside of the Bulwarks for the Belaying Pin Rails and the Hull Cleats & Sheaves mounting locations. Nothing worse then a taunt line ripping off a Pin Rail, UGH!!!!!!!!!
Attachments

WIP---
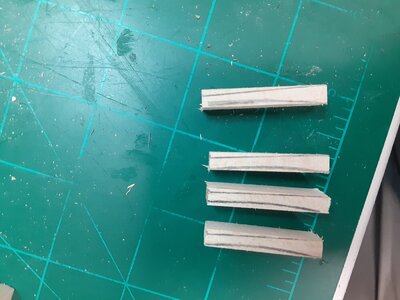
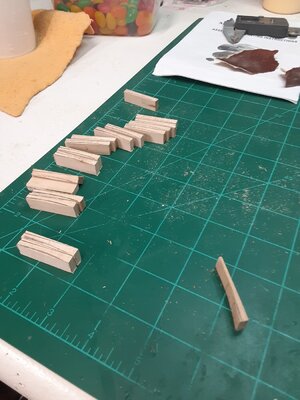
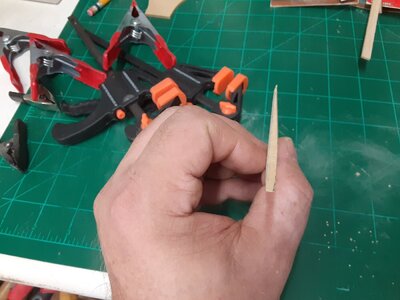
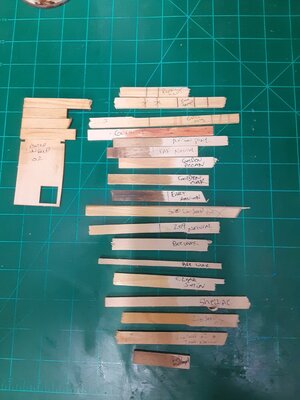
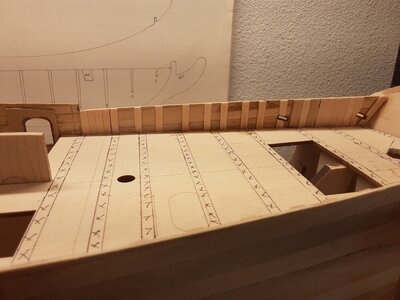
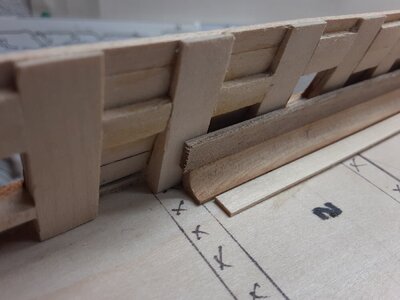
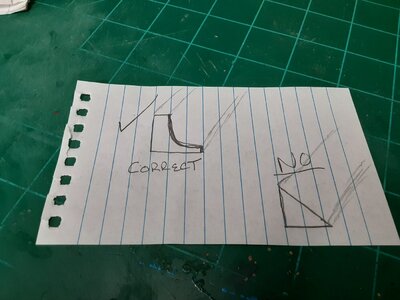
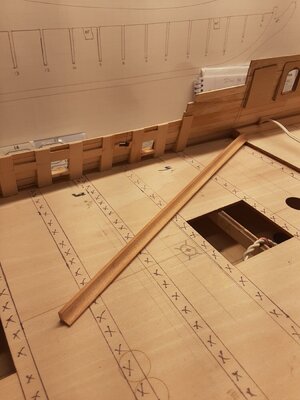
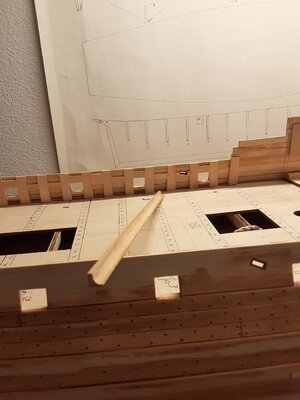
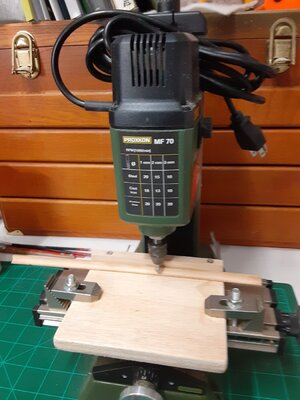
While I wait for the stain to thoroughly dry, I am going to work on the correct waterways. The kit supplies some square stock to shape into a triangle shape to use but this is not correct. I realize not everyone can correct this mistake but I am very fortunate to have a Proxxon MF70 Milling machine to make new ones. The photos show my test piece that I made to get the correct measurements, ect.
While I wait for the stain to thoroughly dry, I am going to work on the correct waterways. The kit supplies some square stock to shape into a triangle shape to use but this is not correct. I realize not everyone can correct this mistake but I am very fortunate to have a Proxxon MF70 Milling machine to make new ones. The photos show my test piece that I made to get the correct measurements, ect.
Attachments
-
 20211018_002115.jpg165.4 KB · Views: 122
 -
 20211018_002115.jpg165.4 KB · Views: 111
 -
 20211018_002636.jpg167.5 KB · Views: 102
 -
 20211018_001019 (1).jpg228.5 KB · Views: 99
 -
 20211018_001841.jpg206.2 KB · Views: 97
 -
 20211018_001854.jpg176.5 KB · Views: 98
 -
 20211018_002027.jpg190 KB · Views: 98
 -
 20211018_002103.jpg239.8 KB · Views: 115
 -
 20211018_002146.jpg195.9 KB · Views: 122

Hi Rick, you are doing great. This build is a lot of fun and looking at the speed of your build you will overtake me on mine ") .
.
.WIP----
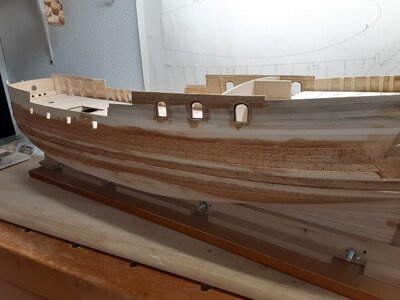
Got the Wales Painted and the first coat of the Turquoise Blueish Color that I believe is closest to the Royal Caroline's actual color based on documentation that I have read. The color is actually called Peacock Teal by DecoArt Americana. I also got the first coat of Red on the inside Gun Ports. I will do some touchups and then coat the paint with a clear sealer and then get ready to prep & paint the lower Hull Off White. (NOTE)- I did not take the Teal paint all the way down the plank. I wanted some wood to be able to have a good bonding area for the decorative scroll carving and for the chainplates to go. More later on the Chainplates------


Got the Wales Painted and the first coat of the Turquoise Blueish Color that I believe is closest to the Royal Caroline's actual color based on documentation that I have read. The color is actually called Peacock Teal by DecoArt Americana. I also got the first coat of Red on the inside Gun Ports. I will do some touchups and then coat the paint with a clear sealer and then get ready to prep & paint the lower Hull Off White. (NOTE)- I did not take the Teal paint all the way down the plank. I wanted some wood to be able to have a good bonding area for the decorative scroll carving and for the chainplates to go. More later on the Chainplates------
WIP--
Hi everyone. A quick update. I've decided to install the Hulls Rudder Hinges prior to painting the Lower Hull White. The Rudder Hinges & the Rudder itself ended up being a lot more work then anticipated!!!!! The First thing needed done was to Resize the Rudder itself. In the 1st photo, you will see the Blue Markings. This is the areas that the Rudder that was trimmed down to match the Plans from the Royal Museum in Greenwich & AOS. This step is actually pretty important since I am painting the Below the Water Line (BWL) White and Line would not be correct on the Rudder Location if I did not (See Photos). The other issue that the Kit Maker got wrong was some of the Rudder Hinges are not Long enough!!! I decided to make 2 of the needed Longer ones out of wood since they will be painted white. I painted the Wood Hinges Wrought Iron so I can get the desired effect of Color after Painting over them the White Color. I will add more Photos of the Hinges soon because I am not done yet. The Rudder is Just Sitting on the Hinges for the Photos ONLY!!!


Hi everyone. A quick update. I've decided to install the Hulls Rudder Hinges prior to painting the Lower Hull White. The Rudder Hinges & the Rudder itself ended up being a lot more work then anticipated!!!!! The First thing needed done was to Resize the Rudder itself. In the 1st photo, you will see the Blue Markings. This is the areas that the Rudder that was trimmed down to match the Plans from the Royal Museum in Greenwich & AOS. This step is actually pretty important since I am painting the Below the Water Line (BWL) White and Line would not be correct on the Rudder Location if I did not (See Photos). The other issue that the Kit Maker got wrong was some of the Rudder Hinges are not Long enough!!! I decided to make 2 of the needed Longer ones out of wood since they will be painted white. I painted the Wood Hinges Wrought Iron so I can get the desired effect of Color after Painting over them the White Color. I will add more Photos of the Hinges soon because I am not done yet. The Rudder is Just Sitting on the Hinges for the Photos ONLY!!!
Hi Maarten. I wish I was farther along but so many little things to do on this kit as you know. I couldn't catch you in a million years, I have not even started on cleaning up the carvings yet, LOL. Your RC is Looking awesome my man!!!!!!Hi Rick, you are doing great. This build is a lot of fun and looking at the speed of your build you will overtake me on mine
- Joined
- Apr 20, 2020
- Messages
- 6,424
- Points
- 738
great work, it's looks beautifulWIP--
Hi everyone. A quick update. I've decided to install the Hulls Rudder Hinges prior to painting the Lower Hull White. The Rudder Hinges & the Rudder itself ended up being a lot more work then anticipated!!!!! The First thing needed done was to Resize the Rudder itself. In the 1st photo, you will see the Blue Markings. This is the areas that the Rudder that was trimmed down to match the Plans from the Royal Museum in Greenwich & AOS. This step is actually pretty important since I am painting the Below the Water Line (BWL) White and Line would not be correct on the Rudder Location if I did not (See Photos). The other issue that the Kit Maker got wrong was some of the Rudder Hinges are not Long enough!!! I decided to make 2 of the needed Longer ones out of wood since they will be painted white. I painted the Wood Hinges Wrought Iron so I can get the desired effect of Color after Painting over them the White Color. I will add more Photos of the Hinges soon because I am not done yet. The Rudder is Just Sitting on the Hinges for the Photos ONLY!!!
