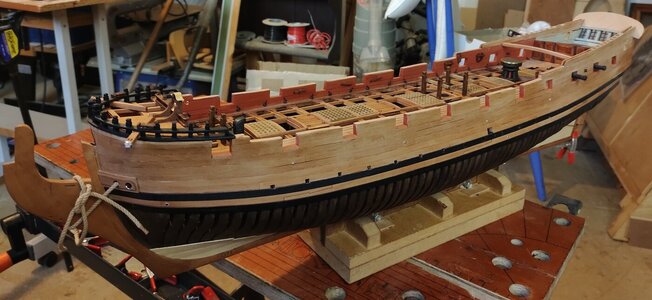
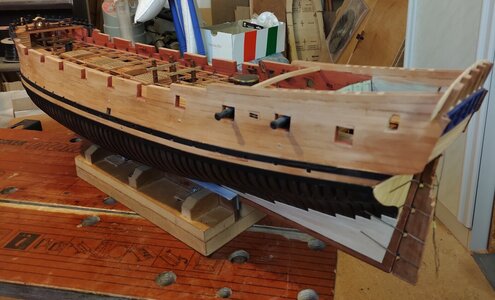
1/48 scale 20 gun ship from Modelship Dockyard kit [COMPLETED BUILD]

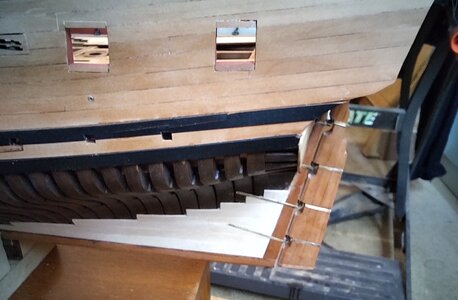
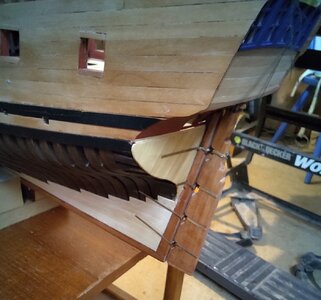
Since I last put virtual pen to paper I have started working on the stern of Scarborough, adding a small bench below the transom lights in the captain's cabin. I also built up the rudder and fixed it to stern post. I used the gudgeon and pintle braces from the kit, I found these, like most of the photo-etched sheet, to be a little flimsy an ,at least to my eye, slightly out of scale. Regardless they look nice enough.
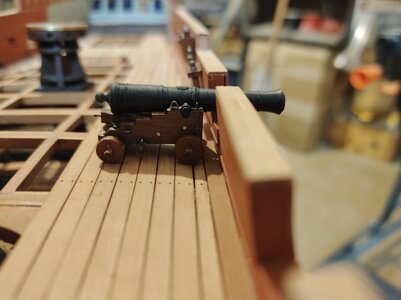
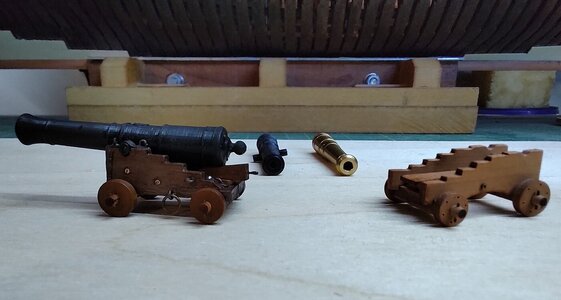
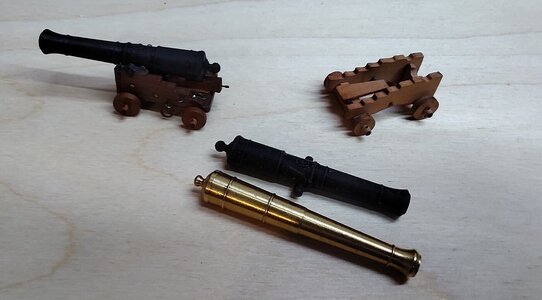
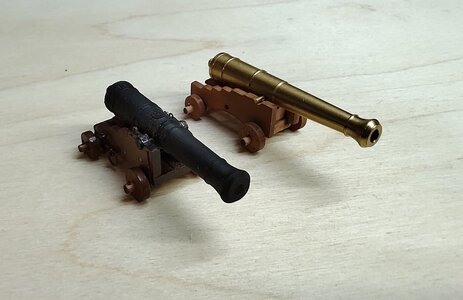
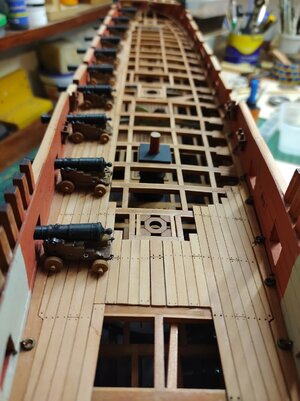
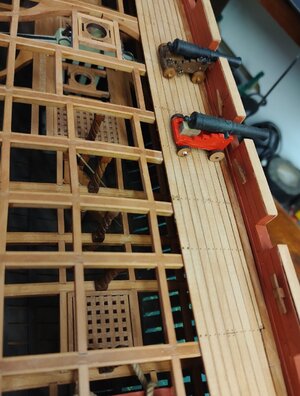
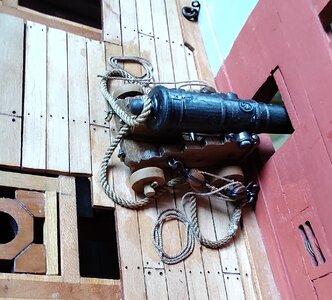
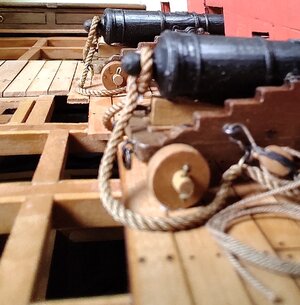
Perhaps I am too fussy but I really did not like the gun barrels that came with the kit, like wise the gun carriages, although top notch, well designed and produced, are simply of a different era and I could not make myself fit them. First the barrels are way too long at a scale length of over eight and a half feet,( 1719 Establishment calls for seven and a half feet with a bore of three and a half inches, scale eqv. of 1.85mm). Amusingly the bore of the brass guns in the kit scales up to 5.85 inches, a 32 pound gun circa 1720 had a bore of just over 6 inches. I guess these barrels are just generic, but to me they just don't look right. So having made a rod for my own back I set out to find a suitable barrel and make a convincing carriage.
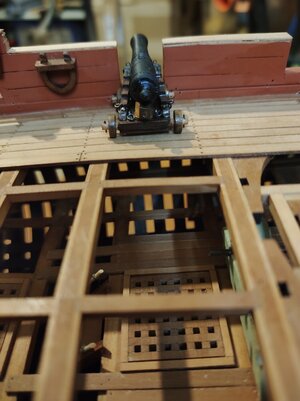
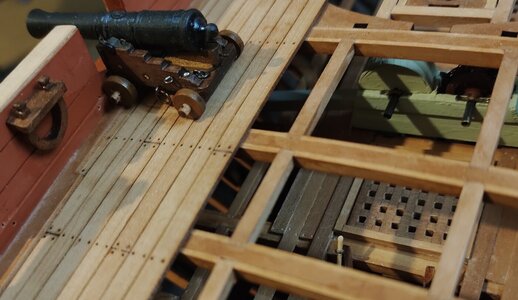
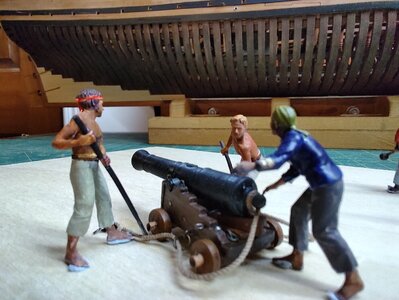
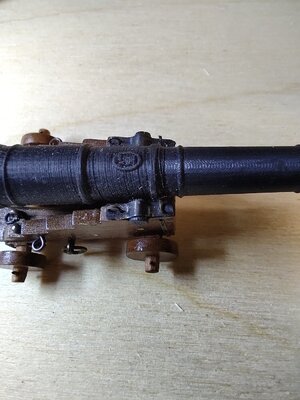
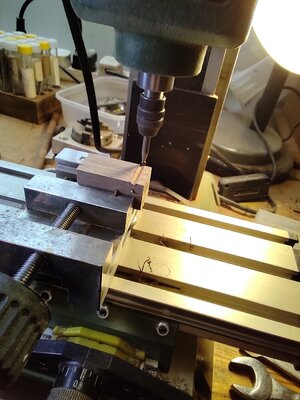
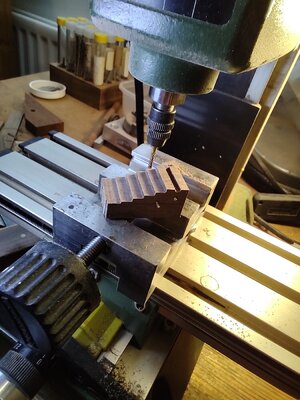
The barrels I had 3D printed from Vanguard Models, and the carriage, although probably not a pretty as the ones in the kit I made (at the fourth attempt) using what information I could gather. Interestingly although the carriage drawn in the AoS Blandford book by Goodwin is very like the carriage supplied in the text Goodwin describes a carriage with a bed, so there has been a mix-up there somewhere. Like I said maybe I am just too fussy.

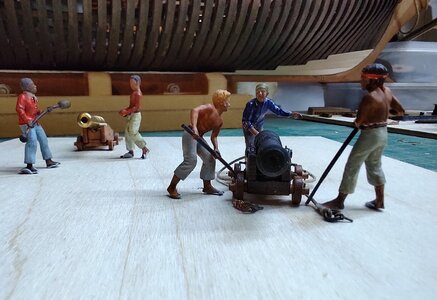
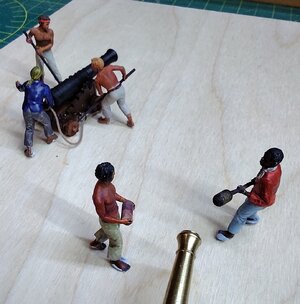
Here are some photos including the JJ Board of Ordnance Mk. 4 prototype bed and trucks carriage and gun. (not to mention a few odd looking boyos to serve her).
IMG_20230424_222335.jpgIMG_20230424_222346.jpgIMG_20230424_222509.jpgIMG_20230424_222718.jpgIMG_20230424_222836.jpgIMG_20230424_222913.jpgIMG_20230424_222925.jpgIMG_20230424_235255.jpgIMG_20230424_235354.jpgIMG_20230424_235509.jpgIMG_20230425_001204.jpgIMG_20230425_083012.jpgIMG_20230425_083108.jpgIMG_20230425_083550.jpg Cheers JJ..
ps that brass barrel would make a nice table cigarette lighter.
 
Since I last put virtual pen to paper I have started working on the stern of Scarborough, adding a small bench below the transom lights in the captain's cabin. I also built up the rudder and fixed it to stern post. I used the gudgeon and pintle braces from the kit, I found these, like most of the photo-etched sheet, to be a little flimsy an ,at least to my eye, slightly out of scale. Regardless they look nice enough.
Perhaps I am too fussy but I really did not like the gun barrels that came with the kit, like wise the gun carriages, although top notch, well designed and produced, are simply of a different era and I could not make myself fit them. First the barrels are way too long at a scale length of over eight and a half feet,( 1719 Establishment calls for seven and a half feet with a bore of three and a half inches, scale eqv. of 1.85mm). Amusingly the bore of the brass guns in the kit scales up to 5.85 inches, a 32 pound gun circa 1720 had a bore of just over 6 inches. I guess these barrels are just generic, but to me they just don't look right. So having made a rod for my own back I set out to find a suitable barrel and make a convincing carriage.
The barrels I had 3D printed from Vanguard Models, and the carriage, although probably not a pretty as the ones in the kit I made (at the fourth attempt) using what information I could gather. Interestingly although the carriage drawn in the AoS Blandford book by Goodwin is very like the carriage supplied in the text Goodwin describes a carriage with a bed, so there has been a mix-up there somewhere. Like I said maybe I am just too fussy.

Here are some photos including the JJ Board of Ordnance Mk. 4 prototype bed and trucks carriage and gun. (not to mention a few odd looking boyos to serve her).

View attachment 370994View attachment 370995View attachment 370996View attachment 370997View attachment 370998View attachment 370999View attachment 371000View attachment 371001View attachment 371002View attachment 371003View attachment 371004View attachment 371005View attachment 371006View attachment 371007 Cheers JJ..
ps that brass barrel would make a nice table cigarette lighter.
Good morning Jack. It is this feature of amazing detail in your work which inspired me to “go for it “ with detail on my Cazador. Clearly i don’t get it spot on like you do but thanks for the inspiration. Wonderful work as always.
Cheers Grant
 
Good morning Jack. It is this feature of amazing detail in your work which inspired me to “go for it “ with detail on my Cazador. Clearly i don’t get it spot on like you do but thanks for the inspiration. Wonderful work as always.
Cheers Grant
Nice of you to say Grant, but I think I am better in theory than in practice and practice is what I need plenty of. Nice to hear from you all the best JJ..
 
Hello friends,
First of all I have to say the great work produced by you all and shown on this site is truly inspiring.
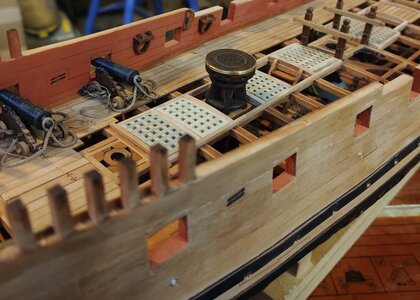
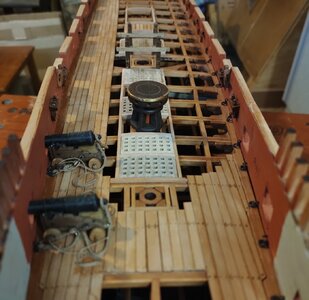
Well since it has been a while I thought it was time to let loose my two fingers on the keyboard and show what I have been up to. Firstly having settled on the mk.4 gun carriage I went into 'mini' mass production in an attempt to produce ten, as identical as I could make them, bed and truck carriages circa 1720. The only difference I made to the fourth prototype was to move the two rear ring bolts at the rear of the bed from the top to the rear side as it looked like they would foul the breaching rope were they where. I had thought to paint the carriages scarlet but after experimenting with an earlier failure I decided to stick with the natural walnut finish.
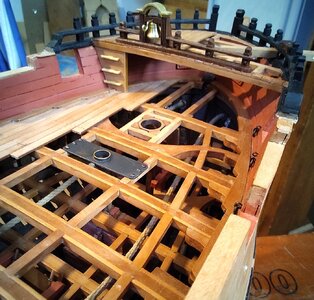
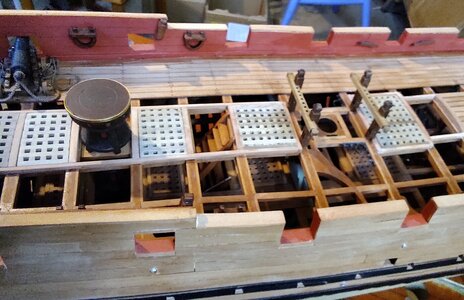
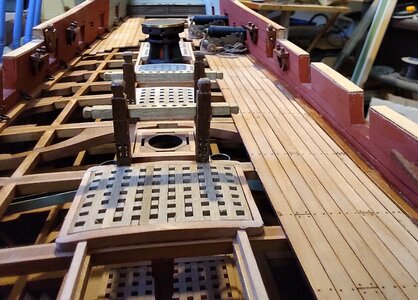
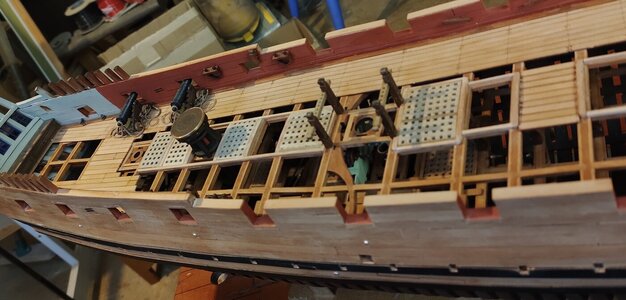
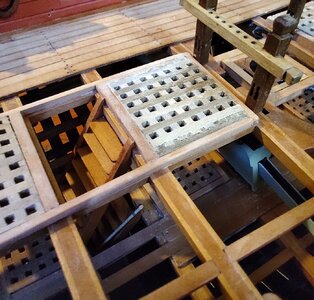
Having completed the guns I thought it wise to install the two rear most before I started constructing the quarter deck. That also went for the rear most gratings so I have decided to construct all the upper deck gratings and their surrounding coamings before going on to the q.d. The quarter deck will be my first major deviation from the Blandford plans, but that's for the future.
Here are some photos of my progress.


IMG_20230520_062125.jpg


IMG_20230425_185425.jpgIMG_20230425_192515.jpgIMG_20230505_154420.jpgIMG_20230505_205156.jpgIMG_20230505_074936.jpgIMG_20230501_112228.jpgIMG_20230513_113318.jpgIMG_20230514_120354.jpgIMG_20230520_061034.jpgIMG_20230520_061147.jpgIMG_20230520_061240.jpgIMG_20230520_061308.jpgIMG_20230520_061340.jpgIMG_20230520_061406.jpgIMG_20230520_061457.jpgIMG_20230520_061648.jpg

Cheers JJ..
 
Hello friends,
First of all I have to say the great work produced by you all and shown on this site is truly inspiring.
Well since it has been a while I thought it was time to let loose my two fingers on the keyboard and show what I have been up to. Firstly having settled on the mk.4 gun carriage I went into 'mini' mass production in an attempt to produce ten, as identical as I could make them, bed and truck carriages circa 1720. The only difference I made to the fourth prototype was to move the two rear ring bolts at the rear of the bed from the top to the rear side as it looked like they would foul the breaching rope were they where. I had thought to paint the carriages scarlet but after experimenting with an earlier failure I decided to stick with the natural walnut finish.
Having completed the guns I thought it wise to install the two rear most before I started constructing the quarter deck. That also went for the rear most gratings so I have decided to construct all the upper deck gratings and their surrounding coamings before going on to the q.d. The quarter deck will be my first major deviation from the Blandford plans, but that's for the future.
Here are some photos of my progress.


View attachment 375245View attachment 375246View attachment 375247View attachment 375248View attachment 375249View attachment 375250View attachment 375251View attachment 375252View attachment 375253View attachment 375254View attachment 375256View attachment 375257View attachment 375258View attachment 375259View attachment 375260View attachment 375262

Cheers JJ..
In regard to your carriages, which look great by the way, be careful with natural walnut as it will lighten considerably with age. However, you probably already are aware of this. :)
 
Hi Jack - long time no chat. I was so chuffed when I saw your latest progress report. I really enjoy watching your artistry as it adds just so much to the overall build. The gun carriages - like everyone has said - are superb!
 
Hi Jack - long time no chat. I was so chuffed when I saw your latest progress report. I really enjoy watching your artistry as it adds just so much to the overall build. The gun carriages - like everyone has said - are superb!
Hi Heinrich,
Hope you are keeping well, thank you for your kind comments. I am really quite pleased with the way the gun carriages turned out as information about truck and bed carriages of that era is hard to come by,(not many wooden carriages have survived from early shipwrecks having either rotted or been eaten away). However I found a surprising gem of a source in the form of a Masters Thesis by a lady called Katrina Bunyard ; THE DEVELOPMENT OF THE NAVAL TRUCK GUN CARRIAGE: HISTORY, ARCHAEOLOGY, AND DESIGN. It is really very informative and Ms. Bunyard done a great job, well worth a read. https://thescholarship.ecu.edu/bits...MASTERSTHESIS-2019.pdf?sequence=1&isAllowed=y
Nice to hear from you and I am glad you are still keeping an eye on my work. I hope to post more soon. Regards JJ..
 
In regard to your carriages, which look great by the way, be careful with natural walnut as it will lighten considerably with age. However, you probably already are aware of this. :)
Hi Jeff.
Thank you for the word on walnut, if I ever knew about it going lighter I had forgotten, (thought it, like oak, just got darker with sun light), mind you since I live in Northern Ireland where we get rain eight days a week all year round I doubt I have to worry too much. Thank you for taking an interest, every comment I get keeps me going. Cheers JJ..
 
Good morning,
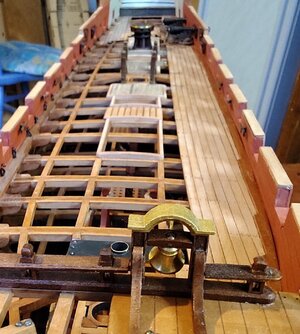
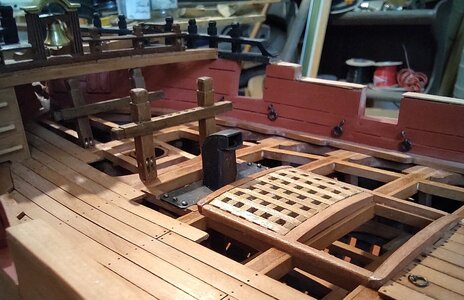
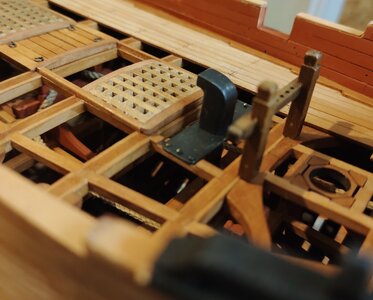
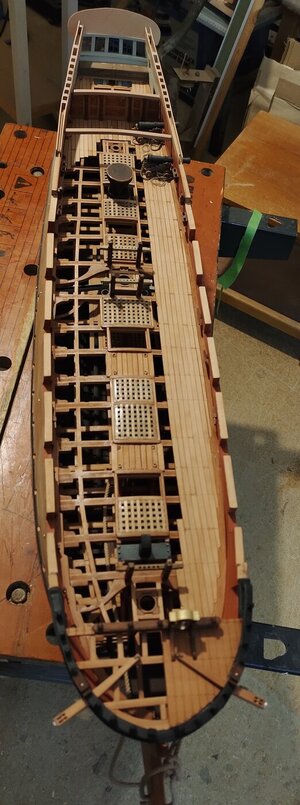
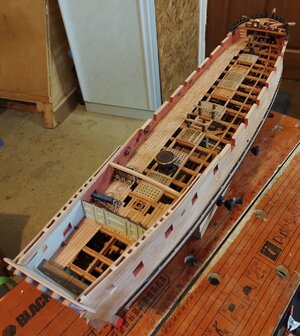
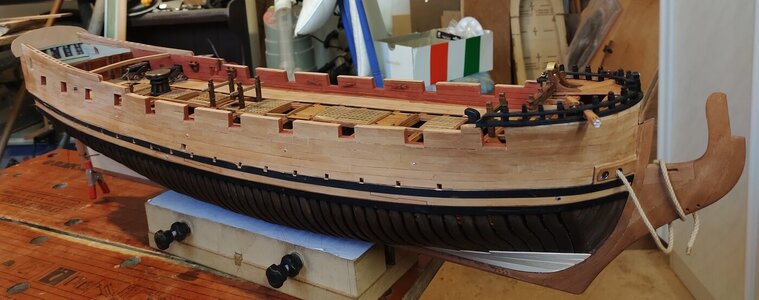
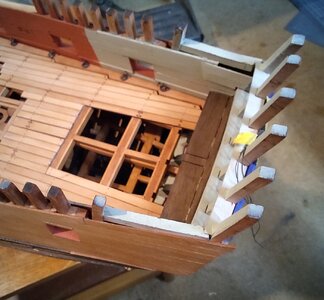
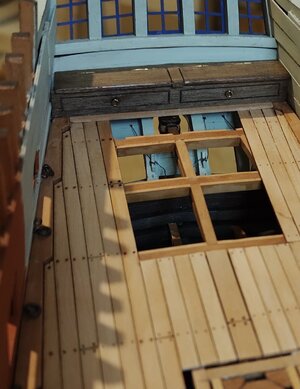
I had some time last night so I finished of the centre line of the main deck. I have now made and added all the walnut gratings, although not entirely happy now that I see them close up I will leave them for now. This now lets me get on with the quarter deck. As I have said this is the first major change from the Blandford kit. Scarborough was launched in 1722 and under Anson was stationed at Carolina until 1728 when she was brought back for a repair and refit at Plymouth, costing an astounding £2853.17.09d. (she only cost £3581 to build six years previously. And while I can find no definite proof that her quarter deck was extended at this refit I think the cost suggests it might have been possible, (by then the later build 20 gun ships where being built with the quarter deck stretched beyond the mizzen mast and the wheel behind the mast up on the Q.D.). After the refit Scarborough was recommissioned and under Capt. Barnsley was sent to the Leeward Islands, which is interesting to know as it suggests her hull would have been coated with 'white stuff' rather than the cheaper 'dark stuff' that would have been used in colder waters.
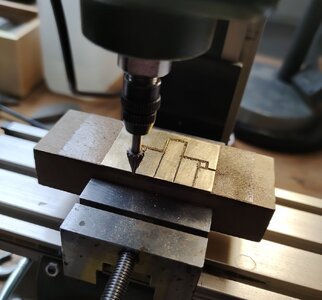
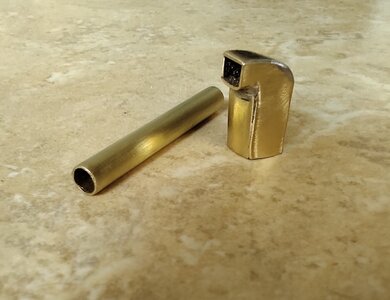
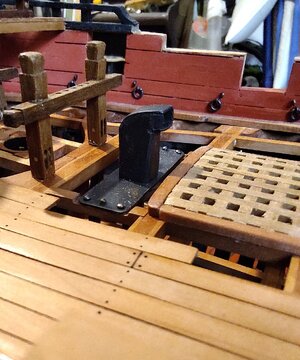
While finishing the centre line I decided to change the galley flue to a different design and ever the cheapskate I had a go at making the new one out of a piece of scrap brass, hummm. maybe I should buy one. Well just like the dockyard at Plymouth I will spare no cost on the quarter deck.
Here are some photos.

IMG_20230524_114407.jpgIMG_20230524_152651.jpgIMG_20230524_230113.jpgIMG_20230524_230134.jpgIMG_20230524_230713.jpgIMG_20230524_232614.jpgIMG_20230525_052236.jpgIMG_20230525_052445.jpgIMG_20230525_052510.jpgIMG_20230525_052545.jpg Cheers JJ..
 
Very good work and progress - and I like the galley flue you made
Please check the direction of the opening of the galley flue.
Usually it is in the direction foreward so 180° turned - the smoke has to go with the wind, when the ship is sailing and the wind is blowing from aft to fore
 
Very good work and progress - and I like the galley flue you made
Please check the direction of the opening of the galley flue.
Usually it is in the direction foreward so 180° turned - the smoke has to go with the wind, when the ship is sailing and the wind is blowing from aft to fore
Thank you for your kind words Uwek and for putting me right about the direction of the flue opening. Of course it could be argued, that with the fore course set, the down draft from the sail would be blowing towards the stern. That is why, I believe, these cowlings where movable, (I have seen drawings of some with handles on their sides). Cheers JJ..
 
Hi Jack,

If I could make a flue that nice I certainly would not purchase one from the secondary market. First class and very 'handcrafted.'
Hi Paul

It was not with false modesty what I said about the flue, when I soldered it up I really was disappointed with my effort. However now that I look at it, blackened and in place, I think it will do. I, up until now, was not really enjoying this build and admit I had a lot of issues with the so-called instructions but now I am free-wheeling with my own ideas I feel a lot better, and just maybe I can make something respectful by the end.

All the best and thank you for your interest. JJ..
 
Good morning,
I had some time last night so I finished of the centre line of the main deck. I have now made and added all the walnut gratings, although not entirely happy now that I see them close up I will leave them for now. This now lets me get on with the quarter deck. As I have said this is the first major change from the Blandford kit. Scarborough was launched in 1722 and under Anson was stationed at Carolina until 1728 when she was brought back for a repair and refit at Plymouth, costing an astounding £2853.17.09d. (she only cost £3581 to build six years previously. And while I can find no definite proof that her quarter deck was extended at this refit I think the cost suggests it might have been possible, (by then the later build 20 gun ships where being built with the quarter deck stretched beyond the mizzen mast and the wheel behind the mast up on the Q.D.). After the refit Scarborough was recommissioned and under Capt. Barnsley was sent to the Leeward Islands, which is interesting to know as it suggests her hull would have been coated with 'white stuff' rather than the cheaper 'dark stuff' that would have been used in colder waters.
While finishing the centre line I decided to change the galley flue to a different design and ever the cheapskate I had a go at making the new one out of a piece of scrap brass, hummm. maybe I should buy one. Well just like the dockyard at Plymouth I will spare no cost on the quarter deck.
Here are some photos.

View attachment 376168View attachment 376169View attachment 376170View attachment 376171View attachment 376172View attachment 376173View attachment 376174View attachment 376175View attachment 376176View attachment 376177 Cheers JJ..
Good morning Jack. I am a fan of your work. Thanks for the history as well. I think the flue is super- Christian Horner may consider it for the inlet on the Redull upgrade….. ROTF. Cheers Grant
 
Good morning Jack. I am a fan of your work. Thanks for the history as well. I think the flue is super- Christian Horner may consider it for the inlet on the Redull upgrade….. ROTF. Cheers Grant
Yea Grant,
now that I look at it ,it does have the look of a big old 'V' eight intake. Perhaps, subconsciously I wast thinking Lotus 72 when I
 
Back
Top