1/60 scale RC model of a schooner, loosely based on a gunboat steamship from the second half of the 19th century.

Ciao a tutti i modellisti navali.

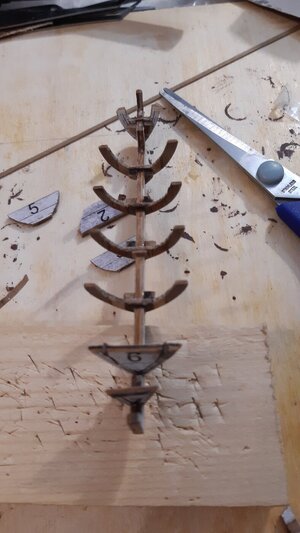
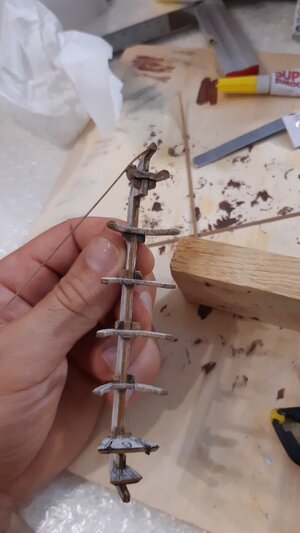
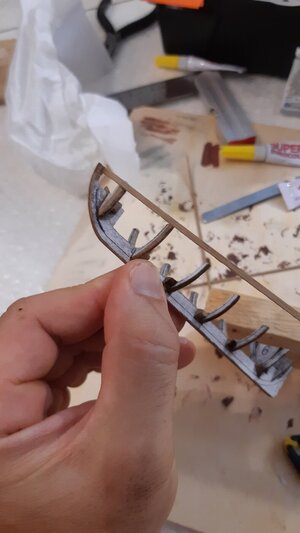
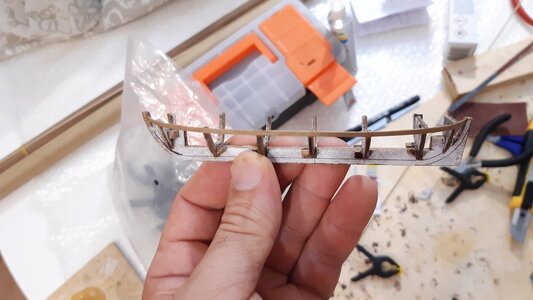
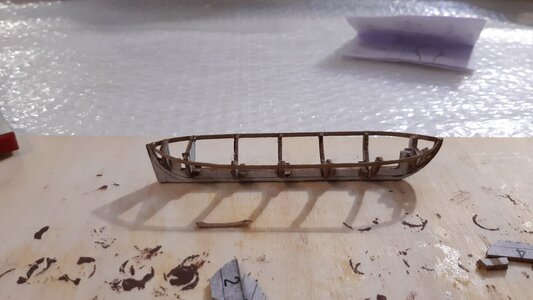
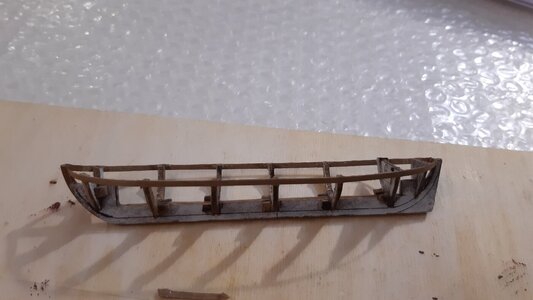
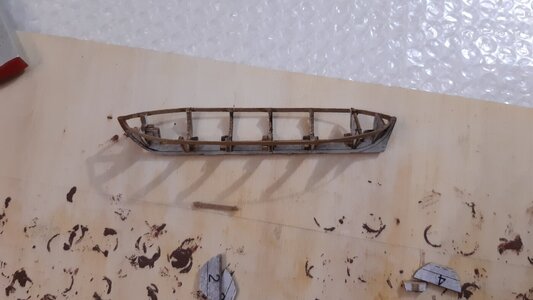
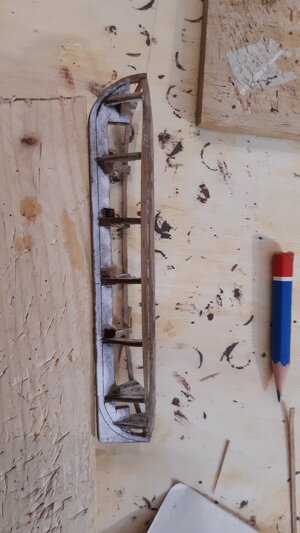
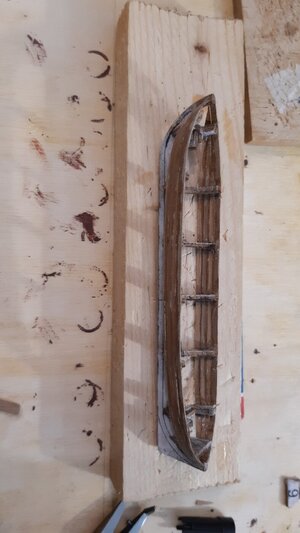
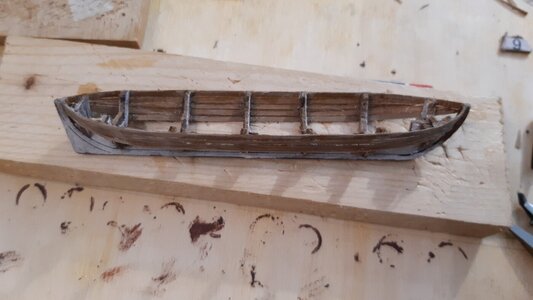
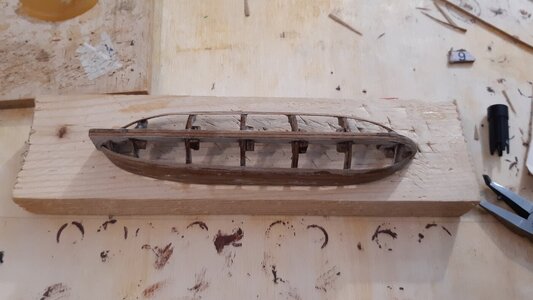
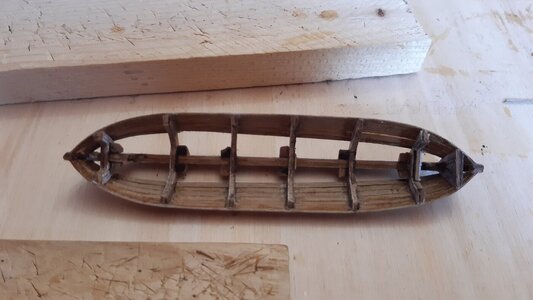
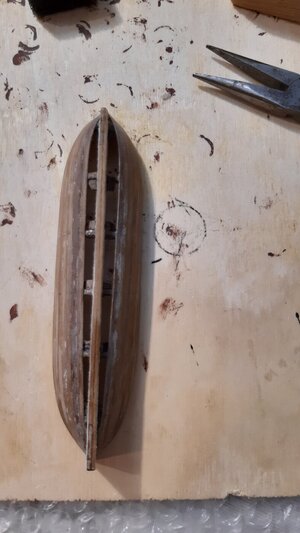
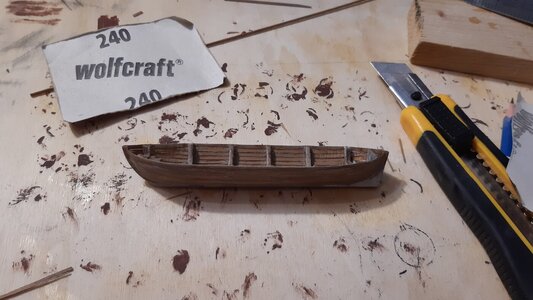
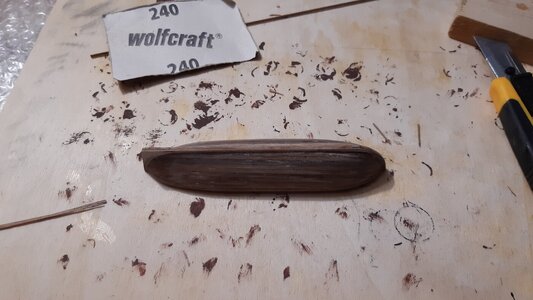
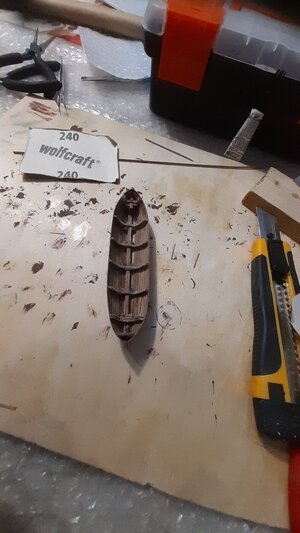
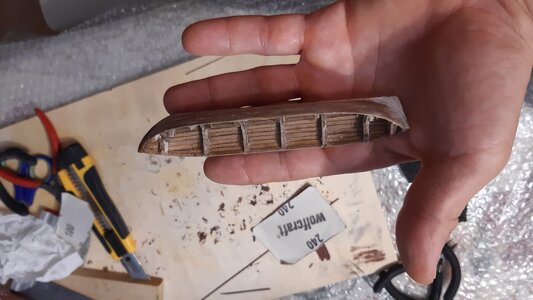
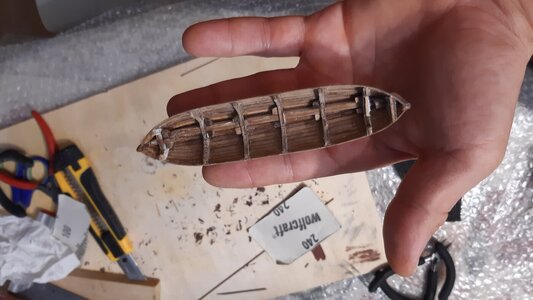
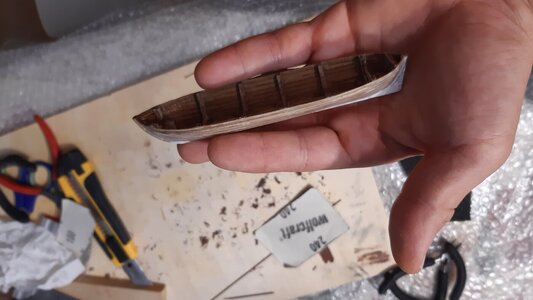
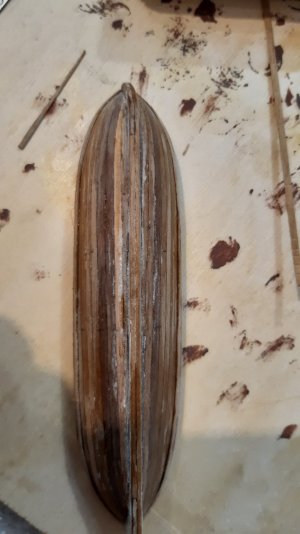
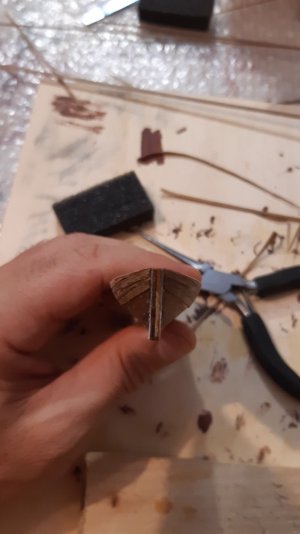
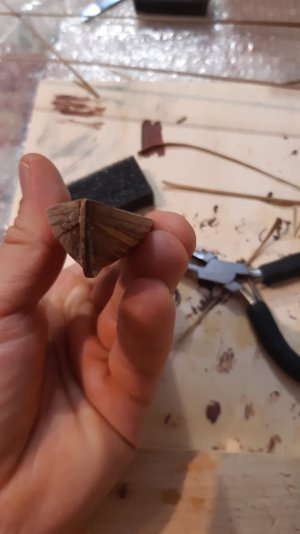
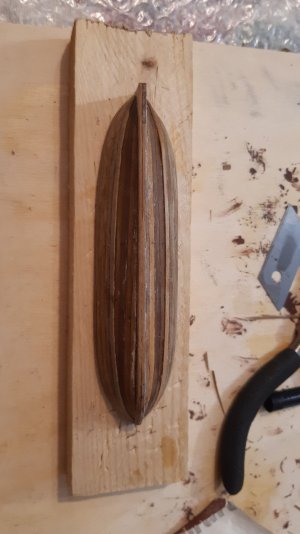
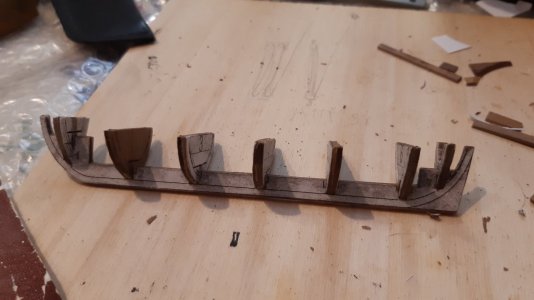
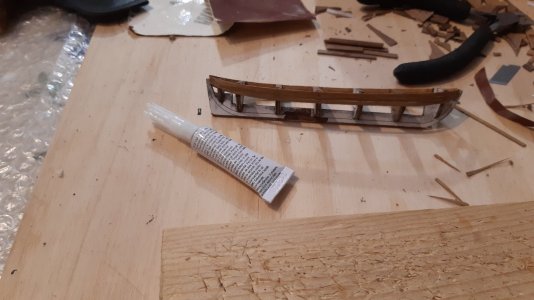
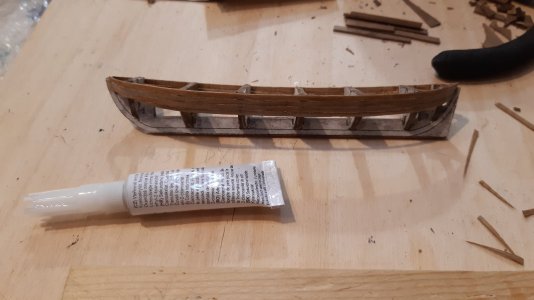
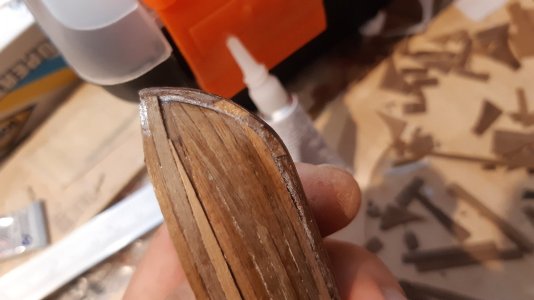
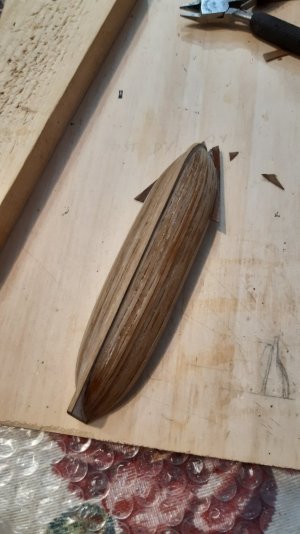
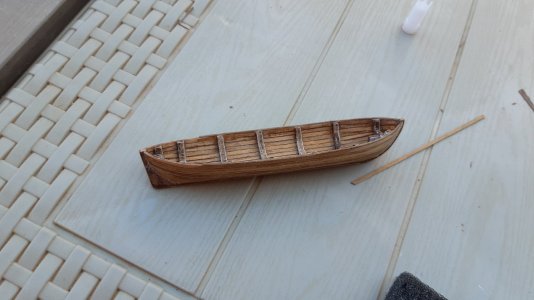
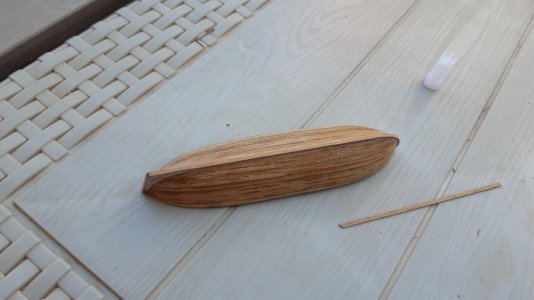
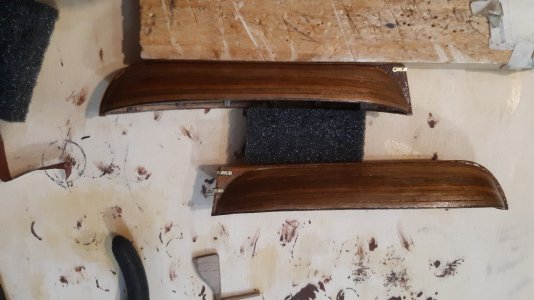
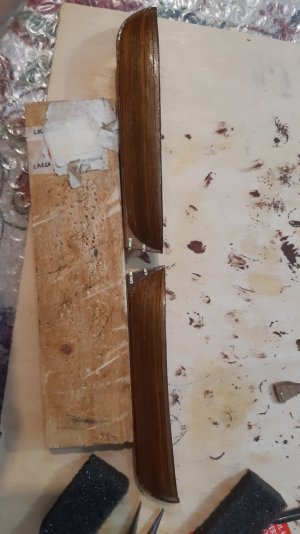
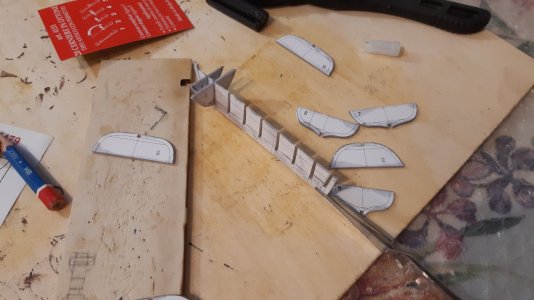
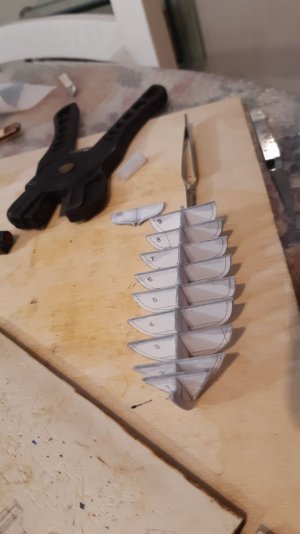
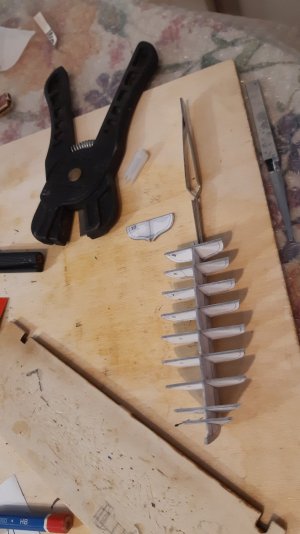
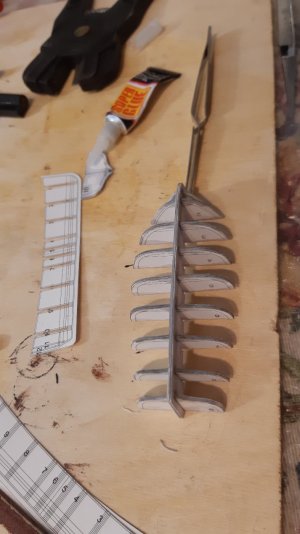
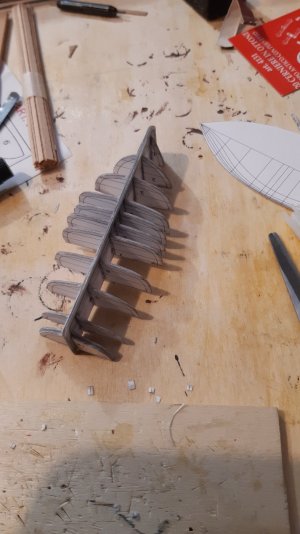
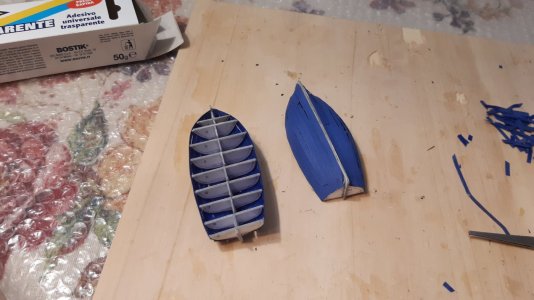
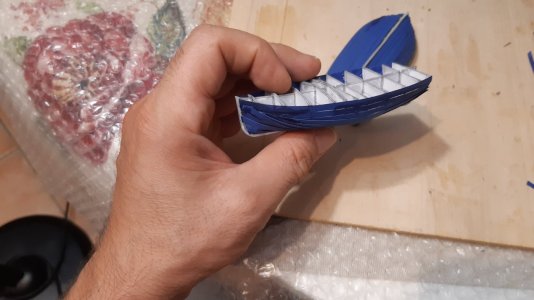
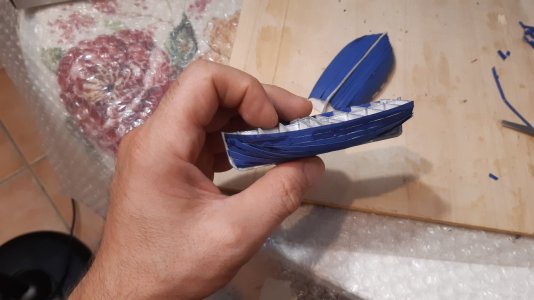
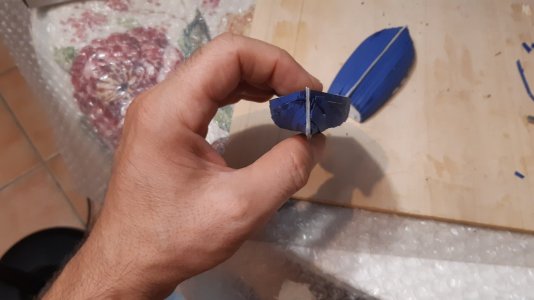
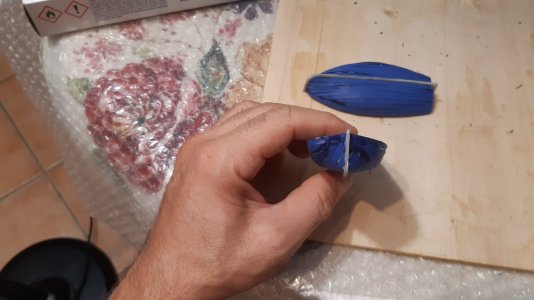
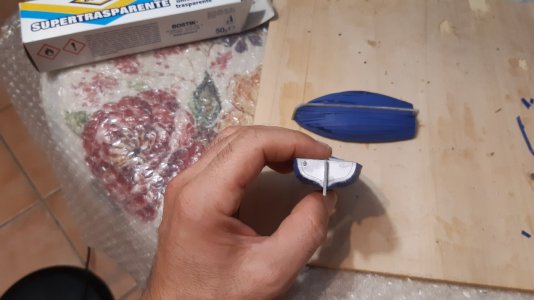
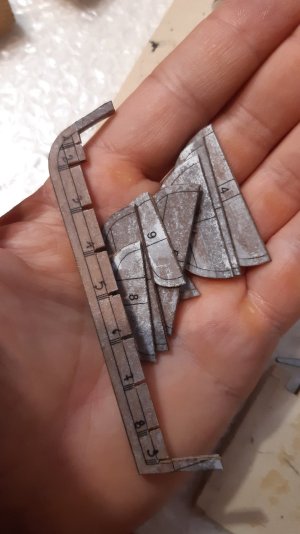
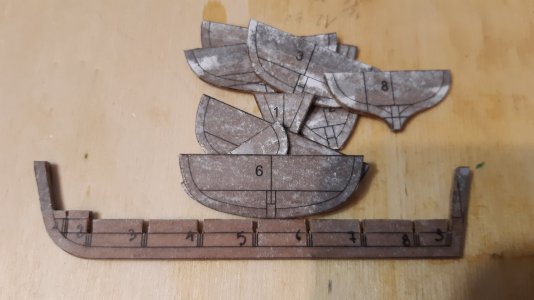
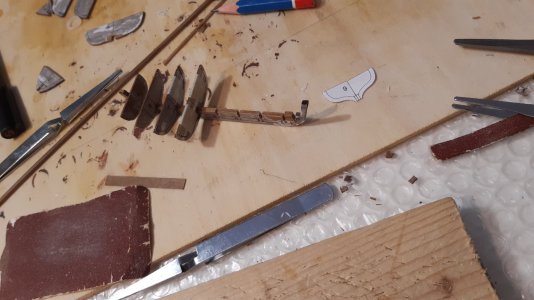
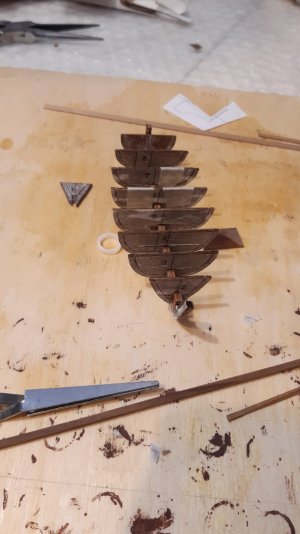
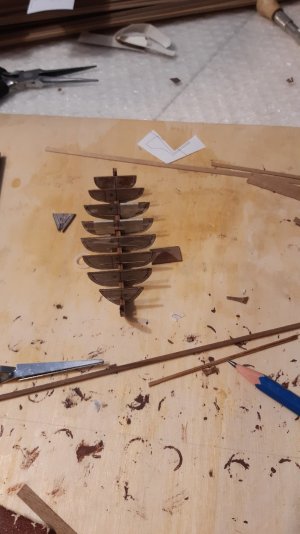
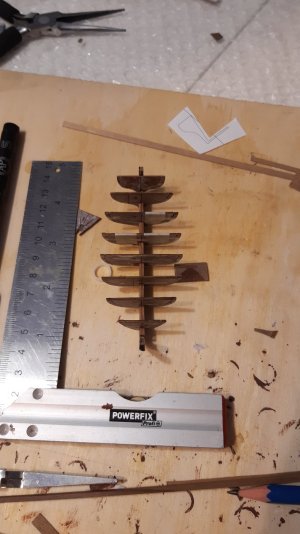
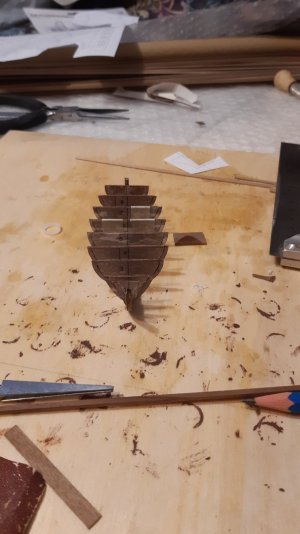
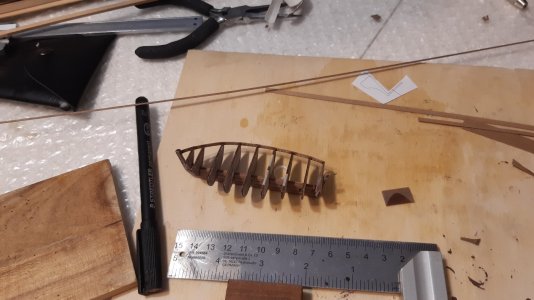
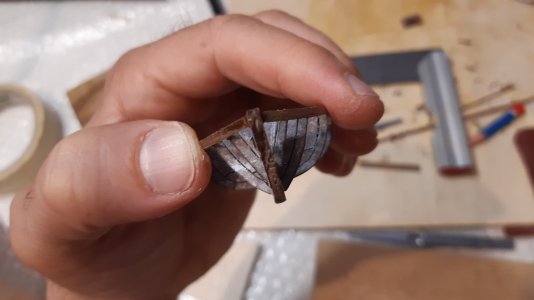
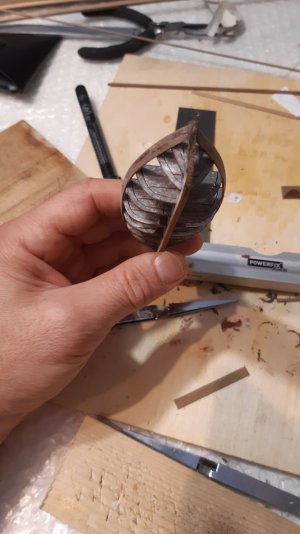
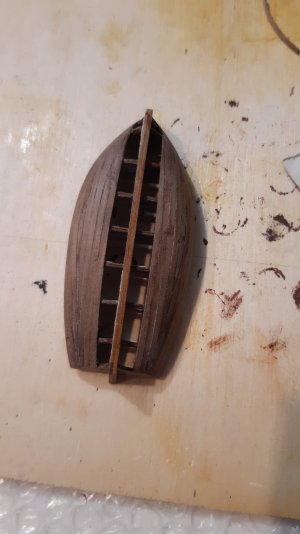
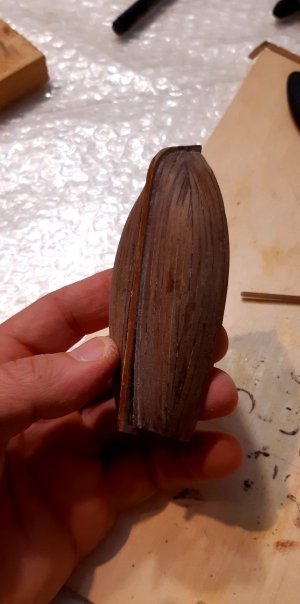
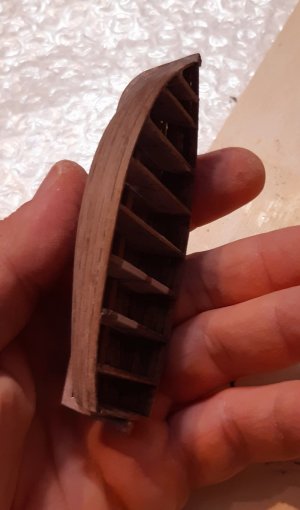
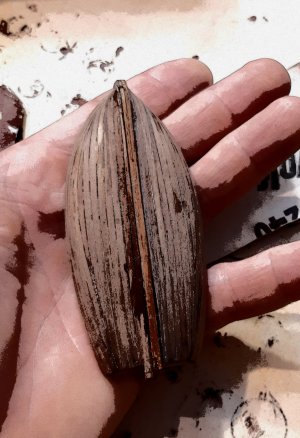
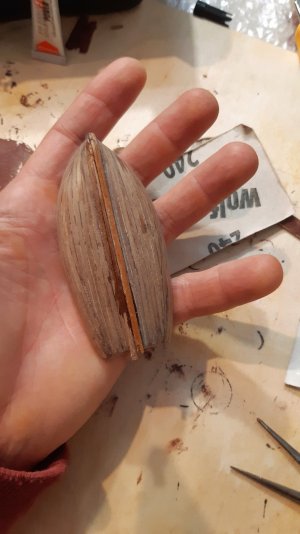
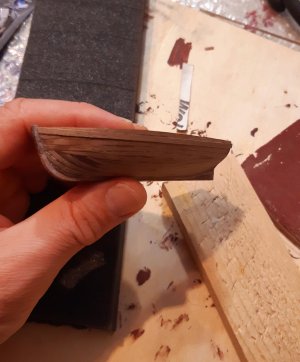
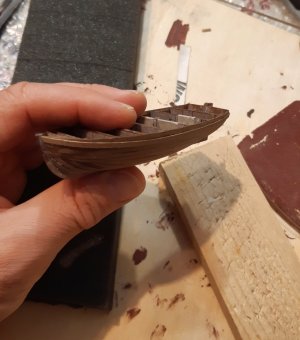
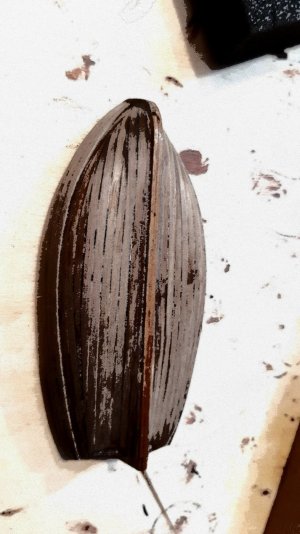
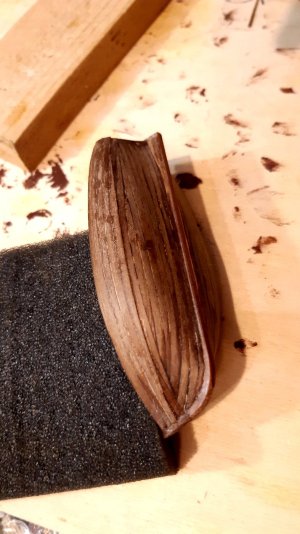
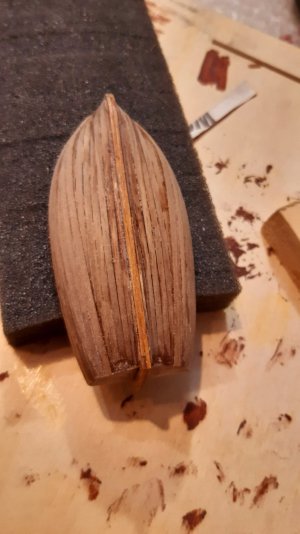
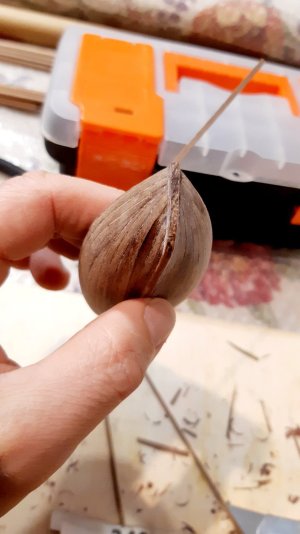
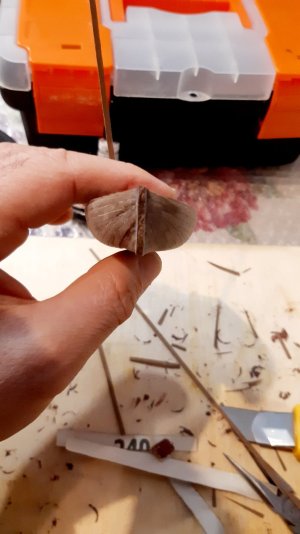
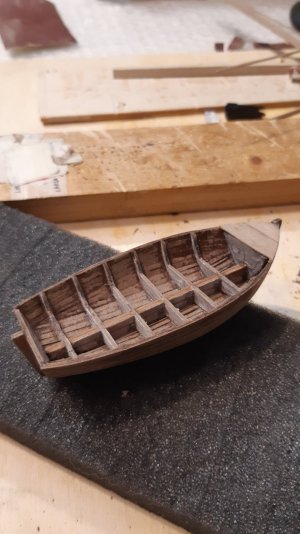
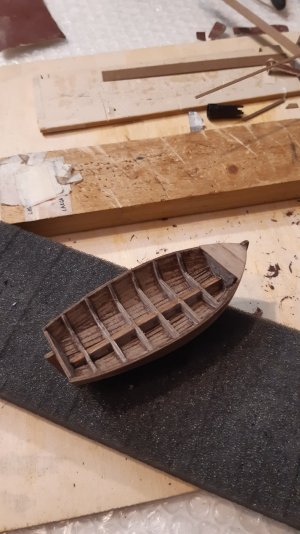
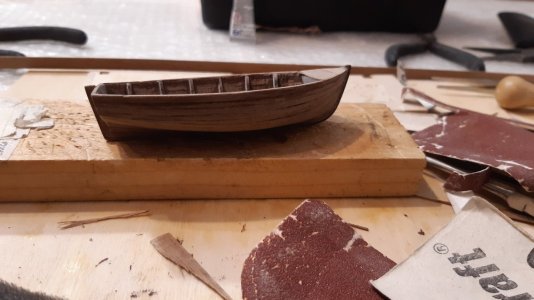
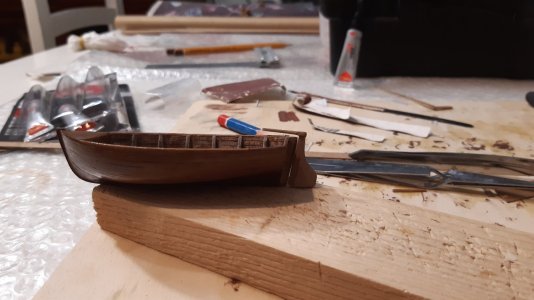
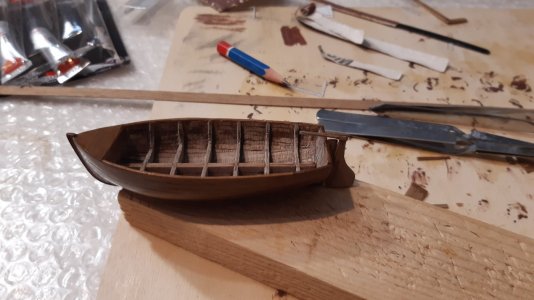
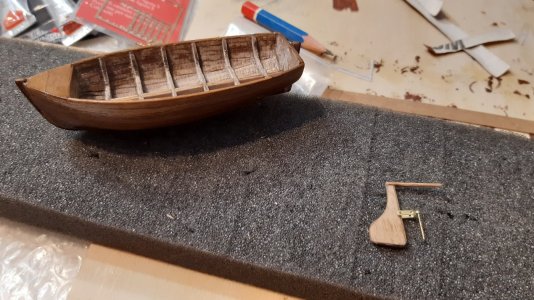
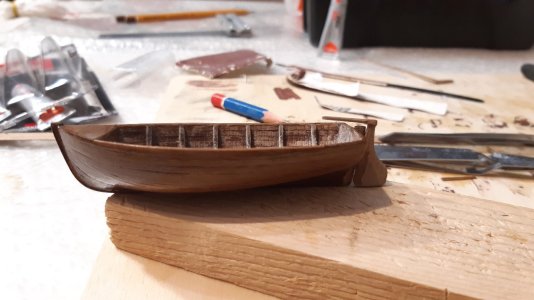
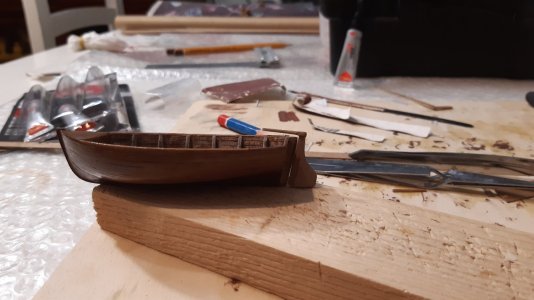
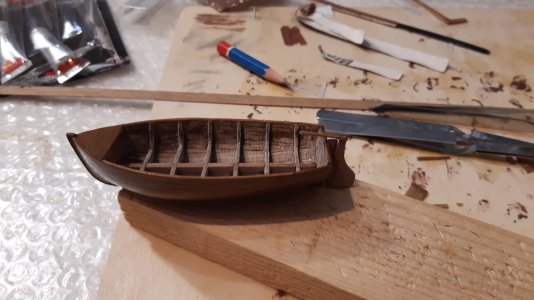
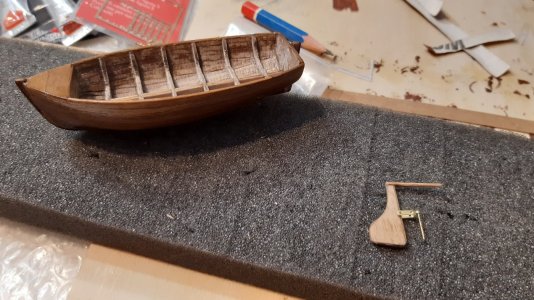
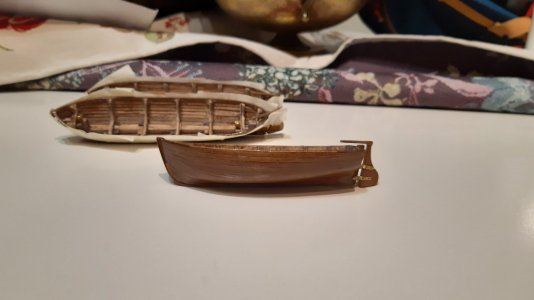
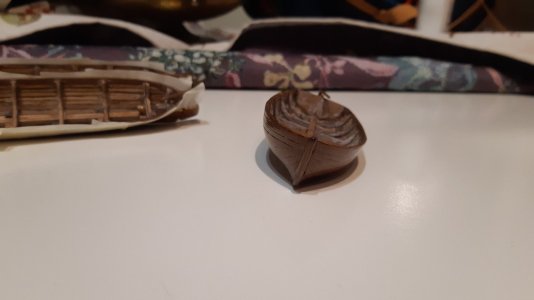
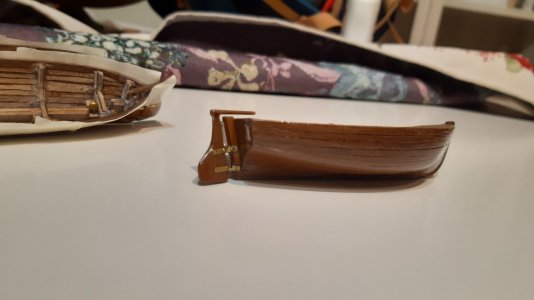
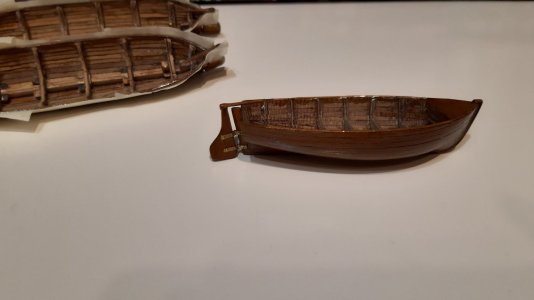
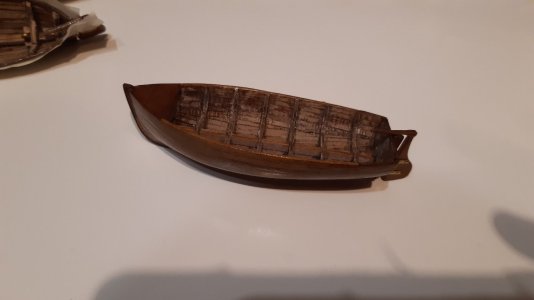
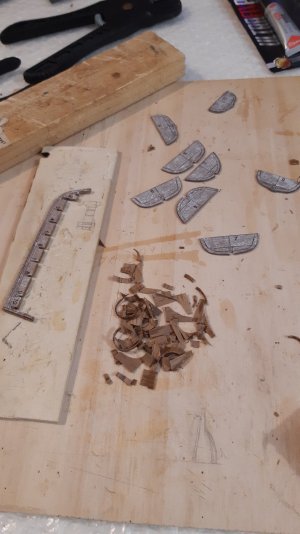
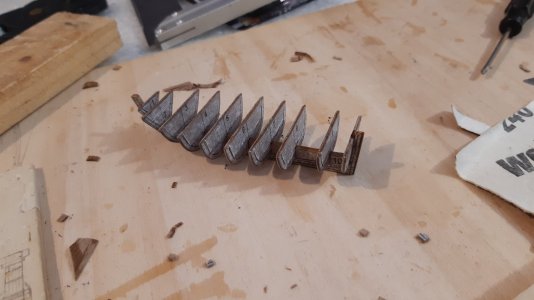
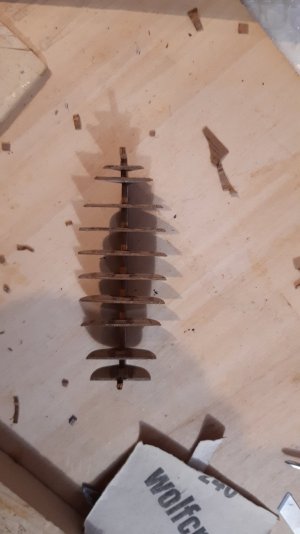
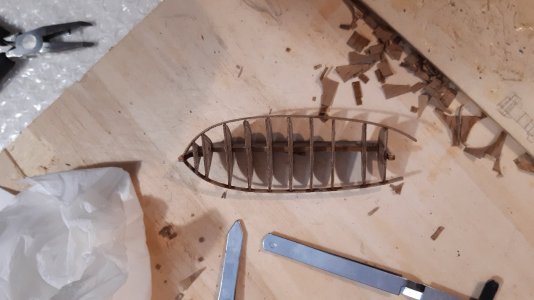
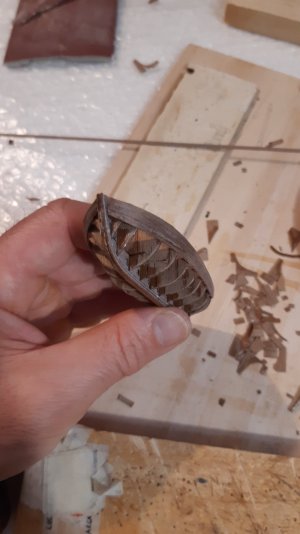
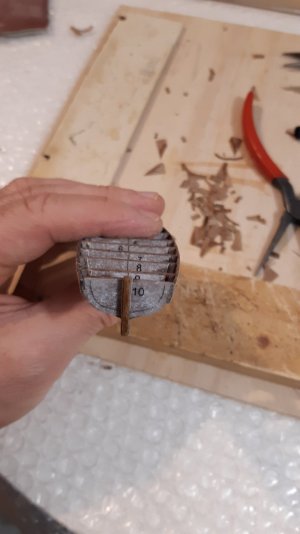
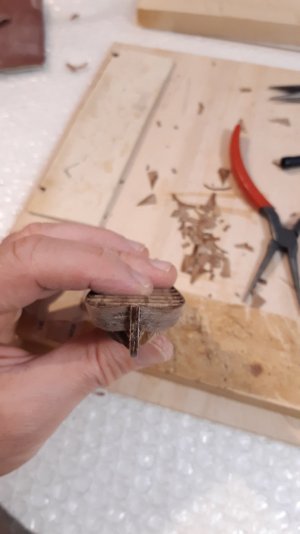
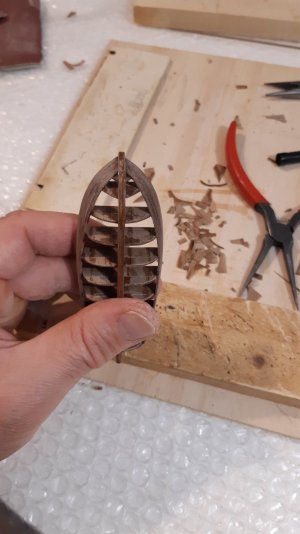
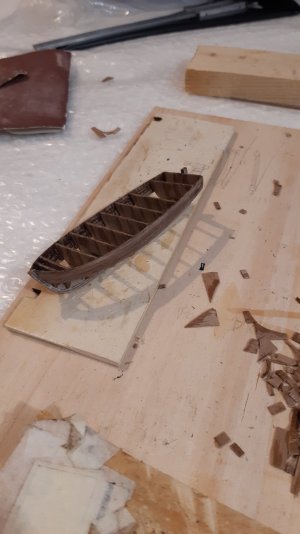
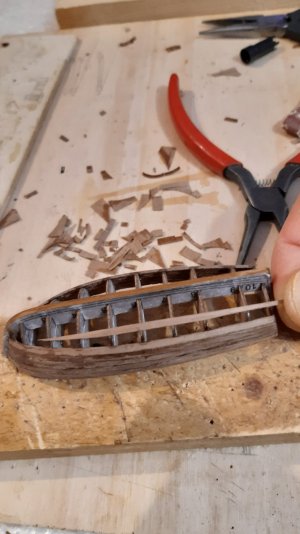
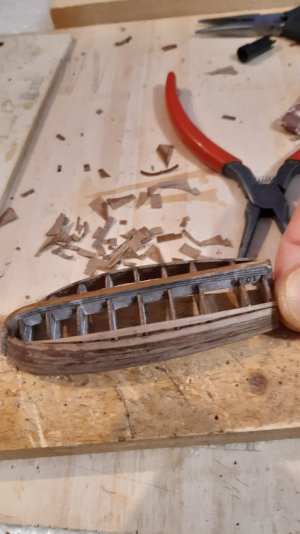
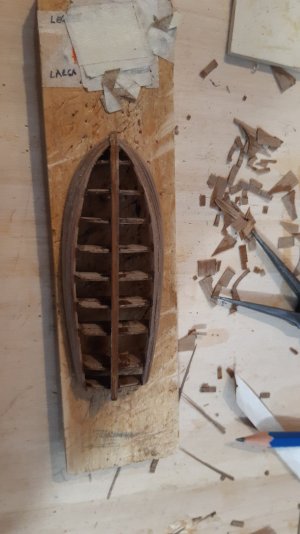
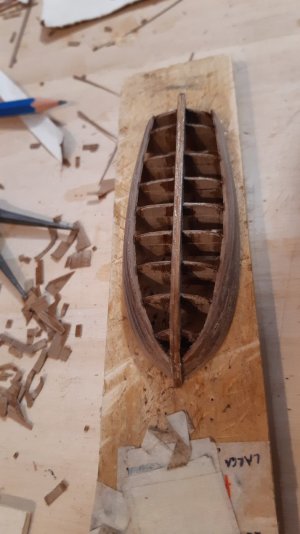
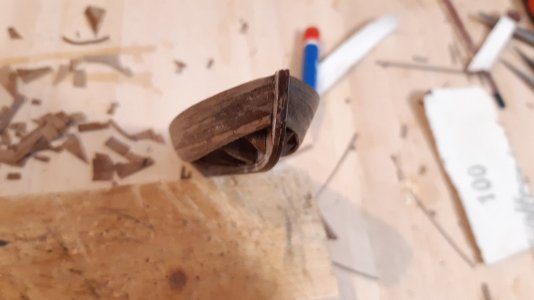
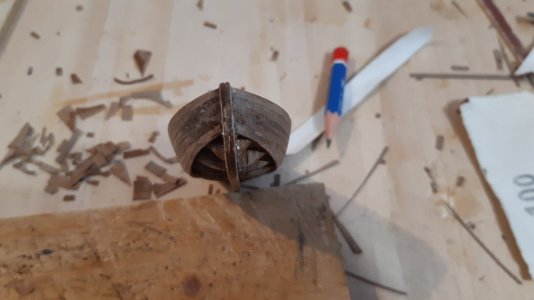
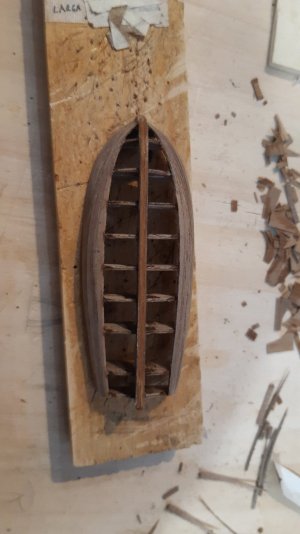
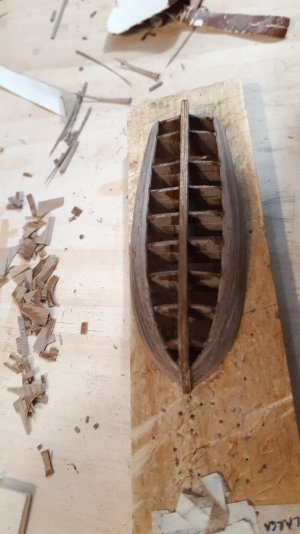
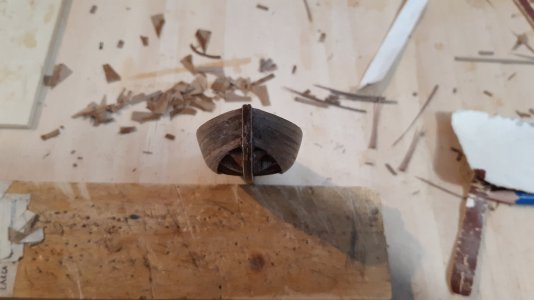
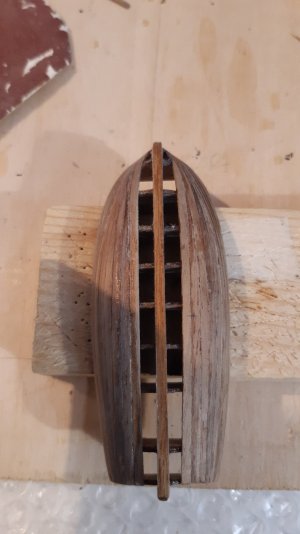
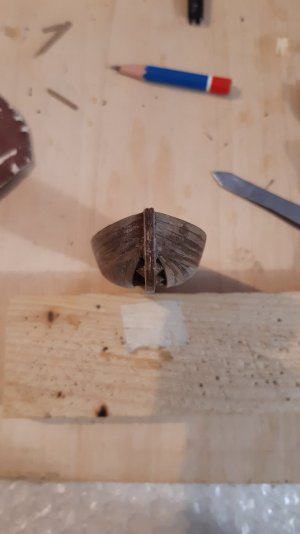
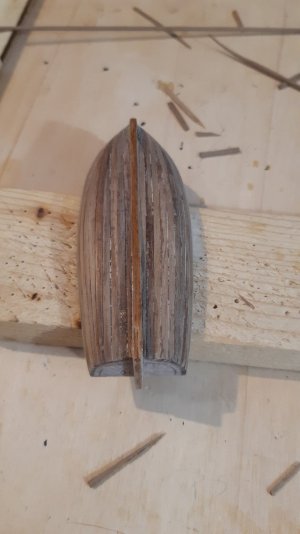
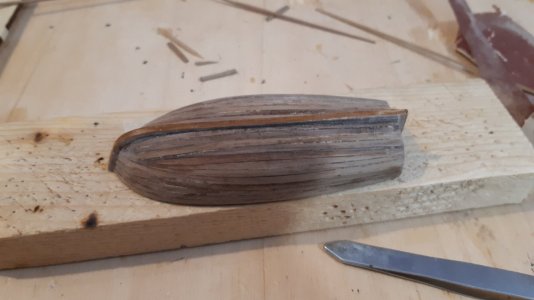
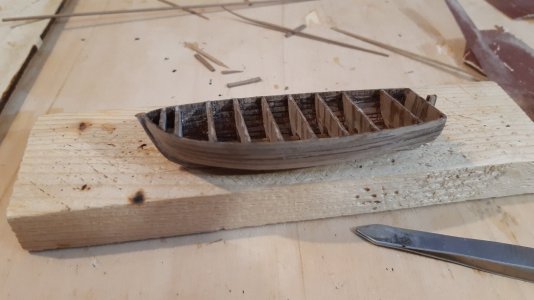
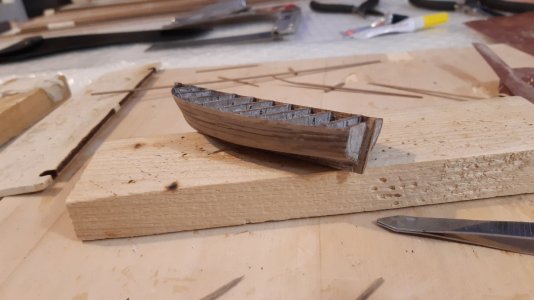
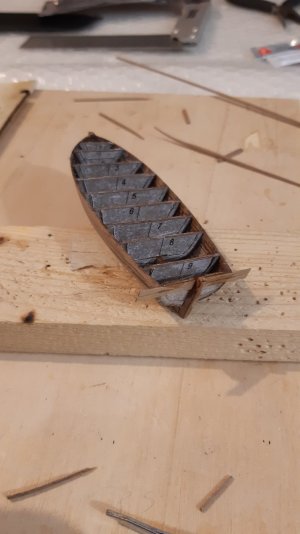
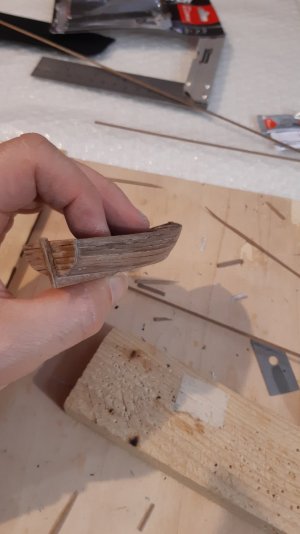
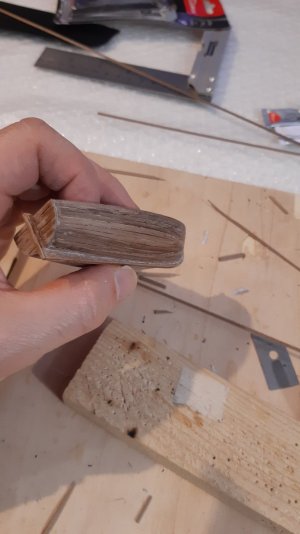
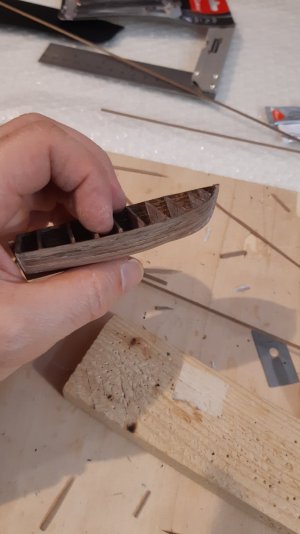
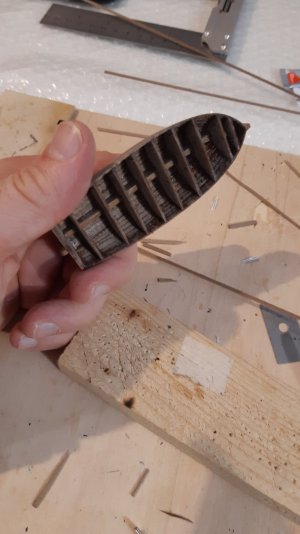
Ho terminato il primo fasciame della scialuppa.

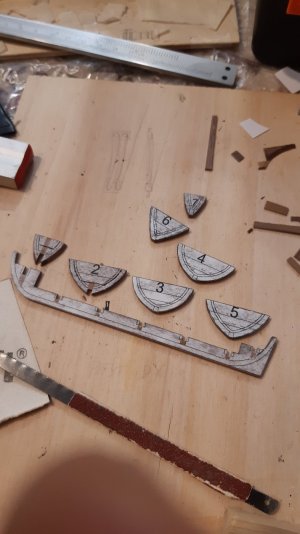
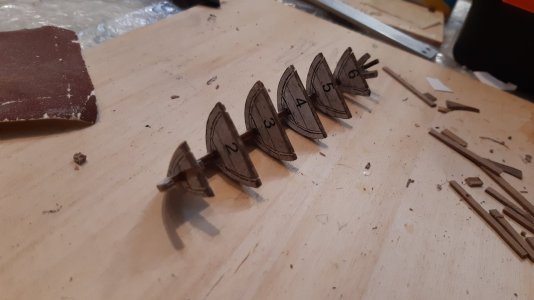
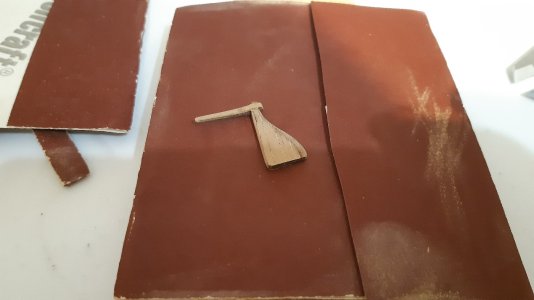
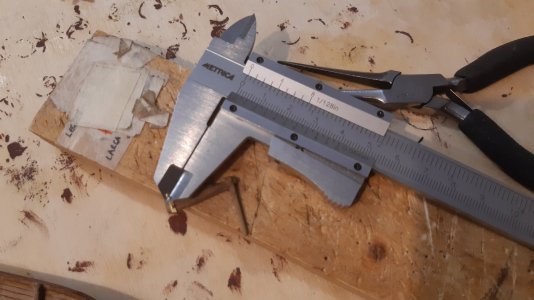
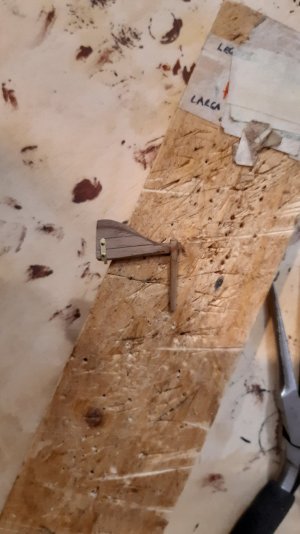
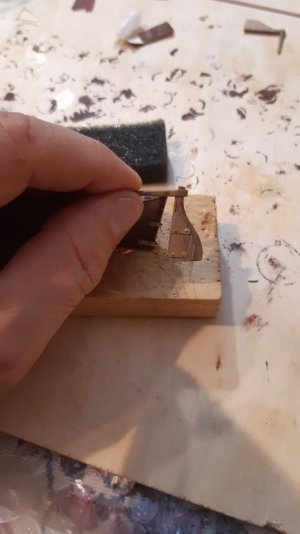
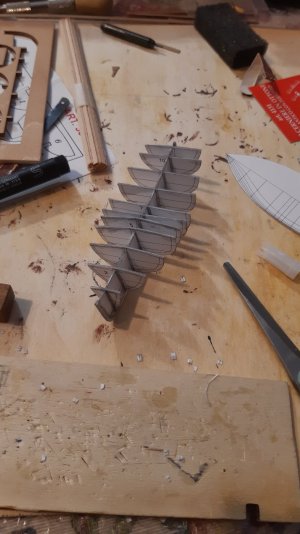
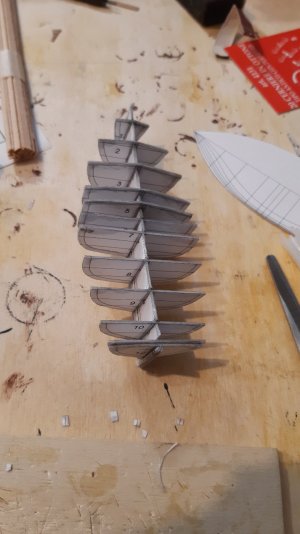
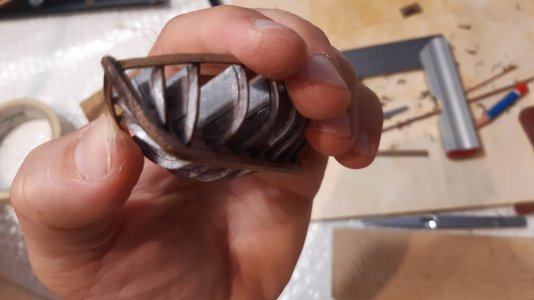
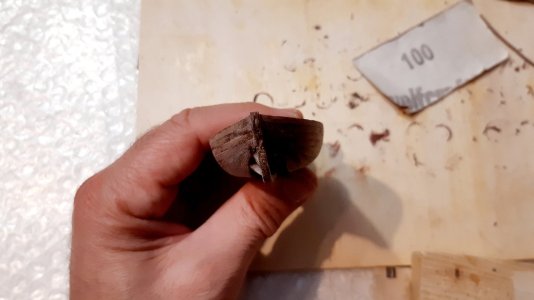
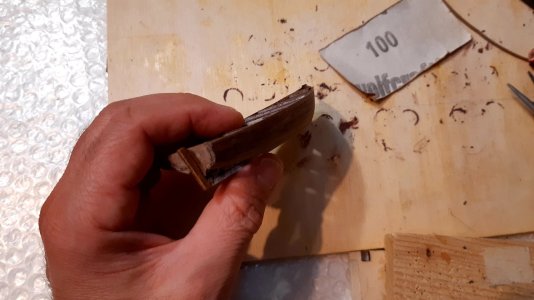
Nelle foto in sequenza potete osservare le fasi di costruzione.
E' grosso modo lo stesso metodo che uso per le navi.
In questo caso la difficoltà era maggiore a causa delle ridottisime dimensioni.

Ho preferito scegliere listelli larghi 2 mm perchè, nonostante la maggiore difficoltà, erano in scala. 2 mm corrispondono tavole di 12 cm di larghezza (molto coerenti con la realtà).
Mi sono pentito di aver scelto lo spessore di 0,5 mm, troppo poco.
Prima di conoscere e utilizzare la pinza piegalistelli, sceglievo listelli di spessore minimo per avere meno problemi con la curvatura.
Questa vecchia abitudine mi condiziona e mi segue ancora oggi.
Avrei dovuto comprare listelli di spessore da 1 mm (mi avrebbero consetito maggior margine di carteggiatura).

Ora sono indeciso se fare il secondo fasciame o no.
Voi che ne pensate?
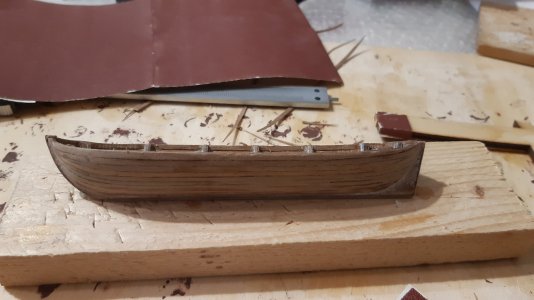
Dopo aver carteggiato mi sono reso conto che lo scafo è venuto bene, non ha alcun bisogno di stucco (io non lo uso mai) per correggere avvallamenti o imperfezioni.
Questo va a favore della scelta di non fare il secondo fasciame, inoltre risparmierei tempo prezioso.
Tuttavia lo scafo è veramente leggero ed esile.
I listelli sono molto fini già in partenza (0,5 mm) ma sono stati ulteriormete ridotti con la carteggiatura.
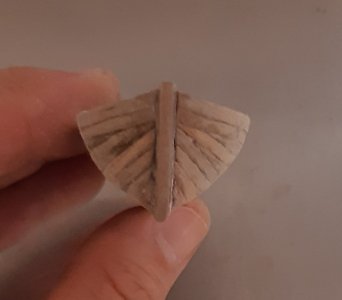
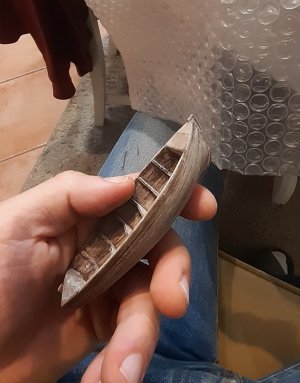
A tenerla in mano fa impressione per quanto è fino lo scafo. Inoltre guardando lo scafo in controluce sembra quasi trasparente.
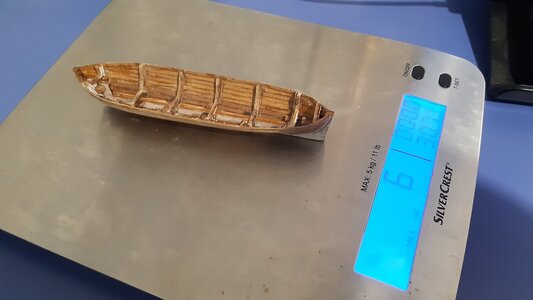
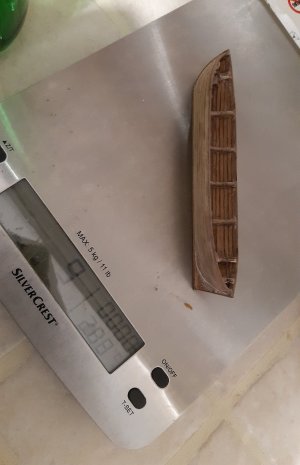
Attualmente pesa appena 6 grammi ed è lunga 130 cm.
Chi ha seguito la costruzione di questo modello in scala 1:60 fin dall'inizio sa che sono molto attento a posizionare i pesi in alto. le scialuppe dovranno essere molto leggere.

Penso che perderò altro tempo per irrobustire la struttura.
Credo che farò il secondo fasciame e forse resinerò l'interno.

Se la resina epossidica che avevo comprato 12 anni fa non è scaduta (che voi sappiate scadono?) irrobustire gli scafi per me è sempre un'ottima idea.
Senza usare fibra ma spennellando direttamente l'interno dello scafo con la resina epossidica si ottiene un guscio durissimo, molto resistente senza aumentare in maniera aprrezzabile il peso e gli ingombri.
All'esterno userò solo la vernice.

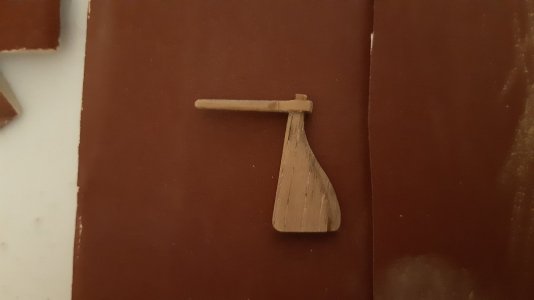
Devo fare ancora il bordo della falchetta, gli scalmi, il paiolato, il timone e i posti a sedere. Sono ancora indeciso se mettere o no il telo di copertura.

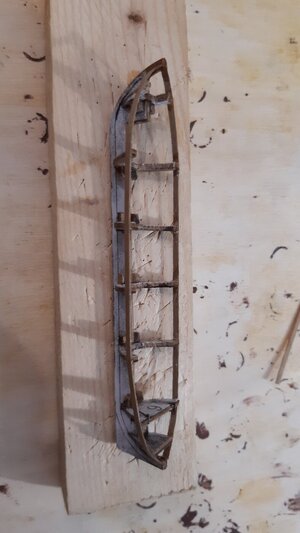
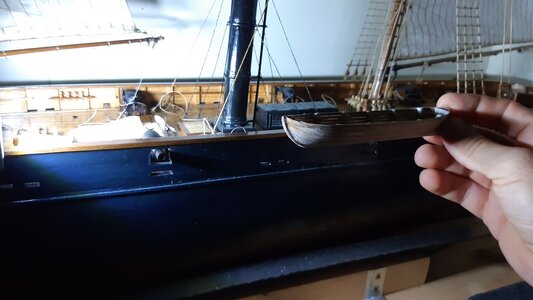
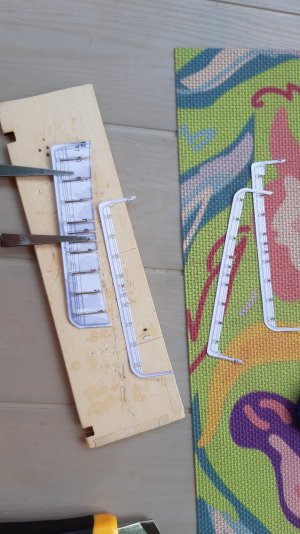
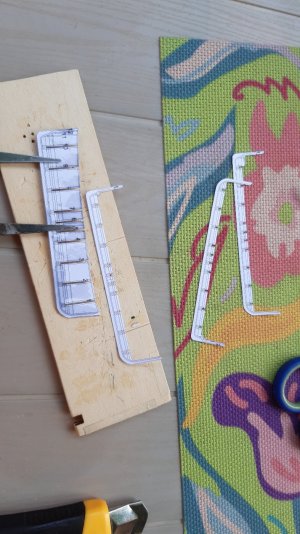
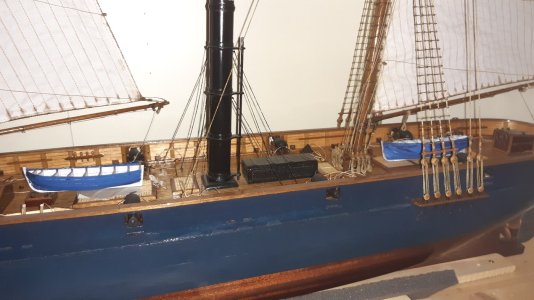
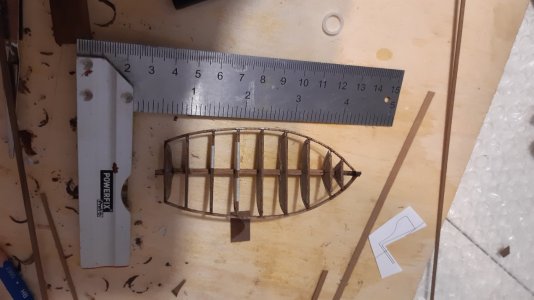
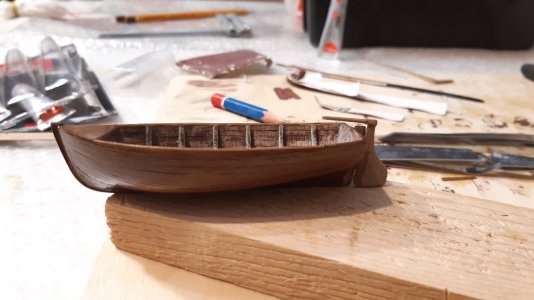
Nell'ultima foto si può vedere grosso modo dove andrà collocata la scialuppa (sospesa all'esterno con appositi supporti ricurvi, che mi dovrò studiare).


Hello to all naval modelers.

I have finished the first planking of the lifeboat.
In the sequential photos you can see the construction phases.
It is roughly the same method I use for ships.
In this case the difficulty was greater due to the very small dimensions.
I preferred to choose 2 mm wide strips because, despite the greater difficulty, they were in scale. 2 mm correspond to 12 cm wide boards (very consistent with reality).I regretted having chosen the thickness of 0.5 mm, too little.
Before knowing and using the strip bending pliers, I chose strips of minimum thickness to have fewer problems with the curvature.
This old habit conditions me and still follows me today.
I should have bought 1 mm thick strips (they would have allowed me more margin for sanding).

Now I am undecided whether to make the second planking or not.What do you think?
After sanding I realized that the hull came out well, it does not need any filler (I never use it) to correct depressions or imperfections.
This is in favor of the choice not to make the second planking, also I would save precious time.
However the hull is really light and slender.
The strips are very thin to begin with (0.5 mm) but they were further reduced with sanding.
Holding it in your hand is impressive for how thin the hull is.
Also looking at the hull against the light it seems almost transparent.Currently it weighs just 6 grams and is 130 cm long.
Those who have followed the construction of this 1:60 scale model from the beginning know that I am very careful to position the weights high up.
The lifeboats will have to be very light.

I think I will spend more time to strengthen the structure.
I think I will make the second planking and perhaps I will resin the interior.

If the epoxy resin I bought 12 years ago hasn't expired (do you know if they expire?) strengthening the hulls is always a great idea for me.
Without using fiber but by brushing the inside of the hull directly with epoxy resin you get a very hard shell, very resistant without appreciably increasing the weight and bulk.
On the outside I will only use paint.
I still have to do the edge of the gunwale, the oarlocks, the floorboard, the rudder and the seats.

I'm still undecided whether or not to put the cover sheet.

In the last photo you can see roughly where the dinghy will be placed (suspended on the outside with special curved supports, which I will have to study
).

20240810_164123.jpg

20240810_165503.jpg

20240810_165511.jpg

20240810_181316.jpg

20240810_200056.jpg

20240810_200111.jpg

20240810_200117.jpg

20240811_122558.jpg

20240811_131649.jpg

20240811_135000.jpg


20240811_184543.jpg

20240811_184551.jpg

20240811_184559.jpg

20240814_154551.jpg

20240814_154602.jpg

20240815_225824.jpg

20240816_012745.jpg

20240816_012758.jpg

20240816_012813.jpg

20240816_012828.jpg

20240816_012855.jpg

20240816_012858.jpg

20240816_012902.jpg

20240817_144219.jpg

20240816_013116.jpg
 
...Dimenticavo! mi serve aiuto!

Sono indeciso se lasciare la scialuppa scoperta oppure mettere un telo.
Normalmente c'era sempre il telo, quindi sarebbe la soluzione più realistica. In questo modo eviterei di dover fare molti dettagli interni.
Tuttavia noi modellisti facciamo come ci pare e possiamo imamginare che in quel momento era stato tolto il telo per una qualsiasi ragione.

In ogni caso vorrei sapere se qualcuno di voi ha immagini o disegni di scialuppe di quel periodo storico (seconda metà dell'ottocento o anche primi novecento).
Vanno bene immagni di navi vere ma anche di modellini in scala.
Mi interessa visualizzare bene (per poterli riprodurre) i particolari di come era posizionato e legato il telo oppure i dettagli interni di una scialuppa.


I forgot! I need help!

I am undecided whether to leave the lifeboat uncovered or put a sheet on it.
Normally there was always a sheet, so it would be the most realistic solution.
This way I would avoid having to do a lot of internal details.
However, we modelers do what we want and we can imagine that at that moment the sheet had been removed for any reason.

In any case, I would like to know if any of you have images or drawings of lifeboats from that historical period (second half of the nineteenth century or even early twentieth century).
Images of real ships are fine, but also of scale models.
I am interested in visualizing well (in order to reproduce them) the details of how the sheet was positioned and tied or the internal details of a lifeboat.
 
Ciao Johan, rifare le scialuppe va bene perchè non vai a toccare un modello già perfetto.
La scialuppa è un elemento a se stante e puoi sempre decidere se sostituirlo o no.
Mi incuriosisce molto l'uso della carta, perchè non listelli di legno?
In ogni caso seguirò con molto interesse questi nuovi sviluppi.

Hi Johan, redoing the lifeboats is fine because you are not touching a model that is already perfect.
The lifeboat is an element in itself and you can always decide whether to replace it or not.
I am very curious about the use of paper, why not wooden strips?
In any case I will follow these new developments with great interest.
Hi Alessandro,

I will not be redoing the dories of my Bluenose, but in hindsight I might have chosen a different approach.
As for the paper, the original material, supplied with the kit was 0,5mm thick wood and almost impossible to apply correctly. The frames of the dories were very fragile and the planking was prone to splitting. On the other hand, I found paper to be a very good alternative for certain parts, it's highly pliable, doesn't split easily and applying diluted adhesive afterwards gives satisfying robustness.
Ciao Johan.

"...but in hindsight I might have chosen a different approach."
che intendi? Che approccio avresti avuto ?

Io sto lavorando con listelli i spessore 0,5 mm e larghi 2 mm, tuttavia avrei lavorato meglio con listelli di spessore 1 mm e larghi 2 mm.
La carta ha ottimi requisiti è vero hai ragione.
Va benissimo per un modello statico ma per un modello RC che andrà in acqua (anche se in poche occasioni purtroppo) non tanto.
Ho visto modelli navali completamente costruiti in carta, sono stupefacenti.

Hi Johan.

"...but in hindsight I might have chosen a different approach."
what do you mean? What approach would you have had?

I am working with 0.5 mm thick and 2 mm wide strips, however I would have worked better with 1 mm thick and 2 mm wide strips.
Paper has excellent requirements, you are right.
It is fine for a static model but for an RC model that will go into the water (even if on few occasions unfortunately) not so much.

I have seen naval models completely built in paper, they are amazing.
Like I said, I might have used paper for the planking of the dories, given its properties. Since mine is a static model, its lack of water resistance is of no concern. Worse, if I would expose my model to the elements, it wouldn't survive; I used a water-soluble wood glue.

As for paper models, check out @Ab Hoving, he has build some beautiful (paper) specimen: https://shipsofscale.com/sosforums/threads/ship-in-trouble.13276/
 
Buona sera a tutti, qualche aggiornamento.

Ho deciso di fare il secondo fasciame, l'ho finito.
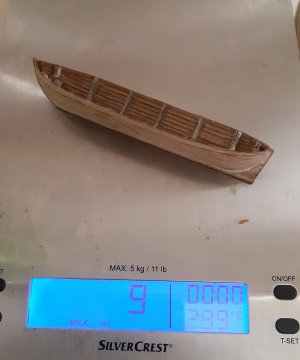
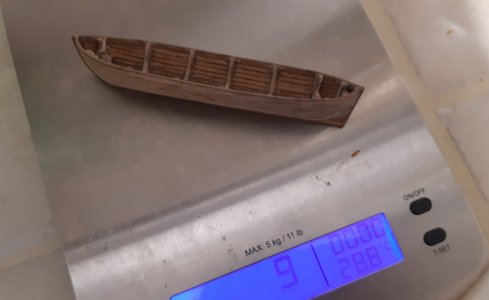
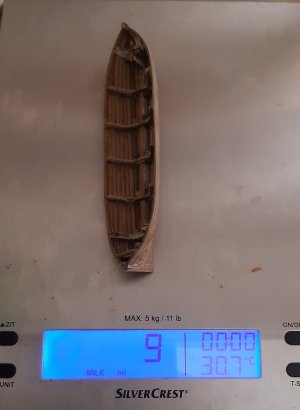
Era di 6 grammi ora è di 9 grammi, ma è più robusto, va bene.

Ho iniziato a dipingere lo scafo esterno.
Dovrò sicuramente fare il timone e penso di mettere il telo protettivo in modo da evitare tutti i dettagli interni.


Good evening everyone, some updates.

I decided to do the second planking, I finished it.
It was 6 grams now it is 9 grams, but it is more robust, it's fine.
I started painting the external hull.
I will definitely have to do the rudder and I think I will put the protective cover in order to avoid all the internal details.


20240817_194758.jpg

20240817_200516.jpg

20240817_211955.jpg

20240817_212006.jpg

20240817_220122.jpg

20240817_224245.jpg

20240818_003258.jpg

20240818_003325.jpg

20240818_114625.jpg

20240818_114651.jpg

20240818_115949.jpg

20240818_115959.jpg

20240818_153824.jpg

20240818_153833.jpg

20240818_164234.jpg

20240818_185318.jpg

20240818_185337.jpg
 
Ho finito lo scafo della seconda scialuppa e le sto dipingendo entrambe.
Farò il timone e poi posizionerò la tela in qualche modo.

Nel frattempo sto finendo i disegni per le altre due scialuppe che possono essere posizionate al centro del ponte.

Metterò solo qualche foto, saltando alcuni passaggi di costruzione, perché sono praticamente identiche alla prima. Sono venute quasi identiche.
Verniciate sembrano molto più belle, ve le farò vedere presto.


I have finished the hull of the second lifeboat and I am painting them both.
I will make the rudder and then position the canvas somehow.

In the meantime I am finishing the drawings for the other two lifeboats that can be placed in the center of the deck.
I will only put a few photos, skipping some construction steps, because they are practically identical to the first one.
They came out almost identical.
Painted they look much nicer, I will show them to you soon.


20240820_191701.jpg

20240821_205916.jpg

20240822_003407.jpg

20240822_003415.jpg

20240822_231813.jpg

20240822_231825.jpg

20240823_174317.jpg

20240823_190743.jpg

20240823_194309.jpg

20240823_201627.jpg

20240824_142322.jpg

20240824_161805.jpg

20240824_161811.jpg

20240829_013901.jpg

20240829_013910.jpg

20240829_013922.jpg

20240830_154245.jpg

20240830_154247.jpg

20240830_154312.jpg

20240830_164839.jpg

20240830_170942.jpg

20240830_173730.jpg

20240830_173738.jpg

20240830_181043.jpg

20240830_214035.jpg
 
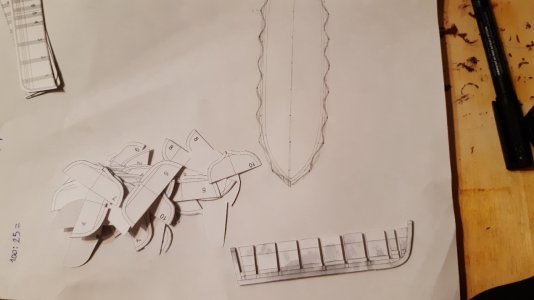
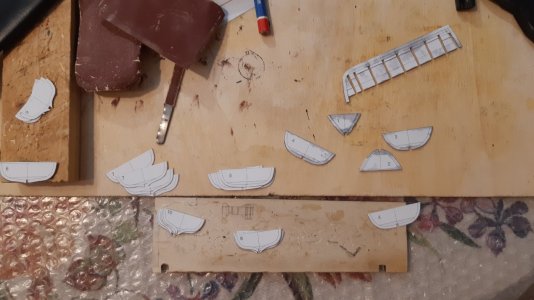
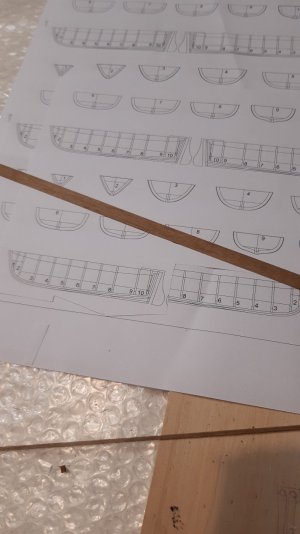
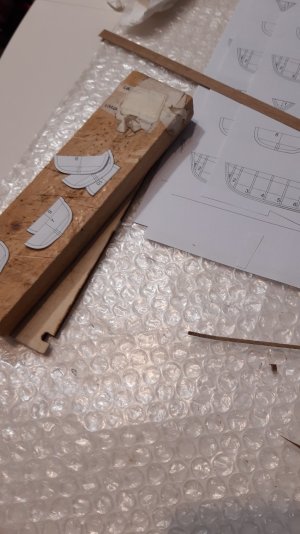
Mentre stavo finendo le scialuppe laterali ho iniziato a costruire le scialuppe centrali.
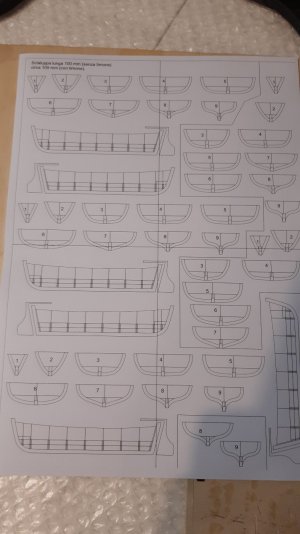
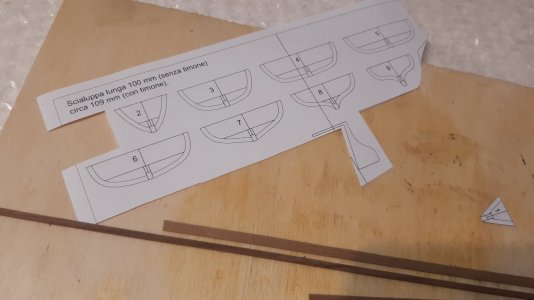
Ho stampato i fogli con chiglia e ordinate per trasferirli su legno.
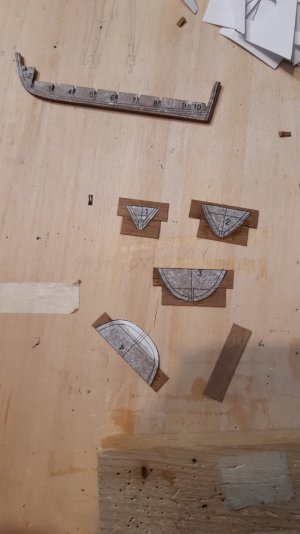
Poiché non volevo perdere altro tempo a ricontrollare i progetti sul software, ho eseguito alcuni modelli di prova in cartone e carta.
Alla fine questa procedura mi ha fatto perdere mlto più tempo.

Dopo aver finito gli scafi delle due barche di prova (in cartone) non ero del tutto convinto.
Ho ricominciato a disegnare per trovare qualcosa che mi convinceva di più nella forma.

Comunque l'idea è quella di finire prima gli scafi di tutte e quattro le scialuppe (due laterali e due centrali). Rinforzare gli interni con la resina epossidica e poi finire tutti i particolari.
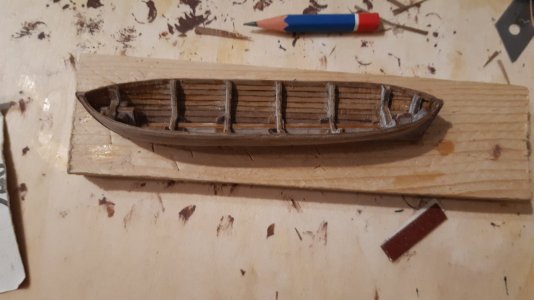

While I was finishing the side boats I started building the central boats.
I printed the sheets with keel and frames to transfer them to wood.
Since I didn't want to waste any more time checking the designs on the software, I made some test models in cardboard and paper.
In the end this procedure took me a lot more time.
After finishing the hulls of the two test boats (in cardboard) I wasn't completely convinced.
I started drawing again to find something that convinced me more in shape.
Anyway the idea is to finish the hulls of all four boats first (two side and two central).
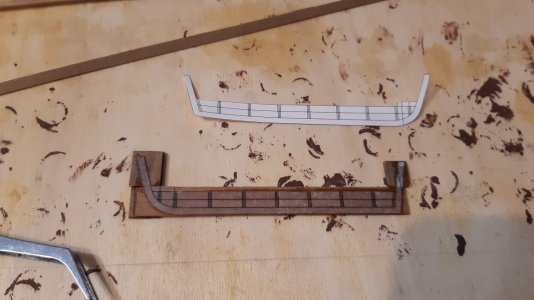
Reinforce the interiors with epoxy resin and then finish all the details.

20240831_193110.jpg

20240831_195020.jpg

20240831_211932.jpg

20240831_223500.jpg

20240831_223504.jpg

20240831_225630.jpg

20240901_121455.jpg

20240901_121500.jpg

20240901_123419.jpg

20240901_165501.jpg

20240901_165513.jpg

20240901_165522.jpg

20240901_165604.jpg

20240907_174111.jpg

20240907_174209.jpg

20240907_174213.jpg

20240907_174217.jpg

20240907_174235.jpg

20240907_174242.jpg

20240907_174247.jpg

20240907_174251.jpg

20240907_174303.jpg

20240907_174304.jpg

20240907_174310.jpg

20240907_175039.jpg
 
That's a lot of effort ánd hours in those darling little boats. Looking good on this schooner.
 
Grazie mille per il tuo commento Johan, grazie a Magic Mike, Shota70, Peter Voogt, Tobias e Jimsky.

Thanks a lot for your comment Johan, thanks to Magic Mike, Shota70, Peter Voogt, Tobias and Jimsky.
 
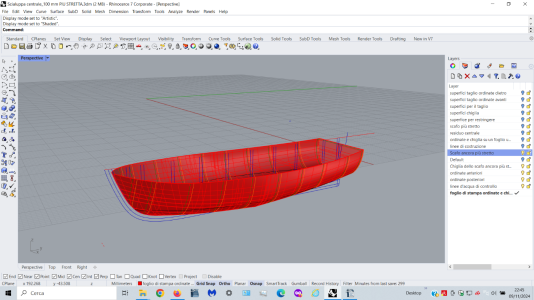
Come avevo detto, i progetti precedenti non mi avevano convinto del tutto.

Ho preferito riprogettare da zero una scialuppa di salvataggio.
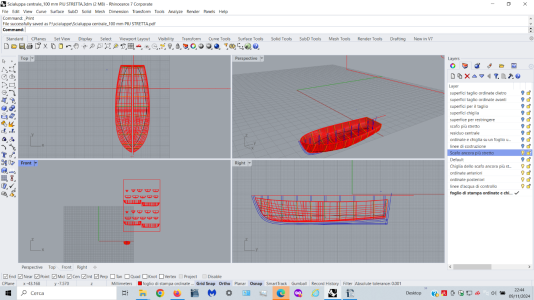
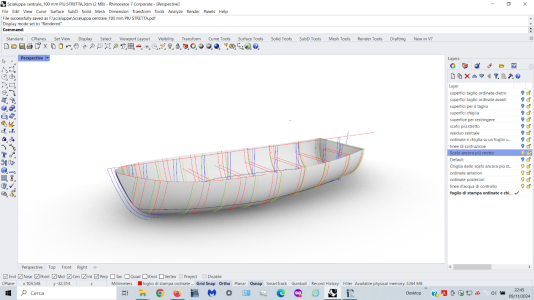
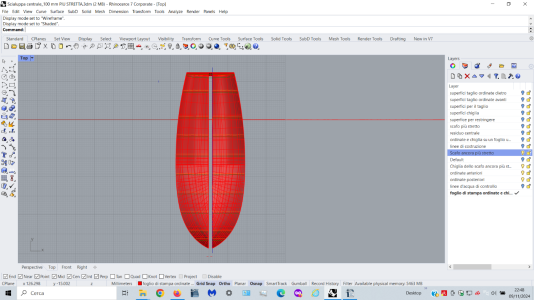
Dopo varie correzioni ho trovato le giuste e coerenti linee d'acqua per lo scafo.
Come al solito, ho riportato il disegno della chiglia e delle ordinate su un foglio A4 in formato PDF, per il successivo taglio del legno.

Per questa scialuppa di salvataggio ho pensato a una forma più corta ma più larga. Non potevo farla più lunga (come quelle laterali ad esempio) per problemi di spazio. La volevo più larga per consentire un maggiore dislocamento.
Ho immaginato che almeno una scialuppa di questo tipo sarebbe stata utile a bordo.
Ho pensato che sarebbe stato utile per il comandante avere a disposizione una scialuppa di salvataggio per trasportare un'ancora.
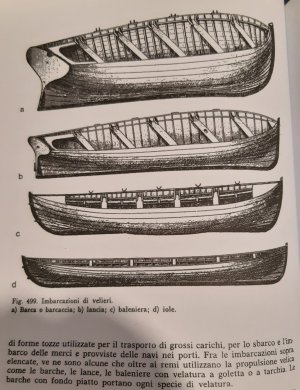
Questo tipo di scialuppa in italiano si chiama "Barcaccia", differente dalla "lancia" più fina e slanciata e dalla "baleniera" con disegno di prua e poppa simili (quelle che metterò ai lati).

As I said, the previous projects had not convinced me completely.
I preferred to redesign a lifeboat from scratch.
After several corrections I found the right and coherent water lines for the hull.
As usual, I transferred the drawing of the keel and frames onto an A4 sheet in PDF format, for the subsequent cutting of the wood.
For this lifeboat I thought of a shorter but wider shape.
I could not make it longer (like the lateral ones for example) due to space problems.
I wanted it wider to allow for greater displacement. I imagined that at least one lifeboat of this type would be useful on board.I thought it would be useful for the captain to have a lifeboat available to carry an anchor.
This type of lifeboat in Italian is called "Barcaccia", different from the thinner and more slender "lancia" and from the "baleniera" with a similar bow and stern design (the ones I will put on the sides).


20240921_165202.jpg

20240921_173514.jpg

20240921_173518.jpg

20240922_000141.jpg

20240922_000208.jpg

20240922_181059.jpg

20240922_181757.jpg

20240922_181800.jpg

20240922_181821.jpg

20240922_182232.jpg

20240922_183805.jpg

20240922_185210.jpg

20240922_185218.jpg

20240922_185242.jpg
 
Come avevo detto, i progetti precedenti non mi avevano convinto del tutto.

Ho preferito riprogettare da zero una scialuppa di salvataggio.
Dopo varie correzioni ho trovato le giuste e coerenti linee d'acqua per lo scafo.
Come al solito, ho riportato il disegno della chiglia e delle ordinate su un foglio A4 in formato PDF, per il successivo taglio del legno.

Per questa scialuppa di salvataggio ho pensato a una forma più corta ma più larga. Non potevo farla più lunga (come quelle laterali ad esempio) per problemi di spazio. La volevo più larga per consentire un maggiore dislocamento.
Ho immaginato che almeno una scialuppa di questo tipo sarebbe stata utile a bordo.
Ho pensato che sarebbe stato utile per il comandante avere a disposizione una scialuppa di salvataggio per trasportare un'ancora.
Questo tipo di scialuppa in italiano si chiama "Barcaccia", differente dalla "lancia" più fina e slanciata e dalla "baleniera" con disegno di prua e poppa simili (quelle che metterò ai lati).

As I said, the previous projects had not convinced me completely.
I preferred to redesign a lifeboat from scratch.
After several corrections I found the right and coherent water lines for the hull.
As usual, I transferred the drawing of the keel and frames onto an A4 sheet in PDF format, for the subsequent cutting of the wood.
For this lifeboat I thought of a shorter but wider shape.
I could not make it longer (like the lateral ones for example) due to space problems.
I wanted it wider to allow for greater displacement. I imagined that at least one lifeboat of this type would be useful on board.I thought it would be useful for the captain to have a lifeboat available to carry an anchor.
This type of lifeboat in Italian is called "Barcaccia", different from the thinner and more slender "lancia" and from the "baleniera" with a similar bow and stern design (the ones I will put on the sides).


View attachment 482945

View attachment 482946

View attachment 482947

View attachment 482948

View attachment 482949

View attachment 482950

View attachment 482951

View attachment 482952

View attachment 482953

View attachment 482954

View attachment 482955

View attachment 482956

View attachment 482957

View attachment 482958
Hey Alessandro, just out of curiosity; do you have any historical evidence or indications, justifying your decision to build a wider boat?
 
Ciao Johan, si forse è un pò troppo larga rispetto alla lunghezza.

Però sono quasi certo che alcune barche erano più larghe di altre (forse io ho un pò esagerato nell'interpretare la cosidetta "barcaccia").


La tua domanda mi fa molto piacere perchè è un argomento che mi interessa e mi incuriosisce molto, perciò spero che ne nasca una bella discussione con molti contributi (tutti i contributi dei modellisti navali di questo forummi sono graditi) da cui io possa trarre molte informazioni da confrontare.

Rispondo subito che non ho fonti riscontrabili e inconfutabili con quello che ho scritto, purtroppo.
Quello che dirò è frutto: di ricordi e di letture fatte in passato (ma di cui ho difficoltà a reperire tutte le fonti), di immagini prese da libri ma soprattutto da internet. Di queste immagini pochissime sono foto originali, perchè non esistevano macchine fotografiche. Quindi ho fatto affidamento a disegni e dipinti.
Le foto originali riguardano altri modelli navali in scala ma questi vanno considerati con estrema cautela, perchè i modellisti si lasciano spesso andare a licenze molto indulgenti e non sempre sono affidabili.
Infine un piccolo apporto è dato dalle case costruttrici di modellismo navale.
Il periodo storico non deve essere troppo antecedente al 1800 e posteriore al 1900, massimo 1940.

Riassumo quello che so, ma mi riprometto di cercare le fonti bibliografiche di quanto asserisco.
Ogni conferma o confutazione da parte tua e degli altri utenti del forum sarà molto importante per me.
Dunque:

1. Sono quasi certo che le scialuppe di salvataggio avevano molte forme diverse, raggruppabili in alcune tipologie piuttosto omogenee.
2. Le scialuppe delle cannoniere alle quali mi sto liberamente riferendo, avevano solo scialuppe sospese sulle fiancate. Ne avevano quattro.
Non era presente nè la classica scialuppa sospesa a poppa (tipica solo delle navi con specchio di poppa dritto e non curvo).
Queste scialuppe erano molto fini e slanciate (intendo il rapporto fra lunghezza e larghezza molto a favore della lunghezza).
Due di queste quattro scialuppe molto slanciate avevavno la poppa dritta, non so se le altre due avevano la poppa curva come la prua.
Non sono riuscito a capirlo dalle foto.
Quello che è certo è che le scialuppe con questa linea molto slanciata esistevano sia con specchio di poppa dritto sia con poppa curva.
In un famoso dipinto della CSS Alabama possono essere infatti notate entrambe queste due imbarcazioni.
Sulla USS Kearsarge ci sono scialuppe con la poppa curva, forse tutte e quattro.
3. Oltre alle scialuppe molto slanciate che proveremo a nomenclare dopo, ci sono altre scialuppe di forma differente. Alcune erano più veloci alcune più adatte anche ad una navigazione a vela con un albero che veniva posizionato alla bisogna.
Sicuramente esistevano piccole imbarcazioni per gli spostamenti del capitano da nave a nave e altre imbarcazioni più grosse per eseguire dei lavori.
4. Nel corso del tempo le forme e le dimensioni sono cambiate; in alcuni periodi le barche di salvataggio venivano messe una dentro l'altra per ottimizzare gli spazi ma a scapito di un veloce impiego.
5. Proviamo a trovare le fonti delle nomenclature:
Le scialuppe slanciate, con poppa curva, molto simile alla prua, in italiano si definiscono"BALENIERE", proprio perchè molto simili a quelle usate per la caccia alle balene.
Questo l'ho desunto da vari libri e dalle definizioni stesse dei dizionari.
Inoltre molte case modellistiche le riproducono con questa tipica forma.
E' probabilmente la scialuppa sul cui nome associato alla forma si può essere certi (o comunque si hanno meno dubbi).
Non scendo nel dettaglio pedissequo delle fonti, a meno che non sia tu stesso a chiedermelo, ma posso indicarti questi link molto esplicativi:
La scialuppa slanciata ma con lospecchio di poppa dritto non era una "baleniera" e probabilmente era definita "LANCIA".
Ma a questo punto, prima di parlare di altre definizioni, come la "BARCACCIA" , la "PILOTINA",la "IOLE" ecc. riporto testualmente parte di una testo che ho trovato.
"Le barche delle navi da guerra avevano molteplici usi. Poiché i vascelli dell’epoca si avvicinavano molto di rado a terra, se non per entrare in bacino, le barche erano l’unico mezzo di trasporto disponibile per ruoli quali i collegamenti nave-terra (per lo spostamento di beni e persone), i lavori pesanti (come il traino della nave con venti sfavorevoli o il recupero e lo spostamento delle ancore), e impieghi militari vari (come mezzi da sbarco o per l’assalto ad altre navi). Potevano trasportare ufficiali ai consigli di guerra a bordo della ammiraglia di una flotta, piuttosto che sbarcare truppe su una spiaggia in mano al nemico o condurre sortite isolate, o infine esplorare zone sconosciute. Venivano anche usate per portare soccorso a navi indifficoltà, recuperare naufraghi, portare i feriti alla nave ospedale o per la crudele punizione del “giro di chiglia”. Infine potevano essere usate (ma era un impiego solo secondario) come imbarcazioni di salvataggio.
Proprio per questi numerosi usi, molte navi erano dotate di più di una barca. Alcune di esse, come la barcaccia,erano costruite per lavori pesanti quali lo spostamento e il recupero di ancore e il trasporto di beni (acqua, polvere, rifornimenti) e persone.
Altre,come la lancia e la pinaccia,erano adatte all’andatura veloce a remi in acque relativamente calme. Altre ancora, come il cutter e la iole,erano costruite per avere buone caratteristiche nautiche nell’andatura a vela."

E' quindi importante rendersi conto che a bordo di una nave antica servivano tanti tipi di piccole imbarcazioni per vari scopi. In caso di necessità tutte fungevano da scialuppe da salvataggio. Oggi è molto diverso.
Da altra fonte ho trovato che la"barcaccia" era il termine antico per indicare la più grande e la più robusta delle imbarcazioni portata dalle navi mercantili e da guerra; serve per manovre o lavori ed è detta anche semplicemente barca.
La "Lancia" è più piccola della "barcaccia" e più affinata, Usata per comunicare da nave a nave o da nave a terra.
La "baleniera" è più lunga e sottile e con poppa e prua dalla forma simile (quindi poppa arrotondata senza il classico specchio dritto). Usata per i comandanti.
A bordo c'erano anche la "pinaccia"e il "cutter".

7. Uno dei lavori attestati da diverse fonti, che forse può rispondere alla tua domanda, è il trasporto dell'ancora per effettuare il "TONNEGGIO" (non so come si traduce).
In caso di incaglio l'ancora veniva portata lontano dalla nave, lasciata in acqua e poi si "tonneggiava",si tirava l'ancora che, incagliata sul fondale, avrebbe potuto contribuire a tirare via la nave (opportunamente alleggerita il più possibile).
Poteva affondare l'ancora lontano dalla nave e poi mettere le gomene in tensione anche senza che vi fosse l'incaglio ma semplicemente per l'ormeggio in rada.


Hi Johan, yes maybe it's a little too wide for the length.
But I'm almost certain that some boats were wider than others (maybe I exaggerated a bit in interpreting the so-called "barcaccia").

Hi Johan, I am very pleased with your question because it is a topic that interests me and intrigues me a lot, so I hope that a nice discussion will arise with many contributions (all the contributions of the naval modelers of this forum are welcome) from which I can draw a lot of information to compare.
I will immediately answer that I have no verifiable and irrefutable sources with what I have written, unfortunately.
What I will say is the result of: memories of readings done in the past (but of which I have difficulty finding all the sources), of images taken from books but above all from the internet.
Very few of these images are original photos, because in the past there were no cameras.
So I relied on drawings and paintings.
The original photos concern other naval models in scale but these must be considered with extreme caution, because the modelers often let themselves go with very indulgent licenses and are not always reliable.
Finally, a small part is given by the naval model manufacturers.
The historical period must not be too much before 1800 and 1900, maximum 1940.I summarize what I know, but I intend to look for the bibliographic sources of what I assert.Any confirmation or refutation from you and other users of the forum will be very important to me.
So:
1. I am almost certain that the lifeboats had many different shapes, grouped into some rather homogeneous typologies.
2. The lifeboats of the gunboats to which I am freely referring, only had lifeboats suspended on the sides.
They had four.
There was neither the classic lifeboat suspended at the stern (typical only of ships with a straight and not curved transom).
These lifeboats were very thin and slender (I mean the ratio between length and width very much in favor of length).
Two of these four very slender boats had a straight stern, I don't know if the other two had a curved stern like the bow.
I couldn't figure it out from the photos.
What is certain is that boats with this very slender line existed with both a straight transom and a curved stern.In a famous painting of the CSS Alabama, both of these boats can be seen.
On the Kearsarge, there are boats with a curved stern, perhaps all four.
3. In addition to the very slender boats that we will try to name later, there are other boats of different shapes.
Some were faster, some more suitable for sailing with a mast that was positioned as needed.
There were certainly small boats for the captain to move from ship to ship and other larger boats to carry out work.
4. Over time, the shapes and sizes have changed; in some periods the lifeboats were placed one inside the other to optimize the spaces but at the expense of a quick use.
5. Let's try to find the sources of the nomenclatures:
The slender lifeboats, with a curved stern, very similar to the bow, in Italian are called "BALENIERE", precisely because they are very similar to those used for hunting whales.I deduced this from various books and from the definitions in the dictionaries themselves.
Furthermore, many model houses reproduce them with this typical shape.It is probably the lifeboat whose name associated with the shape can be certain (or at least there are fewer doubts).I won't go into the slavish detail of the sources, unless you ask me, but I can point you to these very explanatory links:
The slender boat with a straight transom was not a "whaling boat" and was probably called a "LANCIA".
But at this point, before talking about other definitions, such as the "BARCACCIA", the "PILOTINA", the "IOLE" etc.
I will report verbatim part of a text that I found.
"The boats of the warships had multiple uses. Since vessels of the time rarely approached land, except to enter a dry dock, boats were the only means of transport available for roles such as ship-to-shore connections (for the movement of goods and people), heavy work (such as towing a ship in unfavorable winds or recovering and moving anchors), and various military uses (as landing craft or for assaulting other ships). They could transport officers to war councils aboard the flagship of a fleet, rather than disembark troops on a beach in enemy hands or conduct isolated sorties, or finally explore unknown areas. They were also used to bring aid to ships in difficulty, recover shipwrecked people, carry the wounded to the hospital ship or for the cruel punishment of the "keel turn". Finally, they could be used (but this was only a secondary use) as lifeboats.

Precisely for these numerous uses , many ships were equipped with more than one boat. Some of them, like the barcaccia, were built for heavy work such as moving and recovering anchors and transporting goods (water, gunpowder, supplies) and people.
Others, like the lancia and the pinaccia, were suitable for fast rowing in relatively calm waters. Others, such as the cutter and the iole, were built to have good nautical characteristics when sailing."
It is therefore important to realize that on board an ancient ship many types of small boats were used for various purposes.
In case of need, they all served as lifeboats.
Today it is very different.From another source I found that the "barcaccia" was the ancient term to indicate the largest and most robust of the boats carried by merchant and war ships; it is used for maneuvers or work and is also simply called a boat.
The "Lancia" is smaller than the "barcaccia" and more refined, Used to communicate from ship to ship or from ship to land.
The "whaler" is longer, thinner and with a similarly shaped stern and bow (so rounded stern without the classic straight mirror).
Used for commanders.
On board there were also the "pinaccia" and the "cutter".
7. One of the jobs attested by various sources, which perhaps can answer your question, is transport of the anchor to carry out the "TONNEGGIO" (I don't know how it is translated).In case of a snag, the anchor was taken far from the ship, left in the water and then "tonneggiava", the anchor was pulled which, stranded on the seabed, could have contributed to pulling the ship away (suitably lightened as much as possible).It could be sunk the anchor far from the ship and then put the ropes under tension even without there being a snag simply for mooring in the roadstead.


20241109_203645.jpg
 
Last edited:
Thank you so much, Alessandro, for your very extensive answer.
Especially your link to the "James Caird" provided many insights in Shackleton's journey to South Georgia in one of the ships boats.
Other than that, in other build logs also a lot was written about the boats being carried or, in some cases, presumably towed.
I think these carry-on boats were easily swapped, based on the needs of the journey, or just over time. As long as the boats you're adding are matching the general look and feel of the ship, there's hardly an argument against it (unless of course if you were to add one of these modern day, orange life boats).
 
Ciao Johan, aggiungo una ulteriore spiegazione.

Sai già che mi sono dovuto prendere alcune libertà per renderla RC.
Una di queste sono le scialuppe.
Ne avrei dovuto mettere 4 tutte ai lati.
Tuttavia due di loro, quelle posteriori mi avrebbero impedito di muovere la randa.
Ancora oggi vedendo i disegni di quelle vere non so come facevano a manovrare la randa senza che il boma intruppasse sulle gru.
Avrei potuto lasciarne solo due ma ho preferito averne quattro.
Non avendo il cannone a centro nave ho preferito aggiungerne due al centro per raggiungere il numero di quattro.
Per posizionarle in acqua credo si servissero del gaff.

Tuttavia mi hai fatto venire il dubbio e credo che ne farò ancora un'altra meno larga.


Hi Johan, I add a further explanation.

You already know I had to take some liberties to make it RC.
One of these are lifeboats.
I should have put 4 all on the sides.
However two of them, the rear ones would have prevented me from moving the mainsail.
Even today, seeing the drawings of the real ones, I don't know how they managed to maneuver the mainsail without the boom hitting the cranes.
I could have left just two but I preferred to have four.
Not having the cannon amidships, I preferred to add two in the center to reach the number of four.
To position them in the water I think they used gaff.

However, you have made me doubt and I think I will make another one that is less large.
 
Back
Top