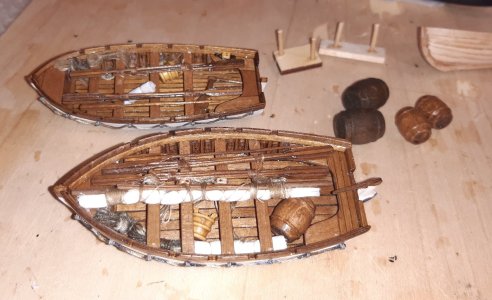
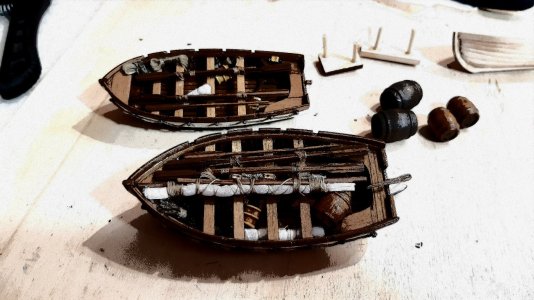
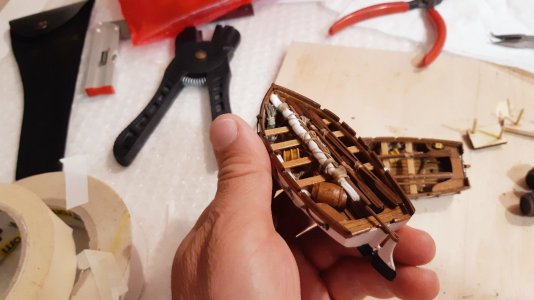
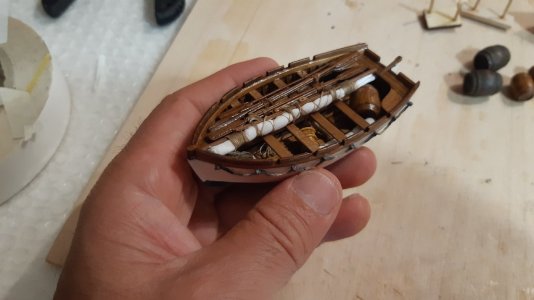
Nicely done Alessandro! Congrats! Magic Mike
-

Win a Free Custom Engraved Brass Coin!!!
As a way to introduce our brass coins to the community, we will raffle off a free coin during the month of August. Follow link ABOVE for instructions for entering.
-

PRE-ORDER SHIPS IN SCALE TODAY!
The beloved Ships in Scale Magazine is back and charting a new course for 2026!
Discover new skills, new techniques, and new inspirations in every issue.
NOTE THAT OUR FIRST ISSUE WILL BE JAN/FEB 2026
You are using an out of date browser. It may not display this or other websites correctly.
You should upgrade or use an alternative browser.
You should upgrade or use an alternative browser.
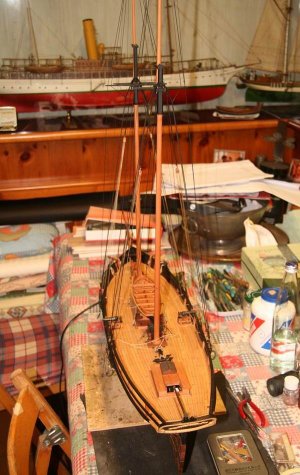
1/60 scale RC model of a schooner, loosely based on a gunboat steamship from the second half of the 19th century.
- Thread starter AlessandroROMA
- Start date
- Watchers 17
- Joined
- Sep 22, 2023
- Messages
- 238
- Points
- 213

Grazie mille Magic Mike.
Thank you so much Magic Mike.
Thank you so much Magic Mike.
- Joined
- Sep 22, 2023
- Messages
- 238
- Points
- 213

Grazie mille Johan, tu hai perfettamente ragione, ma in questa scala non riesco a curare questi minimi particolari in tempi accettabili. Come già dissi in altre occasioni procedo alla velocità di un bradipo sedato, ahimè.Hey Alessandro,
Again enjoying your update, now finishing your life boats. I do have some misgivings though, if I may?
The lifeboat covers, while definitely a finishing touch, appear to be a bit crude, especially the eyelets look a bit out of scale. Do you think that adding seamed edges to the covers would add to the authenticity of the covers?
Thank you very much Johan, you are absolutely right, but on this scale I cannot take care of these small details in an acceptable time.
As I have already said on other occasions I proceed at the speed of a sedated sloth, alas.
- Joined
- Sep 22, 2023
- Messages
- 238
- Points
- 213

Ciao a tutti i modellisti navali di questo forum.
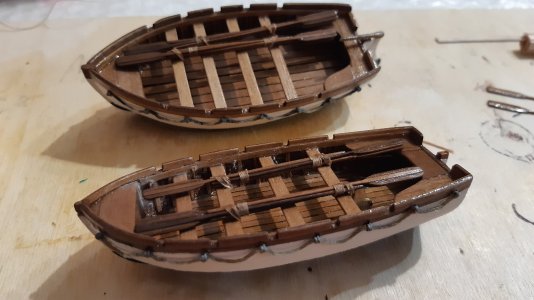
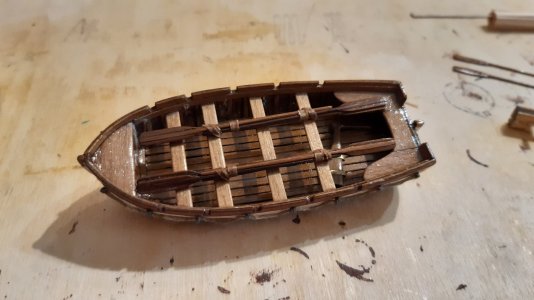
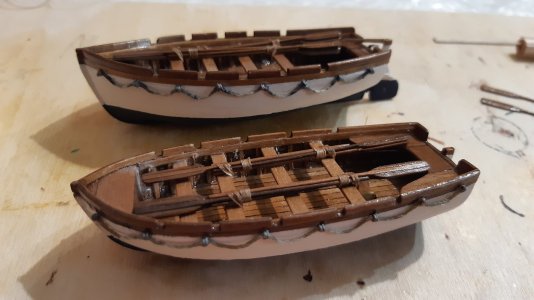
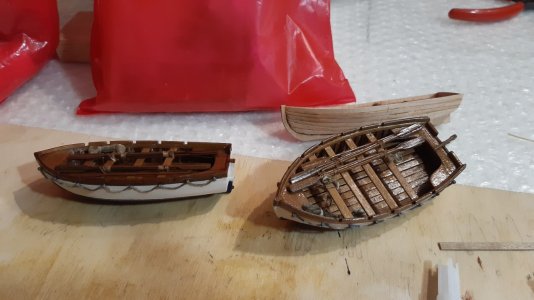
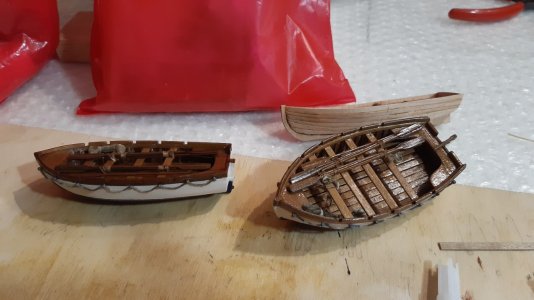
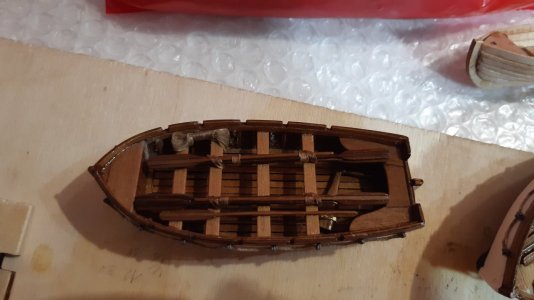
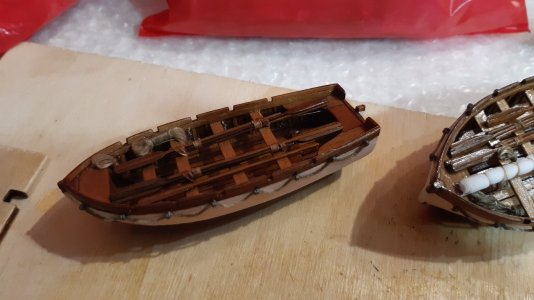
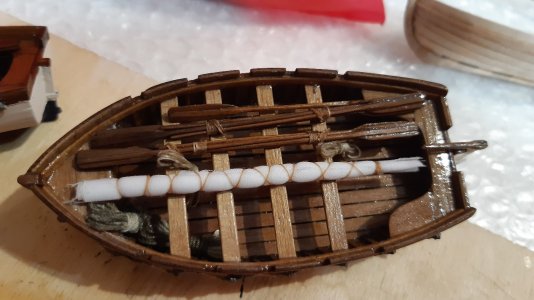
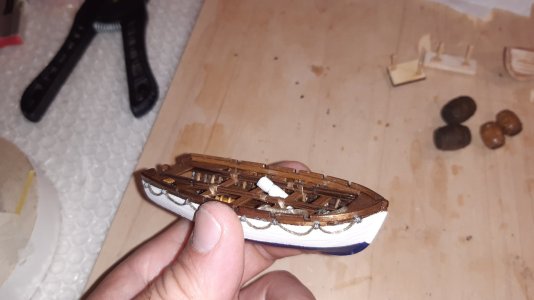
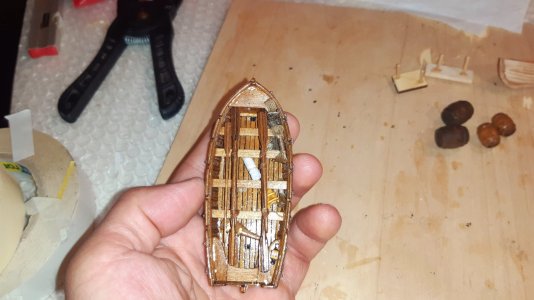
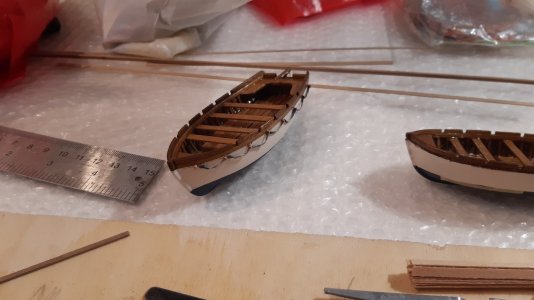
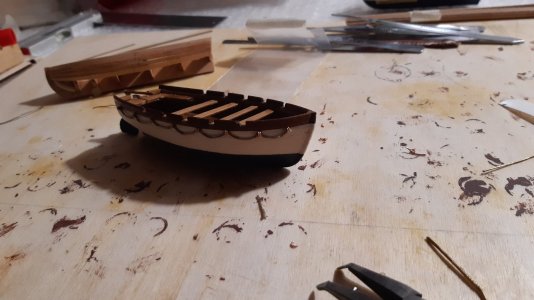
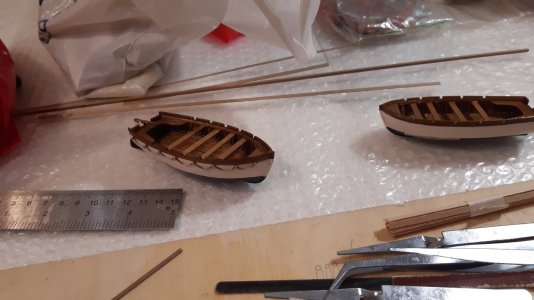
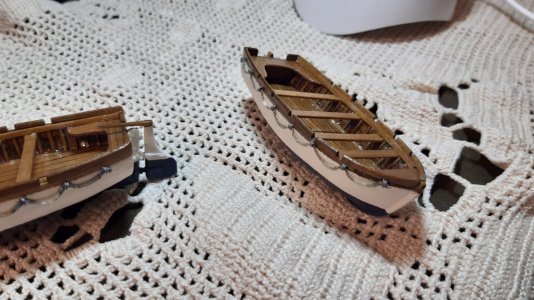
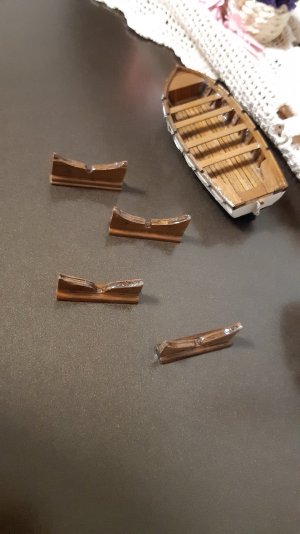
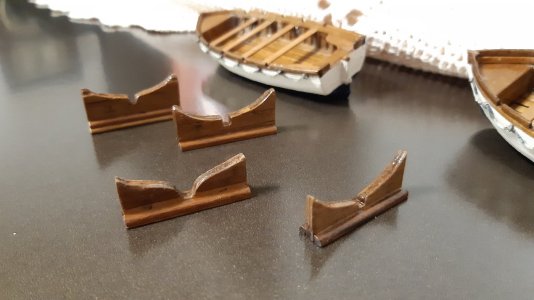
Ho proseguito e terminato l'allestimento delle scialuppe centrali (quelle che andranno posizionate al centro del ponte).
Non hanno delle gru a loro dedicate per essere posizionate in acqua. Immagino che questa funziona sia svolta dai gaff e dalle manovre a disposizione o aggiuntive.
Ho faticato molto per fare i sostegni. Non mi aspettavo che ci avrei messo così tanto.
Dopo aver riflettuto a lungo sul diametro della cima (quella ai lati a cui aggrapparsi quando si è in acqua), ho deciso di posizionarla.
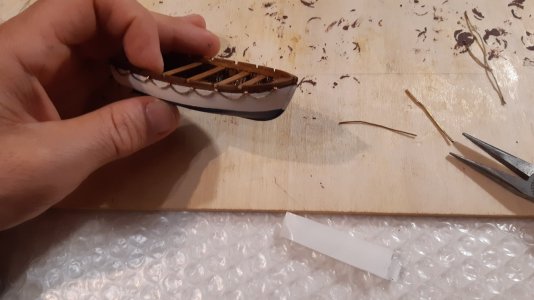
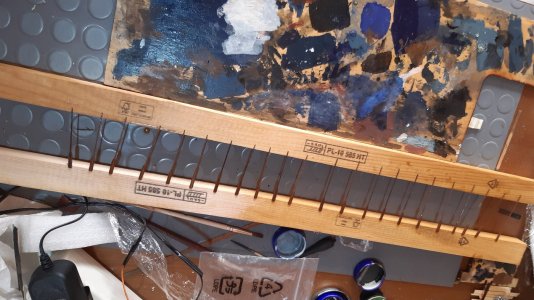
Ho dovuto scegliere con cura il materiale e la forma degli anelli di fissaggio.
Non è stato facile perché erano molto piccoli ed è un lavoro che non avevo mai fatto prima.
Ho usato il rame.
Ero indeciso se scurirlo naturalmente con l'ossidazione o dipingerlo.
Alla fine l'ho colorato.
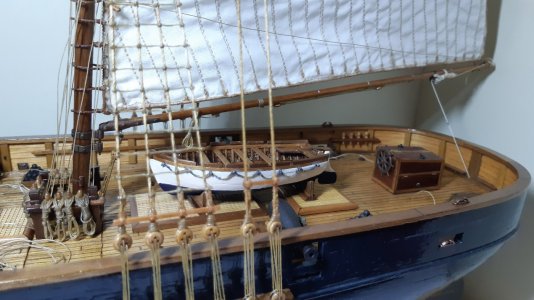
In alcune foto si vede la posizione che assumeranno sul ponte della nave. Non sono ancora incollate.
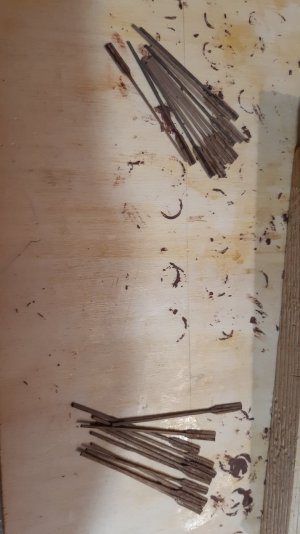
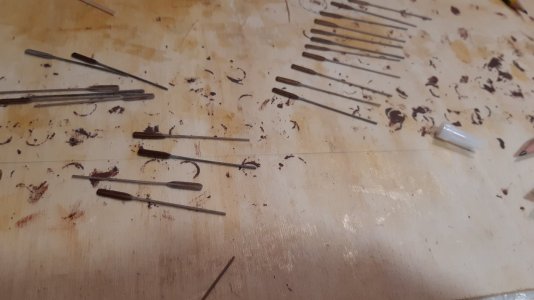
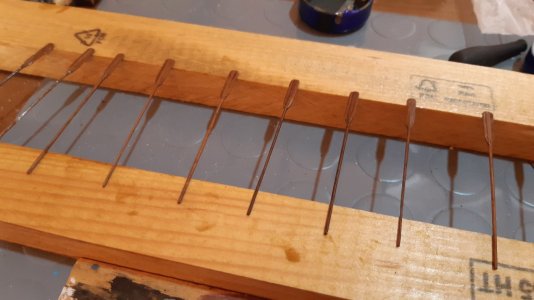
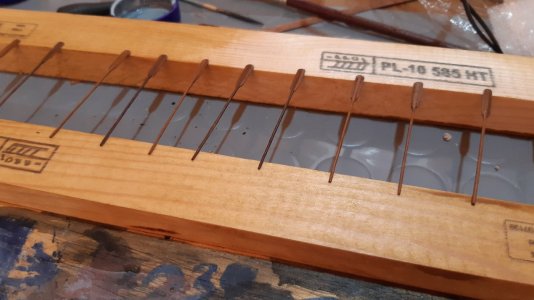
Dato che i remi devono assolutamente essere posizionati, ho iniziato a fare qualche ricerca sulle dimensioni e a ripescare i miei ricordi.
La lunghezza varia molto. Ho trovato alcuni testi che indicano questa lunghezza tra i 2,5 e i 3 metri.
Tre metri in scala 1:60 corrispondono a una lunghezza di 50 mm.
Ho fatto una prova (immaginando la parte che deve essere manovrata entrobordo dal vogatore e la parte che deve potersi muovere in acqua in modo funzionale) sulle due scialuppe di salvataggio e mi sembrava ancora troppo poco.
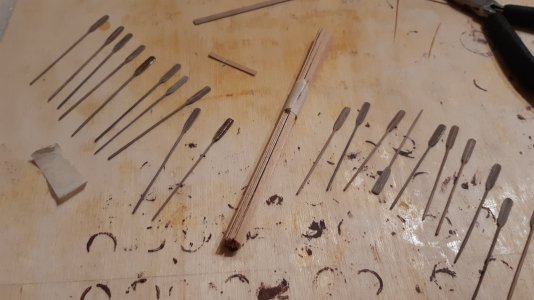
Così, dopo aver confrontato diverse foto, ho deciso di farli lunghi 5,5 cm sulla barca più piccola e 6 cm su quella più grande.
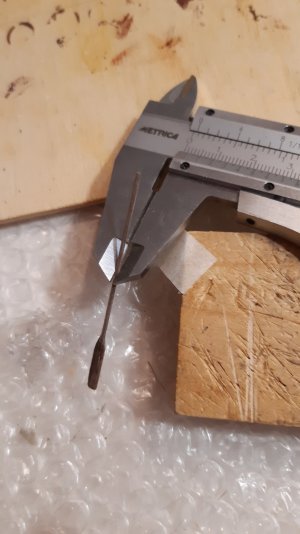
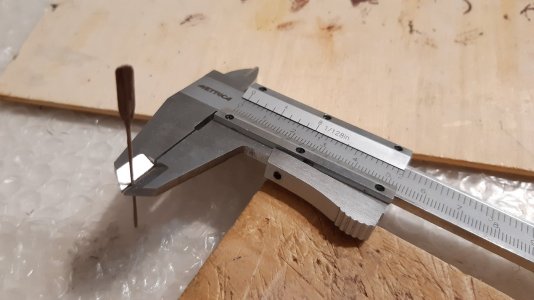
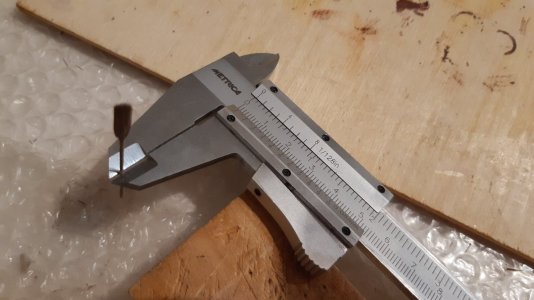
Il diametro è invece di 4 cm che in scala 1:60 equivale a 0,067 cm, ovvero 0,67 mm. Insomma, devo gestire un'asta più sottile di un millimetro. Non sarà facilissimo.
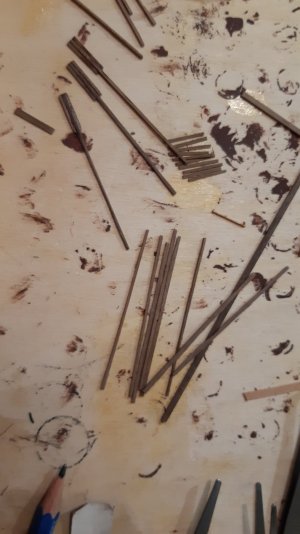
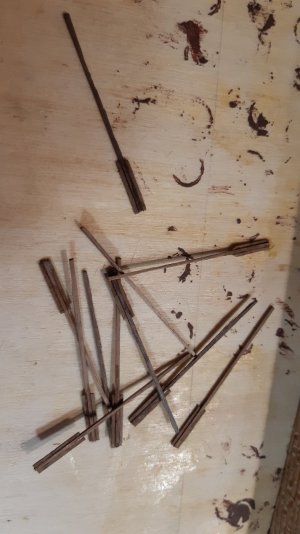
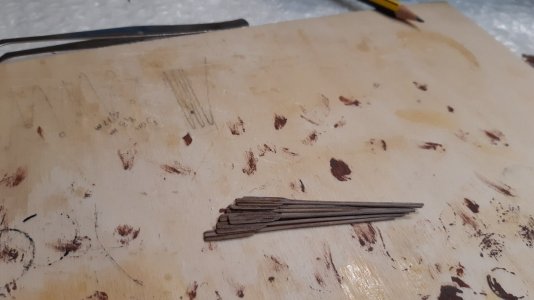
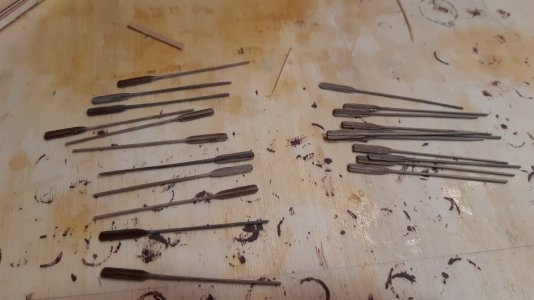
Rimane il problema della larghezza della pala del remo e della sua lunghezza. Quindi ho deciso come costruirli, sarà più facile mostrarlo con le foto che descriverlo.
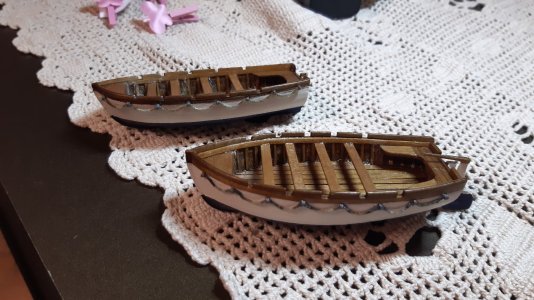
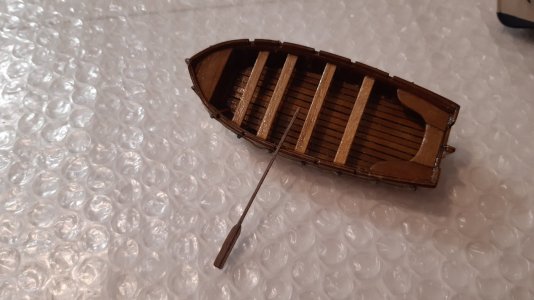
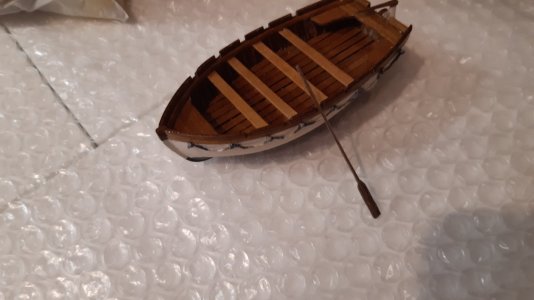
Le ultime immagini riportato la situazione definitiva dell'allestimento interno delle scialuppe centrali.
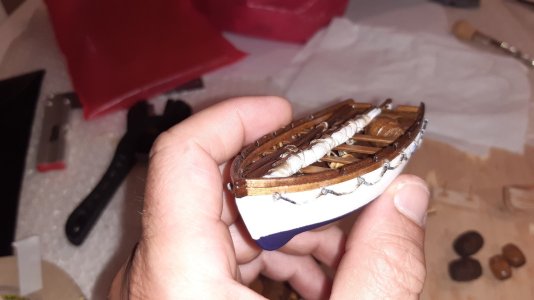
La più grande può montare un albero con randa e fiocco (oltre alla propulsione con i remi). L'albero, la piccozza, il bompresso mobile e le vele sono arrotolati insieme al centro, sopra le panche.
Nella lancia più piccola il timone è sul ponte (non inserito nel dritto di poppa).
Costruisco sempre pezzi di ricambio, quindi avevo due remi in più e li ho lasciati nelle scialuppe di salvataggio. Sapranno cosa farne.
Volevo costruire io stesso barili e secchi, ma visti i tempi biblici di costruzione di questa nave e dato che quelli che avevano erano fatti piuttosto bene, ho usato quelli.
Ho finalmente chiuso la discussione sulle scialuppe di salvataggio centrali.
Hello to all the naval modelers of this forum.
I continued and finished the set up of the central lifeboats (the ones that will be positioned in the center of the deck).
They do not have cranes dedicated to them to be positioned in the water.
I imagine that this function is carried out by the gaffs and the available or additional maneuvers
I worked hard to make the supports. I did not expect it to take me so long.
After thinking for a long time about the diameter of the rope (the one on the sides to hold on to when in the water), I decided to position it.I had to carefully choose the material and shape of the fixing rings.
It was not easy because they were very small and it is a job I had never done before.
I used copper.
I was undecided whether to darken it naturally with oxidation or paint it.
In the end I colored it.
In some photos you can see the position they will take on the deck of the ship.
They are not glued yet.
Since the oars absolutely have to be positioned, I started to do some research on the dimensions and to dig into my memories.
The length varies a lot.
I found some texts that indicate this length between 2.5 and 3 meters.
Three meters in 1:60 scale corresponds to a length of 50 mm.
I did a test (imagining the part that must be maneuvered inboard by the rower and the part that must be able to move in the water in a functional way) on the two lifeboats and it still seemed too little.
So, after comparing several photos, I decided to make them 5.5 cm long on the smaller boat and 6 cm on the larger one.The diameter is instead 4 cm which in 1:60 scale equals 0.067 cm, or 0.67 mm. In short, I have to manage a shaft thinner than a millimeter. It will not be very easy.There remains the problem of the width of the oar blade and its length.
So I decided how to build them, it will be easier to show with photos than to describe.
The last pictures show the final situation of the interior layout of the central lifeboats.
The largest one can mount a mast with mainsail and jib (in addition to oar propulsion).
The mast, gaff, movable bowsprit and sails are rolled together in the center, above the benches.In the smaller lifeboat the rudder is on the deck (not inserted in the sternpost).
I always make spare parts, so I had two extra oars and left them in the lifeboats.
They will know what to do with them.
I wanted to build barrels and buckets myself, but given the biblical construction times of this ship and since the ones they had were quite well made, I used those.
I have finally closed the discussion on the central lifeboats.


- Joined
- Sep 22, 2023
- Messages
- 238
- Points
- 213

- Joined
- Sep 3, 2021
- Messages
- 5,199
- Points
- 738

Those oars,a true labor of love!Ciao a tutti i modellisti navali di questo forum.
Ho proseguito e terminato l'allestimento delle scialuppe centrali (quelle che andranno posizionate al centro del ponte).
Non hanno delle gru a loro dedicate per essere posizionate in acqua. Immagino che questa funziona sia svolta dai gaff e dalle manovre a disposizione o aggiuntive.
Ho faticato molto per fare i sostegni. Non mi aspettavo che ci avrei messo così tanto.
Dopo aver riflettuto a lungo sul diametro della cima (quella ai lati a cui aggrapparsi quando si è in acqua), ho deciso di posizionarla.
Ho dovuto scegliere con cura il materiale e la forma degli anelli di fissaggio.
Non è stato facile perché erano molto piccoli ed è un lavoro che non avevo mai fatto prima.
Ho usato il rame.
Ero indeciso se scurirlo naturalmente con l'ossidazione o dipingerlo.
Alla fine l'ho colorato.
In alcune foto si vede la posizione che assumeranno sul ponte della nave. Non sono ancora incollate.
Dato che i remi devono assolutamente essere posizionati, ho iniziato a fare qualche ricerca sulle dimensioni e a ripescare i miei ricordi.
La lunghezza varia molto. Ho trovato alcuni testi che indicano questa lunghezza tra i 2,5 e i 3 metri.
Tre metri in scala 1:60 corrispondono a una lunghezza di 50 mm.
Ho fatto una prova (immaginando la parte che deve essere manovrata entrobordo dal vogatore e la parte che deve potersi muovere in acqua in modo funzionale) sulle due scialuppe di salvataggio e mi sembrava ancora troppo poco.
Così, dopo aver confrontato diverse foto, ho deciso di farli lunghi 5,5 cm sulla barca più piccola e 6 cm su quella più grande.
Il diametro è invece di 4 cm che in scala 1:60 equivale a 0,067 cm, ovvero 0,67 mm. Insomma, devo gestire un'asta più sottile di un millimetro. Non sarà facilissimo.
Rimane il problema della larghezza della pala del remo e della sua lunghezza. Quindi ho deciso come costruirli, sarà più facile mostrarlo con le foto che descriverlo.
Le ultime immagini riportato la situazione definitiva dell'allestimento interno delle scialuppe centrali.
La più grande può montare un albero con randa e fiocco (oltre alla propulsione con i remi). L'albero, la piccozza, il bompresso mobile e le vele sono arrotolati insieme al centro, sopra le panche.
Nella lancia più piccola il timone è sul ponte (non inserito nel dritto di poppa).
Costruisco sempre pezzi di ricambio, quindi avevo due remi in più e li ho lasciati nelle scialuppe di salvataggio. Sapranno cosa farne.
Volevo costruire io stesso barili e secchi, ma visti i tempi biblici di costruzione di questa nave e dato che quelli che avevano erano fatti piuttosto bene, ho usato quelli.
Ho finalmente chiuso la discussione sulle scialuppe di salvataggio centrali.
Hello to all the naval modelers of this forum.
I continued and finished the set up of the central lifeboats (the ones that will be positioned in the center of the deck).
They do not have cranes dedicated to them to be positioned in the water.
I imagine that this function is carried out by the gaffs and the available or additional maneuvers
I worked hard to make the supports. I did not expect it to take me so long.
After thinking for a long time about the diameter of the rope (the one on the sides to hold on to when in the water), I decided to position it.I had to carefully choose the material and shape of the fixing rings.
It was not easy because they were very small and it is a job I had never done before.
I used copper.
I was undecided whether to darken it naturally with oxidation or paint it.
In the end I colored it.
In some photos you can see the position they will take on the deck of the ship.
They are not glued yet.
Since the oars absolutely have to be positioned, I started to do some research on the dimensions and to dig into my memories.
The length varies a lot.
I found some texts that indicate this length between 2.5 and 3 meters.
Three meters in 1:60 scale corresponds to a length of 50 mm.
I did a test (imagining the part that must be maneuvered inboard by the rower and the part that must be able to move in the water in a functional way) on the two lifeboats and it still seemed too little.
So, after comparing several photos, I decided to make them 5.5 cm long on the smaller boat and 6 cm on the larger one.The diameter is instead 4 cm which in 1:60 scale equals 0.067 cm, or 0.67 mm. In short, I have to manage a shaft thinner than a millimeter. It will not be very easy.There remains the problem of the width of the oar blade and its length.
So I decided how to build them, it will be easier to show with photos than to describe.
The last pictures show the final situation of the interior layout of the central lifeboats.
The largest one can mount a mast with mainsail and jib (in addition to oar propulsion).
The mast, gaff, movable bowsprit and sails are rolled together in the center, above the benches.In the smaller lifeboat the rudder is on the deck (not inserted in the sternpost).
I always make spare parts, so I had two extra oars and left them in the lifeboats.
They will know what to do with them.
I wanted to build barrels and buckets myself, but given the biblical construction times of this ship and since the ones they had were quite well made, I used those.
I have finally closed the discussion on the central lifeboats.
View attachment 524341
View attachment 524342
View attachment 524343
View attachment 524344
View attachment 524345
View attachment 524346
View attachment 524347
View attachment 524348
View attachment 524349
View attachment 524350
View attachment 524351
View attachment 524352
View attachment 524353
View attachment 524354
View attachment 524355
View attachment 524356
View attachment 524357
View attachment 524358
View attachment 524359
View attachment 524360
View attachment 524361
View attachment 524362
View attachment 524364
View attachment 524365
View attachment 524366
- Joined
- Sep 3, 2021
- Messages
- 5,199
- Points
- 738

The completed life boats, including oars, sails,barrels, buckets, etc will definitely add to the overall looks of your model. Well done indeed.... altre foto descritte in precedenza...
... other photos described above...
View attachment 524368
View attachment 524369
View attachment 524370
View attachment 524371
View attachment 524372
View attachment 524373
View attachment 524374
View attachment 524375
View attachment 524376
View attachment 524377
View attachment 524378
View attachment 524380
View attachment 524381
View attachment 524382
View attachment 524383
- Joined
- Sep 10, 2024
- Messages
- 1,037
- Points
- 393

Your lifeboats look fantastic! I am curious - would the lifeboat supports have been placed directly on the gratings as you show? It seems that it would be difficult to quickly cover the hatches during stormy seas.
Le vostre scialuppe di salvataggio sono fantastiche! Sono curioso: i supporti delle scialuppe di salvataggio sarebbero stati posizionati direttamente sulle grate, come mostrate? Sembra che sarebbe difficile coprire rapidamente i boccaporti durante la tempesta.
Le vostre scialuppe di salvataggio sono fantastiche! Sono curioso: i supporti delle scialuppe di salvataggio sarebbero stati posizionati direttamente sulle grate, come mostrate? Sembra che sarebbe difficile coprire rapidamente i boccaporti durante la tempesta.
- Joined
- Sep 22, 2023
- Messages
- 238
- Points
- 213

Grazie a Johan, RussF, Jimsky e Peter Gutterman per gli apprezzamenti.
Thanks to Johan, RussF, Jimsky and Peter Gutterman for the appreciation.
Thanks to Johan, RussF, Jimsky and Peter Gutterman for the appreciation.
- Joined
- Sep 22, 2023
- Messages
- 238
- Points
- 213

Grazie mille Johan.Those oars,a true labor of love!
Thank you very much Johan.
- Joined
- Sep 22, 2023
- Messages
- 238
- Points
- 213

Grazie di nuovo Johan.The completed life boats, including oars, sails,barrels, buckets, etc will definitely add to the overall looks of your model. Well done indeed.
Thanks again Johan.
- Joined
- Sep 22, 2023
- Messages
- 238
- Points
- 213

Ciao Russ, grazie per l'apprezzamento e complimenti per l'acutezza dell'osservazione.Your lifeboats look fantastic! I am curious - would the lifeboat supports have been placed directly on the gratings as you show? It seems that it would be difficult to quickly cover the hatches during stormy seas.
Le vostre scialuppe di salvataggio sono fantastiche! Sono curioso: i supporti delle scialuppe di salvataggio sarebbero stati posizionati direttamente sulle grate, come mostrate? Sembra che sarebbe difficile coprire rapidamente i boccaporti durante la tempesta.
Grazie mille anche per la vostra splendida traduzione.
Sono abituato alle osservazioni acute, intelligenti e sagaci di Johan (RDN1954). A lui non sfugge nulla e ne sono nati dei dialoghi molto interessanti e istruttivi per me.
Devo dire che questo tipo di osservazioni è molto stimolante per me. Molto spesso colpiscono nel segno e mi inducono a fare delle modifiche. Qualche volta invece mi arrendo.
Entrando nel merito della tua osservazione devo dire innanzitutto che hai ragione. E' certamente un errore.
Le scialuppe centrali non erano previste nel progetto iniziale. Se le avessi previste non le avrei posizionate in modo da impedire l'apertura dei carabottini.
Un'apertura scomoda è un vulnus (bisogna rinunciare a quelle aperture finchè le scialuppe sono in posizione) ma addiruttura non poterle coprire con un telo in caso di burrasca o tempesta è un grosso difetto.
Come soluzione ho immaginato questo:
Il supporto della scialuppa è posizionato proprio sulla divisione di due carabottini diversi. No va quindi immaginato che il supporto poggi su una grata unica ma sulla parte che separa due grate diverse.
In questo modo sarà possibile un piccolo spostamento per poter infilare l'incerata di protezione (anzi le due incerate di protezione).
Sull'ultima grata ho immaginato due teli che si uniscono intorno al supporto con lacci e chiusure sovrapposte.
In alternativa si può immaginare che le aperture venivano coperte alzando di poco la scialuppa servendosi di manovre correnti applicate al gaff e sollevando di pochi centimetri i supporti (più di una persona) in modo da poter infilare la tela cerata sotto.
L'altra alternativa è quella di viaggiare con i carabottini sui quali poggiano i supporti perennemente coperti da cerata, potendo contare sugli altri carabottini liberi per il ricambio di aria e la luce.
Hi Russ, thanks for the appreciation and compliments for the sharpness of the observation.
Thanks a lot also for your splendid translation.
I am used to Johan's (RDN1954) sharp, intelligent and sagacious observations.
Nothing escapes him and some very interesting and instructive dialogues have arisen from them.
I must say that these kind of observations are very stimulating for me.
Very often they hit the mark and induce me to make changes.
Sometimes however I give up.
Getting into the merits of your observation I must first say that you are right.
It is certainly a mistake.
The central lifeboats were not foreseen in the initial project. If I had foreseen them I would not have positioned them in such a way as to prevent the opening of the gratings.
An inconvenient opening is a vulnus (you have to give up those openings while the lifeboats are in position) but not being able to cover them with a sheet in the event of a storm or tempest is a big flaw.
As a solution I imagined this:
The lifeboat support is positioned right on the division of two different gratings.
Therefore, it should not be imagined that the support rests on a single grating but on the part that separates two different gratings.In this way, a small movement will be possible to be able to insert the protective tarpaulin (or rather the two protective tarpaulins).
On the last grating I imagined two sheets that join around the support with overlapping laces and closures.
Alternatively, you can imagine that the openings were covered by raising the lifeboat a little using running rigging applied to the gaff and raising the supports a few centimeters (more than one person) so as to be able to insert the tarpaulin underneath.
The other alternative is to travel with the gratings on which the supports rest permanently covered by tarpaulin, being able to count on the other free gratings for air exchange and light.
- Joined
- Sep 10, 2024
- Messages
- 1,037
- Points
- 393

Grazie mille anche per la vostra splendida traduzione. Thanks a lot also for your splendid translation.
I truly wish I could take credit, but we can thank Google for that!
Vorrei davvero potermi prendere il merito, ma per questo possiamo ringraziare Google!
Come soluzione ho immaginato questo: As a solution I imagined this: ...
I like your imagination. You have thought this through and have some very plausible explanations. Just remember the phrase, "That's my story and I'm sticking to it."
Mi piace la tua immaginazione. Hai riflettuto a lungo e hai fornito delle spiegazioni molto plausibili. Ricorda solo la frase: "Questa è la mia storia e mi attengo ad essa".
- Joined
- Sep 22, 2023
- Messages
- 238
- Points
- 213

Grazie Russ, volevo aggiungere una cosa.I truly wish I could take credit, but we can thank Google for that!
Vorrei davvero potermi prendere il merito, ma per questo possiamo ringraziare Google!
I like your imagination. You have thought this through and have some very plausible explanations. Just remember the phrase, "That's my story and I'm sticking to it."
Mi piace la tua immaginazione. Hai riflettuto a lungo e hai fornito delle spiegazioni molto plausibili. Ricorda solo la frase: "Questa è la mia storia e mi attengo ad essa".
Ribadisco che se avessi progettatto di posizionare le scialuppe sul ponte (e non solo laterali come inizialmente immaginato) non avrei ostruito i carabottini.
Tuttavia, a posteriori, ho trovato delle giustificazioni che non sono solo frutto della mia immaginazione.
La mancanza di spazio rendeva alcune scelte obbligate.
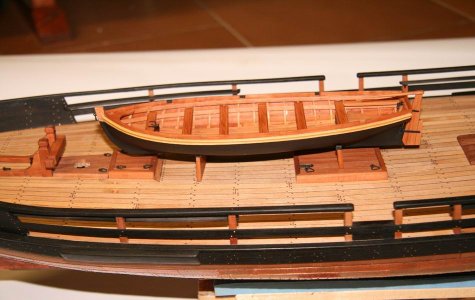
Posto alcune foto della LA JACINTHE 1825 scala 1:30.
Si tratta di un capolavoro eseguito da un modellista italiano, di un livello superiore al mio (in Italia si può dire che non gli allaccio nemmeno le scarpe).
Ebbene, puoi notare che la scialuppe sono sopra un boccaporto del deck.
Ora, è vero che questo boccaporto non è una grata e non ha bisogno di essere coperto con un'incerata quando arriva una burrasca ma è pur vero che è un boccaporto molto grande e importante e sul ponte non ce ne sono molti altri.
Deduco quindi che, molto spesso, sulle imbarcazioni antiche lo spazio non era poi molto e bisognava fare di necessità virtù.
Insomma, forse spostare la scialuppa era in preventivo più spesso di quanto possiamo immaginarci.
P.S. Anche io uso Google.
Thanks Russ, I wanted to add something.
I repeat that if I had planned to place the lifeboats on the deck (and not only on the sides as initially imagined) I would not have obstructed the gratings.
However, in hindsight, I found some justifications that are not just the fruit of my imagination.
The lack of space made some choices forced.
I am posting some photos of the LA JACINTHE 1825 1:30 scale.
It is a masterpiece made by an Italian modeler, of a higher level than mine (in Italy you can say that I don't even tie his shoes).
Well, you can see that the lifeboats are above a deck hatch.
Now, it is true that this hatch is not a grate and does not need to be covered with a tarpaulin when a storm arrives but it is also true that it is a very large and important hatch and on the deck there are not many others.
I deduce then that, very often, on ancient boats there was not much space and one had to make a virtue of necessity.
In short, perhaps moving the lifeboat was planned more often than we can imagine.
P.S. I use Google too.


- Joined
- Sep 10, 2024
- Messages
- 1,037
- Points
- 393

Grazie Russ, volevo aggiungere una cosa.
Ribadisco che se avessi progettatto di posizionare le scialuppe sul ponte (e non solo laterali come inizialmente immaginato) non avrei ostruito i carabottini.
Tuttavia, a posteriori, ho trovato delle giustificazioni che non sono solo frutto della mia immaginazione.
La mancanza di spazio rendeva alcune scelte obbligate.
Posto alcune foto della LA JACINTHE 1825 scala 1:30.
Si tratta di un capolavoro eseguito da un modellista italiano, di un livello superiore al mio (in Italia si può dire che non gli allaccio nemmeno le scarpe).
Ebbene, puoi notare che la scialuppe sono sopra un boccaporto del deck.
Ora, è vero che questo boccaporto non è una grata e non ha bisogno di essere coperto con un'incerata quando arriva una burrasca ma è pur vero che è un boccaporto molto grande e importante e sul ponte non ce ne sono molti altri.
Deduco quindi che, molto spesso, sulle imbarcazioni antiche lo spazio non era poi molto e bisognava fare di necessità virtù.
Insomma, forse spostare la scialuppa era in preventivo più spesso di quanto possiamo immaginarci.
P.S. Anche io uso Google.
Thanks Russ, I wanted to add something.
I repeat that if I had planned to place the lifeboats on the deck (and not only on the sides as initially imagined) I would not have obstructed the gratings.
However, in hindsight, I found some justifications that are not just the fruit of my imagination.
The lack of space made some choices forced.
I am posting some photos of the LA JACINTHE 1825 1:30 scale.
It is a masterpiece made by an Italian modeler, of a higher level than mine (in Italy you can say that I don't even tie his shoes).
Well, you can see that the lifeboats are above a deck hatch.
Now, it is true that this hatch is not a grate and does not need to be covered with a tarpaulin when a storm arrives but it is also true that it is a very large and important hatch and on the deck there are not many others.
I deduce then that, very often, on ancient boats there was not much space and one had to make a virtue of necessity.
In short, perhaps moving the lifeboat was planned more often than we can imagine.
P.S. I use Google too.
View attachment 525053
View attachment 525054
View attachment 525055
View attachment 525056
Yes, it is a beautiful model and I agree with everything you say, Alessandro. It makes me wonder if the racks that the boat sits on were bolted to the hatch covers. Even with the boat lashed down, I could see the racks tipping forward or aft in rough weather if they were not fastened. I will have to defer to someone with more nautical knowledge then me for this question.
Sì, è un bellissimo modello e sono d'accordo con tutto quello che dici, Alessandro. Mi chiedo se le rastrelliere su cui poggia la barca fossero imbullonate ai boccaporti. Anche con la barca ancorata, vedevo le rastrelliere ribaltarsi in avanti o indietro in caso di maltempo, se non fossero state fissate. Dovrò rimettere la domanda a qualcuno con più conoscenze nautiche di me.
- Joined
- Sep 22, 2023
- Messages
- 238
- Points
- 213

Yes, it is a beautiful model and I agree with everything you say, Alessandro. It makes me wonder if the racks that the boat sits on were bolted to the hatch covers. Even with the boat lashed down, I could see the racks tipping forward or aft in rough weather if they were not fastened. I will have to defer to someone with more nautical knowledge then me for this question.
Sì, è un bellissimo modello e sono d'accordo con tutto quello che dici, Alessandro. Mi chiedo se le rastrelliere su cui poggia la barca fossero imbullonate ai boccaporti. Anche con la barca ancorata, vedevo le rastrelliere ribaltarsi in avanti o indietro in caso di maltempo, se non fossero state fissate. Dovrò rimettere la domanda a qualcuno con più conoscenze nautiche di me.
Scusami il ritardo nella risposta Russ, ma ho potuto leggere il tuo messaggio solo ora.
Anche questa domanda è molto sagace. Le tue osservazioni sono molto stimolanti e sono l'anima di un forum.
Io non sono esperto e sarà difficile che qualcuno possa dirtelo con certezza. Anche per i marinai attuali può essere difficile, le cose sono molto cambiate.
Non so se erano imbullonati.
Nel farli ho cercato di creare una base abbastanza larga per garantire il più possibile la staticità dell'elemento.
Delle robuste cime incrociate dovrebbero tenere ferma la barca verso il deck e quindi anche i supporti che stanno sotto. Tuttavia, come giustamente osservi tu, chissà se potevano bastare in caso di tempesta.
Io credo di si. Mi baso su un discorso logico:
L'importante era tenere ferma la scialuppa in caso di tempesta. Qualora le funi non avessero tenuto e la scialuppa fosse sbalzata via, poco importava della sorte dei supporti.
Inoltre, finchè le funi tenevano, la barca manteneva ben fermi anche i supporti.
P.S. Anche un modellista che sta in questo stesso forum (JerryTodd con la sua magnifica Constellation) ha creato delle scialuppe mettendo i supporti proprio sopra i carabottini.
Non mi pare che siano fissati, ma non si può dire con certezza.
Sicuramente c'erano golfare per fissare le scialuppe.
Ecco il link:
Constellation, the sloop of war c.1856 in 1:36 scale for R/C sailing
Except for the clamps, you can't tell I epoxied all the starboard pin-rails on, including up on the starboard bow
shipsofscale.com
Sorry for the delay in replying Russ, but I was only able to read your message now.
This question is also very insightful.
Your observations are very stimulating and are the soul of a forum.
I am not an expert and it will be difficult for anyone to tell you for sure.
Even for today's sailors it can be difficult, things have changed a lot.
I do not know if they were bolted.
In making them I tried to create a base wide enough to guarantee the static nature of the element as much as possible.
Strong crossed ropes should hold the boat steady towards the deck and therefore also the supports that are underneath.
However, as you rightly observe, who knows if they would have been enough in the event of a storm.
I think so. I base my argument on a logical reasoning: The important thing was to keep the lifeboat steady in the event of a storm. If the ropes had not held and the lifeboat had been thrown away it would have mattered little what happened to the supports.
Furthermore, as long as the ropes held, the boat also held the supports firmly in place.
P.S. Also a modeler who is in this same forum (JerryTodd with his magnificent Constellation) has created some lifeboats by placing the supports right above the gratings.
I don't think they are fixed, but it is not possible to say for sure.
Surely there were eyebolts to secure the lifeboats.
Here is the link:
Constellation, the sloop of war c.1856 in 1:36 scale for R/C sailing
Except for the clamps, you can't tell I epoxied all the starboard pin-rails on, including up on the starboard bow
shipsofscale.com
Last edited:
- Joined
- Sep 22, 2023
- Messages
- 238
- Points
- 213

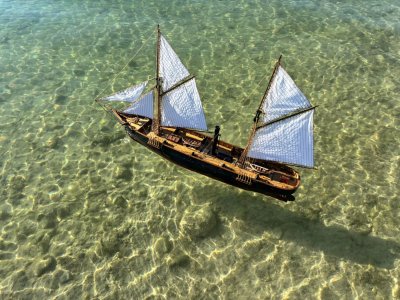
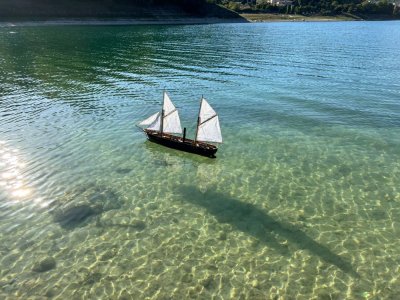
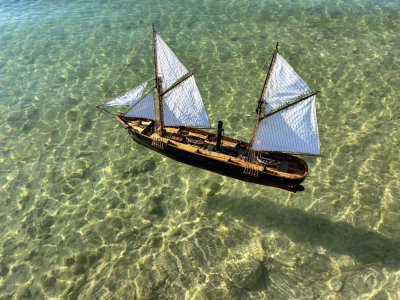
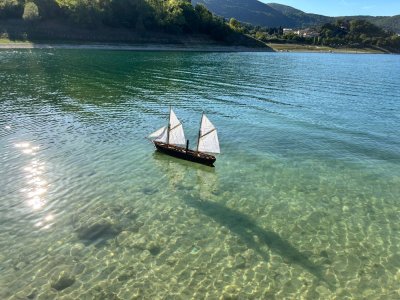
Seconda navigazione a vela sul Lago Paterno del modello in scala 1:60 di una cannoniera a vapore armata di goletta, assistita da una motonave in scala 1:50.
Il modello non è ancora completato.
Rispetto al primo viaggio, sono stati aggiunti i cannoni e le scialuppe di salvataggio centrali.
Data di navigazione: 4 settembre 2025
OBIETTIVI E SCOPI
Avevo programmato di imbarcarmi su due navi.
Sulla Francesca avrei montato tre telecamere.
Una piccola e leggera telecamera (tipo spycam cinese), non di altissima qualità (ma che in passato aveva sempre funzionato), è stata montata sul fumaiolo con nastro biadesivo.
Non ha avuto alcun impatto sulla stabilità laterale della nave grazie al suo peso molto leggero.
La visuale era piuttosto libera.
L'obiettivo era filmare il movimento della nave dalla prua e, soprattutto, ottenere riprese ravvicinate (molto ravvicinate) dell'altra nave.
Una videocamera tipo GoPro (ma di una marca molto più economica, che uso normalmente per le immersioni subacquee) per le riprese subacquee grazie alla custodia trasparente e impermeabile.
Inizialmente posizionerei la videocamera sotto lo scafo per le riprese subacquee e, successivamente, sul ponte per primi piani della goletta in navigazione.
Un vecchio cellulare, inutilizzato, ma performante.
LUOGO
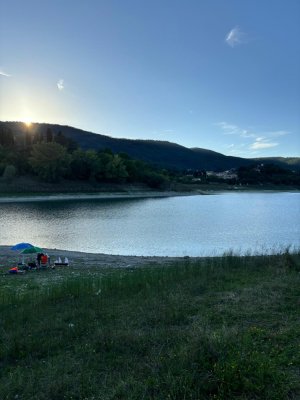
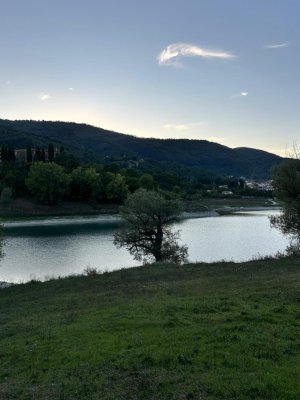
Lago del Turano (provincia di Rieti), a circa un'ora di auto da Roma.
Il lago è lungo 8 km, largo 3 km e copre una superficie di 5,58 km², con una profondità massima di 68 metri.
NAVIGAZIONE
Avevo visto le previsioni meteo in anticipo.
Non erano ottime (bel tempo, niente pioggia, ma vento leggero, e solo a metà giornata), ma avevo già programmato la giornata e non potevo cambiarla.
Comunque, verso le 14:00, le previsioni davano circa 14 km/h.
Purtroppo, a causa di vari preparativi a terra, sono riuscito a varare le barche solo alle 17:00, quando il vento si era completamente calmato.
Il mio errore più grande è stato non preparare tutto il giorno prima, pensando di poterlo fare la mattina.
Mi servirà da lezione per la prossima volta.
REGISTRAZIONE VIDEO
La microcamera cinese ha smesso di funzionare e si è spenta dopo mezzo minuto.
Forse perché non veniva usata da due anni e la batteria non teneva più la carica.
La telecamera Nilox invece mi ha sorpreso. Aveva sempre funzionato bene.
Nessun problema. Questa volta, non ha iniziato a registrare.
Il telefono si è rivelato troppo pesante da appoggiare su un lato.
Essendo così grande, non c'era altro posto.
Avrei dovuto creare una struttura di supporto, ma non c'era tempo.
Alla fine, ho scattato solo da riva con il telefono.
In controluce e con un dispositivo di medie prestazioni, molte riprese mancano di dettagli.
Ad esempio, le vele sono bianche e uniformi.
Le cuciture e i dettagli sono visibili solo nella foto di apertura di alcuni video.
L'unico vantaggio è che (con il sole che mi illuminava direttamente) sono stati creati effetti di luce molto belli senza dover applicare filtri o effetti di post-produzione.
Montaggio video
Anni fa usavo programmi come Pinnacle Studio e mi piaceva usare molte delle sue funzionalità (sfocatura e transizioni tra le scene, picture-in-picture, effetti, ecc.).
Per questo video ho utilizzato un'app gratuita per Android: YouCut.Ho semplicemente combinato diverse clip, tagliato ed eliminato alcune parti, rimosso l'audio e aggiunto musica.
Nient'altro, nessun filtro o effetto.
Allego due video molto brevi e tre montaggi (uno lungo, uno medio e uno breve).
Inoltre, i link di YouTube per chi non riesce ad aprire i file video.
Second sailing voyage on Lake Paterno of the 1:60 scale model of a schooner-armed steam gunboat, assisted by a 1:50 scale motor vessel.
The model is not yet completed.
Compared to the first voyage, the cannons and central lifeboats have been added.
Navigation date: September 4, 2025
AIMS AND OBJECTIVES
I had planned to take two ships.
On the Francesca, I would mount three cameras.
A small, lightweight video camera (a Chinese spycam type), not of the highest quality (but which had always worked in the past), was mounted on the funnel with double-sided tape.
It had no impact on the ship's lateral stability thanks to its very light weight.
The view was fairly unobstructed.
The goal was to film the ship's movement from the bow and, above all, to get close (very close) shots of the other ship.
A GoPro-type camera (but a much cheaper brand, which I normally use when scuba diving) for underwater footage thanks to the transparent, waterproof housing.
I would initially position the camera under the hull for underwater footage and, later, on the deck for close-up shots of the schooner underway.
An old, unused, but capable cell phone.
LOCATION
Lake Turano (province of Rieti), about an hour's drive from Rome.
The lake is 8 km long, 3 km wide, and covers a surface area of 5.58 km², with a maximum depth of 68 meters.
NAVIGATION
I had seen the weather forecast beforehand. It wasn't great (good weather, no rain, but light wind, and only during the middle of the day), but I had already planned the day and couldn't change it.
Anyway, around 2:00 PM, the forecast was for about 14 km/h.
Unfortunately, due to various preparations on shore, I was only able to launch the boats at 5:00 PM, when the wind had completely died down.
My biggest mistake was not preparing everything the day before, thinking I could do it in the morning. It will serve as a lesson for next time.
VIDEO RECORDING
The Chinese micro camera stopped working and turned off after half a minute. Maybe because it hadn't been used for two years and the battery no longer holds a charge.
The camera surprised me. Had it always worked well? No problems. This time, it wouldn't start recording.
The phone proved too heavy to place on its side. Since it was so large, there was no other place. I would have had to create a support structure, but there was no time.
In the end, I only shot from the shore with my phone.
When backlit and with a medium-performance device, many shots lack detail. For example, the sails are white and uniform. The seams and details are only visible in the opening photo of some videos.
The only advantage is that (with the sun facing directly against me) very beautiful lighting effects came out without applying any filters or post-processing effects.
Video Editing
Years ago, I used programs like Pinnacle Studio and enjoyed using many of its features (blurring and transitions between scenes, picture-in-picture, effects, etc.).
For this video, I used a free Android app: YouCut.
I simply combined several clips, cut and deleted some parts, removed the audio, and added music. Nothing else, no filters or effects.
I'm attaching two very short videos and three edits (one long, one medium, and one short).
Plus the YouTube links for anyone who can't open the video files


Last edited:
- Joined
- Sep 22, 2023
- Messages
- 238
- Points
- 213

Scusate, non riesco ad allegare i video metterò i link YouTube
Sorry, I can't attach the videos. I'll post the YouTube links.
For a better viewing experience, I recommend clicking on the YouTube logo and watching them on that platform instead of pressing play directly.
Sorry, I can't attach the videos. I'll post the YouTube links.
For a better viewing experience, I recommend clicking on the YouTube logo and watching them on that platform instead of pressing play directly.
Last edited:
- Joined
- Sep 22, 2023
- Messages
- 238
- Points
- 213

Grazie mille Johan, sempre troppo buono. Spero che tu sia indulgente anche con i video, ma eventuali critiche sono più che giustificate, non ti preoccupare.Beautiful shots!
I especially like the ones of the schooner a bit further away; for some odd reason they appear to add authenticity.
Thanks so much, Johan, always so kind.
I hope you're being lenient with the videos, too, but any criticism is more than justified, don't worry.

