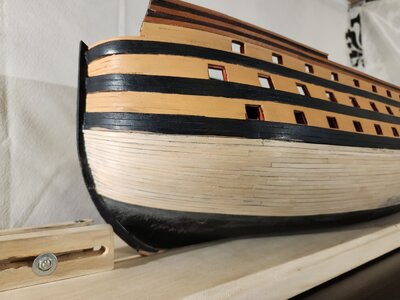
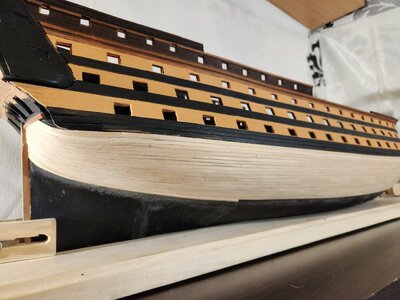
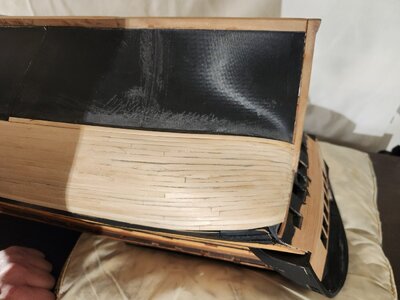
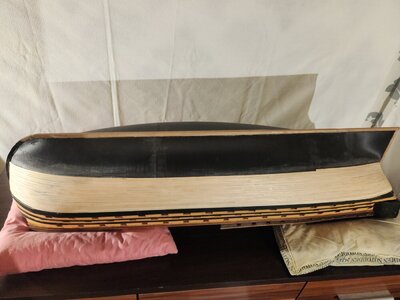
another way would be lifting the planks, IMHO. Carefully lift by prying the plank then you can put some wood filling, and put the planks back. Or you may replace those few planks all together.I wanted to use a putty as a last resort. Maybe someone will have other idea
-

Win a Free Custom Engraved Brass Coin!!!
As a way to introduce our brass coins to the community, we will raffle off a free coin during the month of August. Follow link ABOVE for instructions for entering.
-

PRE-ORDER SHIPS IN SCALE TODAY!
The beloved Ships in Scale Magazine is back and charting a new course for 2026!
Discover new skills, new techniques, and new inspirations in every issue.
NOTE THAT OUR FIRST ISSUE WILL BE JAN/FEB 2026
You are using an out of date browser. It may not display this or other websites correctly.
You should upgrade or use an alternative browser.
You should upgrade or use an alternative browser.
118 Gun French three-decker - Le Commerce de Marseille / L'Ocean - scale 1:72
- Joined
- Jan 21, 2022
- Messages
- 886
- Points
- 403

Thanks for the tip. I don't think removing any planks is an option. They are preety much cemented. I'll try to fix it somehow, but thanks anywayanother way would be lifting the planks, IMHO. Carefully lift by prying the plank then you can put some wood filling, and put the planks back. Or you may replace those few planks all together.
- Joined
- Jan 21, 2022
- Messages
- 886
- Points
- 403

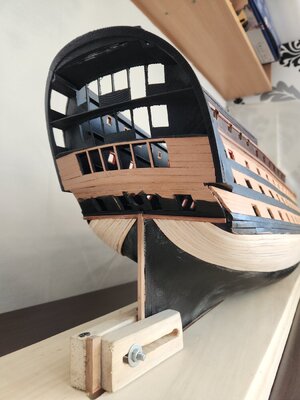
Beautiful lines on this ship. The shot of the butt end is 'cool'. Your planking work is really impressive!
- Joined
- Jan 21, 2022
- Messages
- 886
- Points
- 403

Thank you Paul. So far I was 'only' twice forced to fill gaps with cutted piceces of wood to fill space between planks. So far, so goodBeautiful lines on this ship. The shot of the butt end is 'cool'. Your planking work is really impressive!

Last edited:
Bon courage, as les Amis Français often say! The planking looks great!
- Joined
- Jan 21, 2022
- Messages
- 886
- Points
- 403

Thank you. Unfortunetly other side is not that great. I didn't menage to fix that mistake which I mentioned earlier in posts and it keeps continuing. I'm afraid it can only be fixed with puttyBon courage, as les Amis Français often say! The planking looks great!
- Joined
- Oct 15, 2017
- Messages
- 1,191
- Points
- 443

Looking great. The run of planks is very gentle and pleasing to the eye. Apologies if already stated, but I'm assuming you are using CA? If so, medium viscosity?
Kris' printed hull foundation and your construction skills, you two have collaborated to create a new innovated approach to ship modelling.
KUDOS to you both!
Kris' printed hull foundation and your construction skills, you two have collaborated to create a new innovated approach to ship modelling.
KUDOS to you both!
Looking very nice! The amount of work to plank a ship of this size is remarkable!
- Joined
- Jan 21, 2022
- Messages
- 886
- Points
- 403

Thank you for appreciation.
Yes medium CA 100g already used and starting a new bottle.
This hull is very forgiving in mistakes. Even if I bend or fit a plank not 100% in right way I can file down to it's shape and it still holds ship betifull lines.
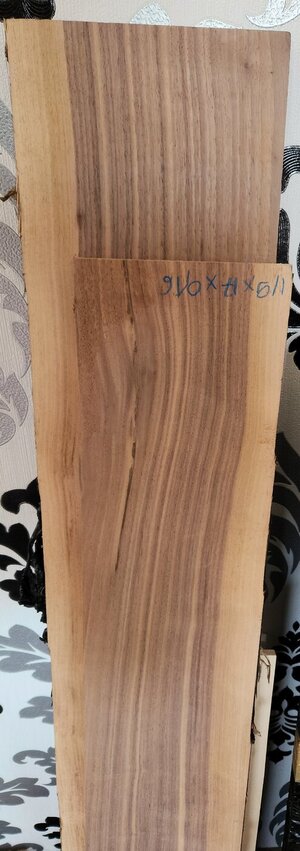
I didn't mention that before, below last wale I use a maplewood and I've almost cut down a 111x24x0,18cm plank. So such project is very wood consuming.
Last edited:
- Joined
- Jan 21, 2022
- Messages
- 886
- Points
- 403

Yes. A nice test of patience before coppering(not in this oneLooking very nice! The amount of work to plank a ship of this size is remarkable!
- Joined
- Jan 21, 2022
- Messages
- 886
- Points
- 403

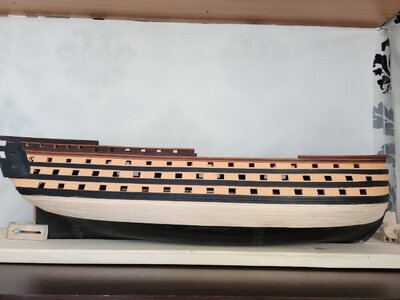
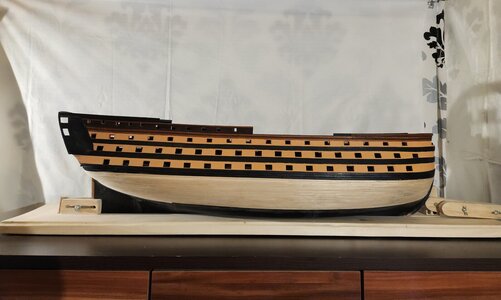
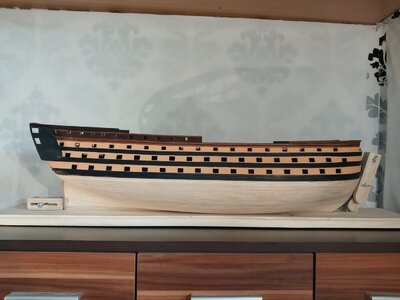
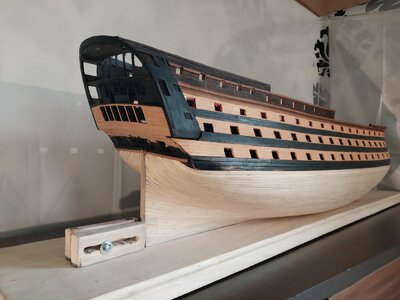
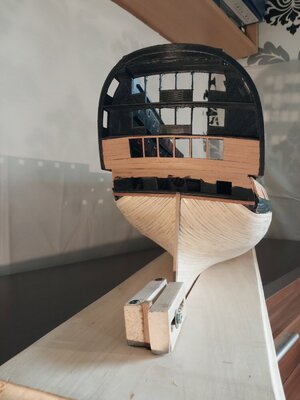
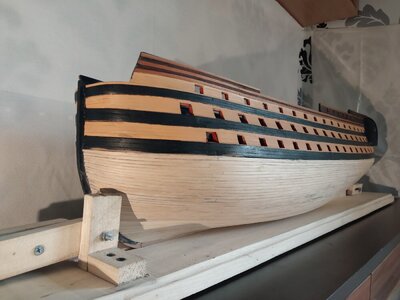
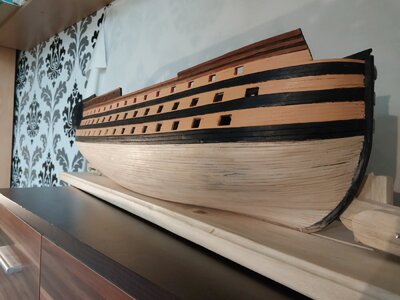
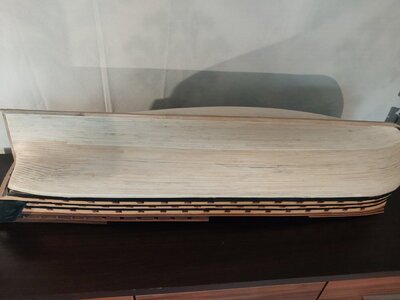
Today is THE DAY. Planking is finished
There will be no further layer of walnut veneer. First of all, this one is already so matched that adding even 0.5mm will be visible and won't match in thickness with the lower Wales. And secondly, it's doing the same thing all over again: NO NO NO and again NO. My mental endurance will not stand it. What's too much is not healthy
As you can see on reversed bottom some planks didn't line very well, but the shape of hull still remained the same.
Overall impressions of working with 3d hull. It's very pleasant to work with. With no experiance I was able to shape it much better then if I were to start some baisic POB kit. It's something weird to say,but the hull forces you to make it the right way. I bet if you have some(any) experience in wood ship modeling the results would be much better. Despite some small bumps and other mistakes I'm very pleased with results


Congratulations my friend! A fine accomplishment and so very well done. Bravo!
- Joined
- Jan 21, 2022
- Messages
- 886
- Points
- 403

Thank you. It's always a pleasure to read your commentsCongratulations my friend! A fine accomplishment and so very well done. Bravo!
Looking very good! Congrats on your milestone. 

My Congratulation for finishing the planking works - A very big milestone reached
Bravo!
Bravo!
- Joined
- Jan 21, 2022
- Messages
- 886
- Points
- 403

Thank you. From now on things should be little less repetitive and finally I can do sth elseMy Congratulation for finishing the planking works - A very big milestone reached
Bravo!
- Joined
- Jan 21, 2022
- Messages
- 886
- Points
- 403

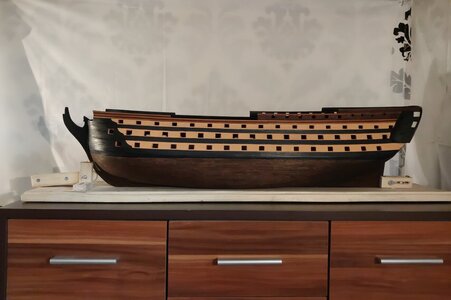
14.04.2023 Update
Water line is done. The knee of the head- re-do. With maple wood I could make cuts much deeper which resulted in better lines.
There's also anchor prtoections. Is this correct name? I'm not sure if they should be black. On Le Bretagne and one of the L'Ocean the're black, but on paintings and other models they're yellow. I decided to stay with Naval Action game like look.
As for the underwater part. It was all an big experiment and I wasn't quite sure if It'll be a succesfull one, so there aren't photos of this process. Sorry
Firts I tought acrylic paints can be a good option to start with. They worked before, what can go wrong... I made some samples, choose the color that suits best, but on model things weren't all that wonderful. I had to scrape everything down to zero. In places with putty or glue mixed with wood dust it was impossible to do. Next step chestnut stain to brighten the hull before palisander stain. I'm leaving the jugment how it finally looks to you. I know it has shortcomings and mistakes, but I'm already drawing conclusions.
Same story with anchor protection they'll be better in next model. As I said in first post this is completly new to me and I treat this model as a big experiment and a play ground.
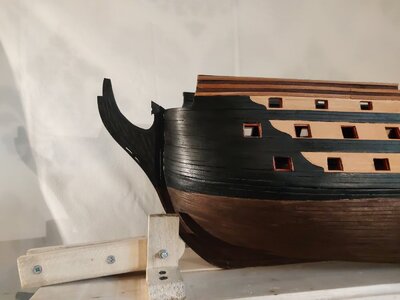
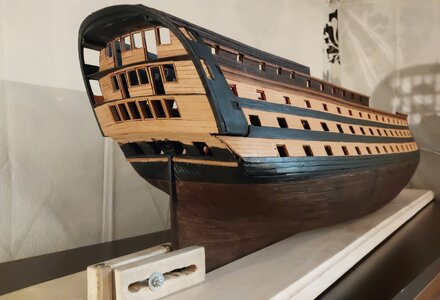
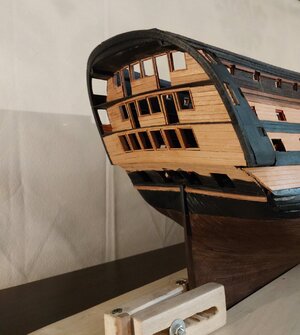
The knee of the head after and before

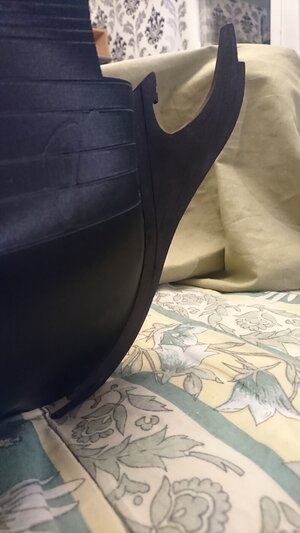
Water line is done. The knee of the head- re-do. With maple wood I could make cuts much deeper which resulted in better lines.
There's also anchor prtoections. Is this correct name? I'm not sure if they should be black. On Le Bretagne and one of the L'Ocean the're black, but on paintings and other models they're yellow. I decided to stay with Naval Action game like look.
As for the underwater part. It was all an big experiment and I wasn't quite sure if It'll be a succesfull one, so there aren't photos of this process. Sorry
Firts I tought acrylic paints can be a good option to start with. They worked before, what can go wrong...
 I made some samples, choose the color that suits best, but on model things weren't all that wonderful. I had to scrape everything down to zero. In places with putty or glue mixed with wood dust it was impossible to do. Next step chestnut stain to brighten the hull before palisander stain. I'm leaving the jugment how it finally looks to you. I know it has shortcomings and mistakes, but I'm already drawing conclusions.
Same story with anchor protection they'll be better in next model. As I said in first post this is completly new to me and I treat this model as a big experiment and a play ground.


The knee of the head after and before


