-

Win a Free Custom Engraved Brass Coin!!!
As a way to introduce our brass coins to the community, we will raffle off a free coin during the month of August. Follow link ABOVE for instructions for entering.
-

PRE-ORDER SHIPS IN SCALE TODAY!
The beloved Ships in Scale Magazine is back and charting a new course for 2026!
Discover new skills, new techniques, and new inspirations in every issue.
NOTE THAT OUR FIRST ISSUE WILL BE JAN/FEB 2026
You are using an out of date browser. It may not display this or other websites correctly.
You should upgrade or use an alternative browser.
You should upgrade or use an alternative browser.
17th Century Battle Station - HMS Mordaunt, 1:32 - DocBlake
Where's Don's attempt on this great build?
Havagoodone Greg
Love the birds eye maple board, very chique.
Hope it doesnt atracts to much attention away from the model itself.
Hope it doesnt atracts to much attention away from the model itself.
Thanks Maarten! Once the planking is in place, there won’t be that much maple visible, so I think I’ll be OK.
As a side note, that birds eye maple would look awesome on the body of a guitar. I don't know if I've ever seen that much figure in such a small piece.
I'm green with envy about that birds eye maple. I checked, we can get it here in Australia, but its soooooo expensive.As a side note, that birds eye maple would look awesome on the body of a guitar. I don't know if I've ever seen that much figure in such a small piece.
Happymodeling
Greg
Hi Winston! I'm glad you could stop by.
I bought that curly bird's eye maple a few years back. 4/4 planks, 8"-10" wide and 16' long. All of it heavily figured as was this cutoff. A guy had this in his garage and I bought all 8 planks for $2.50/ board foot. I felt guilty taking his lumber!
I bought that curly bird's eye maple a few years back. 4/4 planks, 8"-10" wide and 16' long. All of it heavily figured as was this cutoff. A guy had this in his garage and I bought all 8 planks for $2.50/ board foot. I felt guilty taking his lumber!
Excellent work Dave, You and Mike are making this a hard one to follow
Excellent work Dave, You and Mike are making this a hard one to follow
G'day Don
Regarding this issue,
When will we see the start of your build? You are correct in saying, it's going to hard for you, but I think you up to the challenge!Havagooday mate
Greg
Hi Greg, I hope to be caught up on another project by the end of the week then I will start this one. We also have the world`s junior men`s softball tournament in town that I will be watching all week so I am busy juggling time around that too. Australia has a team here along with New Zealand who are the world champs.
I started gluing up the frames by attaching the two outermost ones to the buildboard and the deck clamp. I built a quick little jig to ensure these were exactly perpendicular, and measured the same distance apart at the top as at the bottom. the jig straddles the deck clamp and keeps the frames square to the buildboard. 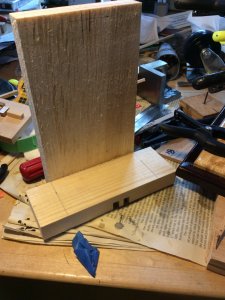
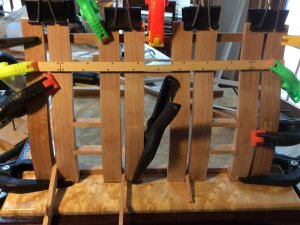 Because the planking is pre-cut and pre-treenailed, it's very important that the inside frames align with the three gun ports properly.

 Because the planking is pre-cut and pre-treenailed, it's very important that the inside frames align with the three gun ports properly.
The precision of this kit is amazing! Mike said that if something doesn't fit, it's because something is out of square. He is absolutely right!
The precision of this kit is amazing! Mike said that if something doesn't fit, it's because something is out of square. He is absolutely right!
It really has been a joy to build so far!!! You are doing great, keep going!!!! I like how you used an outboard planking strake for alignment testing.
The frames are all glued in place except for the upper futtocks, above the gun ports. I'll wait until the main deck clamp is installed. Although most of the gun deck beams will be hidden by planking, the ends are plainly visible and the beams must be laid out exactly so the butt joints and treenails fall in the center of each beam.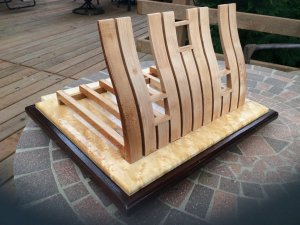
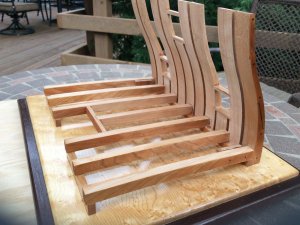
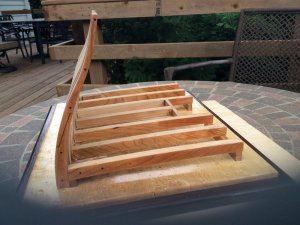


Are you referring to the bolts for the knees?Looking great Dave. I can already see your extra little details coming to life!!
Happymodeling
Greg
The lower deck was installed next. All the decking for the three kits was randomized so there was no discernible grain pattern in the finished deck on any of the three models. The effect is much more realistic the a plain vanilla deck of holly would be...although we did consider holly for the decking! Next is a fine finish sanding and some poly on the decking.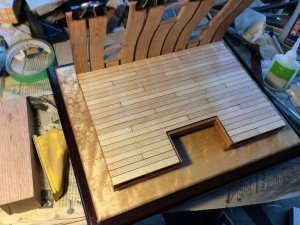

Very nice Dave.
The planking is realy looking good, also with the 5 shift pattern of the joints !


