3d printing

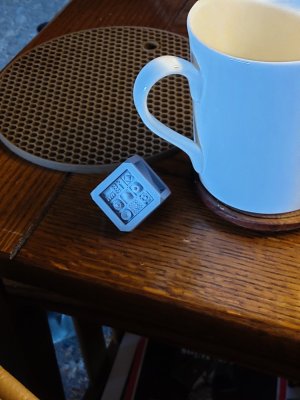
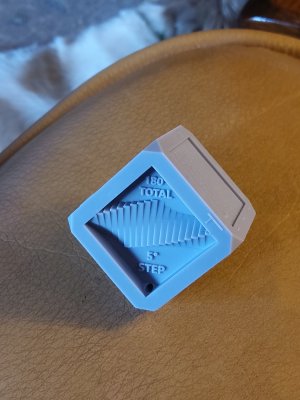
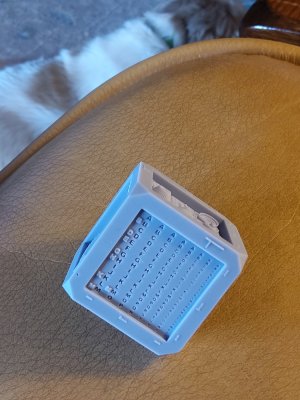
The pieces that come out of a filament printer always seem to need deburring before I can use them and sometimes I don't get what I want. I am not sure if the resolution would improve if I changed the nozzle from 0.4 mm to 0.2 mm but I intend to find out.
Please note that the pieces I print are less than a couple of centimetres in length so there might be a point where I am hitting limitations on filament printers. I believe resin printers do a better job with small pieces, but I am not interested in the mess and the post treatment that the parts require.
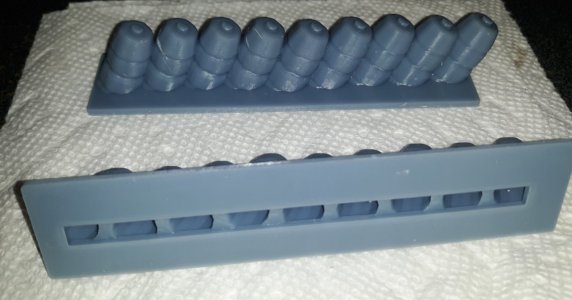
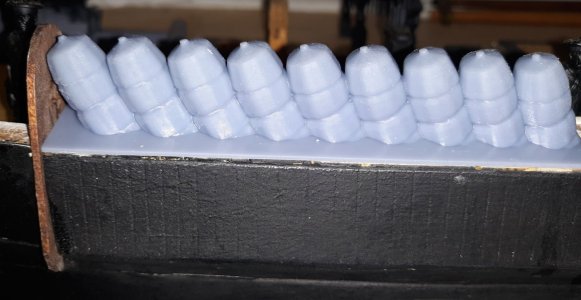
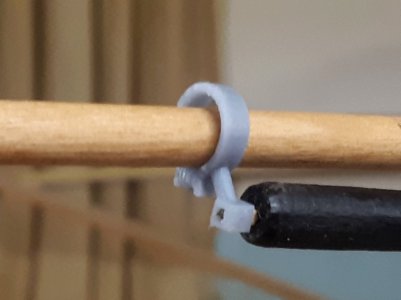
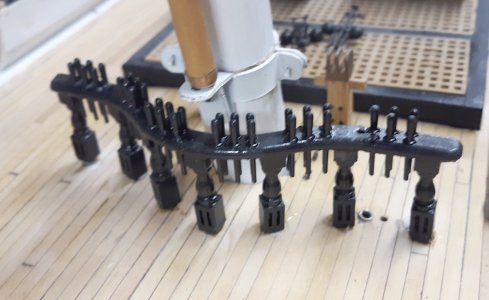
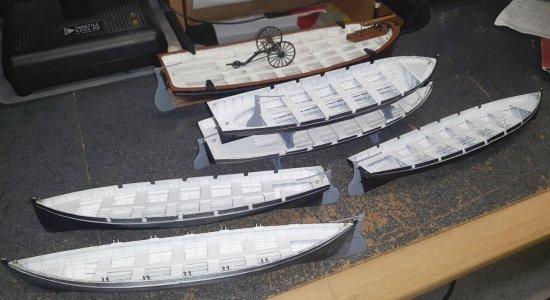
Resolution is something to consider....20240812_082412.jpg20240812_082447.jpg20240812_082425.jpg20240812_082419.jpg
 
The pieces that come out of a filament printer always seem to need deburring before I can use them and sometimes I don't get what I want. I am not sure if the resolution would improve if I changed the nozzle from 0.4 mm to 0.2 mm but I intend to find out.
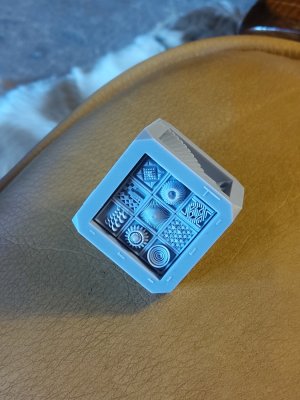
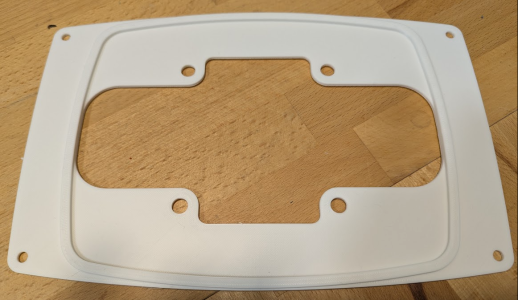
That shouldn't be happening and it sounds like you haven't yet managed to get your printer dialled in, or you've got moisture in the filament, or more likely, both. Apologies if this is teaching you to suck eggs but if I was you, I'd go through the calibration process again and run print temperature and speed towers for the reel of filament you plan to use (as opposed to generic tests) to figure out what gives you the best result. Below is a PLA print literally hot off my machine, as you'll see there are no zits, no stringing, crisp edges and detail, pretty much ready for use. I haven't spent hours dialling it in, in fact I only received this particular printer last week. Back in the day, I wasted a lot of time chasing my tail by fiddling with the multitude of settings in Cura, convinced I would magically discover the secret sauce. These days, I basically use the stock settings and just adjust print temperature and speed based on tower test. The game changer is dry filament. I always use a filament dryer: unless the reel has come straight out of the packet, I give it an hour or two in the dryer before starting to print, and keep the dryer running throughout the print, as that's where the reel sits. I know from bitter experience that without a dryer, it'll be zits, strings and fails galore. Even if it's only been open for a few hours, it'll suck up moisture.

You will be able to get a finer finish with a 0.2 tip but printing will be much slower and more prone to fails. I figure there's a reason that every printer comes with the 0.4 tip as stock: it's the sweet spot. Keep in mind that you can under-extrude using a 0.4 by quite a margin to get thinner lines, but given how cheap tips are, it's worth experimenting with other sizes anyway. Personally, I found 0.2 quite usable, less so 0.1.

Ultimately, if you want fine detail you'd need to look at resin. Yes, it's a 'wet' process and not one I'd want to run inside the house, but it's not that messy once you develop a good workflow.

1738537307466.png
 
That shouldn't be happening and it sounds like you haven't yet managed to get your printer dialled in, or you've got moisture in the filament, or more likely, both. Apologies if this is teaching you to suck eggs but if I was you, I'd go through the calibration process again and run print temperature and speed towers for the reel of filament you plan to use (as opposed to generic tests) to figure out what gives you the best result. Below is a PLA print literally hot off my machine, as you'll see there are no zits, no stringing, crisp edges and detail, pretty much ready for use. I haven't spent hours dialling it in, in fact I only received this particular printer last week. Back in the day, I wasted a lot of time chasing my tail by fiddling with the multitude of settings in Cura, convinced I would magically discover the secret sauce. These days, I basically use the stock settings and just adjust print temperature and speed based on tower test. The game changer is dry filament. I always use a filament dryer: unless the reel has come straight out of the packet, I give it an hour or two in the dryer before starting to print, and keep the dryer running throughout the print, as that's where the reel sits. I know from bitter experience that without a dryer, it'll be zits, strings and fails galore. Even if it's only been open for a few hours, it'll suck up moisture.

You will be able to get a finer finish with a 0.2 tip but printing will be much slower and more prone to fails. I figure there's a reason that every printer comes with the 0.4 tip as stock: it's the sweet spot. Keep in mind that you can under-extrude using a 0.4 by quite a margin to get thinner lines, but given how cheap tips are, it's worth experimenting with other sizes anyway. Personally, I found 0.2 quite usable, less so 0.1.

Ultimately, if you want fine detail you'd need to look at resin. Yes, it's a 'wet' process and not one I'd want to run inside the house, but it's not that messy once you develop a good workflow.

View attachment 499086
I think i am going to go ahead and change the nozzle first before I start fidgeting with the settings. I will also slow the printer down too.
I don't have a filament dryer but maybe I should buy one.
Finally I will also go ahead and recalibrate the printer. I like the look of both yours and @Philski's prints so I am convinced now that I didn't do enough to dialin the printer. The one thing I have not done, and I should have is to calibrate the extruder esteps.
I think I will also try to add the Brim option for the build plate adhesion.
One thing. Do you heat the bed even with PLA filament?
 
Do you heat the bed even with PLA filament?
Yes, I always heat the bed, regardless which type of filament I use - in my case, mostly PETG, but lately I’ve been using PLA and PLA+ more often. I also use a glass plate and 3DLAC on my little Ender 3, but so far I’ve been fine with just the PEI plate on the Neptune. These things only affect first layer adhesion though and, while they certainly make a big difference to that, you can still have zitty, stringy, poorly fused prints that stay on the plate.

A good and simple test to do is this: open a new reel and print something immediately, then do the same with a reel that’s been open for a while. If you get perfect prints off the former but problems with the latter, you’ll know you have a moisture issue. A sunlu dryer only costs $30 or $40 and is worth every cent. When I turned to resin I actually parked my FDM printer for more than a year because I got so fed up with how hit and miss it seemed and the poor quality results, but once I sorted out bed adhesion and filament drying, I started using it more and more. It now accounts for almost all of my non-model-making, arty or functional stuff. If it could deliver the same surface finish as resin I’d use it for everything, but sadly it’ll never be able to hold a candle to resin for fine detail.
 
FDM printing does have its own pros and cons compared to DLP (resin) printing, but there is one area where resin always wins: Resolution. -If you're making brackets and functional items, FDM is pretty handy. If trying to print smaller parts with high details, resin is your friend.

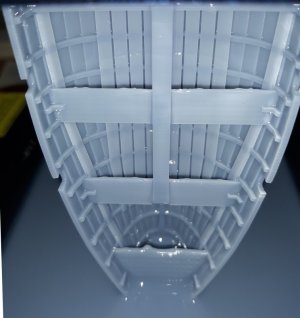
To prevent faceting when designing hulls, I use 180 sides (min). A lot of 3D designers miss this crucial step - always set the number of sides (object modeling) or resolution (CAD) high enough to preclude faceting for the scale being printed.

In simple terms, slicers do not modify geometry. Garbage in equals garbage printed out. There are two main file formats for 3D printing: OBJ and STL, though most slicers use either, to create the G-code the printer understands.

I spent years working with expensive commercial-grade FDM printers and liked the ease of breaking off supports, cleaning the bed, checking the spool level and starting a new print. They worked great for their intended use, (and huge build volume) but failed miserably when printing small details. I also spent a lot of time maintaining them. Occasionally, I would return after a weekend print and find a catastrophic failure with a roll of filament piled up and the print head encased in a rock-hard ball of cooled plastic. That usually involved a half-day of repair several times a year for each printer.

I ended up buying a resin printer and evaluated it at home. The print quality was like night and day with the steepest learning curve being part orientation and getting the hang of setting up manual supports.

Clean-up was a PITA until I came up with a good workflow. I can remove a print or build plate of parts, clean them up, dry them and have them in a cure station (or outside in the summer) with my equipment cleaned in about 15 minutes, so it isn't a big deal.

Eye protection and gloves are required whenever liquid resin is present. Resin is mildly caustic.

The only "repairs" I have performed in more than four years of resin printing is an annual fep replacement, and Z-drive screw cleaning and lube which takes less than an hour. After several hundred prints, the machine has been a reliable workhorse. Any part failure, (usually slight warpage affecting dimensional tolerances on large, curved parts) has been my own fault relating to part orientation and supports.

Unless you're single, resin printing is best done in a well-ventilated space, (my climate-controlled garage is ideal) where a resin spill on the floor isn't going to initiate divorce proceedings. While my printer doesn't create any appreciable smell, the IPA used to clean parts and wipe down my cleaning tubs with paper towels does. Luckily, it evaporates quickly.

In the beginning, I used to submerge fresh parts in IPA for a few minutes to clear holes and remove excess resin; that created too much contaminated IPA to dispose of. Switching to a spray bottle and a foam brush cut my annual IPA use/expense by 75% with no loss of cleanliness. Every time I see someone pouring a gallon of IPA into a cleaning station or showing off their "still" to recycle IPA, I cringe and seek out the visual comfort of the closest exit and fire extinguisher. There are eco-friendly resin cleaners on the market for those who don't want to deal with IPA.
 
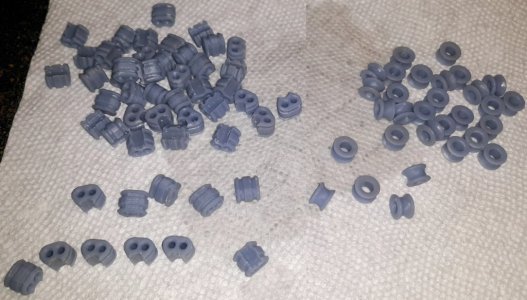
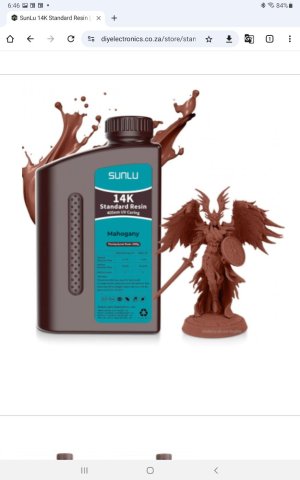
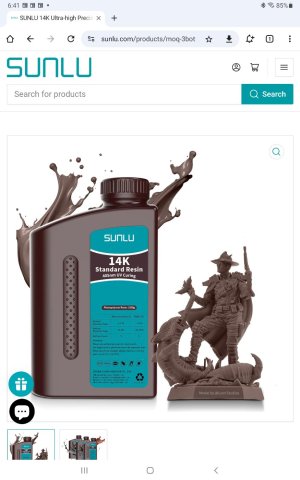
I am awaiting delivery of my first resin printer (Elegoo Saturn 4 16K). I have searched around for resin that resembles (red) oak in color. I want to print deadeyes and blocks. I have found lots of beige, but nothing that looks nice as wood.

Reddit recommended to mix my own, but that sounds a bit overkill for my first run

Any suggestions here?
Have a look at red clay versions. Painting will still have to be done. Screenshot_20250218-162420_Chrome.jpgScreenshot_20250218-162731_Chrome.jpg
 
Last edited:
Unless the requirement is for clear resin, color is irrelevant, since the resin parts still have to be primed, then painted.

Resin prices are all over the place. Buy the cheapest resin of the type you need for the application. After much experimentation, I only use ABS-like resin for thermal stability and slight flexibility without parts being too brittle.

CC
 
you will still have to paint your blocks, cleats ect. as they will still have a "plastic" look no matter what color resin you use. I use burnt sienna which gives them a honey colored finish or I mix in a little black to darken them. Use a matt finish clear coat to finish them off. Also after printing make sure to clear out the rigging holes to prevent any resin from hardening and blocking the holes.
 
I use Siraya Tech Build resin because on RC models I need stronger parts. Cannon barrels I printed with the Elegoo Standard resin warped and cracked like drying mud after a few months just sitting on a bookshelf while the ones I bought before I had the printer were, and are fine.
My models are radio-controlled and will be outside, so the parts have to be primed, painted, and coated to protect from UV as much as possible, the resin's color is meaningless.

I've tried other resins such as ABS-like, all were too weak to even just sit without beginning to droop and crack over time.

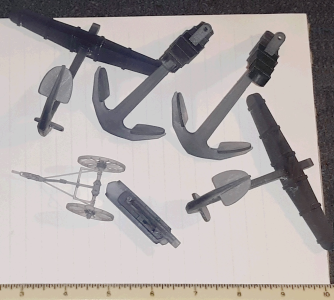
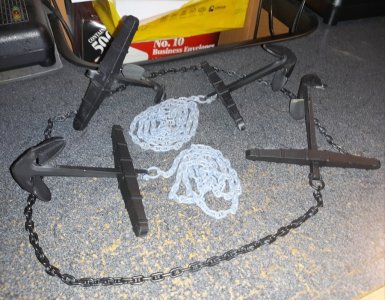
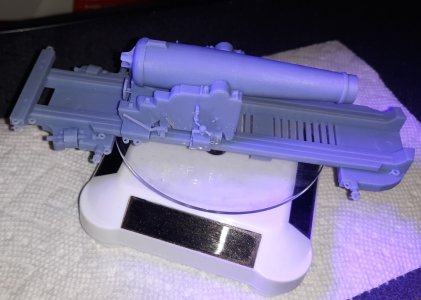
The anchors and boat-howitzer are printed in Siraya Tech Build Smokey Black which is somewhat transparent. The studded anchor chain was printed-in-place with Siraya Tech Build Sonic Gray
con20220309.png con20220410e.jpg
The pivot-gun was print in one piece, though I no longer do that with my guns anymore
con20220315c.jpg
They aren't works of art by any measure, but the hammocks are hollowed and the trays are open to save resin. They've been epoxied to the tops of the hammock-rails/bulkheads for a couple of years now in my shop with no heat or A/C with no signs of cracking, coming loose, or deforming.
con20220420a.jpg con20220420c.jpg
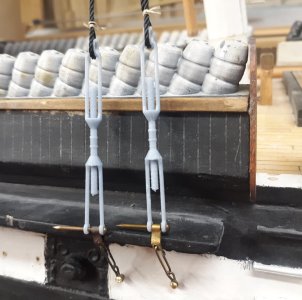
My intention when I got into 3D printing was making non-structural parts such as guns, crew figures, figure-heads, decorations, capstans, gratings, etc; but I found this resin to be strong enough for working parts like; bullseye, blocks, stuns'l irons, pin-rails, even turnbuckles.
It's not indestructible, it is basically plastic, after-all, but it's given my models details I can't manage with old, fat fingers.
con20220528b.jpg con20220620e.jpg con20240102b.jpg con20240117c.jpg con20241214.jpg con20231018c.jpg con20220325a.jpg con20220524d.jpg
(Everything was printed on Elegoo Mars, and Mars 3 printers)
 
Last edited:
I also use Siraya Tech, for extremely thin parts, but it's also one of the resin I blend with others (typically ABS-like) if I'm trying to get the best of both worlds. I find the support side of Siraya is much more bumpy and/or wavy than less runny resins, which is not always acceptable. By and large, Elegoo ABS-like is my foundation block, but it seemed like Elegoo changed the formula a couple of years back such that it became too bendy on it's own. But mixed with standard, or syratech, or any of various other resins, I can usually get what I want.

EspenT - if you haven't already seen this elsewhere, you'll find this is typical of the 3D community, whether it's software, hardware, filament, resins, preparation, post-processing and so on. If you put 6 of us in a room we'd give you 7 different opinions, all of which have at least some currency. Leastways, each of them works for that particular user. I think we would probably all agree with the following though - as a starter, get a couple of bottles of your printer manufacturers grey resin, one standard, the other abs-like, and use their recommended setting for printing. You should be able to print straight out of the box this way, with virtually zero risk of fails, and you'll have a solid baseline for comparison when you then start experimenting. Grey is popular because it's much easier to see the detail, whereas if you jump in with red or brown this is less the case.
 
Back
Top