-

Win a Free Custom Engraved Brass Coin!!!
As a way to introduce our brass coins to the community, we will raffle off a free coin during the month of August. Follow link ABOVE for instructions for entering.
-

PRE-ORDER SHIPS IN SCALE TODAY!
The beloved Ships in Scale Magazine is back and charting a new course for 2026!
Discover new skills, new techniques, and new inspirations in every issue.
NOTE THAT OUR FIRST ISSUE WILL BE JAN/FEB 2026
You are using an out of date browser. It may not display this or other websites correctly.
You should upgrade or use an alternative browser.
You should upgrade or use an alternative browser.
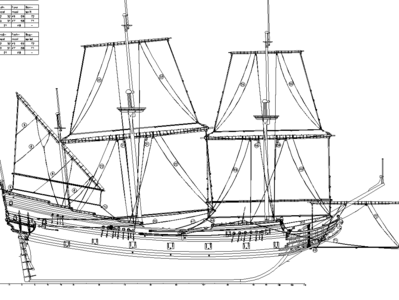
A 143 feet long Dutch warship from 1681. Cardstock [COMPLETED BUILD]
- Thread starter Ab Hoving
- Start date
- Watchers 24
-
- Tags
- completed build
Hi Ab, amazing what you have done with paper!!! The sails above are spectacular. I see you sprayed with starch, did you have a hairdryer on them to get the billowing effect as you sprayed them with starch? I'm guessing they were done in place on the model as all the rigging seems to be pulling correctly.
Yes Chris, just spray them and handle a hair dryer. A perfect method as you can see.
Thanks for the complements
Thanks for the complements
Hi Ab,The sample is already in the mail.
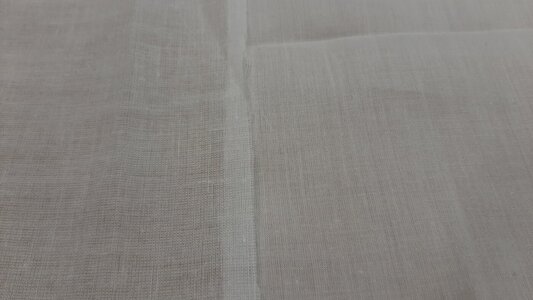
Today I received the Batist cloth I ordered and compared it to your sample.
Your sample is finer in structure and slightly less transparant.
For the scale you are building your sample is definately the better one, for my current 1:30 build mine could be a good option to test.

I will send you a sample in return.
Have a nice and healthy 2021.
Hello Maarten,
Today I received your sample. Thank you. You are right: batist is less close woven than Navara Fine lawn and much more transparent. Of course it depends of the scale you are working in, but for the time being I prefer the latter over all the other samples I held in my hands so far. I'm content with the three meters (!) I purchased.
Here my new years wish:

Ab
Today I received your sample. Thank you. You are right: batist is less close woven than Navara Fine lawn and much more transparent. Of course it depends of the scale you are working in, but for the time being I prefer the latter over all the other samples I held in my hands so far. I'm content with the three meters (!) I purchased.
Here my new years wish:

Ab
Many thanks, Ab and Grietje! Happy New Year and best wishes!
Again a beautiful picture with a view at s lands magazijn in Amsterdam, love it.
Also to you and your wife a fantastic new year as to all other members of SOS.
Also to you and your wife a fantastic new year as to all other members of SOS.
Many Thanks for
This brings me to the opinion, that for the "normal" scale of 1:48 the Navara Fine lawn from Whaleys Bradford would be the best choice - I will order some material.......
the comparing the two cloths directly together - with this we can really see the difference.Hi Ab,
Today I received the Batist cloth I ordered and compared it to your sample.
Your sample is finer in structure and slightly less transparant.
For the scale you are building your sample is definately the better one, for my current 1:30 build mine could be a good option to test.
View attachment 201973
View attachment 201974
I will send you a sample in return.
Have a nice and healthy 2021.
This brings me to the opinion, that for the "normal" scale of 1:48 the Navara Fine lawn from Whaleys Bradford would be the best choice - I will order some material.......
Hallo @Ab HovingPerhaps you are interested in witnessing one of my builds. My system is fast and cheap and it hardly makes a mess of the workshop. Consider it as 'modelbuilding light'.
It always starts with a draught. Many times, if there are no useful drawings available, I have to develop them from scratch, like for instance an original specification contract. My loyal Belgium friend Rene Hendrickx works my suggestions out in the free downloadable shipbuilding program Delftship, so I can print the lines and body plan.
View attachment 140556
I glue the frame prints to stiff card and cut them out. I use a stuff called grey-board, available at your art-supplier, but any stiff card you have in your dustbin will do.
I double the frames below lower deck level and cut slots in them to fit the deck.
I'm not sure if these pictures come from this particular project, but since there is little difference they will do.
View attachment 140557
Then the whole contraption is glued together.
View attachment 140558
Then the lines of the ship are decided by placing the lower wale. This is a tricky part, as there are very few points that can be used as a reference. Small deviations will end up in a terrible mess, so care has to be taken.
View attachment 140560.
Then the frames are covered by strips of cardboard. I use a kind of soft and fluffy material, called 'wood board'. At the same time I removed the parts of the frames above deck level and doubled the inside with another layer of wood board.
View attachment 140561
Then I use filler to get rid of the angles. The nice thing of wood board is that it can be sanded (up to a degree) without delaminating. I also cut the lower gunports.
View attachment 140562
After dry-fitting the upper decks the upper gunports can be cut out. Don't bother to look at the pleasure vessel in the fore-ground, this is the first picture of the warship I made, showing it in a stage ready to be planked.
View attachment 140567
All this makes a very quick process. It only took a week to get to this stage. In fact I hardly noticed I was making this vessel, because I work on six or seven hulls at the same time and I completely forgot to take pictures of this one.
The whole hull below the upper wale is 'planked' with strips of wood imprinted, self adhesive white plastic, called c-d-plastic. Very cheap and it works easy, because with the use of a hair dryer they can be bend in the necessary curves.
View attachment 140576
After a primer I paint the hull above the waterline with Humbrol 64 and below with 28.
After a week of drying I brush a dark brown, called Van Dijks Bruin (from a tube), over the upper part. Immediately after that I wipe the brown off with a soft cloth, leaving paint in the wood print, so a suggestion of real wood is achieved.
View attachment 140563
Now I can finish the details like the carvings and painting. I found a ship that matches the size of this model, called Akerboom (oak tree), with the right number of guns.
View attachment 140574
The rest is a simple rigging job.
I always prepare my masts up to the stage that they can be fitted with sails on them. That way I can work on them, without forcing myself too long in the same attitude, leaving me with sour arms and shoulders. Another thing that has to do with age is that I leave both my deadeyes and my ratlines white until they are ready and I can finish them with a dark paint.
View attachment 140575
When I will work on the rigging again I will keep you posted. I don't know when that will be, because I am a bit inconstant nowadays. There are a lot of projects waiting for me.
we wish you all the BEST and HAPPY BIRTHDAY

Enjoy your special day - great to have you on board
Happy birthday, Ab!  Wishing you many more years of a happy and healthy life!
 Wishing you many more years of a happy and healthy life!
Congratulations, Ab - This is all exceptionally well executed!
Thank you all, it's an honor to get your good wishes.
Cheers!
Cheers!
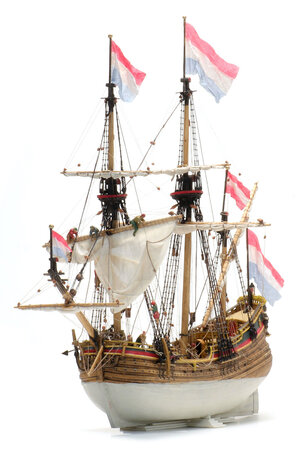
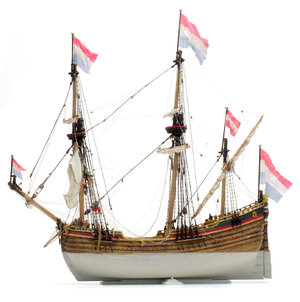
Maybe the wrong thread, but since I donated seven of my models to the Archaeological Museum 'Huis van Hilde' in Castricum, Holland, I missed the sight of a nice fluit. The house seemed empty without one. So I built me a new one. The hull was no problem, it only took me three weeks, but the rigging is always a challenge. Repetitive and boring, but in the end the reward is always so good. You end up with a lively model, only by adding sails in a specific situation. Dutch sailors sat on the yard, one hand for the ship, one for themselves.
Judge for yourself.
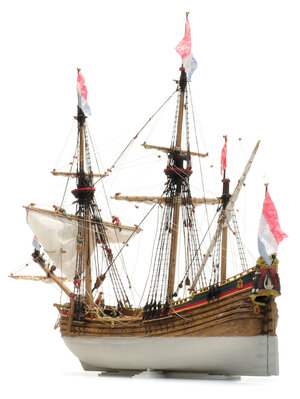
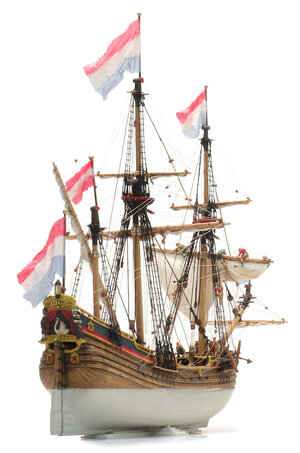
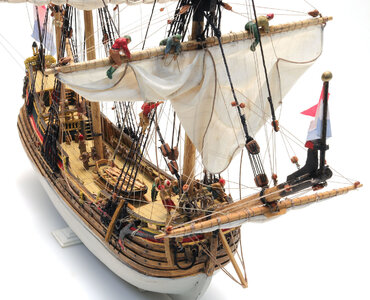
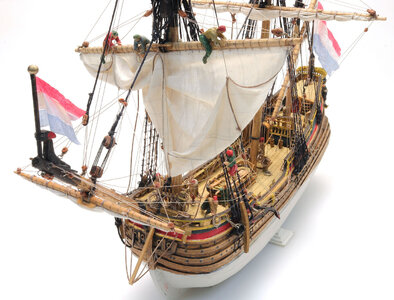
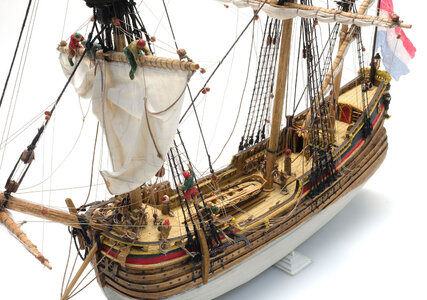
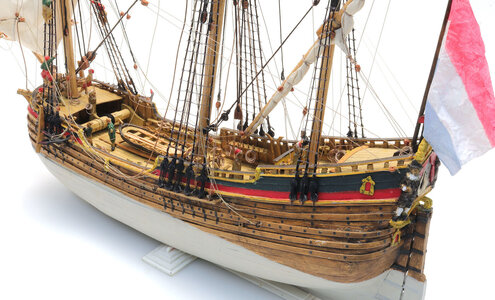
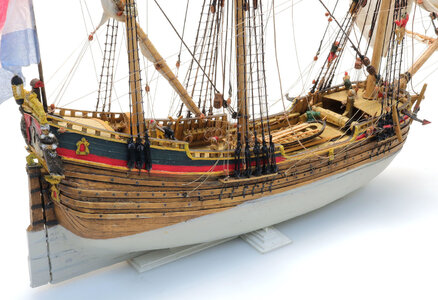
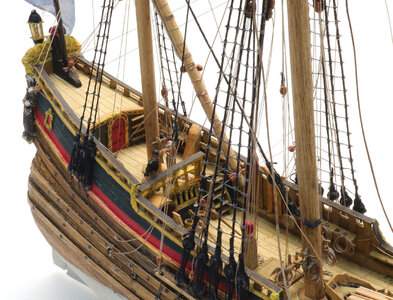
Judge for yourself.


one more beautiful model - wonderful work 

- Joined
- Aug 6, 2021
- Messages
- 2
- Points
- 1
What a great way to model a hull.Perhaps you are interested in witnessing one of my builds. My system is fast and cheap and it hardly makes a mess of the workshop. Consider it as 'modelbuilding light'.
It always starts with a draught. Many times, if there are no useful drawings available, I have to develop them from scratch, like for instance an original specification contract. My loyal Belgium friend Rene Hendrickx works my suggestions out in the free downloadable shipbuilding program Delftship, so I can print the lines and body plan.
View attachment 140556
I glue the frame prints to stiff card and cut them out. I use a stuff called grey-board, available at your art-supplier, but any stiff card you have in your dustbin will do.
I double the frames below lower deck level and cut slots in them to fit the deck.
I'm not sure if these pictures come from this particular project, but since there is little difference they will do.
View attachment 140557
Then the whole contraption is glued together.
View attachment 140558
Then the lines of the ship are decided by placing the lower wale. This is a tricky part, as there are very few points that can be used as a reference. Small deviations will end up in a terrible mess, so care has to be taken.
View attachment 140560.
Then the frames are covered by strips of cardboard. I use a kind of soft and fluffy material, called 'wood board'. At the same time I removed the parts of the frames above deck level and doubled the inside with another layer of wood board.
View attachment 140561
Then I use filler to get rid of the angles. The nice thing of wood board is that it can be sanded (up to a degree) without delaminating. I also cut the lower gunports.
View attachment 140562
After dry-fitting the upper decks the upper gunports can be cut out. Don't bother to look at the pleasure vessel in the fore-ground, this is the first picture of the warship I made, showing it in a stage ready to be planked.
View attachment 140567
All this makes a very quick process. It only took a week to get to this stage. In fact I hardly noticed I was making this vessel, because I work on six or seven hulls at the same time and I completely forgot to take pictures of this one.
The whole hull below the upper wale is 'planked' with strips of wood imprinted, self adhesive white plastic, called c-d-plastic. Very cheap and it works easy, because with the use of a hair dryer they can be bend in the necessary curves.
View attachment 140576
After a primer I paint the hull above the waterline with Humbrol 64 and below with 28.
After a week of drying I brush a dark brown, called Van Dijks Bruin (from a tube), over the upper part. Immediately after that I wipe the brown off with a soft cloth, leaving paint in the wood print, so a suggestion of real wood is achieved.
View attachment 140563
Now I can finish the details like the carvings and painting. I found a ship that matches the size of this model, called Akerboom (oak tree), with the right number of guns.
View attachment 140574
The rest is a simple rigging job.
I always prepare my masts up to the stage that they can be fitted with sails on them. That way I can work on them, without forcing myself too long in the same attitude, leaving me with sour arms and shoulders. Another thing that has to do with age is that I leave both my deadeyes and my ratlines white until they are ready and I can finish them with a dark paint.
View attachment 140575
When I will work on the rigging again I will keep you posted. I don't know when that will be, because I am a bit inconstant nowadays. There are a lot of projects waiting for me.
You seem to have many innovative ways to produce your models , and in particular , you are very proficient with using all manner of card stock .
Very well done indeed !
- Joined
- Aug 6, 2021
- Messages
- 2
- Points
- 1
These little guys are looking busy !Maybe the wrong thread, but since I donated seven of my models to the Archaeological Museum 'Huis van Hilde' in Castricum, Holland, I missed the sight of a nice fluit. The house seemed empty without one. So I built me a new one. The hull was no problem, it only took me three weeks, but the rigging is always a challenge. Repetitive and boring, but in the end the reward is always so good. You end up with a lively model, only by adding sails in a specific situation. Dutch sailors sat on the yard, one hand for the ship, one for themselves.
Judge for yourself.
View attachment 249406View attachment 249407View attachment 249408View attachment 249409View attachment 249410View attachment 249429View attachment 249430View attachment 249431View attachment 249432View attachment 249433
Great action model !


