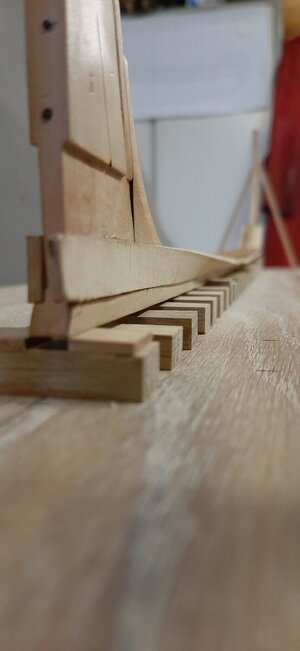
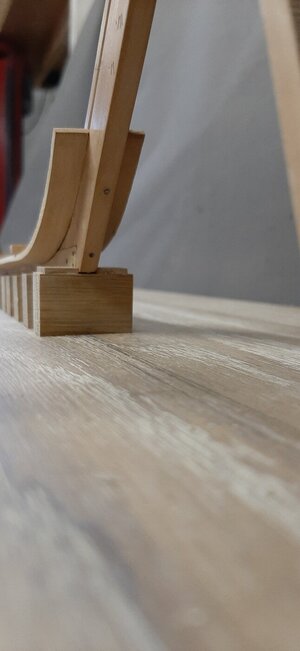
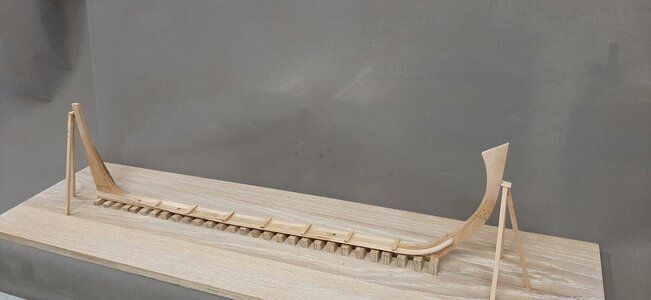
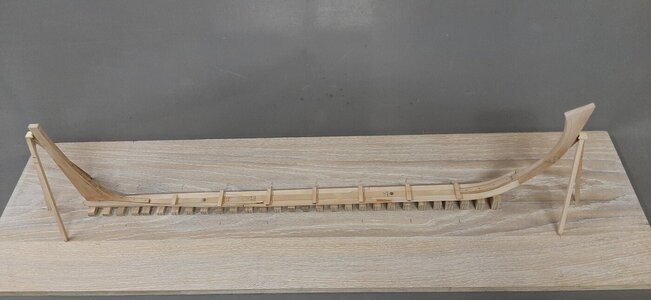
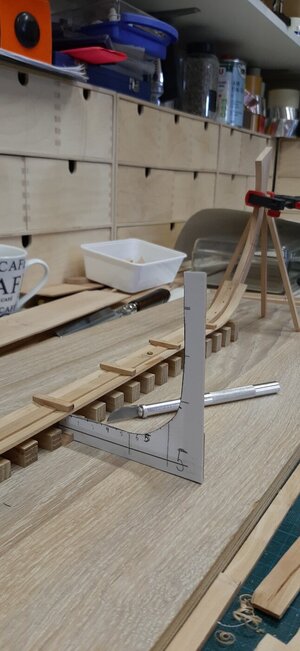
A Dutch Fluyt in shell first, reconstructing the "Ghost ship" scale 1:36

A nice and surprising start. A plank at the back, one at the front, and then the appropriate part in between. Very promising, Maarten.
Regards, Peter
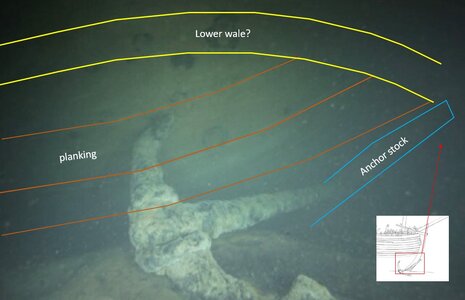
Hi Peter, this is how it was done on the Pinas Samuel wreck. See the planking of PS and SB below. On the direction of the SB joints you can see the middle part was fitted at last.
0e21583e-c31b-29c6-c949-7e785ee02350.jpg
f08ee7a1-e122-dddd-010a-43093d24ca8b.jpg
 
Nice start. A very difficult part on this build. Smart to use these blocks.
The garboard strake on the stem goes high at your build. Are you sure about this? In my first attempt I did that too. But the result was that the shape of the stem was to sharp. More like a English ship and not the Dutch wale look. In the program of Ab you also see the garboard strake not so high above the keel.
The planks on the bow must stay flat and horizontal in the beginning to get that round wale shape bow. In my first attempt I tried a lot of corrections to get the shape. In my second attempt with the garboard strake ending low with a rounding, the shape almost comes on his own. I try to show in the morning some pictures what I try to explain.
Thx Stephan,

I have been thinking about this and maybe one strake would have been fine. I have taken Vasa here as example which also has more then one plank countersunk into the stern post.
Screenshot_20230302-225337_Gallery.jpg
I think due to the shape of the fluyt I am ok and indeed otherwise REDO.

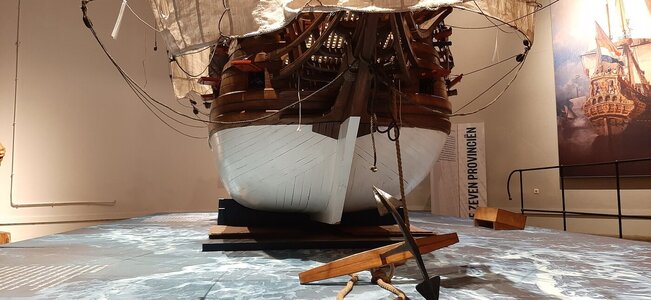
Regarding the bow I am ok, I am making the bow differently as this bow is extremely blunt with a complete flat surface.
My bildge planks will enclose the bow around the floor planks.
You can see below in the 7 p model in Lelystad.
20230305_151429.jpg
 
The stern is okay I think. Could be one or more planks. I'm having doubs about the stem, bow. When you go to high with the first plank, the rest must follow and before you know you end to high or have to make your planks smaller at the end. With the result a small sharp bow, like my first attempt.
 
Steef, what a wonderful project!
Following your build makes me realize that the “shell"-method is not simple, nor straightforward, but instead requires a high level craftsmanship.
Thanks Johan, a big compliment. I can only say try it, maybe just a small ship. It is so much fun and a big learning curve.
 
Steef, what a wonderful project!
Following your build makes me realize that the “shell"-method is not simple, nor straightforward, but instead requires a high level craftsmanship.
Hi Johan,

You know you are on my blog :-)

We are both building shell first. Stephan Hohenzollern and myself the ghostship fluyt.
 
The stern is okay I think. Could be one or more planks. I'm having doubs about the stem, bow. When you go to high with the first plank, the rest must follow and before you know you end to high or have to make your planks smaller at the end. With the result a small sharp bow, like my first attempt.
The methode I build the bow is different, this ensures the full whale like bow.
This is what I create, same like in the wreck.
Planking bow.jpg
 
Looks like the bottom of a 'boeier'. How you gonna solve this with the rest of the bottom planks when they have to end on the lower wale. The lower wale comes in place after the frames. What I did understand of the shell first was that the planks ending only on the keel. Not in free air. That looks like the same problem the HZ model had. That is not a shell first model, I needed to change the lower hull to make so. But I could be wrong. There is still a lot to learn.
 
Hi Johan,

You know you are on my blog :)

We are both building shell first. Stephan Hohenzollern and myself the ghostship fluyt.
Hey Maarten, I'm afraid I've gotten a little mixed up. I responded to Stephan's post, without realizing I was actually polluting your blog... Mea culpa.
 
Last edited:
Looks like the bottom of a 'boeier'. How you gonna solve this with the rest of the bottom planks when they have to end on the lower wale. The lower wale comes in place after the frames. What I did understand of the shell first was that the planks ending only on the keel. Not in free air. That looks like the same problem the HZ model had. That is not a shell first model, I needed to change the lower hull to make so. But I could be wrong. There is still a lot to learn.
In shell first the floor and bilge planks are first fitted, then the floor timbers are fitted, followed by some futtocks. Along these futtocks the shape of the hulls is set out using a plank which is the plank between the lower wales.
Then all remaining futtocks are placed followed by the lower wales.
Only then the planking between the bilge planks and the wales is filled in, so no planks will be fitted in thin air, these will be fitted on the futtocks. Shell first is only used for floor and bilge planks.
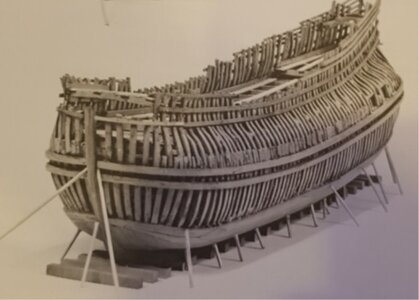
See below Ab's zeehaen and you see what I try to say.
4332955.jpg
 
Last edited:
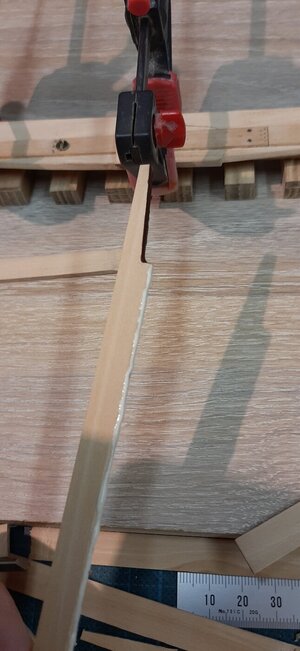
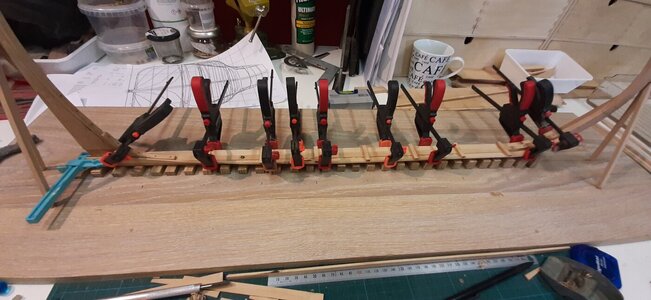
Today I had some spare time to add the SB garboard strake.
The planks are glued on the rabbet with regular PVA, the joints with brown PVA.
20230603_112912.jpg

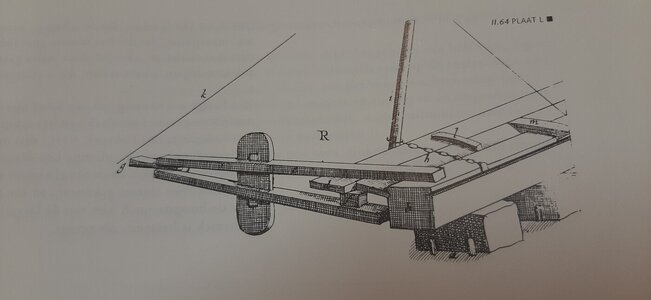
Sorry instead of the "hell" a device with chains and levers I use clamps to fit the planks. Think I will make and test a "hell".
20230603_113200.jpg

And the hell below at figure i
20230602_145927.jpg

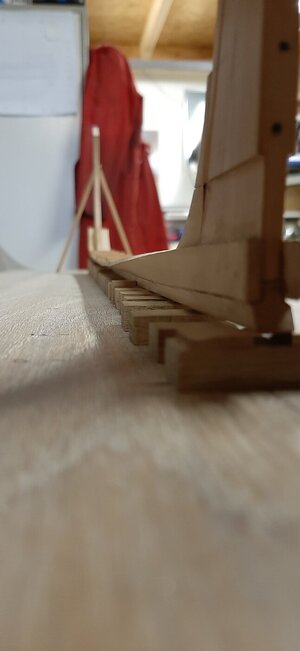
And some status pictures, now I can finish planking the floor.
20230603_210221.jpg
20230603_210208.jpg
20230603_210242.jpg
20230603_210139.jpg
20230603_210148.jpg
 
In shell first the floor and bilge planks are first fitted, then the floor timbers are fitted, followed by some futtocks. Along these futtocks the shape of the hulls is set out using a plank which is the plank between the lower wales.
Then all remaining futtocks are placed followed by the lower wales.
Only then the planking between the bilge planks and the wales is filled in, so no planks will be fitted in thin air, these will be fitted on the futtocks. Shell first is only used for floor and bilge planks.
See below Ab's zeehaen and you see what I try to say.
View attachment 377684
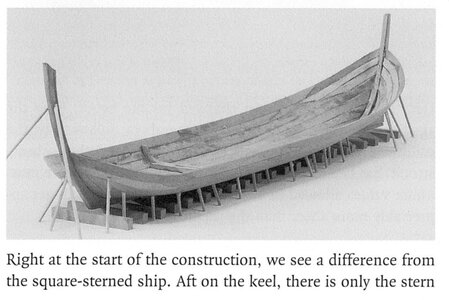
What I read and understand in the book of Hoving is that the first floor timber and Bilge at the stem is installed to hold these planking of the floor at the bow. Otherwise they hang in thin air. That seems the difference between a fluit and a Pinas. The planking of the floor will be bent to the keel/bow-beam in case of a Pinas or 2-decker like mine. The fluit is build like the Catship where the first floor timber and bilge strake at the bow is placed by shell-first. This is of the bluff (brick) shape bow of the fluit. Now I understand. This makes our builds interesting to follow to see the differences between a bluff bowed ship and a square sterned ship with a streamlined bow.

The picture doesn't show these timbers at the bow in this angle the picture is taken. They should be there or I must misunderstood the reading.

01.jpg02.jpg
 
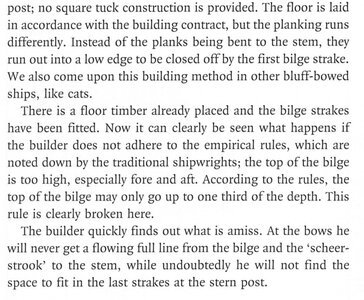
I'm not sure if I understand the discussion here. What I was trying to say in the book was that there are several methods to plank a hull. The sharper the bow, the bigger the chance that all strakes end at the stempost. In shapes like the fluit often the bottom strakes end against the lower bilge strake, like here:
29.jpg
This is a picture of a 'narrow ship' (smalschip) by the way. Also a very wide body, not unlike the fluit. Other solutions however were applied as well, like Maarten's research shows (parallel planks, of which some end against the stem and stern, some against the lower wale. I don't know if the way of planking caused the difference between a fluit and a pinas, but I doubt it. It might just as well have to do with the shipbuilder's preference and his available wood stock. And of course the fact that he had to make sure that both sides of the outside of the bottom and the top of the turn of the bilge were symmetrical and not too high, like I showed in the picture. Also he had to keep in mind that the 'huidigt' (the distance between the top of the turn of the bilge and the master ribband (scheerstrook)) had to be planked in the cheapest and easiest way. Several conditions to keep an eye on.
Sorry for my infringement.

Oh, and Maarten: the exact location where the garboard strake begins to turn vertical near the sternpost is crucial in the design. Too close to the stern and the shape becomes too bulky, too far away and the ship will become sleek. See Van Yk, page 67-72. I trust you found your location by studying your draught...
Good luck,
Ab
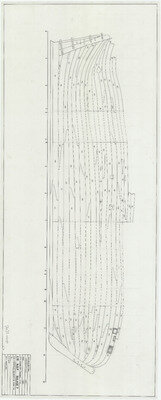
 
What I read and understand in the book of Hoving is that the first floor timber and Bilge at the stem is installed to hold these planking of the floor at the bow. Otherwise they hang in thin air. That seems the difference between a fluit and a Pinas. The planking of the floor will be bent to the keel/bow-beam in case of a Pinas or 2-decker like mine. The fluit is build like the Catship where the first floor timber and bilge strake at the bow is placed by shell-first. This is of the bluff (brick) shape bow of the fluit. Now I understand. This makes our builds interesting to follow to see the differences between a bluff bowed ship and a square sterned ship with a streamlined bow.

The picture doesn't show these timbers at the bow in this angle the picture is taken. They should be there or I must misunderstood the reading.

View attachment 377791View attachment 377792
Hi Stephan,

There are no floor timbers added except the midship frame which is placed at 1/3 from the stem. This floor timber is placed after the floor is finished. The two bilge timbers are bolted to this floor timber to control the shape of the bilge.
To avoid planks are in thin air small poles are used below the ship to support the planking.
The floor planks in my case are 6 rows followed by 3 rows of bilge planks.
As Ab is mentioning below the first bilge plank is enclosing the floor planks. When I fit the first bilge strake I will trim the floor planking to create the correct shape I need.
For me this is also a study project so I will see how it works out. In my mind I already finished several versions and this seem the most logical version.
Keep in mind the floor towards the stem in the fluyt is nearly completely flat, which is totaly different from your design.
 
Last edited:
@Ab Hoving
Thanks, I agree indeed about the planks that they end against the stem or stern have nothing to do with a fluit or pinas. But only with the shape.
But those parallel planks that end against the lower wale on the bow. Those I don't understand in shell first. My brain just doesn't want to except that those where lay together not ending on something. In your book you're speaking about cats, where the floor timber is already placed. Is that to give these planking of the floor on the stem some hold when they where placed parallel and finaly end against the lower wale? Which is placed in a later stage of the build. My experience in building till now tells me this very hard to achieve without some support like ending on the stem.
 
I'm not sure if I understand the discussion here. What I was trying to say in the book was that there are several methods to plank a hull. The sharper the bow, the bigger the chance that all strakes end at the stempost. In shapes like the fluit often the bottom strakes end against the lower bilge strake, like here:
View attachment 377816
This is a picture of a 'narrow ship' (smalschip) by the way. Also a very wide body, not unlike the fluit. Other solutions however were applied as well, like Maarten's research shows (parallel planks, of which some end against the stem and stern, some against the lower wale. I don't know if the way of planking caused the difference between a fluit and a pinas, but I doubt it. It might just as well have to do with the shipbuilder's preference and his available wood stock. And of course the fact that he had to make sure that both sides of the outside of the bottom and the top of the turn of the bilge were symmetrical and not too high, like I showed in the picture. Also he had to keep in mind that the 'huidigt' (the distance between the top of the turn of the bilge and the master ribband (scheerstrook)) had to be planked in the cheapest and easiest way. Several conditions to keep an eye on.
Sorry for my infringement.

Oh, and Maarten: the exact location where the garboard strake begins to turn vertical near the sternpost is crucial in the design. Too close to the stern and the shape becomes too bulky, too far away and the ship will become sleek. See Van Yk, page 67-72. I trust you found your location by studying your draught...
Good luck,
Ab
Thx Ab for stepping in, much appreciated.

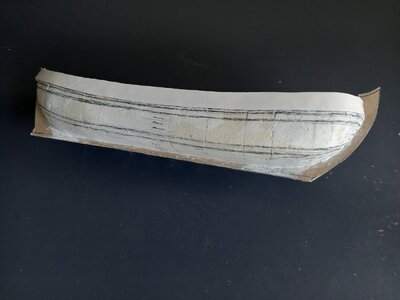
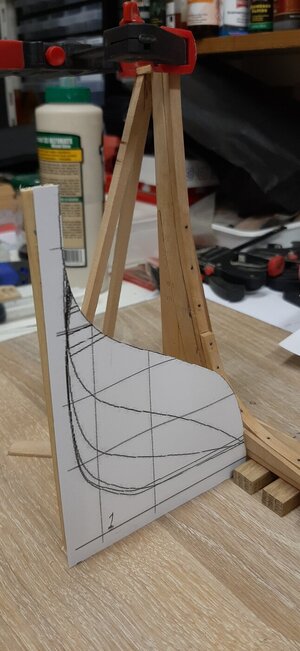
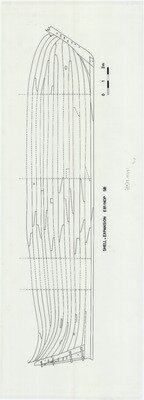
To check the shape of the planking I have made some gauges to check the shape during installation. These are the shape of the hull including planking as I designed in Delftship.
20230604_164000.jpg
20230604_164013.jpg

During the planking proces I use these to preshape the planks on the hull so these can be installed without tension.
Under the installed planks I will glue small poles to support the installed planks so I can easily shape the outline before starting the first bilge plank.

If any one has suggestions or questions feel free to ask or to comment, that is the fun of doing a project like Stephan or myself we want to learn from it.
 
Hi Steef,

There are no floor timbers added except the midship frame which is placed at 1/3 from the stem. This floor timber is placed after the floor is finished. The two bilge timbers are bolted to this floor timber to control the shape of the bilge.
To avoid planks are in thin air small poles are used below the ship to support the planking.
The floor planks in my case are 6 rows followed by 3 rows of bilge planks.
As Ab is mentioning below the first bilge plank is enclosing the floor planks. When I fit the first bilge strake I will trim the floor planking to create the correct shape I need.
For me this is also a study project so I will see how it works out. In my mind I already finished several versions and this seem the most logical version.
Keep in mind the floor towards the stem in the fluyt is nearly completely flat, which is totaly different from your design.
Okay I will be patience and wait and see how you work this out. It just looks to me very difficult to hold these curved planks next to eachoter and keep the curve in them without extra support. The poles don't look to me enough support. The replica of the 7P gave also a lot of trouble on that point.
 
@Ab Hoving
Thanks, I agree indeed about the planks that they end against the stem or stern have nothing to do with a fluit or pinas. But only with the shape.
But those parallel planks that end against the lower wale on the bow. Those I don't understand in shell first. My brain just doesn't want to except that those where lay together not ending on something. In your book you're speaking about cats, where the floor timber is already placed. Is that to give these planking of the floor on the stem some hold when they where placed parallel and finaly end against the lower wale? Which is placed in a later stage of the build. My experience in building till now tells me this very hard to achieve without some support like ending on the stem.
Hi Stephan,

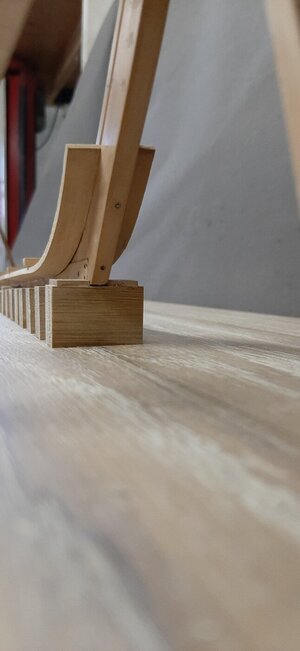
You mean this plank and the 5 that will be next to it?
20230603_210246.jpg

The will be enclosed by the bilge planks when fitted as soon the floor planks and the main floor timber is placed.

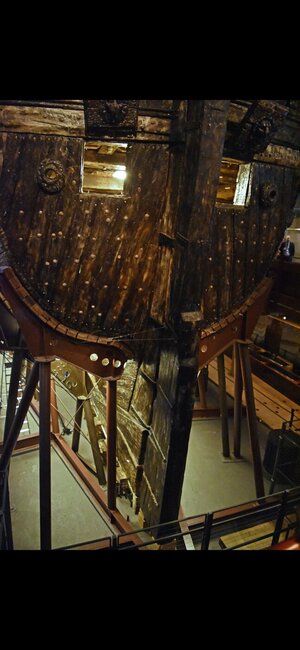
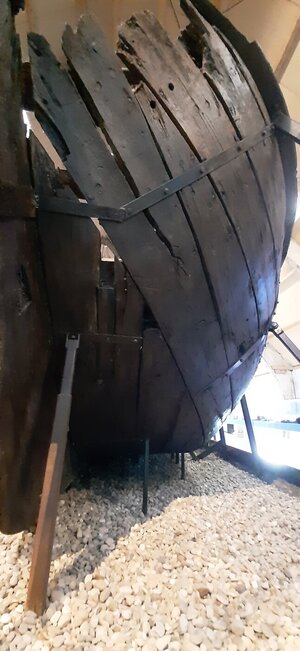
See below in the wreck in Lelystad, same construction.
20230305_143727.jpg
 
Okay I will be patience and wait and see how you work this out. It just looks to me very difficult to hold these curved planks next to eachoter and keep the curve in them without extra support. The poles don't look to me enough support. The replica of the 7P gave also a lot of trouble on that point.
Who said it will be easy :-)
I hope my first plank is fitted high enough.
Guess in two weeks I will reach that stage, allthough I also have some bussiness travels in my agenda for the coming weeks :-(
 
Back
Top