-

Win a Free Custom Engraved Brass Coin!!!
As a way to introduce our brass coins to the community, we will raffle off a free coin during the month of August. Follow link ABOVE for instructions for entering.
-

PRE-ORDER SHIPS IN SCALE TODAY!
The beloved Ships in Scale Magazine is back and charting a new course for 2026!
Discover new skills, new techniques, and new inspirations in every issue.
NOTE THAT OUR FIRST ISSUE WILL BE JAN/FEB 2026
You are using an out of date browser. It may not display this or other websites correctly.
You should upgrade or use an alternative browser.
You should upgrade or use an alternative browser.
A Dutch Fluyt in shell first, reconstructing the "Ghost ship" scale 1:36
- Thread starter Maarten
- Start date
- Watchers 74
-
- Tags
- dutch fluit
Highly interesting work - many thanks for sharing your new challenge
- Joined
- Oct 11, 2021
- Messages
- 740
- Points
- 403

Maarten, it's like looking at a real Dutch shipyard of the 17th century. I love the tools you recreate as well to clamp and hold everthing together. It's just a simple but effective way of clamping. Thanks to you I start to understand the planking method of the hull (Vlakbouwmethode) which is brilliant, simple and effective. No patterns to follow, just to understand the fundamentals. However to execute this method is very very hard to do and you are doing an exceptional good job!
Thanks for showing so far!
Peter
Thanks for showing so far!
Peter
Hi Bela,Im Beitrag #46 hast du das „Lions-Wrack“ erwähnt und einen einfachen Längsschnitt gezeigt. Gibt es weitere Informationen zu diesem Schiff? Ich konnte bisher nichts finden.
Über Hinweise freue ich mich sehr.
Danke
Bela
You can find research papers of her from Niklas Eriksson on Academia.edu.
See the link below. Academia.edu is a site where all types of academic research is posted by their writers, you can also contact the writers via the site, very helpfull because there are a lot of very interesting papers to find.
Eriksson, N. 2012. The Lion Wreck: a survey of a 17th‐century Dutch merchant ship - an interim report
Eriksson, N. 2012. The Lion Wreck: a survey of a 17th‐century Dutch merchant ship - an interim report
www.academia.edu
Hi Pter,Maarten, it's like looking at a real Dutch shipyard of the 17th century. I love the tools you recreate as well to clamp and hold everthing together. It's just a simple but effective way of clamping. Thanks to you I start to understand the planking method of the hull (Vlakbouwmethode) which is brilliant, simple and effective. No patterns to follow, just to understand the fundamentals. However to execute this method is very very hard to do and you are doing an exceptional good job!
Thanks for showing so far!
Peter
Maybe you can consider for your next build, you only need some additional sawing machines in your kitchen. Ps don t tell your admiral.
I can recommend it, a lot of fun to do this.
- Joined
- Aug 8, 2019
- Messages
- 5,585
- Points
- 738

I agreea lot of fun to do this.
After a week in China for bussiness I finally had some time again to work on the Zwaan.
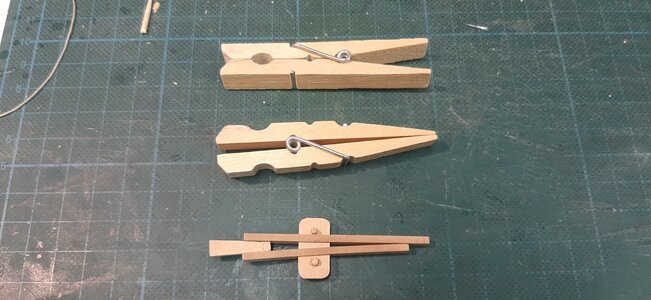
First I made extra boeitangen from some clothspin. Simpel and straight forward but very effective.
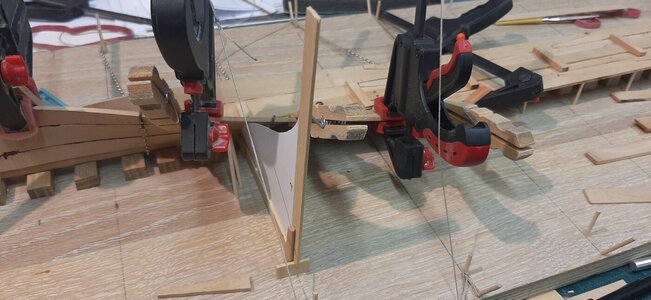
The new boeitangen are up to their task while fitting the SB 3rd stern plank.
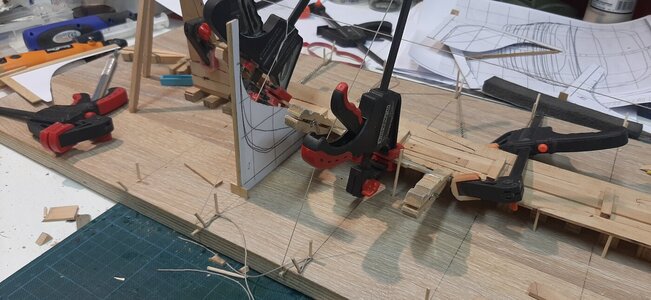
After fitting enjoying the sweeping lines at the stern section. The 4rd row wil start changing the shape towards the typical fluyt shape at the stern.
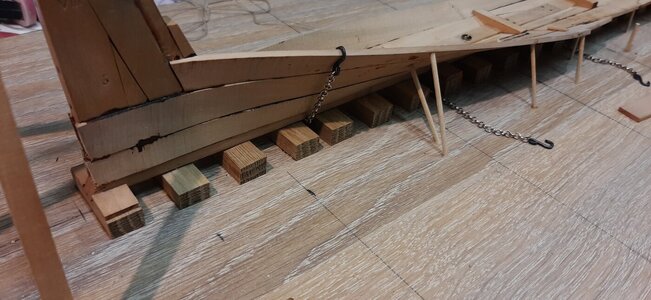
More and more poles are added fixating the shape of the planking.
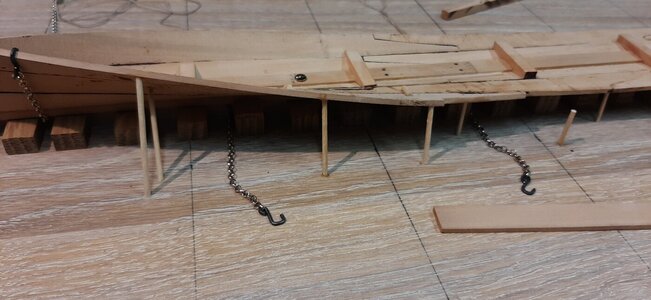
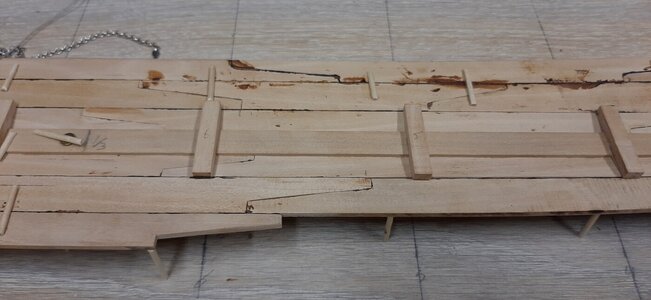
On the inside the planks are held together by small wooden bars nailed to the planking ( in model with a drop of CA)
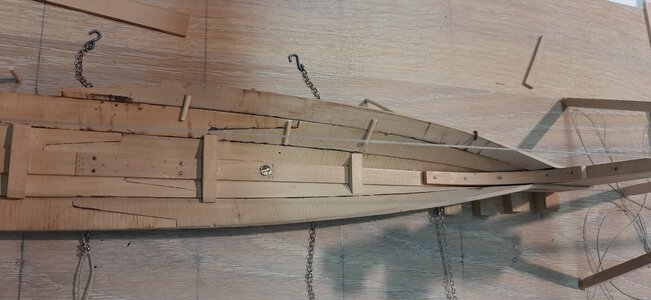
After also fitting the fwd plank the center plank us made to fit. First fitting on one side, followed by scribing the other side.
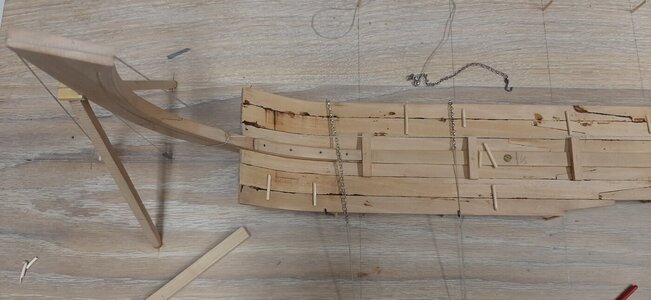
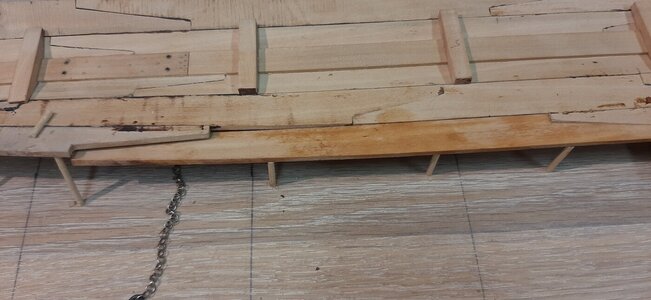
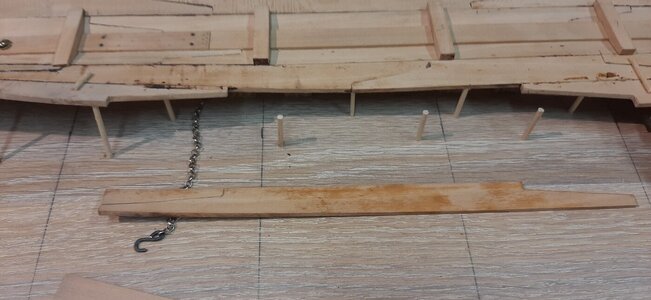
An over view of the inside, work in progress.
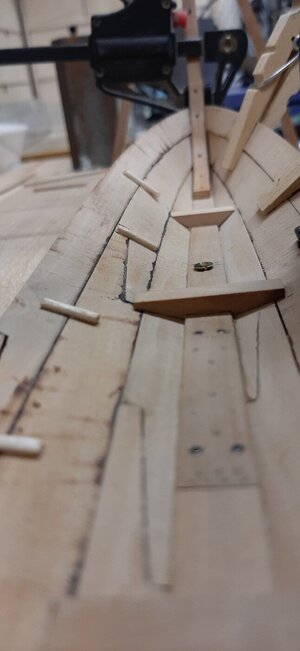
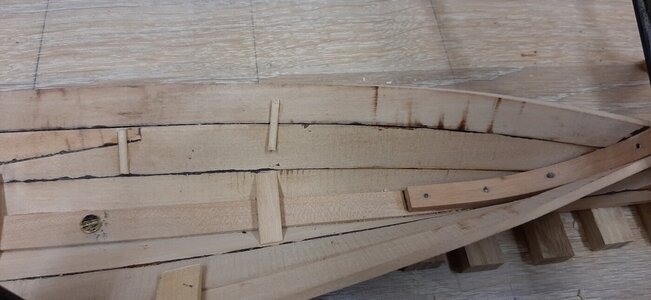
Work on the PS side started.
First I made extra boeitangen from some clothspin. Simpel and straight forward but very effective.

The new boeitangen are up to their task while fitting the SB 3rd stern plank.


After fitting enjoying the sweeping lines at the stern section. The 4rd row wil start changing the shape towards the typical fluyt shape at the stern.

More and more poles are added fixating the shape of the planking.

On the inside the planks are held together by small wooden bars nailed to the planking ( in model with a drop of CA)

After also fitting the fwd plank the center plank us made to fit. First fitting on one side, followed by scribing the other side.


An over view of the inside, work in progress.


Work on the PS side started.

I am always enthusiastic about this type of structure, very revealing to see how you work your way forward bit by bit.
The progress of your build is amazing, Maarten. Looking forward how the bow will fit to these planks.After a week in China for bussiness I finally had some time again to work on the Zwaan.
First I made extra boeitangen from some clothspin. Simpel and straight forward but very effective.
View attachment 381384
The new boeitangen are up to their task while fitting the SB 3rd stern plank.
View attachment 381385
View attachment 381386
After fitting enjoying the sweeping lines at the stern section. The 4rd row wil start changing the shape towards the typical fluyt shape at the stern.
View attachment 381387
More and more poles are added fixating the shape of the planking.
View attachment 381388
On the inside the planks are held together by small wooden bars nailed to the planking ( in model with a drop of CA)
View attachment 381389
After also fitting the fwd plank the center plank us made to fit. First fitting on one side, followed by scribing the other side.
View attachment 381487
View attachment 381390
View attachment 381391
An over view of the inside, work in progress.
View attachment 381488
View attachment 381489
Work on the PS side started.
View attachment 381490
Regards, Peter
Hi Gents thx for comments and likes.
@Steef66, yes the planking takes more time as everything has to fit nearly perf3ct to avoid major tension in the hull, but most probably this extra time is saved by putting in the frame timbers which is far less work compared to frame first building. Time will tell.
@Tobias don t be afraid I will continue boring you with additional planks in rhe comming time.
@Peter Voogt, thx. The first bilge plank will be pre shaped creating the shape of the bow at the correct angle according to my wreck data, then the floor planks are trimmed to be enclosed by this blige plank. At least that is the idea.
In the mean time I have added two plumb lines to my building board. One at the bow to allways ensure the model is level at the table.
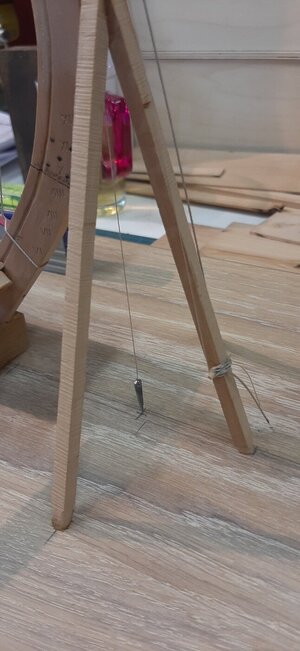
A second plumb line I can move between the stem and stern and change in height. This I can use for all types of measurements inside the hull.
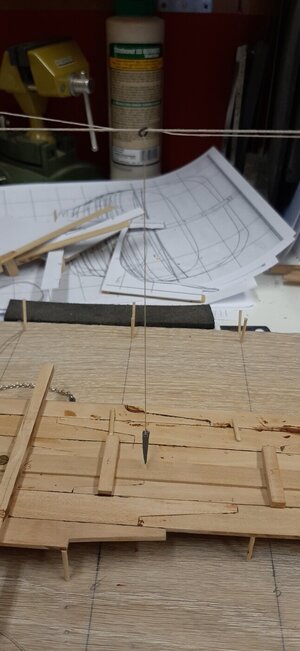
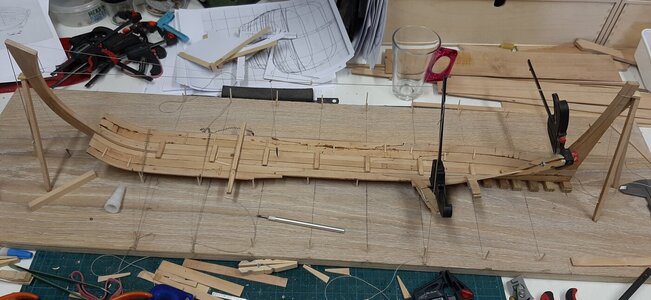
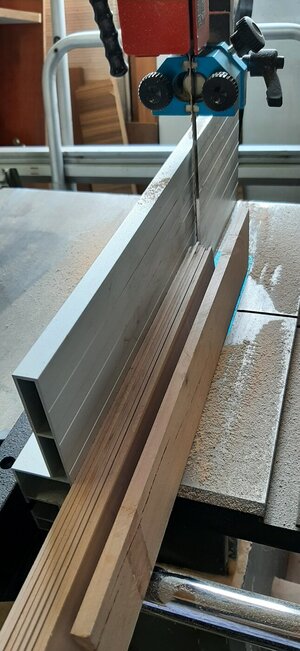
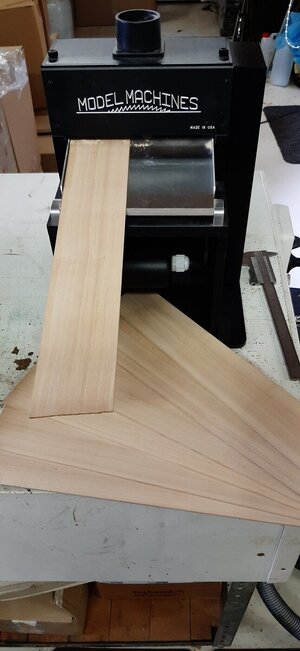
To continue the planking a lot of dust was neede to prepare more 2,3 mm thick boards from a billet of pear.

A second plumb line I can move between the stem and stern and change in height. This I can use for all types of measurements inside the hull.


To continue the planking a lot of dust was neede to prepare more 2,3 mm thick boards from a billet of pear.


Maarten, I love this more traditional approach with tools, etc - The Carpenter's Hand - my dad showed me the trick with the clothes pins when I was little. Between him and me, mom couldn't find her clothes pins on laundry day.
A well thought-out approach, Maarten. It's all in the details.In the mean time I have added two plumb lines to my building board. One at the bow to allways ensure the model is level at the table.
View attachment 382067
A second plumb line I can move between the stem and stern and change in height. This I can use for all types of measurements inside the hull.
View attachment 382071
View attachment 382072
To continue the planking a lot of dust was neede to prepare more 2,3 mm thick boards from a billet of pear.
View attachment 382073
View attachment 382074
Regards, Peter
Kurt Konrath
Kurt Konrath
If not for the screws in keel, and large grain of your build board, I would think we are looking at photos from a full scale shipyard under construction.
Great work, very interesting build, will keep watching it.
Great work, very interesting build, will keep watching it.
- Joined
- Sep 14, 2020
- Messages
- 152
- Points
- 88

Wow what a dedicated build! looking at the first pages of your build it looks like the process by the builders was very haphazard in the construction but by the time we get to this page one can see that there is a lot of thought that would go in to the construction of this type of ship. I will definitely follow to the end!
Thx gents.
@The learner actually most ships in the Northern part of the Netherlands were build this way untill the end of the 17th century. From small inland water boat up to large war ships.
@Kurt Konrath this was the idea, lets look it as much as possible as a 17th century shipyard, I even thought about putting sand on the building board but that is not practical .
.
Now work continues with the 4th strake.
For time efforts I used also my small clamps.
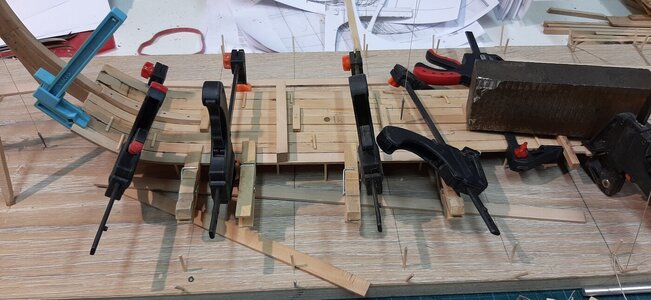
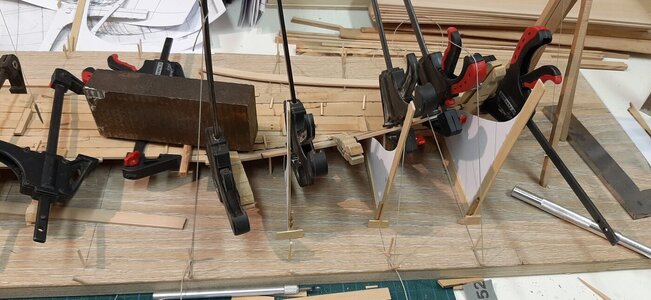
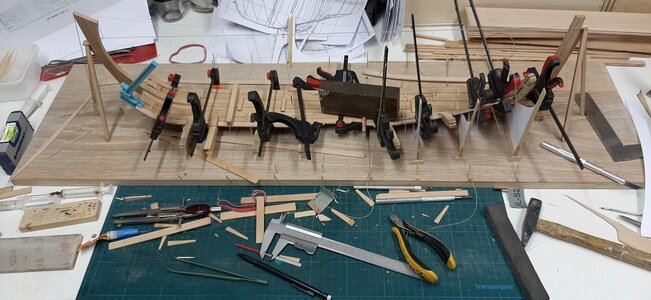
The shape continues to grow.
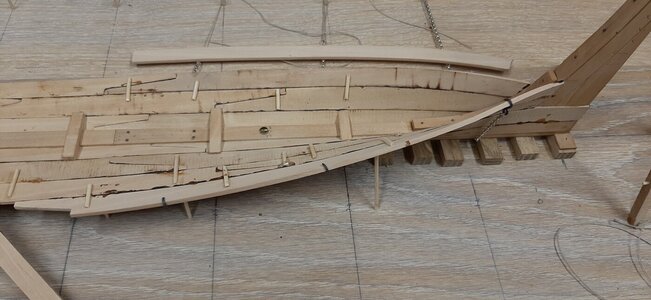
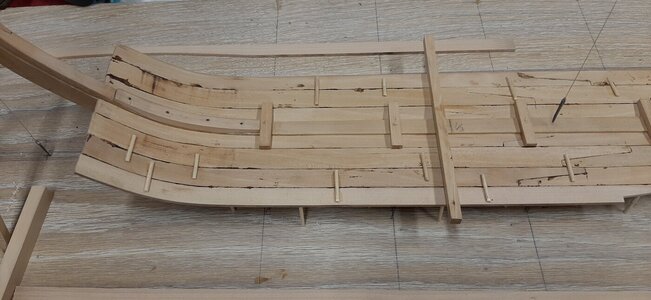
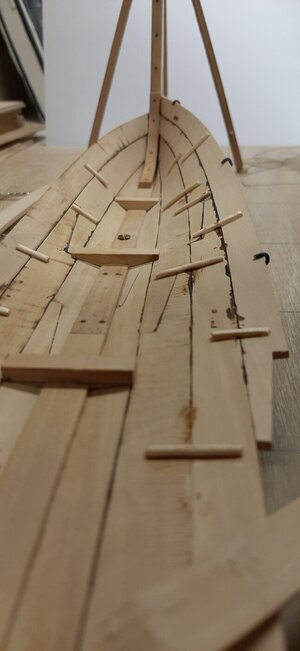
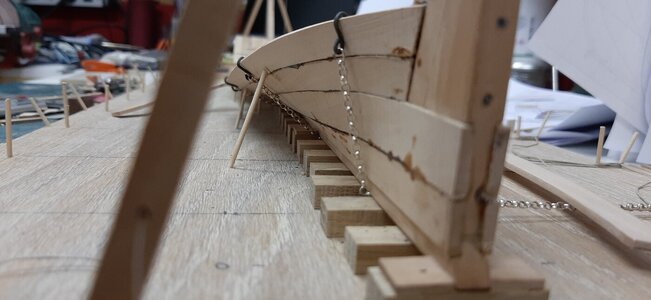
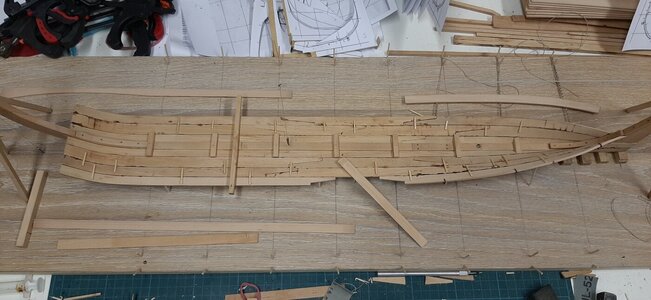
Two more strakes on the PS side and then the 3 bilge strakes starts. These bilge strakes change the shape from floor to sides of the hull.
@The learner actually most ships in the Northern part of the Netherlands were build this way untill the end of the 17th century. From small inland water boat up to large war ships.
@Kurt Konrath this was the idea, lets look it as much as possible as a 17th century shipyard, I even thought about putting sand on the building board but that is not practical
Now work continues with the 4th strake.
For time efforts I used also my small clamps.


The shape continues to grow.


Two more strakes on the PS side and then the 3 bilge strakes starts. These bilge strakes change the shape from floor to sides of the hull.
That's a nice Dutch toboggan you're making... snowshoes? garden tool? adze?


