A Dutch Fluyt in shell first, reconstructing the "Ghost ship" scale 1:36

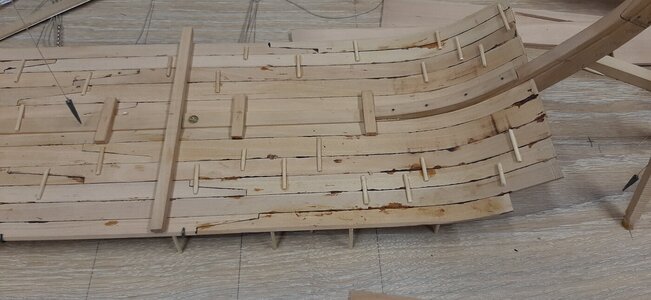
Yes another row of planks is added on SB and PS side making a total of 5 per side.
View attachment 385451
View attachment 385452
View attachment 385453

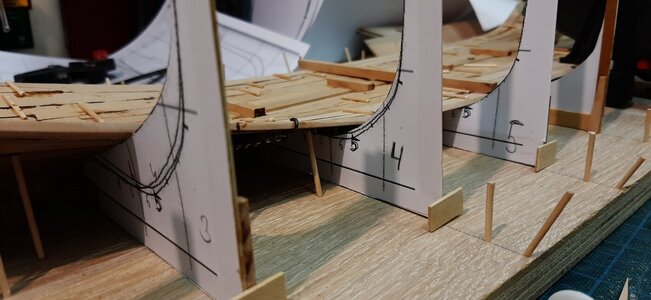
You slowly see the typical fluyt shape develloping on the stern.
View attachment 385455
View attachment 385460

On the bow it is stil completely rectangular in shape.
View attachment 385454
View attachment 385456

The last plank in the 5th row is shaped.
View attachment 385457

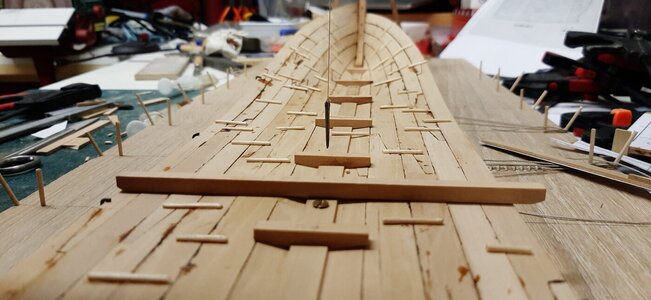
The total floor consists of 6 rows as wide as the center frame member at 1/3 of the hull length.
View attachment 385458
View attachment 385459
To this frame member the bilge futtocks and bilge planks will be fitted.

Each plank takes up to one hour, so one strake of planks 3 hours per side. 6 more hours and work on the bilge can start.

And an overview sofar.
View attachment 385461
Nice to see the progress, shown with some very instructive pictures, Maarten.
Regards, Peter
 
I'm eager to see the process of the transition from "vlak" to an upwards strake. I guess you have to bevel the edge of the planks to get the correct angle?
This is such a grant project...
Thx gents for all comments and likes.
Hope more shipwrights will follow and try this way of building for Dutch ships.

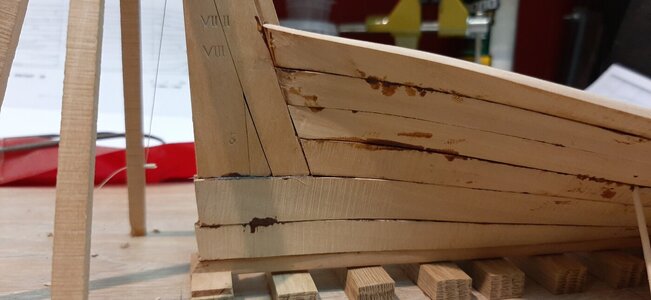
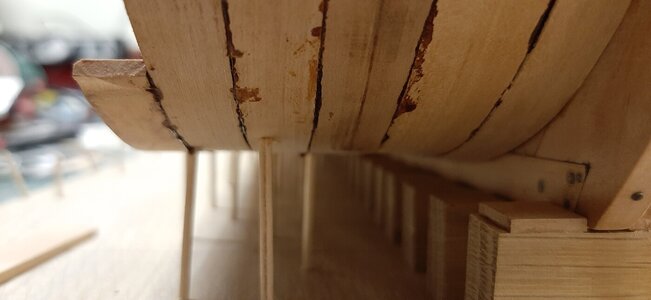
@Ptèr , yes this is the way to go forward. First one additional row of planks with the edge slightly bevelled. The bilge futtock will shape this angle. This first bilge plank will enclose the bow planks so these will then be trimmed to create the correct angle between the bilge planks and the stempost.
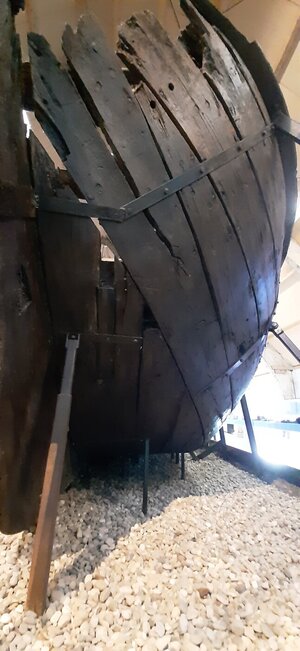
See below how in the wreck of Anna Maria.
Bow Anna Maria.jpg

You can also perfectly see it on the wreck of the ventjager in Lelystad.
20230305_143727.jpg
 
Last edited:
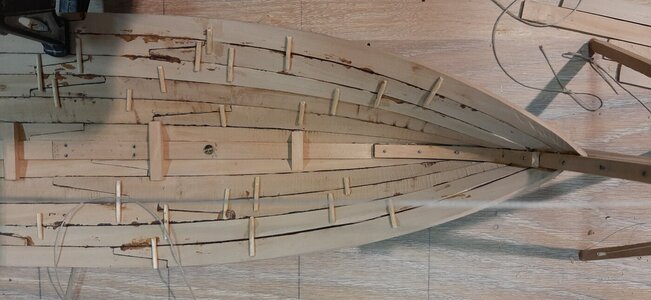
The 6th strake of planks is fitted on the SB side.
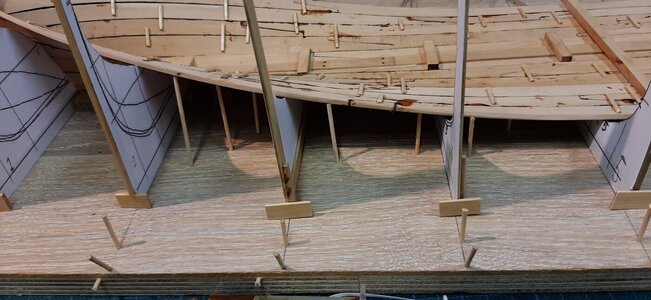
This is the final row of the floor. Now slightly more then 2/3 of the total width of the hull has been reached for the square shape of the fluyt.
20230721_174007.jpg

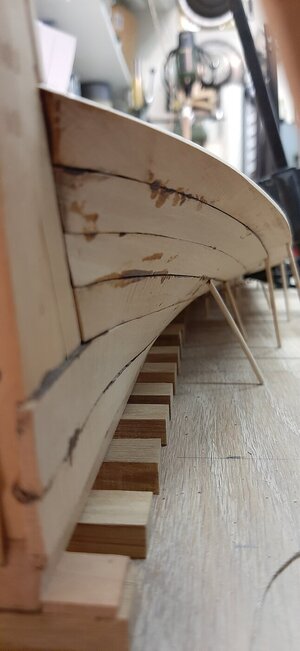
You get a severe curvature in the planks from the upright stern to the flat floor.
20230721_174020.jpg
20230721_174029.jpg

The natural flow of the planks is not following my line drawing at frame position 4. I leave it like this because the shape and flow of the hull planks look perfect, all other frame positions look fine.
20230721_174940.jpg

The only thing which maybe needs some additional attention is the outward curvature of the planks at the stern. To create the very recognizable buttox of the fluyt the planking at the stern really has to be bended to the max.
20230721_175010.jpg

I think the angled planking we see at fluyt construction at the stern helps in creating this shape. I still have to decide when to add stealers to the sternplanking to start to create this angle as my planks now still have a square position at the stern.
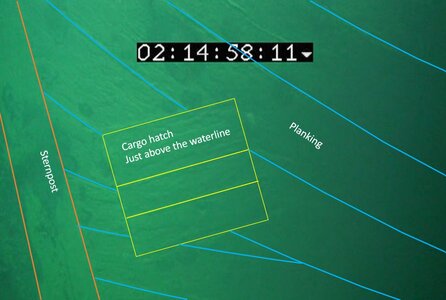
In the ship wreck I do see stealers in the stern planking just above the water line at the stern cargo hatch position. My idea is there to start with the angled planking if possible.
Planking lower stern.jpg

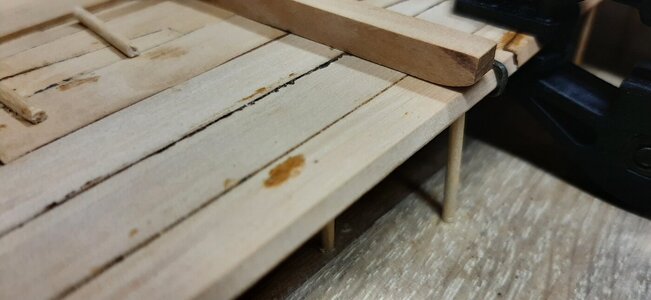
The outside of the plank is also angled to join the first bilge plank.
20230721_175254.jpg

One PS strake to go before fitting the first floor frame.
20230721_175554.jpg
20230721_175636.jpg
20230721_175705.jpg
 
The 6th strake of planks is fitted on the SB side.
This is the final row of the floor. Now slightly more then 2/3 of the total width of the hull has been reached for the square shape of the fluyt.
View attachment 386087

You get a severe curvature in the planks from the upright stern to the flat floor.
View attachment 386088
View attachment 386089

The natural flow of the planks is not following my line drawing at frame position 4. I leave it like this because the shape and flow of the hull planks look perfect, all other frame positions look fine.
View attachment 386090

The only thing which maybe needs some additional attention is the outward curvature of the planks at the stern. To create the very recognizable buttox of the fluyt the planking at the stern really has to be bended to the max.
View attachment 386091

I think the angled planking we see at fluyt construction at the stern helps in creating this shape. I still have to decide when to add stealers to the sternplanking to start to create this angle as my planks now still have a square position at the stern.
In the ship wreck I do see stealers in the stern planking just above the water line at the stern cargo hatch position. My idea is there to start with the angled planking if possible.
View attachment 386097

The outside of the plank is also angled to join the first bilge plank.
View attachment 386092

One PS strake to go before fitting the first floor frame.
View attachment 386093
View attachment 386094
View attachment 386095
Just what Tonias wrote: it looks like a real shipyard, Maarten. Nice pictures, showing the specific details.
Regards, Peter
 
Maarten,

These frame templates you show in two of the photos of your last post, are they just to check your hull contours after bonding, or do you somehow use them to ensure the individual planks follow the required profile, prior to bonding am still trying to get my head around the "shell first" process: how did they control the hull lines? With these pogo sticks? Or with partial frames? Or with full-scale frame templates?

Kind regards,
Johan
 
One question: do all the planks keep their width along their entire length? It looks like that towards the bow. How about aft?
Hi Bela,

Yes until now all planks are the same width along their length. I have added some changes in width between individual strakes of planks.
U have been thinking about some additional width in the stern section, but think I will add that with some stealers.
 
Maarten,

These frame templates you show in two of the photos of your last post, are they just to check your hull contours after bonding, or do you somehow use them to ensure the individual planks follow the required profile, prior to bonding am still trying to get my head around the "shell first" process: how did they control the hull lines? With these pogo sticks? Or with partial frames? Or with full-scale frame templates?

Kind regards,
Johan
Hi Johan,

I use the templates during steaming and bending the planks. In principle the planks are fully shaped before bonding them with PVA glue.
After bonding I again use the template to fixate the plank in the correct position.
 
Hi Johan,

I use the templates during steaming and bending the planks. In principle the planks are fully shaped before bonding them with PVA glue.
After bonding I again use the template to fixate the plank in the correct position.
That actually makes a lot of sense.
Thanks for clarifying.
 
Hi Bela,

Yes until now all planks are the same width along their length. I have added some changes in width between individual strakes of planks.
U have been thinking about some additional width in the stern section, but think I will add that with some stealers.
An extremely exciting project that you are following here. You will gain many experiences and share them with us. Among other things, how the design at the rear can work with stealers. I am very excited and will follow it with great attention.
 
Back
Top