-

Win a Free Custom Engraved Brass Coin!!!
As a way to introduce our brass coins to the community, we will raffle off a free coin during the month of August. Follow link ABOVE for instructions for entering.
-

PRE-ORDER SHIPS IN SCALE TODAY!
The beloved Ships in Scale Magazine is back and charting a new course for 2026!
Discover new skills, new techniques, and new inspirations in every issue.
NOTE THAT OUR FIRST ISSUE WILL BE JAN/FEB 2026
You are using an out of date browser. It may not display this or other websites correctly.
You should upgrade or use an alternative browser.
You should upgrade or use an alternative browser.
A Dutch Fluyt in shell first, reconstructing the "Ghost ship" scale 1:36
- Thread starter Maarten
- Start date
- Watchers 73
-
- Tags
- dutch fluit
A very nice base for the rest of the build, Maarten. It looks old fashioned with all those scarph joints.Today I placed the last two planks on the SB bilge to finish my bath tub.
Below the result of the shell first build part before starting to fill her up with floor timbers.
View attachment 454729View attachment 454730View attachment 454731View attachment 454732View attachment 454733View attachment 454734View attachment 454735
The guidence blocks for the garboard stroke are removed.
View attachment 454736
View attachment 454737
Next is the tingel which is a triangular shaped plank. This creates a space between the keel and planking and floor timbers like the limber hole in the floor timbers on English ships.
View attachment 454738
View attachment 454739
And in reality on the Samuel wreck.
View attachment 454740View attachment 454741
Next time finishing the tingels and starting with the floor timbers.
Regards, Peter
An interesting Idea, certainly at smaller scale.Exemplary work, Maarten.
Now you could also consider to change your shipyard into a diorama and have multiple hulls next to one another in various stages of assembly to show the “shell first” assembly process. Just a suggestion, no pressure or anything…
It would be interesting to scan it in 3D at different build stages and print the model at smaller scale.
Size mattersGreat work, looks real good. And your scale is much better to show details like the tingel. And now the timbers.........

A very nice base for the rest of the build, Maarten. It looks old fashioned with all those scarph joints.
Regards, Peter
At this stage of construction, the whole thing seems very archaic. Remarkable
Thx gents,my dear friend Maarten
it's so unique and so special, well done my it gone a beautiful model
The old fashioned shipyard will be expanded as soon as the floor timbers(buikstukken/liggers) and first futtocks (zitters) are in.
Than the next experimental phase will start.
Setting up the scheerstrook, looking forward to that.
- Joined
- Aug 8, 2019
- Messages
- 5,570
- Points
- 738

You needed time to think that one out, don't you?Size matters

Nope phone battery was dead, also there size mattersYou needed time to think that one out, don't you?

The tingel is in and sanded back in shape to nicely fit between the floor timbers and gardboard strake.
You can clearly see the function, a filler piece to fit the treenails and attach the floors to the gardboard strake and leave a limber space along the keel to drain water to the pumps.
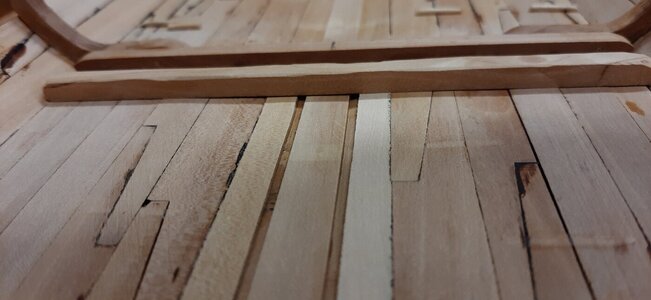
I have removed the temporary wooden bars which kept the planks together and sanded the inner planking to receive the floor. In reality these were removed after the floor timber was place and treenailed to the planks, we have glue . I leave some of the brown tarred surfaces as also can be seen in real wooden ships.
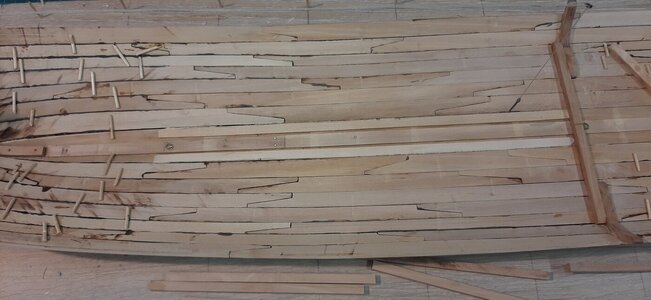
In real 17th century ships are all but straight and even, so all my straight sawn beam I have to mistreat to give them a look and feel of a large timber sawn out of a tree trunk.
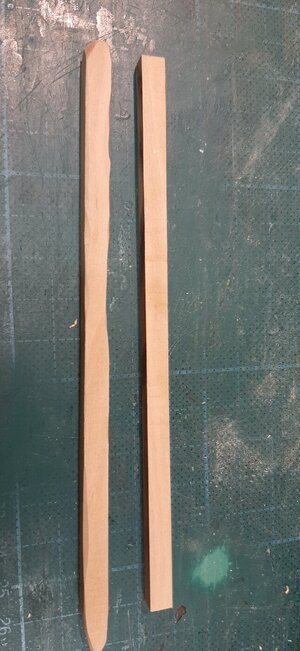
I glue the floor timbers in place with pva and press them with a heavy weight untill the glue sets. Afterwards all floor timbers will be tree nailed to the planks.
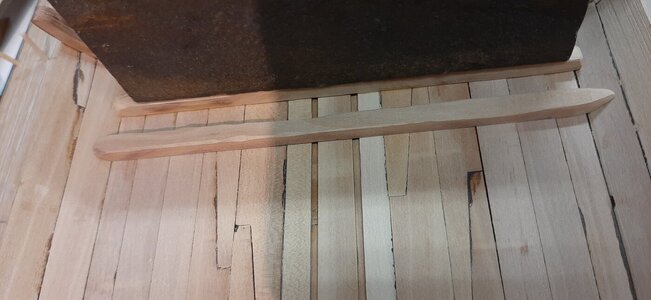
The floors are also different in length not any is the same.
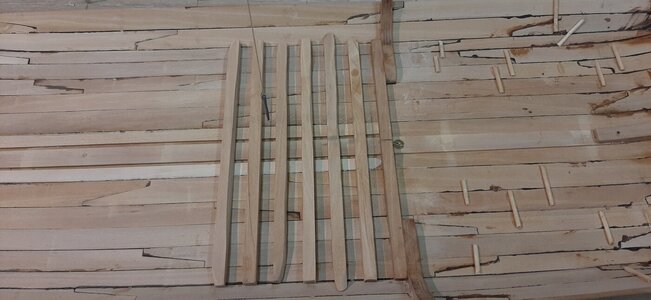
Also the discoloration from the circle saw I leave on the floor timbers.
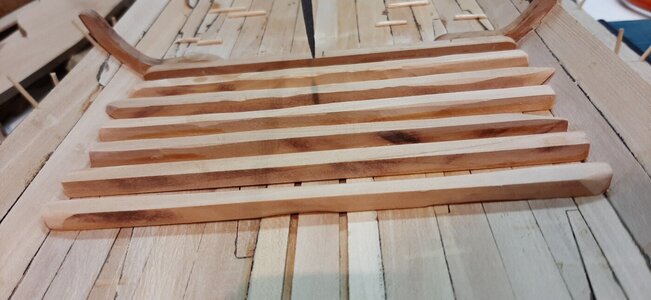
Current status
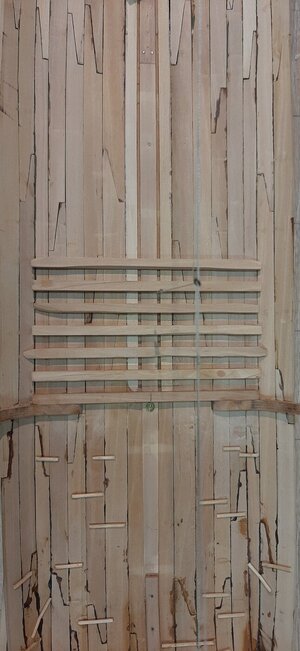
Space between the beams is a slightly more than the width, this to have sufficient space for the zitters / buikstukken. There should be some space between the timbers to create ventilation and avoid rot.
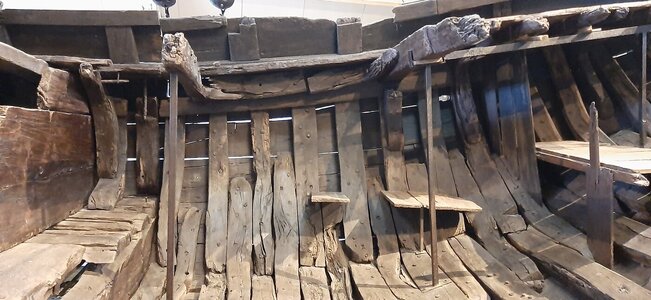
See below inside timbers on two different wrecks.
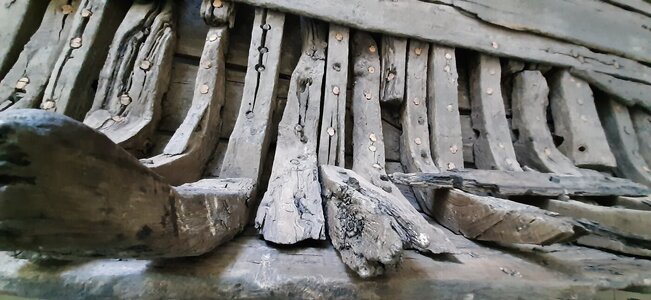
You can clearly see the function, a filler piece to fit the treenails and attach the floors to the gardboard strake and leave a limber space along the keel to drain water to the pumps.

I have removed the temporary wooden bars which kept the planks together and sanded the inner planking to receive the floor. In reality these were removed after the floor timber was place and treenailed to the planks, we have glue

In real 17th century ships are all but straight and even, so all my straight sawn beam I have to mistreat to give them a look and feel of a large timber sawn out of a tree trunk.

I glue the floor timbers in place with pva and press them with a heavy weight untill the glue sets. Afterwards all floor timbers will be tree nailed to the planks.

The floors are also different in length not any is the same.

Also the discoloration from the circle saw I leave on the floor timbers.

Current status

Space between the beams is a slightly more than the width, this to have sufficient space for the zitters / buikstukken. There should be some space between the timbers to create ventilation and avoid rot.
See below inside timbers on two different wrecks.


Last edited:
Fantastic Maarten. A very authentic feeling construction!
Fantastic Maarten. A very authentic feeling construction!
Thx gents,I agree with Paul. And the fun of doing it like this.
Yes Paul, forget the beautiful shiny kits and start building a shell first scratch from your own made drawings
.....These are what my straight timber looks likel my straight sawn beam I have to mistreat to give them a look and feel of a large timber sawn out of a tree trunk.
 . Seriously tho : What a brilliant example of authentic period driven modelling should be. Stunning work Maarten. Cheers Grant
Than start a Dutch build, you can do it without additional work.....These are what my straight timber looks like.
 .
.I (almost) fully agree with Maarten.…… and start building (a shell first) scratch from your own made drawings. It is lot's of fun.
Regards, Peter
...almost doesn't count as an optionI (almost) fully agree with Maarten.


….. In no way I did consider building the shell first on my Balder....almost doesn't count as an option


.... this is a serious statement and requires proof.….. In no way I did consider building the shell first on my Balder.


