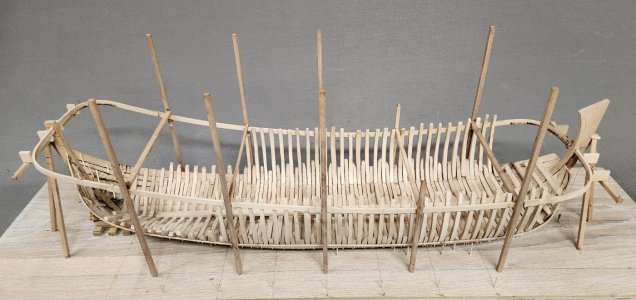
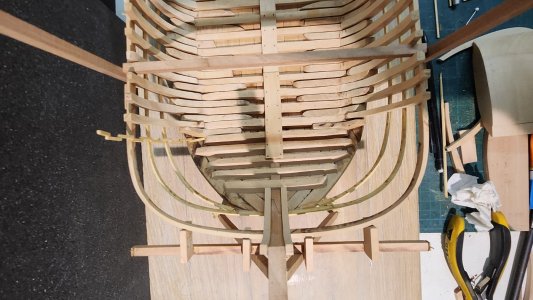
A Dutch Fluyt in shell first, reconstructing the "Ghost ship" scale 1:36

Finally back at work on the fluyt.
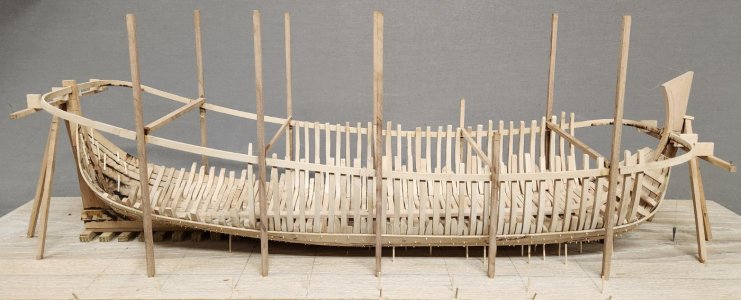
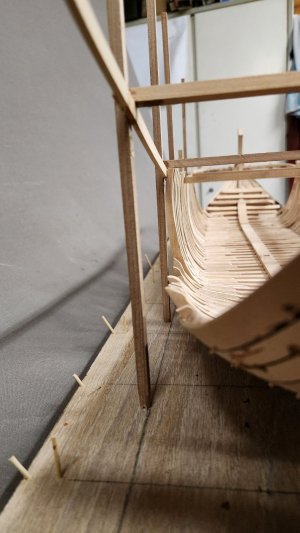
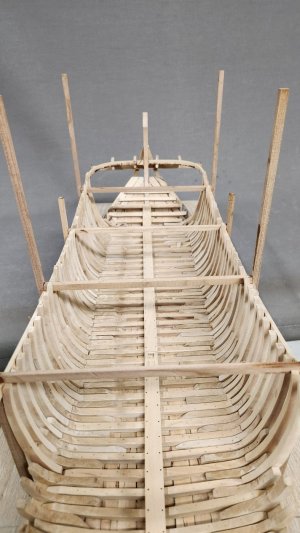
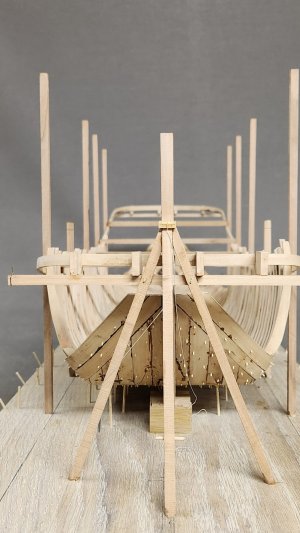
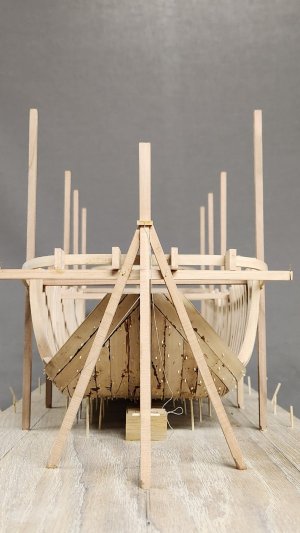
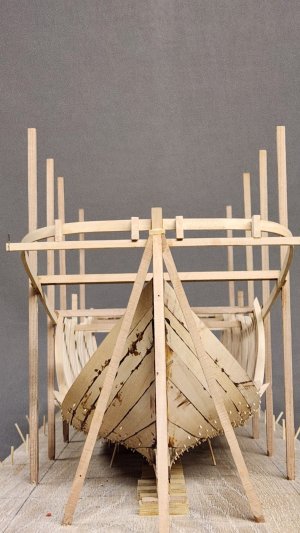
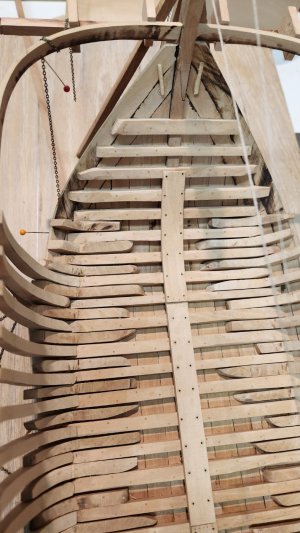
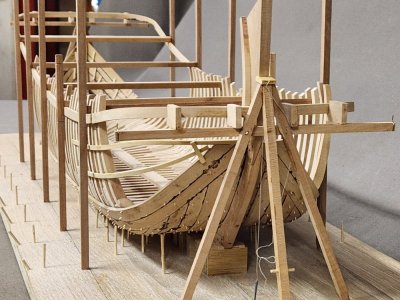
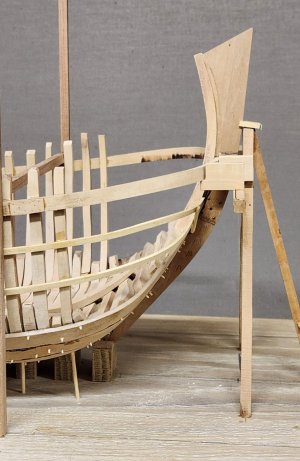
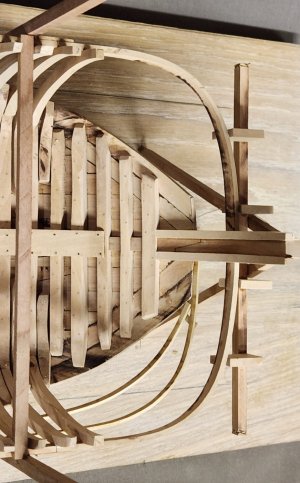
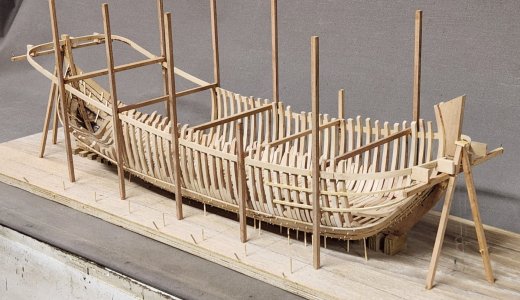
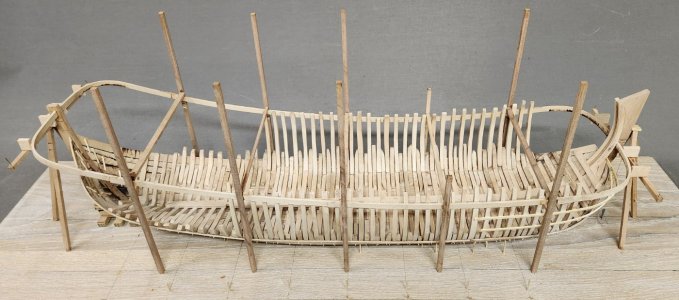
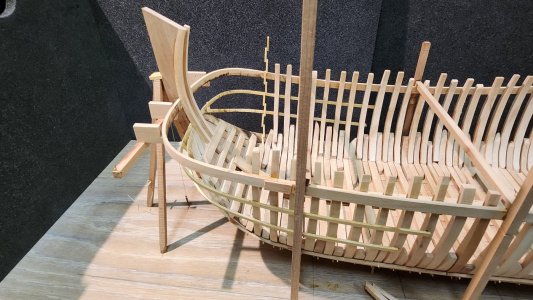
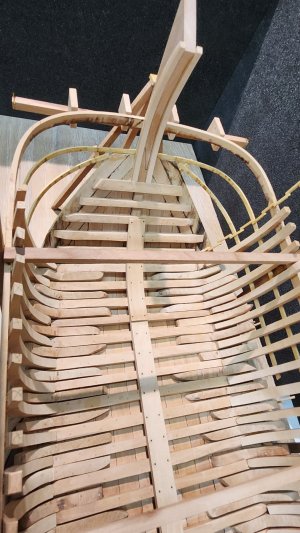
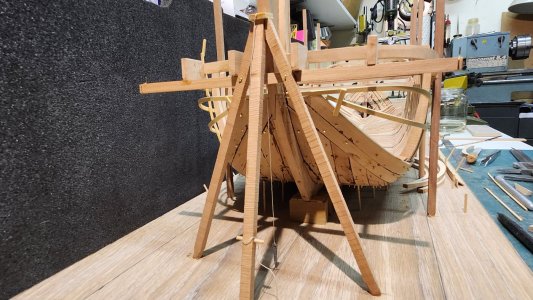
Today a start on the PS forward side fitting the first "oplangen" (second futtocks).
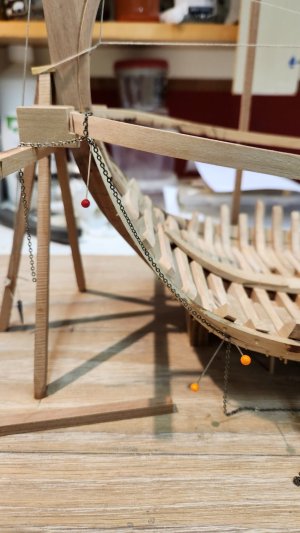
These oplangen will be fitted with treenails to the bilge planks and temporary fitted to the "scheerstrook" which is just a temporary mould to shape the line of greatest breadth.
View attachment 491092View attachment 491093View attachment 491094View attachment 491095
And yes again the shape and size of these oplangen are all different in width and length. The thickness of them will be made identical to fit the planking.

The hull profile of all these oplangen is identical and taken from the center frame design. Only in bow and stern of the ship this will change, but more on that later.
Good to see you back on the shipyard, Maarten. Still full of impressions of your holiday?
Step by step the shape of the Fluyt is coming alive with a nice flowing sheer.
Regards, Peter
 
I am really happy that you found your way back to this challenge. It's looking marvelous. If I compare your simple jig and the jig I build for my Fly, I think that most modelers (including myself) over engineer their builds nowadays.
 
my dear friend Maarten
as always it's incredible work!
wish you all Merry Christmas and Happy new year
 
I am really happy that you found your way back to this challenge. It's looking marvelous. If I compare your simple jig and the jig I build for my Fly, I think that most modelers (including myself) over engineer their builds nowadays.
This "jig" is the setup as used in the real thing a "scheerstrook".
For 18th century ships it is welcome to have a little more guidence on the placement of the frames in 17th century ships this is less critical. As example Vasa has not even the same number of frames on PS as on SB side.
 
A big part of the oplangen is fitted approx. 2/3.
20250105_171149.jpg

All oplangen which are now fitted are based on the same template with the same outer profile. The change in shape of the hull over this length is determined by the width and rise of the liggers (floor) but using the same oplangen (futtock) profile.

Due to the build methode of the Dutch shipbuilders, getting the maximum from every piece of timber, every oplang is different in length and width. This means in my model every oplang need to be fitted and trimmed to recreate this and get a fit to the different shaped liggers.
On the template I have marked the thickness of the liggers and based on this I can roughly lengthen every oplang to fit it to the respective ligger.
20241225_124252.jpg

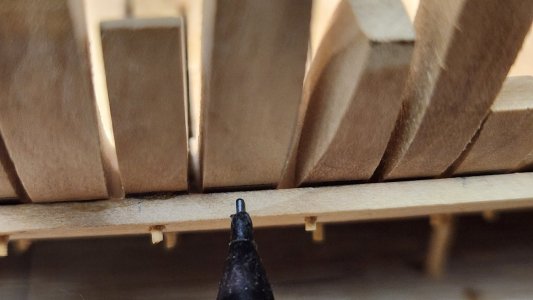
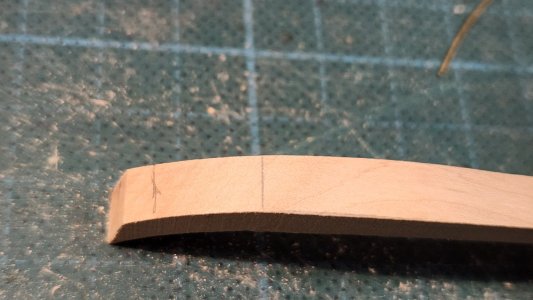
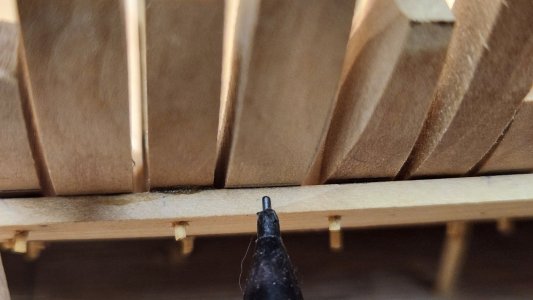
If the oplang is trimmed and there is a proper fit to the ligger the oplang can be trimmed to get a perfect fit to the bilge planks (kimmen). The fit of the default oplang is close as you can see by the small gap.
20241225_124517.jpg

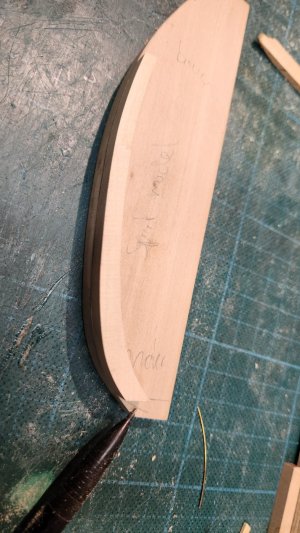
I then mark the top of the plank and the second plank.
20241225_124540.jpg

As the planks are flat the oplang should be trimmed to match that surface to create a perfect fit.
20241225_124640.jpg

All 60 oplangen are trimmed and fitted that way creating a large part of the hull shape. The inner and outer surface of the oplangen is finished in a later stage.
20250105_171157.jpg20250105_171226.jpg20250105_171319.jpg20250105_171454.jpg20250105_171518.jpg20250105_171608.jpg

Next step is shaping the bow.
 
Looking at the top view, it's easy to see the rules those early shipwrights followed are still being used today: maximize payload volume and add the smallest possible streamline body at the front and the back of the cargo bay. Brilliant.
 
Looking at the top view, it's easy to see the rules those early shipwrights followed are still being used today: maximize payload volume and add the smallest possible streamline body at the front and the back of the cargo bay. Brilliant.

@Steef66 , @Herman , @Heinrich ,@RDN1954
Thx gents.

Yes that is exactly at the basis of the late fluyt design. You see the same with the katschip and even in England in the Whitby bark that James Cook used and became the Endeavour.
20240725_160610.jpg20240725_160616.jpg
 
A big part of the oplangen is fitted approx. 2/3.
View attachment 493785

All oplangen which are now fitted are based on the same template with the same outer profile. The change in shape of the hull over this length is determined by the width and rise of the liggers (floor) but using the same oplangen (futtock) profile.

Due to the build methode of the Dutch shipbuilders, getting the maximum from every piece of timber, every oplang is different in length and width. This means in my model every oplang need to be fitted and trimmed to recreate this and get a fit to the different shaped liggers.
On the template I have marked the thickness of the liggers and based on this I can roughly lengthen every oplang to fit it to the respective ligger.
View attachment 493793

If the oplang is trimmed and there is a proper fit to the ligger the oplang can be trimmed to get a perfect fit to the bilge planks (kimmen). The fit of the default oplang is close as you can see by the small gap.
View attachment 493794

I then mark the top of the plank and the second plank.
View attachment 493795

As the planks are flat the oplang should be trimmed to match that surface to create a perfect fit.
View attachment 493796

All 60 oplangen are trimmed and fitted that way creating a large part of the hull shape. The inner and outer surface of the oplangen is finished in a later stage.
View attachment 493799View attachment 493800View attachment 493801View attachment 493802View attachment 493803View attachment 493804

Next step is shaping the bow.
What a progress, Maarten! Her prominent sheer is looking beautiful. Building a model on the old fashion way gives a lot of satisfaction. Together with scratch, it’s double fun.
Regards, Peter
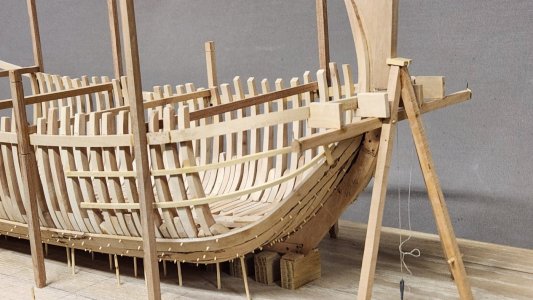
 
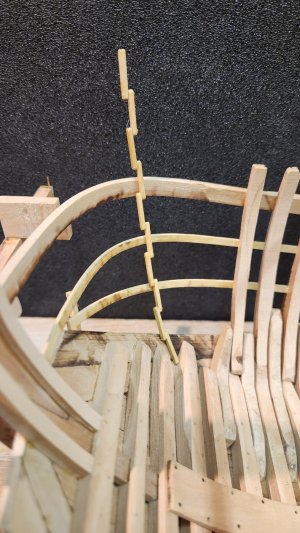
Started with shaping the bow. There are three reference lines which are at the basis of shaping the bow of the ship.
First the shape of the most forward frame which is more or less a copy of the centre frame. Secondly we have the stem and a part of the shell build is following the shape of the rabbet in the stem. The last reference is the scheerstrook.
It is about filling the open space below.
20241225_133517.jpg
20241225_133504.jpg
You see that the chain is nicely following the line of the stem when hanging from the scheerstrook to the floor. You can see this as the hanging guide rail as drawn by Waldemar.

With help of this chain and by eye I have placed two "cent latten" which are guiding strakes to help to determine the shape of the frame members needed to fill the bow.
I placed one cent lat at the spot of the lower wale and one to fill the space between the lower wale and the bilge planks.
20250105_190510.jpg
20250105_190549.jpg
20250105_190640.jpg

In the fluyt the cent lat at the lower wale follows the shape of the higher wale except slightly narrower due to the smaller width lower in the hull. The lower cent lat I place diagonally just touching the previously shown chain of the hanging guiderail.
20250105_190623.jpg

One side finished.
20250105_190533.jpg20250105_190853.jpg

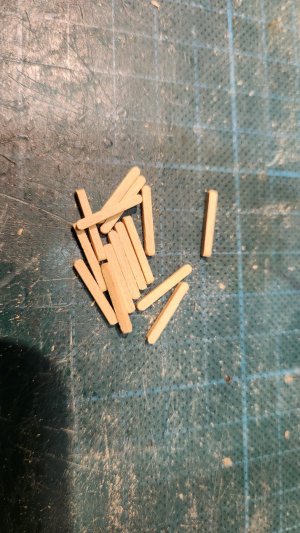
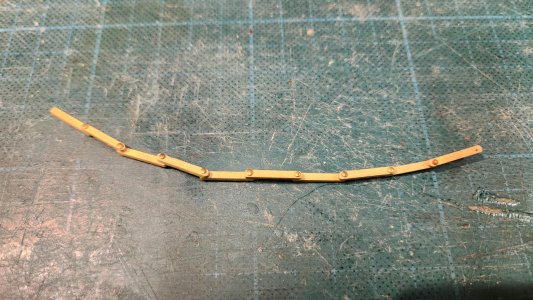
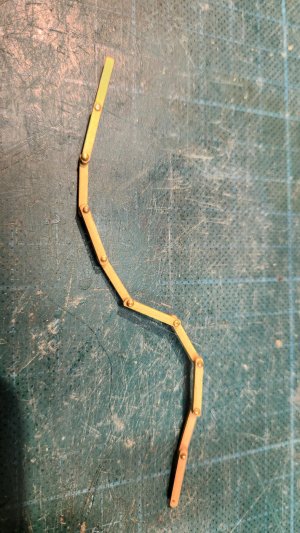
Before going to the PS side I have made a small carpenters tool to measure my bow frame shape. I made several 2 Amsterdam feet long strips to scale. Drilled holes in them and with brass pins clenched them together so they can be bent in shape with some friction.
20250109_191331.jpg
20250109_200117.jpg

These can be used to take the shape of the frame members on the inside of the cent latten and copied to the wood.
20250109_200206.jpg
20250109_201339.jpg

Now both PS and SB side are fitted with cent latten ready to be filled with the oplangen in the bow which will be different from the ones in the sides.
20250110_193143.jpg20250110_193149.jpg20250110_193211.jpg20250110_193221.jpg

The next post is about how to fill the bow with timber.
 
Last edited:
I really admire your bravery with this build, Maarten. Ultimately, you will only know if the hull shape is "correct" once the build of upper stern has also been completed. How does this current hull shape compare to your original drawings/interpretation?
 
Back
Top