A Dutch Fluyt in shell first, reconstructing the "Ghost ship" scale 1:36

Again a small update, lot's of other things on my plate at the moment.
The lower wale is now in place and the scheerstrook removed.
In the bow she now has all three wales in place, in the stern first the top of the frames have to be shaped before the wale is fitted, but that will be in a later stage.
View attachment 516097View attachment 516098View attachment 516099View attachment 516100View attachment 516101View attachment 516102View attachment 516103View attachment 516104

Next will be treenailing the wales to the frames and than finishing the inside of the hull before fitting the ceiling planks and the "koebrug" deck.
That looks very nice with these flowing lines, Maarten. And also standing free!
Regards, Peter
 
Again a small update, lot's of other things on my plate at the moment.
The lower wale is now in place and the scheerstrook removed.
In the bow she now has all three wales in place, in the stern first the top of the frames have to be shaped before the wale is fitted, but that will be in a later stage.
View attachment 516097View attachment 516098View attachment 516099View attachment 516100View attachment 516101View attachment 516102View attachment 516103View attachment 516104

Next will be treenailing the wales to the frames and than finishing the inside of the hull before fitting the ceiling planks and the "koebrug" deck.
Brilliant!
 
Again a small update, lot's of other things on my plate at the moment.
The lower wale is now in place and the scheerstrook removed.
In the bow she now has all three wales in place, in the stern first the top of the frames have to be shaped before the wale is fitted, but that will be in a later stage.
View attachment 516097View attachment 516098View attachment 516099View attachment 516100View attachment 516101View attachment 516102View attachment 516103View attachment 516104

Next will be treenailing the wales to the frames and than finishing the inside of the hull before fitting the ceiling planks and the "koebrug" deck.
This is just “a different level of modelling “….wow. Cheers Grant
 
@Jimsky , @Tobias , @Peter Voogt , @dockattner , @GrantTyler , @Peter Gutterman , @Dean62
Many thanks for all your comments and glad you like it allthough there are plenty much cleaner build here on the forum :-) . Also thanks for all the other likes, much appreciated.

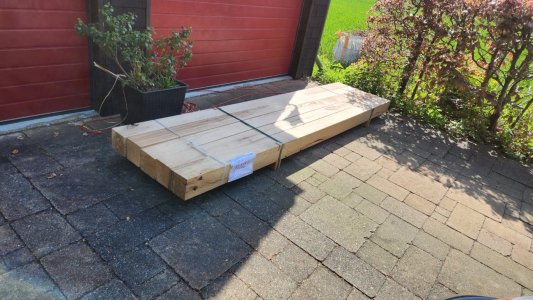
At the moment working on my porch with some bigger 3mtr pieces of oak, so not too much progres on the ship.
20250429_103943.jpg

In the mean time on the ship I am investigating the use of nails and treenails to attach the planks, this to create a correct fitting of the planks.
To give you an idea of a common plank on the Samuel.
[MA]T-133450.jpg

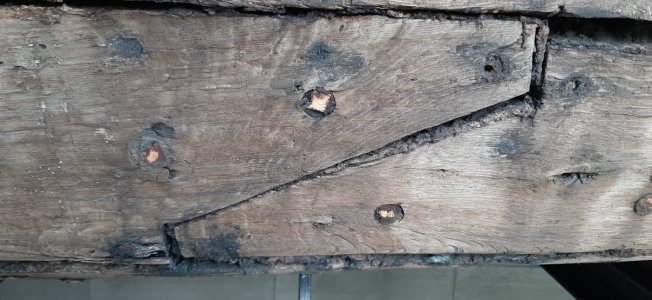
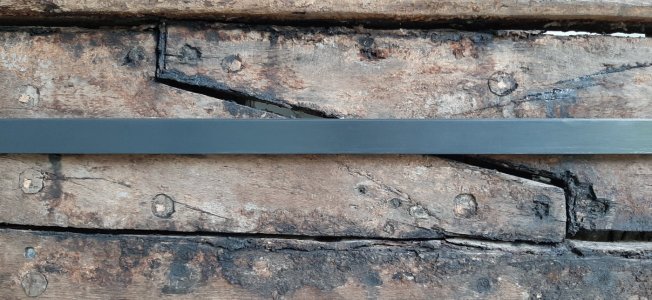
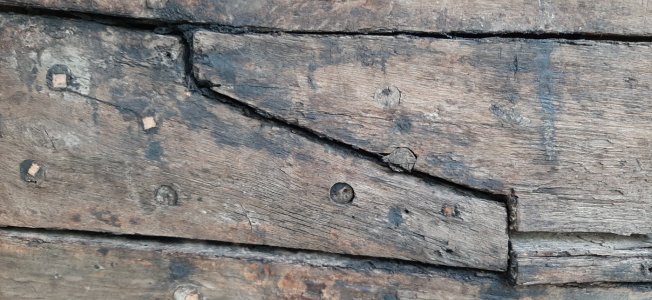
On the Husum wreck of a dutch coaster you see also nails at the plank joint ends.
20240725_154112.jpg20240725_154023.jpg20240725_154035.jpg

All along the the stem keel and stern the planks were nailed.
20240725_153447.jpg20240725_152827.jpg

I have the idea that planks were nailed in place just to fit them. After fitting they were finally fitted with treenails.
In the Samuel planking you see scattered nails at the planks and a rather neat pattern of treenails with two or three treenails per frame timber.
Treenails were fitted for the outer planking of the floor and later addtionally for the ceiling planking. For the sides "huiddigt" I am stil looking into this planking order of first fitting the ceiling or the huiddigt planks between the bilge and lower wale.

To give you an idea how it looks on the model.
20250502_174037.jpg
More on that later.
 
@Jimsky , @Tobias , @Peter Voogt , @dockattner , @GrantTyler , @Peter Gutterman , @Dean62
Many thanks for all your comments and glad you like it allthough there are plenty much cleaner build here on the forum :-) . Also thanks for all the other likes, much appreciated.

At the moment working on my porch with some bigger 3mtr pieces of oak, so not too much progres on the ship.
View attachment 517517

In the mean time on the ship I am investigating the use of nails and treenails to attach the planks, this to create a correct fitting of the planks.
To give you an idea of a common plank on the Samuel.
View attachment 517518

On the Husum wreck of a dutch coaster you see also nails at the plank joint ends.
View attachment 517519View attachment 517520View attachment 517521

All along the the stem keel and stern the planks were nailed.
View attachment 517522View attachment 517523

I have the idea that planks were nailed in place just to fit them. After fitting they were finally fitted with treenails.
In the Samuel planking you see scattered nails at the planks and a rather neat pattern of treenails with two or three treenails per frame timber.
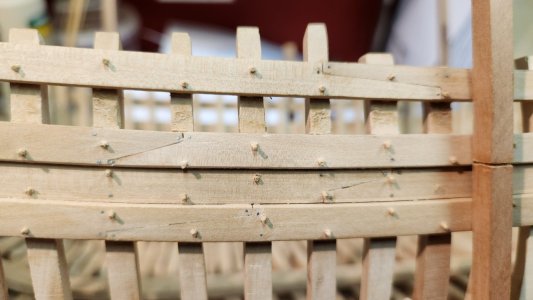
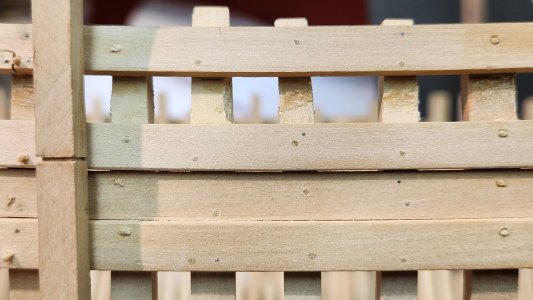
Treenails were fitted for the outer planking of the floor and later addtionally for the ceiling planking. For the sides "huiddigt" I am stil looking into this planking order of first fitting the ceiling or the huiddigt planks between the bilge and lower wale.

To give you an idea how it looks on the model.
View attachment 517524
More on that later.
Nice treenailing, Maarten.
Regards, Peter
 
While treenailing progresses,
20250512_205825.jpg

And also investigating the order of planking which is influencing the treenail patterns I have prepared a new carving to take on my summer holiday traveling workshop.
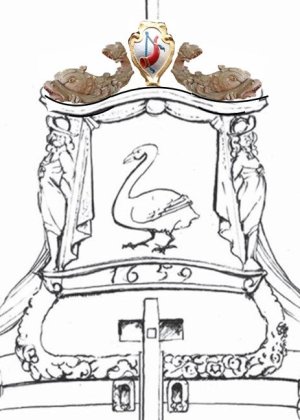
The carving I will start is the tafferel or in Dutch "het doorluchtig hakkebord"
This tafferel carving is not documented by the rov during the several dives at the wreck. Niklas Ericsson had drawn some type of acantus leaves on his artist impression of the ship.
Spant constructie.jpg

I prefer an often seen layout of Dolphins and for my ship with the emblem of the city of Hoorn.
The dolphins are 17th century barok statues and it will look something like this.
`Zwaan spiegel design 2 (1).jpg

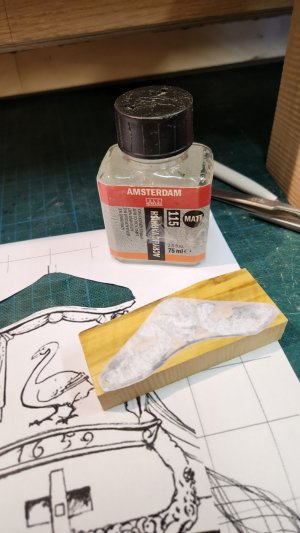
Via the print lacquer transfer methode I am transfering it to a piece of boxwood and when the lacquer is dry I can rub of the paper backing to release the print on the boxwood.
20250512_191502.jpg
That is for next time.
 
Dismantling on the stern has started.
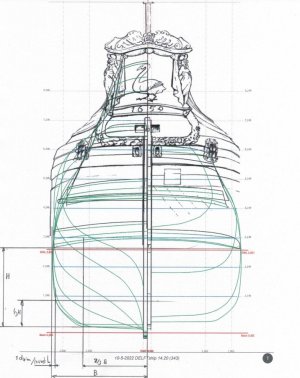
The stern top wale on the PS is removed. I have printed the sternview of my Delftship model and fitted inside to give you an idea of the approximate shape.
View attachment 512986
View attachment 512987

The sanding starts, beautiful weather so working in the garden. The PS side is roughly shaped.
View attachment 512988

On to the SB side, removing the stern top wale and the scheerstrook.
View attachment 512989

You can now clearly see the difference between the PS and SB side.
View attachment 512990

To determine the shape I decided to place some of the top timbers.
Again my delftship drawing came in helpfull.
View attachment 512993

The outward and inward radius of the stern top timber is the same as the radius of the center frame bilge. If I compare it to my centre frame template.
View attachment 512991
View attachment 512992

Additionally I made the a set up of the stern frame to create the shape of the upper hull with "cent latten" strakes in a later stage of the build.
View attachment 512994
View attachment 512995
View attachment 512996

These parts I remove again as I will first fit the lower wales and then start working on the ceiling planks. These are now still easily accesible and will be far mote difficult when the toptimber are fitted.

Some last pictures of the beautiful fluyt shape.
View attachment 512997
View attachment 512998

Next time the lower wale.


Hey Maarten, I remember when you first started this project. I thought to myself, he's going to build a ship from some photos and 3d renderings from sonar, and the available historical information, which can be somewhat ambiguous on its own. This guy is braver than I could ever be.

All I can say is, WOW! She not only has taken shape, but is beautiful! Wonderful craftsmanship. And not to forget, your carvings are great! I really like the backdrop, motivational.

Have you decided how far you will take this marvelous ship model?
Agreed!
 
In Netherlands is probably no problem with access to oak wood? It's the same as pine in other countries, right? A forest high hard weed? ROTF
 
@Jimsky , @Tobias , @Peter Voogt , @dockattner , @GrantTyler , @Peter Gutterman , @Dean62
Many thanks for all your comments and glad you like it allthough there are plenty much cleaner build here on the forum :-) . Also thanks for all the other likes, much appreciated.

At the moment working on my porch with some bigger 3mtr pieces of oak, so not too much progres on the ship.
View attachment 517517

In the mean time on the ship I am investigating the use of nails and treenails to attach the planks, this to create a correct fitting of the planks.
To give you an idea of a common plank on the Samuel.
View attachment 517518

On the Husum wreck of a dutch coaster you see also nails at the plank joint ends.
View attachment 517519View attachment 517520View attachment 517521

All along the the stem keel and stern the planks were nailed.
View attachment 517522View attachment 517523

I have the idea that planks were nailed in place just to fit them. After fitting they were finally fitted with treenails.
In the Samuel planking you see scattered nails at the planks and a rather neat pattern of treenails with two or three treenails per frame timber.
Treenails were fitted for the outer planking of the floor and later addtionally for the ceiling planking. For the sides "huiddigt" I am stil looking into this planking order of first fitting the ceiling or the huiddigt planks between the bilge and lower wale.

To give you an idea how it looks on the model.
View attachment 517524
More on that later.
Interesting theory about the nails at the planks' ends and a plausable one to boot.
Comparing your planking with the added pictures of shipwrecks, your work does look authentic.
 
Hey Maarten, I remember when you first started this project. I thought to myself, he's going to build a ship from some photos and 3d renderings from sonar, and the available historical information, which can be somewhat ambiguous on its own. This guy is braver than I could ever be.

All I can say is, WOW! She not only has taken shape, but is beautiful! Wonderful craftsmanship. And not to forget, your carvings are great! I really like the backdrop, motivational.

Have you decided how far you will take this marvelous ship model?
Hi Ken,

Many thx, it is a fun project to do and I learn a lot during the process. The idea to completely build the ship incl. Interior all the way up to the rigging.
 
Interesting theory about the nails at the planks' ends and a plausable one to boot.
Comparing your planking with the added pictures of shipwrecks, your work does look authentic.

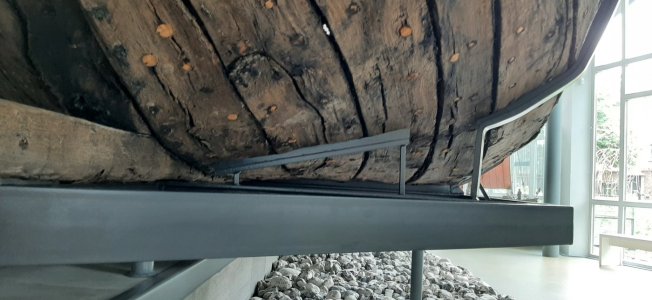
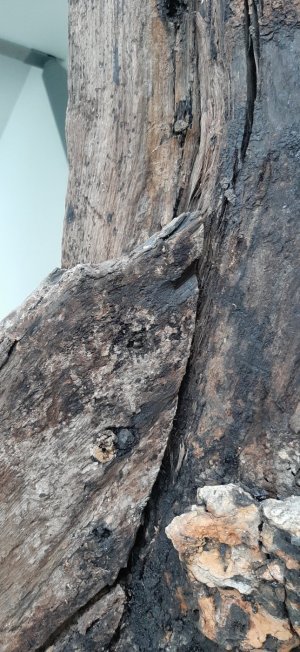
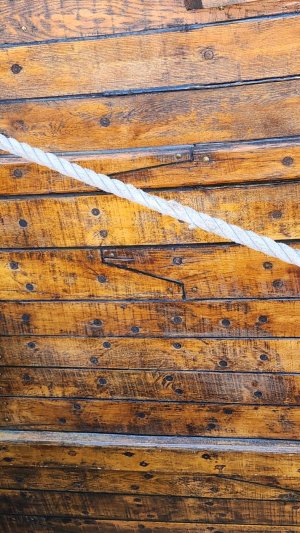
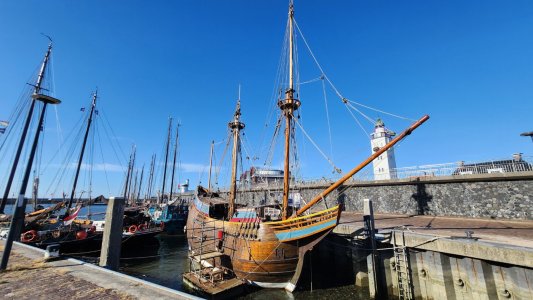
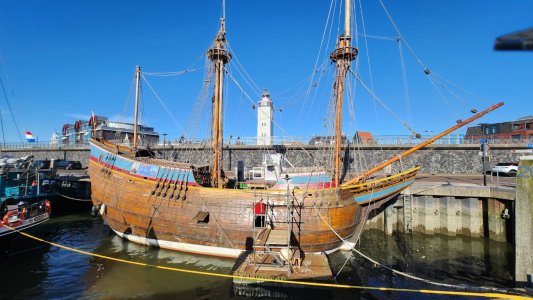
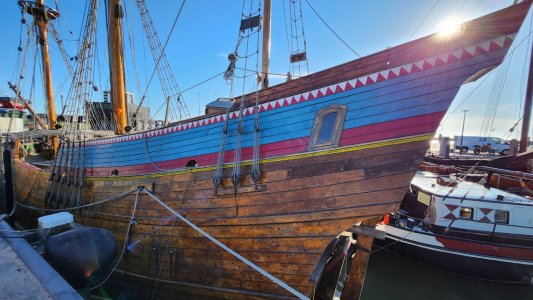
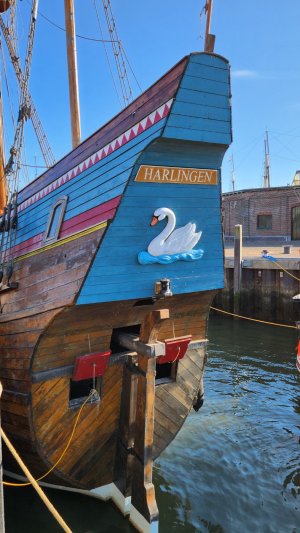
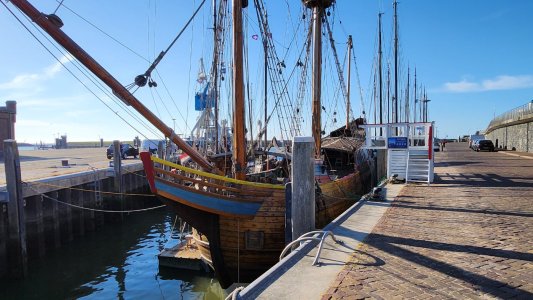
Today I was briefly in Harlingen and had a look at the "witte swaen". Made some detailed pictures of the planking and noticed they came to the same conclusion, similar nail tree nail combination.
20250518_185803.jpg

See below some other pictures of her.
20250518_184958.jpg
20250518_185049.jpg
20250518_185749.jpg
20250518_185855.jpg
20250518_190142.jpg[/QUOTE]
 
So far, so good; the current evidence seems to converge to the usage of these nails as common practice.
It also makes sense; in order to retain some edge distance, one needs to use smaller diameter pins, the much larger treenails simply don't fit in these tight spots.
 
Back
Top