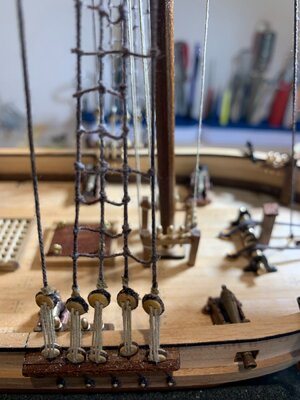
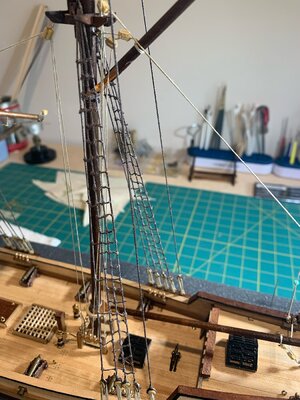
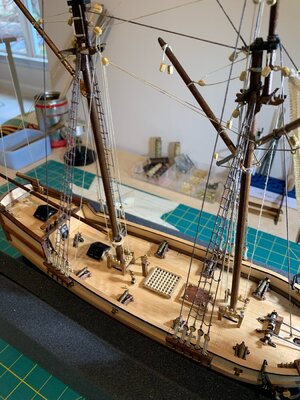
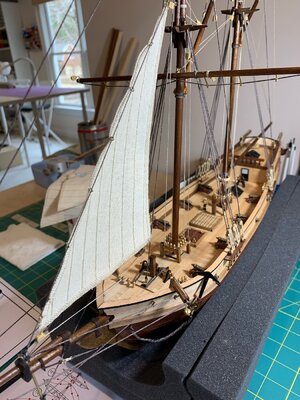
Coming along nicely.
-

Win a Free Custom Engraved Brass Coin!!!
As a way to introduce our brass coins to the community, we will raffle off a free coin during the month of August. Follow link ABOVE for instructions for entering.
-

PRE-ORDER SHIPS IN SCALE TODAY!
The beloved Ships in Scale Magazine is back and charting a new course for 2026!
Discover new skills, new techniques, and new inspirations in every issue.
NOTE THAT OUR FIRST ISSUE WILL BE JAN/FEB 2026
You are using an out of date browser. It may not display this or other websites correctly.
You should upgrade or use an alternative browser.
You should upgrade or use an alternative browser.
Albatros by OcCre American Schooner 1:100 by Kramer [COMPLETED BUILD]
- Thread starter Kramer
- Start date
- Watchers 12
-
- Tags
- albatros completed build occre
Halo Krämer here is a link to YouTube and the albatross maybe that will help you.
Nice work by the way 

I made a template so I could start the rat lines but I have a question. Can't start yet anyway. OcCre calls for raw colored thread at .15mm for the rat lines and .5mm brown for the shrouds. I'm ordering brown .15mm for the rat lines, I don't like the contrast. But to attach the rat lines I saw a video where the guy put a dab or CA on the shrouds and just laid the ratlines on. Seemed easy enough, but I tried it and it didn't really work. I saw another video where a guy tied a simple overhand knot on the first shroud and clove hitches on the rest. Any recommendations on attaching the rat lines to the shrouds?
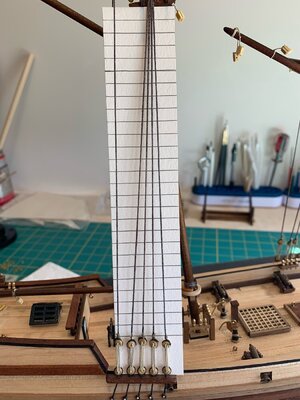

Over hand knot and then clove hitches is the way to go.You are doing a nice job!
- Joined
- Feb 7, 2022
- Messages
- 41
- Points
- 48

Just use clove hitches and a dab of CA. Let the rat lines dib just a little they shouldn't be perfectly straight. It's starting to look like a ship. Good work!
I'm going to start the sails soon and I'm not sure how I should make them look. I've read boil them in tea or don't do anything to them. I've seen people apply a watered down glue mixture to the sails and roll them over a cylinder to give them the appearance that they have caught wind. I've also read some folks say the sails could be furled. Any opinions?
Here's some updated pics. Still waiting on my brown .15 thread from OcCre so I can do the rat lines. The plans call for raw colored thread but I thought the brown would look better.
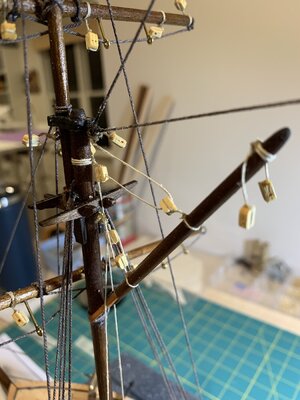
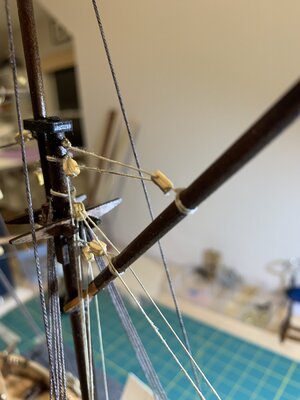
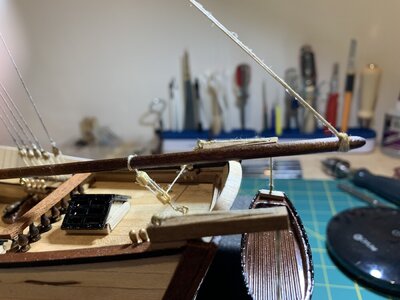
Here's some updated pics. Still waiting on my brown .15 thread from OcCre so I can do the rat lines. The plans call for raw colored thread but I thought the brown would look better.


- Joined
- Feb 7, 2022
- Messages
- 41
- Points
- 48

What is the look you are after? Do you want it to look like it is underway in a breeze, or just returned to port after an extended voyage? I'd go with furled sails myself, as you will still be able to see all the rigging details. If you go furled, make the sails about 2/3s full size.
I just started the sails on mine and could not make up my mind on what I wanted either
,I decided to go full sail if I dont like it I can always change.Yours is looking really good.
,I decided to go full sail if I dont like it I can always change.Yours is looking really good.
- Joined
- Feb 7, 2022
- Messages
- 41
- Points
- 48

The rigging makes the ship. take your time with it. Study the diagrams over and over again, and try to visualize how the ropes run and what they actually do, it makes the rigging job easier.
Step by step you are finalizing the rigging - good work
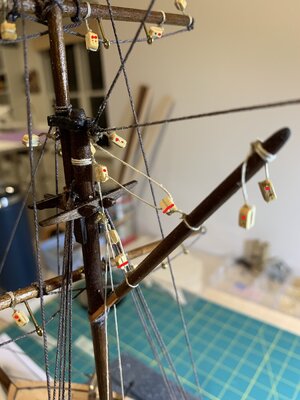
I like to make a small comment of a principle mistake you make / made. Maybe not possible to change on this model, but for your next one.....
You installed in principle the blocks in the wrong direction - I made red dotts where the holes for the rigging rope should be
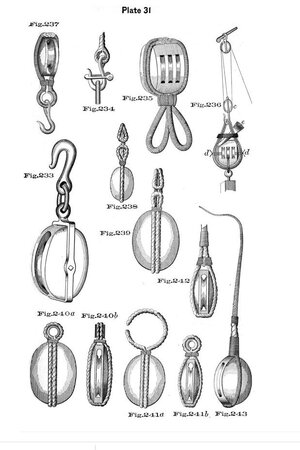
Take a look at this sketch with typical blocks
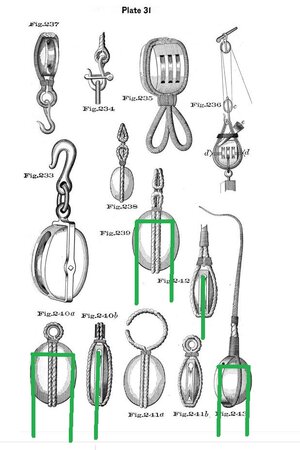
the running rigging line is marked here in green, so you can better imagine where the hole in your block should be
One important info: I made the same mistake on one of my models - the complete riggging blocks in wrong direction - so because of this own experience I realized it on your model
Only to keep this in mind for the future
I like to make a small comment of a principle mistake you make / made. Maybe not possible to change on this model, but for your next one.....
You installed in principle the blocks in the wrong direction - I made red dotts where the holes for the rigging rope should be

Take a look at this sketch with typical blocks

the running rigging line is marked here in green, so you can better imagine where the hole in your block should be

One important info: I made the same mistake on one of my models - the complete riggging blocks in wrong direction - so because of this own experience I realized it on your model
Only to keep this in mind for the future
Wow I just looked at mine and realized I did the same thing!Step by step you are finalizing the rigging - good work
I like to make a small comment of a principle mistake you make / made. Maybe not possible to change on this model, but for your next one.....
You installed in principle the blocks in the wrong direction - I made red dotts where the holes for the rigging rope should be
View attachment 292493
Take a look at this sketch with typical blocks
View attachment 292494
the running rigging line is marked here in green, so you can better imagine where the hole in your block should be
View attachment 292495
One important info: I made the same mistake on one of my models - the complete riggging blocks in wrong direction - so because of this own experience I realized it on your model
Only to keep this in mind for the future
Hey Uwe! Thanks so much for catching such a little thing. That's the only way I'm going to learn. So, the hole for the rigging goes closest to the attachment point for the block. That's a good rule of thumb going forward. These little details will improve my future builds. You only learn this stuff by diving deep into books and on forums like this. Thanks again, and I am all open to observations and suggestions.
Kurt Konrath
Kurt Konrath
You can visualize a round pulley in center, the attachment is the top end and rope would go over the top of the pulley, coming and going away from the attachment end of the pulley.
Having the photos from Uwek is very helpfully it see this function.
And one thing I learned the hard way, as most of us do, is for double pulley blocks, keep lines straight and parallel with each other, from one side to the other top to bottom, like the dead-eyes you have done. They shouldn't cross over each other, creates friction.
Kurt Konrath
Kurt Konrath
As stated on what the sail should look like, you have to determine what state your modeling.
New build in port, clean sails, neatly furled.
Old ship back to port, weathered sails furled.
Under sail in full wind, full sails with shape.
or just got to port with full sails just hanging with no wind. But remember, when in port the sails were stowed to keep the ship from being moved about by winds, even if at anchor in the bay.
Using tea or coffee or thin wash of wood stain, I suggest you test scraps to see what you like. When you take them out, say between paper towels to soak the excess fluid and them drape them flat so no major wrinkles are formed. I have have "borrowed" the Admirals cake cooling rack to help dry top and bottom at same time to speed up time. Just don't get caught by her. Or buy your own rack.
As for ropes, never seen an old ship with hemp ropes that are while, you can die the thread in kit the same way as sails.
That looks really good, turned out really nice.
Finally got my brown thread from OcCre so I started the ratlines. I think the darker thread was the right call aesthetically. I got half way done with the first shroud and realized I did the ratlines backwards. The larger holes are supposed to be on the bow side according to the diagram, not the stern side. But I figured since this is not going in a museum, I can get away with it, this time. Quite a monotonous process, but coming along. I need to develop the right technique to make the ratlines taught enough but with a little sag.
Another thing for the future, I've seen people talk about making their own rope. And I've seen some pictures of some really nice rope. I don't like the fuzz on the .15 raw thread. Doesn't seem to be an issue with the brown .5 thread. For my next ship I think I'll try and get some better thread. From the pictures I've seen it makes a big difference.
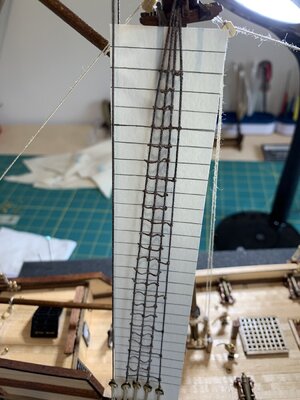
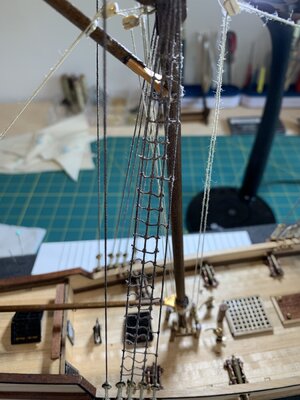
Another thing for the future, I've seen people talk about making their own rope. And I've seen some pictures of some really nice rope. I don't like the fuzz on the .15 raw thread. Doesn't seem to be an issue with the brown .5 thread. For my next ship I think I'll try and get some better thread. From the pictures I've seen it makes a big difference.


Ratlines are done! Probably my least favorite part of the build so far. And by least favorite I still enjoyed doing it. I guess I never got into a methodical rhythm of tying the knots and clove hitches, and I never got consistent with the tension I wanted; not taught but not too much slack. I'm glad I tied them though and didn't just glue the ratlines to the shrouds.
