Amerigo Vespucci, Panart 1:84 scale

Ken

Joined
Dec 16, 2016
Messages
968
Points
453

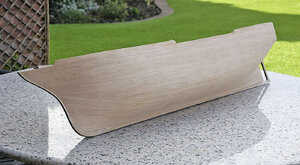
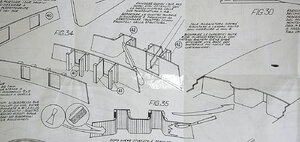
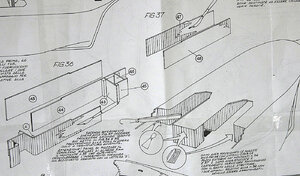
Hi, I have just started the Amerigo Vespucci, 1:84 scale from a Panart kit I’ll show my progress here so that you can see someone else struggle through a build as I’m sure many ordinary modellers do. I bought the kit off Ebay for a good price, it is an early version about 20 – 25 years old and differs quite a bit from their current version, I think for the better. Lime for first planking, not balsa, etched sheet brass for the plating not ply, planked deck instead of printed ply and 12 sheets of plans many 1:1, but poor badly translated instructions instead of the step by step guide.

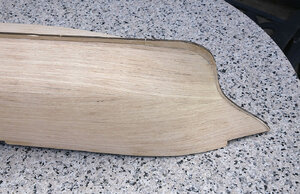
Although old everything was in very good condition, straight keel and bulwarks, which were very well laser cut, matching the plans perfectly, the strip wood is very nice, straight cleanly cut and still flexible enough although has hardened quite a bit. There are hundreds of castings and machined brass fittings all nicely bagged, these will need a serious cleaning as they have become badly tarnished. A very comprehensive and well presented kit.

I admire many of the builders on this site for their skill, painstaking dedication to detail and accuracy but I’m afraid that’s not me. My build will be as simple as I can make it, mostly straight from the box with just enough detail to make it a nice looking well made model that will not take me years, with the chance of getting fed up and abandoning it as I see happening on quite a few of the larger builds, I WILL finish it.

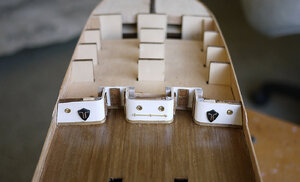
I wanted to start the build by first preparing the mounting. I want to mount it on brass pedestals on a large mahogany plinth so needed to do the preparation for this prior to planking rather than risk damaging the model at a later stage by turning it upside down. My first problem is that due to the lack of availability of stuff due to the Covid restrictions I can’t get anything, the wood yards are closed and even popular online modelling suppliers have run out of anything I want, glues, sealers wood strip and my plinths

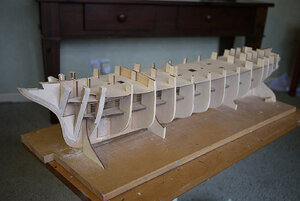
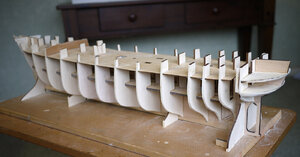
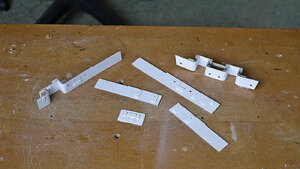
I started by joining together the three sections of keel, I reinforced the joins then beefed up the area where the pedestals will be fixed with rods, I drilled them out and hope that they line up later.

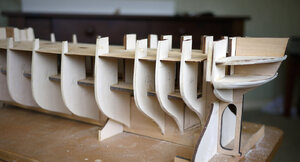
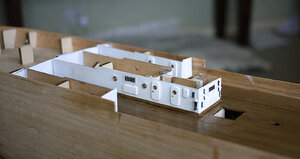
I dry fitted the bulkheads, they only needed the lightest of sanding before becoming a perfect fit. I made up a keel support out of scrap, not very neat looking but works well enough. I have now glued all the bulkheads into place, no issues so far, I’ve now started my journey, please join me.


Ken001.jpg016.jpg017.jpg018.jpg019.jpg020.jpg
 
Last edited:
Great project Ken Thumbsup I think the majority of offerings from the Mantua group are best bought unbuilt secondhand as the upgrades are appalling and a big step backwards IMHO.
I am surprised we don't see more of this kit built,it builds into a stunning model out of the box.There are a few examples on Italian forums,with just the odd one or two dotted around the globe.
On another note,I agree,I looked at Cornwall Model Boats website this morning and the majority of paints/glues etc are out of stock and I can only wonder how long it will be before suppliers get back to normal.

Kind Regards

Nigel
 
Hello Ken, I do not have much experience with Panart kits but happily will watch your build as Amerigo Vespucci from kits parts becomes a gorgeous model!!! Good luck!!
 
I will follow your log with big interest - a Very good friend built also this kit with a lot of bashing - a great model
 
  • Like
Reactions: Ken
Hello, Thanks to everyone who liked or commented on my new build log, as I’m sure you’re aware it really does encourage and motivate.


As it was my first post it was difficult deciding how to present my build and what to include but I feel easier about it now that it’s got going. From my last pics although I didn’t mention it you will have noticed that I had faired the bulkheads and doubled up the edges of the bow and stern ones. I usually fill out those areas with balsa and carve to shape but the lines of this hull are such that I didn’t think that was needed, I did however spend quite some time with a long sanding block making sure that the planks would lay flat and that there would be no dips or lumps when done, this is time well spent.


I have now started the first layer of planks. As I said the wood was very good, they had nice edges and bent easily, the bends being gentle there was no need to soak the planks and with just light crimps with my Amati bending tool I could easily get the correct bend. I used aliphatic white glue and pins to fix them. After getting a fair way down I then started again from the keel up, so far it’s working out perfectly and I feel confident on a good first layer.


On another note I’ll show you my modelling area. I’d like a large dedicated one with plenty of room but like most ordinary modellers I have to make do with a corner of a home study room. It’s not large but if I’m organised it works out quite well and is enough, just, the downside to this is I’m obliged by my wife to tidy up each evening and do any serious sanding outside, even mid winter.


Ken


020a.jpg021.jpg022.jpg
 
Nice progress Ken.I have one of those 12" aluminium Permagrit boxes I use for frame fairing.I would keep the long block for sanding the planking as well.Those stripes are very unforgiving,any undulations,even small ones, will make your hull look like the North Sea on a rough day when the paint is applied.

Regarding your work area,the more space,the more tools you buy and the harder it is to find something when you put it downROTF

Kind Regards

Nigel
 
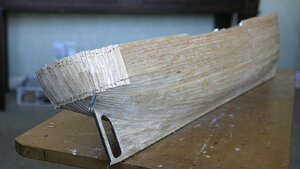
I'm making good progress at the moment. The first planking has now been completed, this is done with1.5 x 6mm lime strips. it went quite smoothly and I feel that the time spent making sure that the frames were well trued and sanded was worth while. The stern looks a but rough but I made it oversized and I will sand it back to shape. All looks very true with no apparent undulations or gaps and looks like it will sand well. I'll wait for a dry day and do that outside the house to keep my wife onside.

Ken023.jpg024.jpg025.jpg
 
Hi, I'm sorry to say that although I'm going to continue with the build I won't be continuing with my log. I will however show it when it's completed.

Ken
 
Hello again. I've re considered my decision about continuing the build log. I just felt that I was doing a piece of homework and it wasn't improving my build experience. I kept up photographing my progress so I'll be able to bring the log up to date and see how I feel about keeping it up, so here we go.

The weather had been fine for a few days so I was able to get a good sanding session in with very good results. The first planking has turned out to be almost perfect, there was no need to use any filler at all, there were no high spots or hollows and I think that with a bit more attention it would even do as a single planked hull. I mentioned it before, the attention to the early effort on the frames has paid off.

I've more pictures of my progress which I'll get around to writing about, not all as good as the hull went.

Ken026.jpg027.jpg028.jpg029.jpg030.jpg
 
Last edited:
A fully underline the words by Jim - we would like to see more often some report of the progress.
BTW: A beautiful are to work on the model - sitting on the terrace, a hot cup of coffee, sun is shining, the grass is green - and a beautiful wooden hull in hands - life can be really GREAT :cool:
 
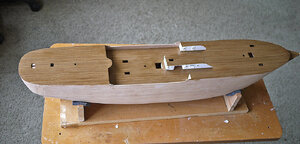
Hi, The next task was to plank the waist deck. The planks supplied were 3 x .5mm dark walnut, the wood was ok but I really don't like the dark colour. I don't understand any kit manufacturer thinking that this colour would be ok for decking it looks so obviously wrong. I was stuck with it as the shops still can't supply an alternative. I should wait and do something else but I don't know for how long this situation will last and I'm impatient to move forward with the build. I laid the planks, I didn't darken the edges as pencil wouldn't show against that colour, I sealed, sanded and varnished with a satin poly.

I then started on the cabins. The instructions would have you put in place the upper decks first but that would make placing and finishing off the deck planking and cabins quite difficult.

The cabins are made up from ply and were supposed to be planked using those horrid walnut strips. rather than do this and then try and get a smooth finish for painting I decided to face them with very thin styrene sheet and then trim to shape, it worked well. The doors and vent covers were also made from styrene, they painted up well, the windows and, vents, fire axes handles and rails were added.

Ken

032.jpg032a.jpg032b.jpg033.jpg034.jpg036a.jpg036a.jpg
 
Hello, This build is moving along quite quickly and it's really starting to take shape. I have recently added the upper decks and planked them. Around the upper edge of the hull will be metal plating, it's very hard brass/copper strips and will not be forgiving like wood so now was the time to ensure that the top of the hull was perfectly level and as per plan.

I planked the upper decks the same as the waist deck, I kept it simple because I just couldn't find the enthusiasm using the supplied wood to spend a lot of time on it, the colour really is awful. I sealed, sanded and varnished it when done.


I was hoping that the amount of stuff on the decks would detract from noticing the colour/texture and that I would be able come to terms with it, but after coming back to it the next day I knew that I would never be happy and in years to come I'd regret it being done like this and just leaving it, so I've decided to bite the bullet and do something about it, however drastic. One good thing about wooden models is that you can re-make anything if you've a mind to, it just takes time. I'm not sure exactly what I'm going to do yet, I'll have a think, so watch this space.

ken

037.jpg038.jpg039.jpg
 
Last edited:
Hi Ken,

Thats exactly what I like about this model, all these little details of doors, railings etc etc.
What is so horrible about your deck planking?
I would sand them with steel wool and put them in a matt oil.
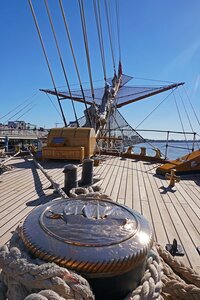
See below the real ships deck.
amerigo-vespucci-marine-schip-antwerpen-italie-5.jpg
 
Great work Ken,but if you are adamant on a redo may I suggest this option;


I use their boxwood "Flatlines" for planking on some of my models.They are 0.6mm thick and available in various widths to suit the width of you decking.Plus they are open and delivering as normal.I got something from them a couple of weeks ago.

This is what the product looks like on My Royal Caroline build;

rc56.jpg

Kind Regards

Nigel
 
Back
Top