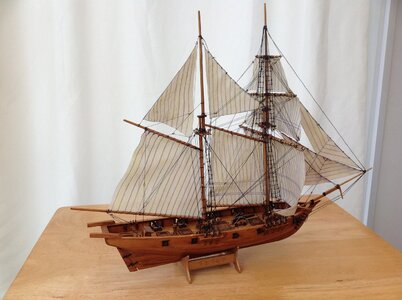
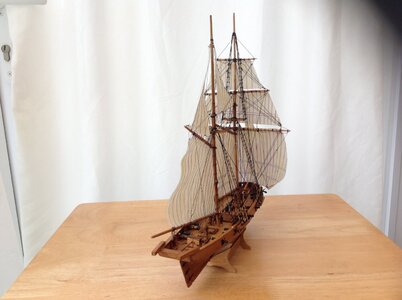
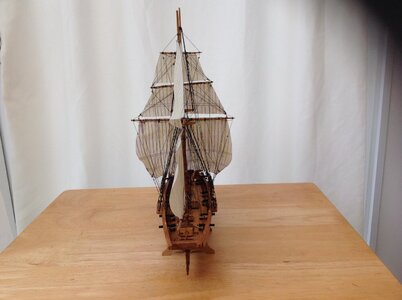
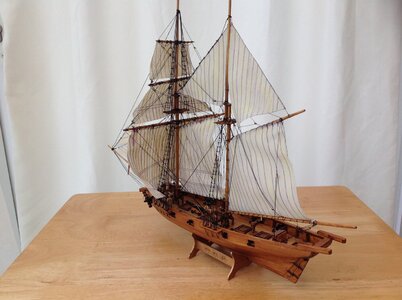
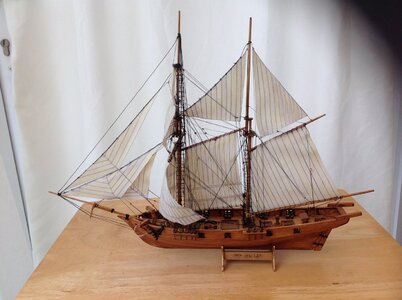
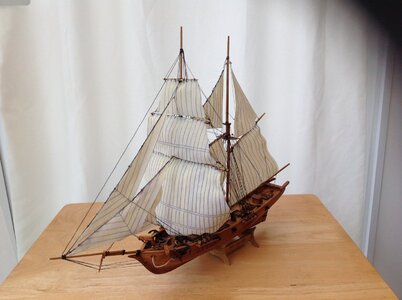
Another Halcon 1:100 scale [COMPLETED BUILD]

Hi Stephen,
I don't know much about ships rigging or sails
I have been trying to follow this picture.

View attachment 331931

I have just recently purchase a book called RIGGING PERIOD SHIP MODELS from a charity shop but it talks mainly about square riggers.
But here is a closer look at what I have done.

View attachment 331933

I know it is not right but it is only going to sit on a shelf were only my wife and I are liable to see it.
And she went know LOL!!!
Hi Martin,
Terminology is fairly similar across the board especially with the standing rigging as far as I know and I am no expert on these things, just enough knowledge to be dangerous. ROTF
I found this on Wiki, the lower stay is what I was referring to.
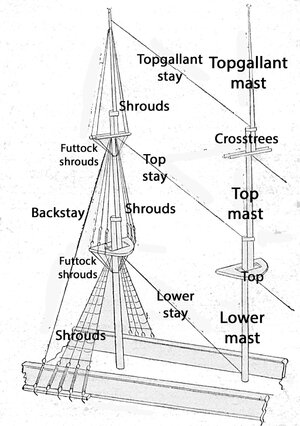
Standing_rigging--square-rigged_sailing_vessel--Detail.jpg

Cheeers,
Stephen.
 
Hi Martin,
Terminology is fairly similar across the board especially with the standing rigging as far as I know and I am no expert on these things, just enough knowledge to be dangerous. ROTF
I found this on Wiki, the lower stay is what I was referring to.

View attachment 331950

Cheeers,
Stephen.
Hi Stephen,
Thank you for the drawing.
I looked like i missed that one.
I think this stay is a double stay going to port and starboard because there is another sail that goes in-between the two masts.
 
Hi Stephen,
Thank you for the drawing.
I looked like i missed that one.
I think this stay is a double stay going to port and starboard because there is another sail that goes in-between the two masts.
Hi Martin,
Yes you would be right, there would probably be what I think is called a "preventer" stay as well seeing it is a warship.

Cheers,
Stephen.
 
Hi Martin,
Yes you would be right, there would probably be what I think is called a "preventer" stay as well seeing it is a warship.

Cheers,
Stephen.
Hi Stephen,
I have fitted it now.
I know the rigging is not correct on this model.
I only wanted to see if I could make something reasonable from junk.
She is almost finished and I should not if fitted sail to her.
Hopefully I will be able to show the finished model in a few more day times.

Now I have a book on ship rigging hopefully the next one will be better.
 
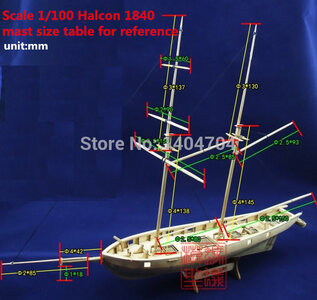
Looking great. Where did you get the measurements for the masts? I just got the kit for my first try at a wooden model. Wish I had found this site before I got this kit.
Hi Bigwill.
Thank you for your comment,
As for the mast measurements I found them posted on this site by other great members.
As an introduction kit to making wood models it is probably not the best but as long as you take your time and work slowly you should be ok.
If I can help in any small way do not hesitate to contact me.

Here are the measurements for the mast's as posted by the other members.

HTB1BeM4IVXXXXaIXVXXq6xXFXXXD.jpg

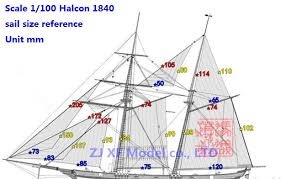
And hopefully you can get some measurements for the sails from here, although a bit tricky to read.

images.jpeg

I hope to post my finished model today, fingers crossed.
 
Last edited:
Hi Guys,

After I decided to fit sails to this ship and used the wrong glue causing the ink to run I was in two minds to continue with this project.
It would be easer to start another one then it would be try and sort this one out.
However I have tried to paint the sails to hide the problem.

But at last it is finished.

My intention was to see if I could make something decent from a cheap Chinese kit.
I think I have managed to do what I set out to do, altho I am not happy with the sails and I also know that the rigging is far from correct.
But as the other members has said with a bit of effort you can make a cheap Chinese kit look decent.

Thank you to every member for showing interest and following this log and also thank you for all the likes.

I know I am a new guy to this site but It Is the great and skilful members of this site that is keeping me motivated.

Thank you guys.

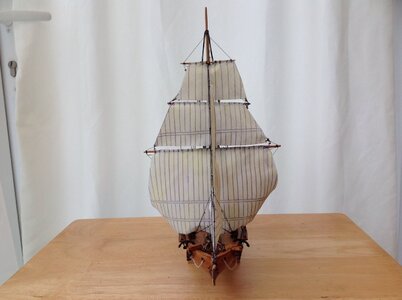
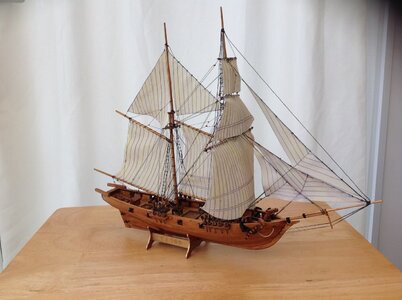
Here are some photos of the finished ship.


IMG_3072.JPGIMG_3073.JPGIMG_3074.JPGIMG_3075.JPGIMG_3076.JPGIMG_3077.JPGIMG_3078.JPGIMG_3079.JPG
 
Congratulations for finishing this challenging model kit - well done !!!
 
Hi, @Martin555:

Well done! Congrats on making a silk purse out of a sow's ear. Despite the sails being perhaps a little less than perfect, you have done a fantastic job on the hull and rigging (given what you started with) and shown what can be accomplished with a little time and patience. I bought my cheap Chinese kits largely in order to practice my skills (such as they are) on something that wouldn't have cost me a fortune if they turned out to be irretrievable junk. Thanks for the inspiration!

Best regards,

Chris (1812er)
 
Hi Guys,

After I decided to fit sails to this ship and used the wrong glue causing the ink to run I was in two minds to continue with this project.
It would be easer to start another one then it would be try and sort this one out.
However I have tried to paint the sails to hide the problem.

But at last it is finished.

My intention was to see if I could make something decent from a cheap Chinese kit.
I think I have managed to do what I set out to do, altho I am not happy with the sails and I also know that the rigging is far from correct.
But as the other members has said with a bit of effort you can make a cheap Chinese kit look decent.

Thank you to every member for showing interest and following this log and also thank you for all the likes.

I know I am a new guy to this site but It Is the great and skilful members of this site that is keeping me motivated.

Thank you guys.

Here are some photos of the finished ship.


View attachment 332367View attachment 332368View attachment 332369View attachment 332370View attachment 332371View attachment 332372View attachment 332373View attachment 332374
Good morning Martin. You achieve your set out intention no doubt. For the price of a couple beers you built a cool little ship- nice. Cheers Grant
 
Hi, @Martin555:

Well done! Congrats on making a silk purse out of a sow's ear. Despite the sails being perhaps a little less than perfect, you have done a fantastic job on the hull and rigging (given what you started with) and shown what can be accomplished with a little time and patience. I bought my cheap Chinese kits largely in order to practice my skills (such as they are) on something that wouldn't have cost me a fortune if they turned out to be irretrievable junk. Thanks for the inspiration!

Best regards,

Chris (1812er)
Hi Chris,
I do not have a model making budget as My wife and I are struggling with the bills but this cheep Chinese kit was a treat.
It was quite enjoyable altho frustrating at times to make.
Most of the models that I make are made from whatever I can find kicking around even if I manage to find some broken bit of furniture that can be used.
It makes the making of the models harder as it is never the correct sizes so a lot of modifications have to be made.
Also I don't have tools like Lathes and Bandsaws so everything is done by hand.
In a strange way I quite enjoy the challenges that working with only hand tool and scrap wood brings.
I am already thinking about my next project.

I do hope you enjoy your build and that you keep us updated and maybe a build log as it also helps all the new guys that are only just starting out in this hobby.
 
Hi Guys,

After I decided to fit sails to this ship and used the wrong glue causing the ink to run I was in two minds to continue with this project.
It would be easer to start another one then it would be try and sort this one out.
However I have tried to paint the sails to hide the problem.

But at last it is finished.

My intention was to see if I could make something decent from a cheap Chinese kit.
I think I have managed to do what I set out to do, altho I am not happy with the sails and I also know that the rigging is far from correct.
But as the other members has said with a bit of effort you can make a cheap Chinese kit look decent.

Thank you to every member for showing interest and following this log and also thank you for all the likes.

I know I am a new guy to this site but It Is the great and skilful members of this site that is keeping me motivated.

Thank you guys.

Here are some photos of the finished ship.


View attachment 332367View attachment 332368View attachment 332369View attachment 332370View attachment 332371View attachment 332372View attachment 332373View attachment 332374
Well done Martin, your rendition looks pretty good from here,

Cheers,
Stephen.
 
Looking great. Where did you get the measurements for the masts? I just got the kit for my first try at a wooden model. Wish I had found this site before I got this kit.
Hallo @BigWill
we wish you all the BEST and a HAPPY BIRTHDAY
Birthday-Cake
 
Great job , just started my first build using this kit and even though my instructions are in English they are useless.
Your build will be a useful source of reference as I battle on! Though doubt mine will be anywhere near as good as yours.
 
Hi Guys,

It is at this stage of the build it will just look like sticks and string so there will not be many updates.

I glued the two masts in place and started the rigging, altho I still have a few booms to shape and fit.

Like a total idiot I decided to make the rigging blocks from cocktail sticks that I reduced the outside diameter of with a file.
I still think they look a little big.

The rigging itself I know will not be totally correct but for a cheep rubbish kit I have to do something.
As you can see I am working on the ratlines at the moment.

So here are a couple of photos of some of the rigging and the ratlines.

I might even make some sail for this ship.

View attachment 330968View attachment 330969View attachment 330970
Hi , do you know what size rigging thread you used please ?
 
Hi Martin (I'm late on the scene as ever :rolleyes:) some very awesome and delicate work here. Very impressive, wish I had similar skills to you. Congratulations on finishing
Hi ConsNZ,
Thank you for your very nice comment.
It was a little tricky at times, and a bit mind blowing.

I am now working on another project called 'My Little Victory' that I am posing a build log on. you may be interested in looking at it.
 
Back
Top