Anteo Harbour Tug. Panart [COMPLETED BUILD]

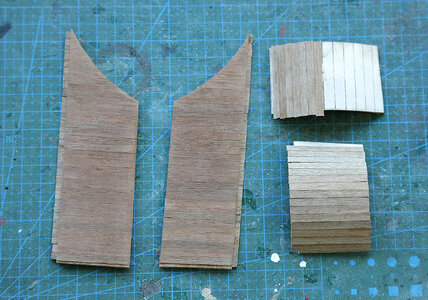
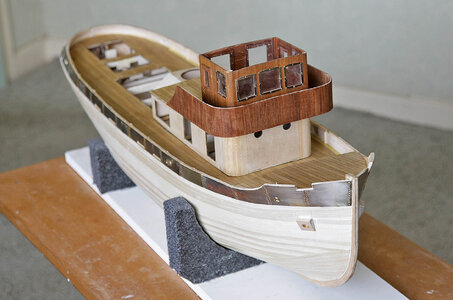
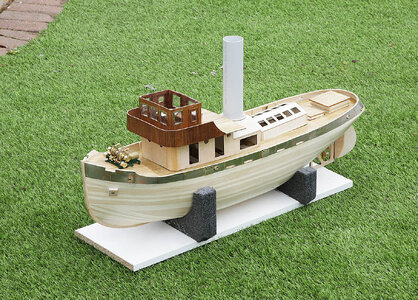
Hello. Today I’m showing the making of the bridge. There were four ply parts, the two corner ones needed to be curved, not difficult after a soak. I sheathed them on both sides with walnut strips before fitting into place. I put on the last edge strips after I’d fitted them so as to hide the joins. When set and sanded I stained them a mahogany. Being of such a scale it would be a shame if I didn’t fully fit out the cabin so that’s my next job.


073.jpg


078.jpg
 
Absolutely neat. Love the Mahogany look.

Jan
Hi Jan, Thanks. The mahogany is a bit of a reflection of my usual ship build, I can’t imagine me building a ship without having stained and polished wood on show. I have a picture in my mind of how I would like the finished look to be and it’s coming together, as I’ve mentioned it’s not intended to be realistic but a bit different and just for display
 
Hello. Today I’m showing the making of the bridge. There were four ply parts, the two corner ones needed to be curved, not difficult after a soak. I sheathed them on both sides with walnut strips before fitting into place. I put on the last edge strips after I’d fitted them so as to hide the joins. When set and sanded I stained them a mahogany. Being of such a scale it would be a shame if I didn’t fully fit out the cabin so that’s my next job.


View attachment 443691


View attachment 443692
A beautiful little tug boat in the making!
 
Hello and many thanks for showing an interest in my build, and for your likes and comments.

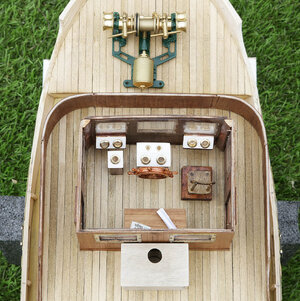
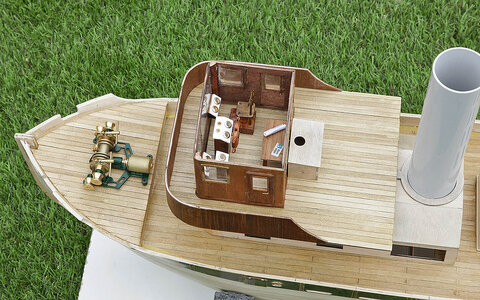
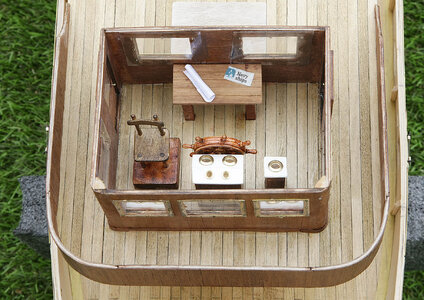
I mentioned that I was going to have a go at detailing the cabin interior, this is the result. A ships wheel was supplied with the kit but everything else was made up from my stash of scrap. The instruments were made from port surrounds from my Amerigo kit and the fascias were made from some plisticard. Once I’d decided what to include it was easy and at this scale was huge fun. I hope that I’ve given it enough navigation aids so that it doesn’t collide with any bridges.

079.jpg

080.jpg

081.jpg

083.jpg
 
Hi Grant, Thanks, not such a little tug but the largest model boat that I've tackled to date.
Good afternoon Ken. Wow, funny how pictures never show the scale. Considering the ships you have built (Amerigo Verssuci, and the Caldercraft Victory- If my memory serves me correctly- etc) this must be a large model. Cheers Grant.
 
The cabin detail looks terrific. I do like the scale of this “little tug”. My Admiral is also admiring your log. I quote her reaction, “That is Beautiful”.

It’s on #1 on my wish list.

Jan
Hi Jan, Your wife has obviously got very good taste. Before I started to build Antio I wouldn’t have agreed, it was just another build. Now I just love the shape, it’s not sleek like a Cutty Sark but there’s something about it, the fact that it’s purely a simple, functional working boat gives it character, I can’t visit my workspace without running my hand along that lovely curved hull. It’s good that one can feel this good about a build, regrettably this has not always been the case.
 
Starts to look great Ken. Love the details in the cabin.
Hi Leysend, Thanks. That was a nice little project, I’m sure that I would have regretted it later if I hadn’t made the effort before attaching the roof.
 
Good afternoon Ken. Wow, funny how pictures never show the scale. Considering the ships you have built (Amerigo Verssuci, and the Caldercraft Victory- If my memory serves me correctly- etc) this must be a large model. Cheers Grant.
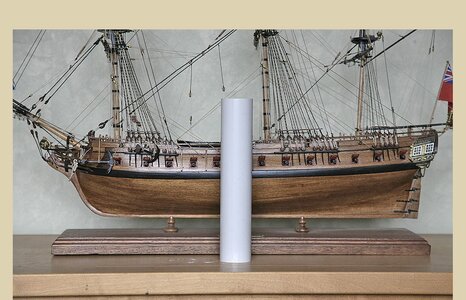
Hi Grant, I’ll do a size comparison later in my log, you’ll get some idea from my kit introduction on page one where I showed the funnel against my HMS Ajax, it’s BIG!
 
Доброе утро. Спасибо, что нашли время просмотреть мою сборку, а также за лайки и комментарии, все очень ценно.

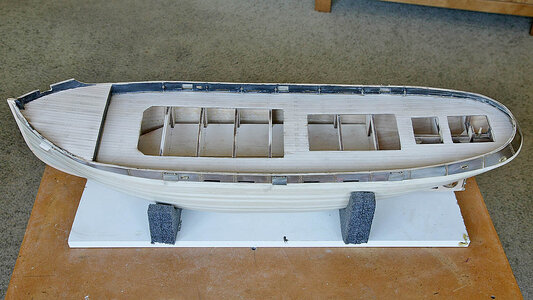
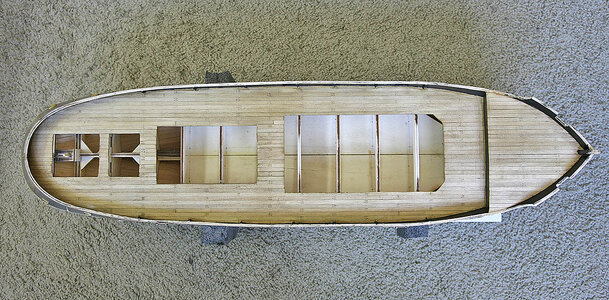
Сейчас я завершил вторую обшивку до стандарта, которым очень доволен. Несмотря на то, что в итоге все получилось хорошо, не обошлось без проблем: поставленные доски были ужасными, и им не место в комплекте, многие из них были очень грубыми, с плохими краями, которые легко раскалывались даже после шлифовки. Я показал фотографию досок и то, как они изначально выглядели на корпусе, я уверен, что вы поймете, какие усилия потребовались, чтобы получить хорошую готовую поверхность.

При обшивке я сначала использовал скребки, чтобы выровнять поверхность, затем нанес обильное покрытие качественной древесной шпаклевкой, а когда она высохла, я впервые хорошо отшлифовал ее зернистостью 120. Затем я нанес слой целлюлозного шлифовального герметика, чтобы укрепить поверхность и заполнить мелкозернистость, и снова отшлифовал, я сделал это три раза, в конечном итоге используя зернистость 400. Это была большая работа, но я должен признаться, что получал от этого удовольствие: видеть, как она постепенно улучшается с каждым разом, было воодушевляющим, это было почти терапевтическим, и я думаю, что это приносило больше удовлетворения, чем установка идеальных предварительно нарезанных досок.

Я упомянул, что это не мой обычный тип сборки, и я несколько колебался, начиная с нее, но должен признать, что она мне нравится, и я провожу с ней больше времени, чем ожидал, счастливых дней.


View attachment 440213

View attachment 440214

View attachment 440215

View attachment 440216

View attachment 440217

View attachment 440218

View attachment 440219

View attachment 440220
Hello! This ship hull looks amazing! WOW! !!
 
  • Like
Reactions: Ken
Hello, and once again thanks for your interest and likes.

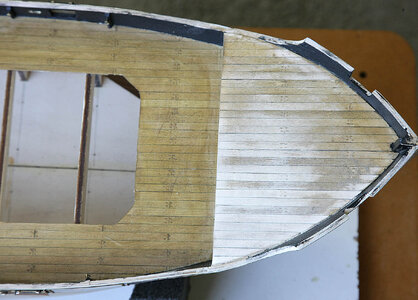
I’ve to tell you that I had a bit of a setback with the build, sort of two steps backward. I masked the deck and painted the inner walls black, I was pleased that I’d got a good finish but when I removed the masking I saw that there were a few small areas where the paint had leached, this isn’t unusual along the wood grain and wasn’t a problem, I just lightly scraped the paint off with a scalpel. The scraping left a few lighter areas, hardly noticeable, I should have just left it alone, but no I decided I wanted it perfect so decided to rub some stain into those areas, wrong decision! The area around the marks darkened leaving the deck blotchy, I decided to re stain the whole deck to at least make it uniform, but on doing so the stain reacted poorly with the previous coats, the whole area went soft and darkened to a muddy colour and showed strange marks on the wood. I decided to sand off a layer of planking to get it back to bare wood and re do it. I would normally have planked the deck using .5 strip, I had none but I did have plenty of 1.5 strip which I used instead so fortunately I had plenty of depth to sand back. It took a lot of effort but I eventually managed to get back to virgin wood only having to replace a few planks. I re-stained, sealed and varnished the decks. Having already done it once and learned from it this second time around turned out better, a more convincing look, so rather than being annoyed I ended up being pretty pleased with myself. This time when I re painted the inner wall I did it by hand very carefully.

This shows the awful colour and the start of my sanding marathon

097.jpg

This shows the sanding completed

098.jpg

This shows the job done

100.jpg
 
Back
Top