Good morning Ken. Wonderful work on the rail. She is a good looking big "little" tug boat...Hello, Thank you for taking an interest in my build, and thank you again to those members who have commented and given their likes.
The build is still coming along nicely and without any stress, the plans are good, all that I need do is interpret them to my way of building. Today I’m showing how I made up the top rail, this was probably the most difficult part of the build to get right. The rail is 8mm x 4mm, it is made up from straight lengths of wood which at this size is very difficult to edge bend to get a curve, at the same time towards the front it has a sharp upwards curve. The same strip of wood is to be used for the stern, they would have you make it in several sections a bit like a hexagon, but when you sanded it to a curve you would narrow it and would see all of the joins through the varnish, not very satisfactory. I decided to cut the stern section from a 4mm sheet of ply, I hoped that staining would mask the ply edge and thankfully it worked well enough. I made up the forward part of the rail using 10mm wide strip then once in place I sanded it to a slight curve which gave me the correct 8mm width. The upward curve which at the same time had an inward curve I made up from several layers of thin 12mm width planks, each being easily bent, I again sanded them to the required curve and width. I had been soaking and bending the main length of rail for about a week, a little more each day, using a hot air gun to get them steaming, eventually I got them to hold the necessary curve before finally fitting. I sanded, sealed, stained and varnished to finish, I was very pleased with the final result, it turned out better than I’d expected.
View attachment 447374
View attachment 447375
View attachment 447376
View attachment 447377
View attachment 447378
View attachment 447379
View attachment 447380
View attachment 447381
View attachment 447382
View attachment 447383
-

Win a Free Custom Engraved Brass Coin!!!
As a way to introduce our brass coins to the community, we will raffle off a free coin during the month of August. Follow link ABOVE for instructions for entering.
-

PRE-ORDER SHIPS IN SCALE TODAY!
The beloved Ships in Scale Magazine is back and charting a new course for 2026!
Discover new skills, new techniques, and new inspirations in every issue.
NOTE THAT OUR FIRST ISSUE WILL BE JAN/FEB 2026
You are using an out of date browser. It may not display this or other websites correctly.
You should upgrade or use an alternative browser.
You should upgrade or use an alternative browser.
- Joined
- Dec 16, 2016
- Messages
- 1,178
- Points
- 493

Hi Peter, Thanks for kind comments, for me it’s a different type of build and I like the fact that the details are a good size to work with, no more difficult to handle small parts.I had a lot to read to catching up your build till now, Ken. A lot of nice details and some very nice riveted bulwark plates.
Regards, Peter
- Joined
- Dec 16, 2016
- Messages
- 1,178
- Points
- 493

Hi Grant, Thanks, I’m pleased with how it’s going, big scale for me from now on.Good morning Ken. Wonderful work on the rail. She is a good looking big "little" tug boat.... Cheers Grant
- Joined
- Dec 16, 2016
- Messages
- 1,178
- Points
- 493

Hi Leysend, I’m pleased that you like it, when I get comments like yours I feel that it’s worth the effort to do the log.Just catching up on your updates from the last 2 weeks and I'm impressed @Ken .
Very clean & professional build and the detail make the ship look amazing.
Eager to see more & thanks for sharing this.
- Joined
- Dec 16, 2016
- Messages
- 1,178
- Points
- 493

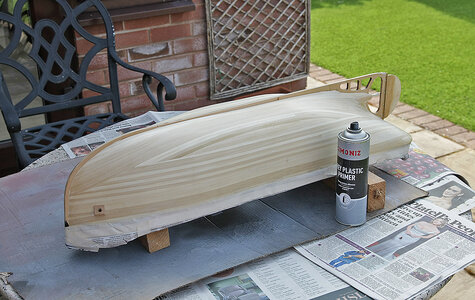
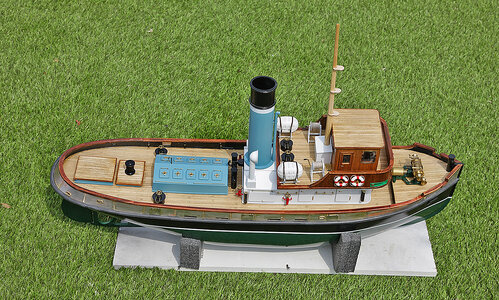
Hello and again welcome, major progress on Antio. I’d put this stage off for as long as I could but now I just had to tackle it, painting the hull. It’s always a nervous time as so much can go wrong and the finish determines how the model will look. Because of its size I couldn’t use my trusty air brush, it couldn’t hope to cover the area so I used spray cans. Thankfully the weather has been pleasant and most importantly nice and still so I was able to paint outside. I masked the upper parts off then gave it its first primer coat, this shows up any minor seams in the planks that you can’t see or feel and yes there were quite a few. I used a fine plastic putty which I worked into the now visible seams then using a 2000 grit paper sanded the hull smooth then again primed the hull, this time it was perfectly smooth without a blemish. I then sprayed the lower half with three fine coats of forest green, when dry I masked off then sprayed the upper black, again three fine coats. After leaving it overnight I gave the whole a buff with a rubbing compound so that both colours would have the same surface sheen, I then applied the white line and finally attached around the hull a rubber bumper. I think it turned out perfect, you would think that it was a GRP hull and not wooden, a very happy Ken.
Whilst I was waiting for the coats to dry I made up and fitted the fire hydrants and hose guides, again a fun little project, the small details are adding up now and giving the boat even more character, I love it.
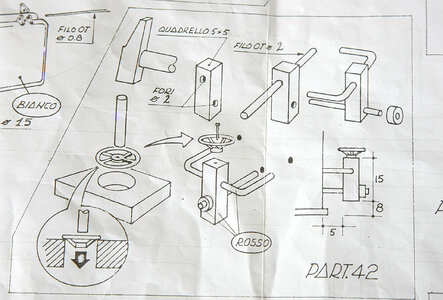
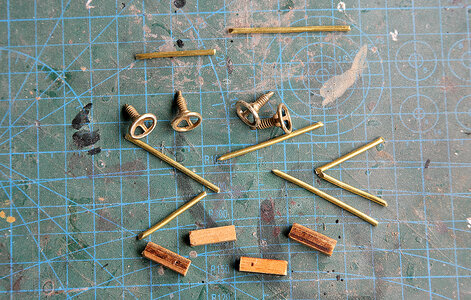
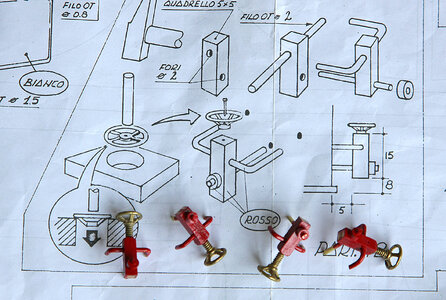
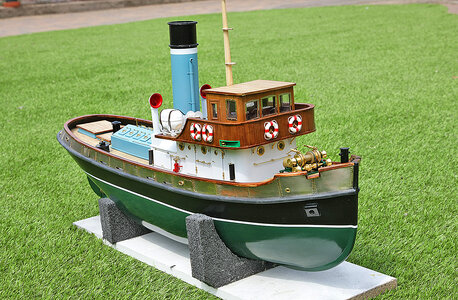
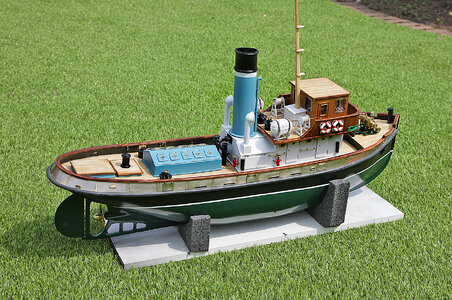
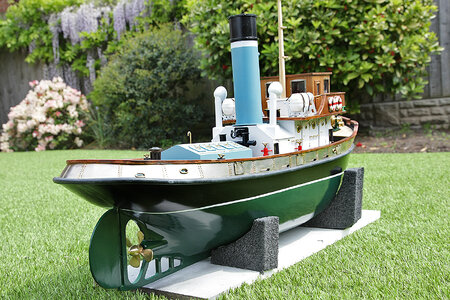
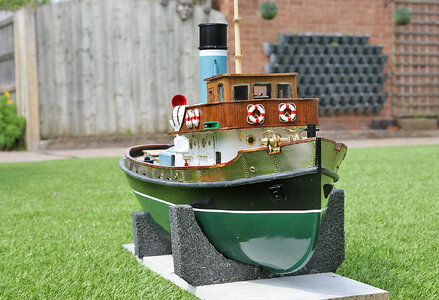
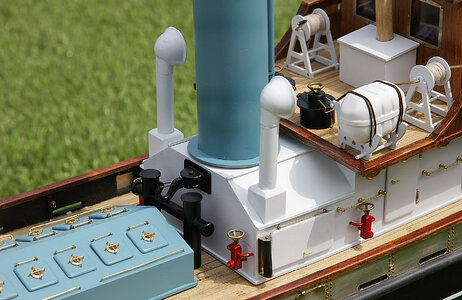
Whilst I was waiting for the coats to dry I made up and fitted the fire hydrants and hose guides, again a fun little project, the small details are adding up now and giving the boat even more character, I love it.


Wow! Now that's a brilliant hull!
Hi @Ken , that is an impressive result on the hull. Spraycans are the way to go on this size of model. May I ask what kind of spray paint was it ? Gloss, semi-gloss or matt ? I suspect gloss looking at the finish. Also what rubbing compound do you use ?
Thank you for sharing. This boat is turning out to become a beauty !
Thank you for sharing. This boat is turning out to become a beauty !
Wow, what a beautiful looking model. Nicely done.
Jan
Jan
- Joined
- Dec 16, 2016
- Messages
- 1,178
- Points
- 493

Hi, Thanks for the compliment. The paint was nothing special, the black was a satin from EBay, the green was something that I’ve had in my garage for at least 20 years, I did a test before I went near the hull with it, I was surprised that it was ok, it was gloss and didn’t perfectly match the black that’s why I rubbed the hull down using TCut, a car rubbing compound. It worked in bringing both paints to a similar sheen, I know it looks very shiny in the pics, that’s because it was in a strong sun, it’s a little less than full gloss but not quite satinHi @Ken , that is an impressive result on the hull. Spraycans are the way to go on this size of model. May I ask what kind of spray paint was it ? Gloss, semi-gloss or matt ? I suspect gloss looking at the finish. Also what rubbing compound do you use ?
Thank you for sharing. This boat is turning out to become a beauty !
- Joined
- Dec 16, 2016
- Messages
- 1,178
- Points
- 493

Thanks Paul, It turned out as good as I’d hoped but better than expected,Wow! Now that's a brilliant hull!
A beautiful paint job, Ken. It gives her a complete different look. A very nice color combination.Hello and again welcome, major progress on Antio. I’d put this stage off for as long as I could but now I just had to tackle it, painting the hull. It’s always a nervous time as so much can go wrong and the finish determines how the model will look. Because of its size I couldn’t use my trusty air brush, it couldn’t hope to cover the area so I used spray cans. Thankfully the weather has been pleasant and most importantly nice and still so I was able to paint outside. I masked the upper parts off then gave it its first primer coat, this shows up any minor seams in the planks that you can’t see or feel and yes there were quite a few. I used a fine plastic putty which I worked into the now visible seams then using a 2000 grit paper sanded the hull smooth then again primed the hull, this time it was perfectly smooth without a blemish. I then sprayed the lower half with three fine coats of forest green, when dry I masked off then sprayed the upper black, again three fine coats. After leaving it overnight I gave the whole a buff with a rubbing compound so that both colours would have the same surface sheen, I then applied the white line and finally attached around the hull a rubber bumper. I think it turned out perfect, you would think that it was a GRP hull and not wooden, a very happy Ken.
Whilst I was waiting for the coats to dry I made up and fitted the fire hydrants and hose guides, again a fun little project, the small details are adding up now and giving the boat even more character, I love it.
View attachment 447836
View attachment 447837
View attachment 447838
View attachment 447839
View attachment 447840
View attachment 447841
View attachment 447842
View attachment 447843
View attachment 447844
View attachment 447845
Regards, Peter
- Joined
- Dec 16, 2016
- Messages
- 1,178
- Points
- 493

Hi Peter. Thanks. I agree, the hull takes on more solidity and it’s curves are more noticeable now that it has colour.A beautiful paint job, Ken. It gives her a complete different look. A very nice color combination.
Regards, Peter
Great colour scheme Ken. As I said in an earlier post she represents the time in her life just out of the ship yard and being turned over to her new owners. No need for any rust, dirt, or grease on this beauty, that will come years after you put her to work.
Jim
Jim
For me, the most difficult part, the painting. It turned out impeccable, magnificent. And those fire hydrants and valves, gorgeous.
- Joined
- Dec 16, 2016
- Messages
- 1,178
- Points
- 493

Hi Adry, Thanks. I think that the small details like the hydrants stand out as individuals and get noticed because there aren't as many about the boat and they take on importance.For me, the most difficult part, the painting. It turned out impeccable, magnificent. And those fire hydrants and valves, gorgeous.
- Joined
- Dec 16, 2016
- Messages
- 1,178
- Points
- 493

Hello, I’ve had many likes and compliments for which I thank you.
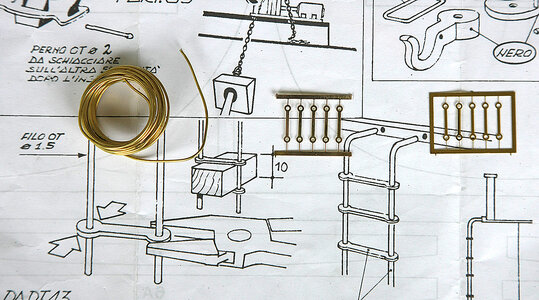
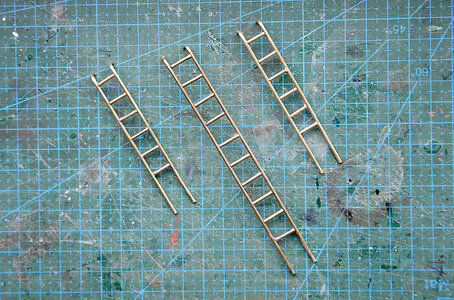
The build is moving forward fairly quickly but it’s now proving difficult showing you in any proper order, I’ve been making up a lot of the smaller detailed parts along the way then putting them in place just to photograph therefore some of the pictures may look to out of sequence.
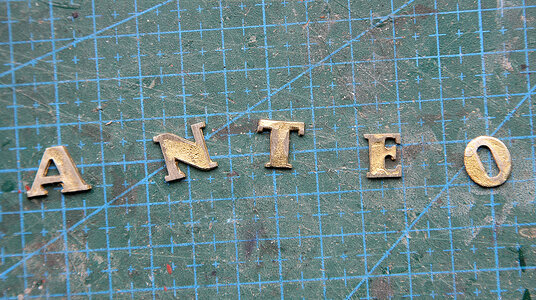
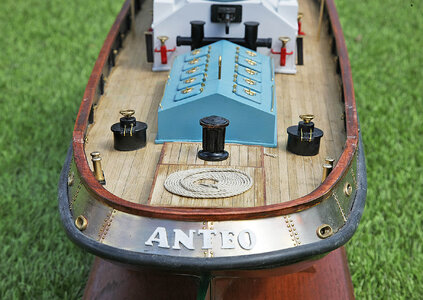
Today I’m showing the ladders that I made and the ships nameplate. The kit supplied a roll of brass wire and some etch pieces to make the ladders, the etch pieces were multi purpose and intended for a few other things and not specific for ladders, they would look wrong so I made up my own, soldering up thin brass rod, I think the look much better. The lettering was a pretty rough casting but cleaned up quite well, once painted they looked ok. More to come.


- Joined
- Dec 16, 2016
- Messages
- 1,178
- Points
- 493

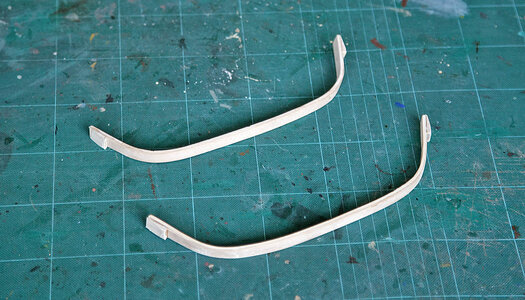
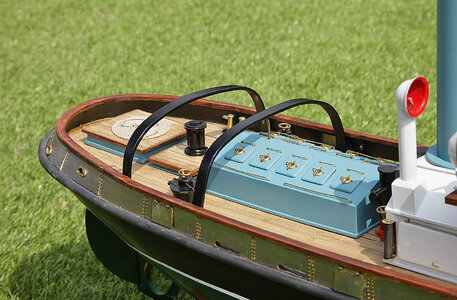
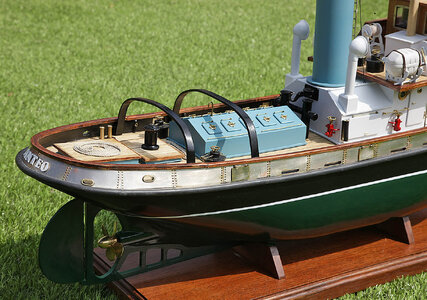
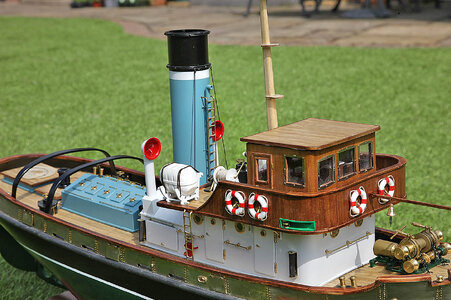
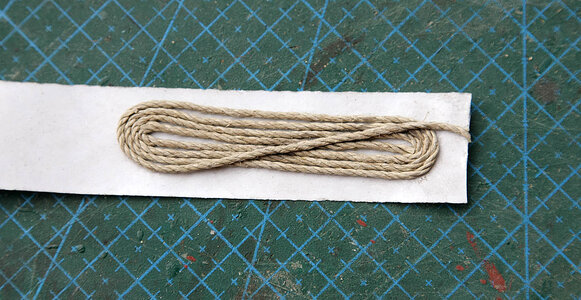
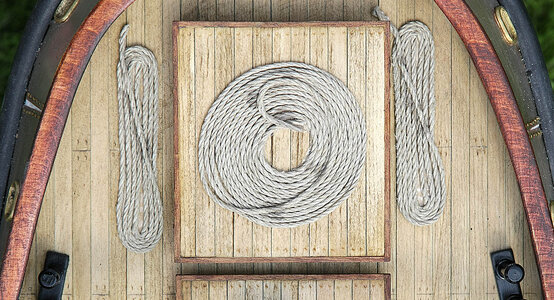
Hello , another update on my progress. I’ve made, painted and fitted the overhead curved fender, fitted into place the ladders that I made earlier and placed large coils of rope on the deck. I couldn’t get the strip wood supplied to the fender to bend enough without breaking so I made it up from two 1.5 thick pieces, bending each separately before sticking them together. The ladders are one each side of the main superstructure and one up the front of the funnel. The rope coils were made up from quite thick cord, the size normally used on anchors for period ships, to get them to coil and lay flat with a natural look I used double sided tape, I lay them as I wanted them on the tape first, I cut away the excess tape, peeled the back off then positioned them on the deck.


- Joined
- Dec 16, 2016
- Messages
- 1,178
- Points
- 493

Good morning, again thanks for following my build.
Today another success story. One of the features on a tug is the rope bow fender annoyingly none was supplied with the kit, quite an omission, I think cost cutting again is the culprit. I’ve been trying for some time to get one but without success, out of stock, wrong size even my local model shop couldn’t get one from Caldercraft who seem to be the main suppliers so it was going to have to be a homemade one. After much deliberation I hit on the idea of using the woven backing from a carpet off cut as this had about the right texture. I plucked off wool pile, ( it was like plucking a chicken ) which left me with a piece of course canvass, I cut it to shape, rolled it around a piece of shaped foam and stitched it closed. Putting it on the boat I saw that both the colour and texture were perfect and it looked right. You’ll also see that the anchors are also now fixed into place.
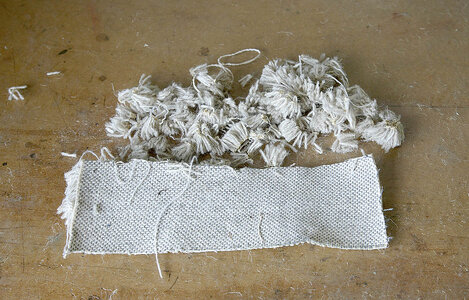
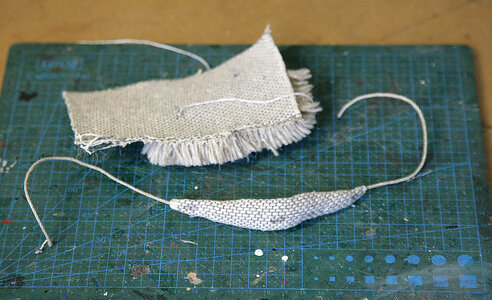
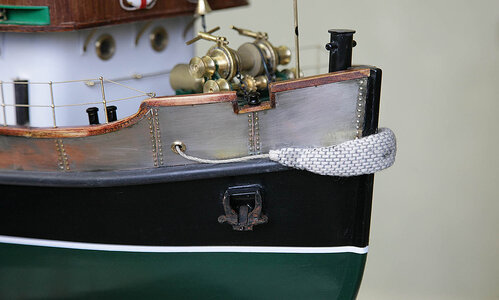
Today another success story. One of the features on a tug is the rope bow fender annoyingly none was supplied with the kit, quite an omission, I think cost cutting again is the culprit. I’ve been trying for some time to get one but without success, out of stock, wrong size even my local model shop couldn’t get one from Caldercraft who seem to be the main suppliers so it was going to have to be a homemade one. After much deliberation I hit on the idea of using the woven backing from a carpet off cut as this had about the right texture. I plucked off wool pile, ( it was like plucking a chicken ) which left me with a piece of course canvass, I cut it to shape, rolled it around a piece of shaped foam and stitched it closed. Putting it on the boat I saw that both the colour and texture were perfect and it looked right. You’ll also see that the anchors are also now fixed into place.


Very good looking fender - maybe a little bit too new and unused, but this will change with the time..... 


