Armed Virginia Sloop - Lauck Street Shipyards, POF 1:32 Scale, Admiralty Style by DocBlake [COMPLETED BUILD]

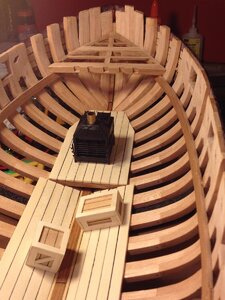
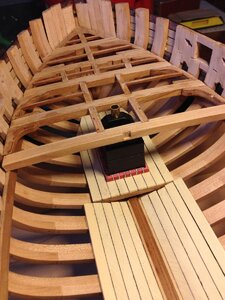
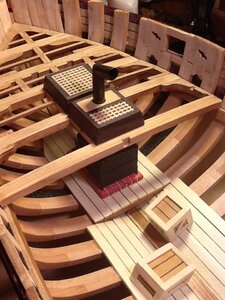
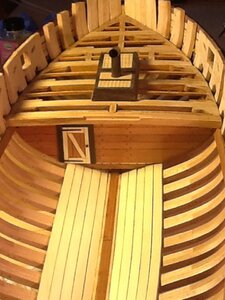
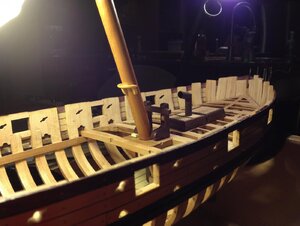
The deck beams for the lower decks installed. The forward lower deck is where the stove sits. The aft lower deck is really just a catwalk that leads from the hold. The hold is subdivided into a hold proper with a light room, and a magazine where I'll add the gunpowder kegs and build the well and shot locker.


69.jpg
 
I finished all the treenails in the outer bulwark planking. I also changed the stern. Something didn't look quite right back there, and I realized that the counter planking needed something to divide it from the framing visually. Like the black strake and wales separate the bulwark planking from the framing. So I simply had the black strake and wale "turn the corner" on each side and end at the sternpost. I think it looks better, and it's not without precedent, even though it's not in the plans!


View attachment 170011
Any chance to see your steps for "tree Nailing"?
 
Any chance to see your steps for "tree Nailing"?


It is actually fairly easy. What turns off people is having to use a drawplate to make the treenails. I've found this difficult to do! I don't do it anymore. Instead, I use common birch toothpicks.

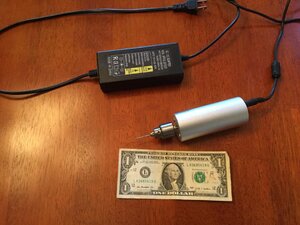
I lay out the location of the treenails with a pencil mark, then score a hole with an awl to guide a drill and prevent any drill "wander". I used to use a pin vise to make the holes, but if you need to drill 800 holes, your hands are going to notice! I now use a small hand held electric drill. You can buy them on Amazon for $30, or if you want to spend $5 more, get a variable speed model. These are fantastic for getting into tight spaces.

For a 1:32 scale model, treenails of 1-1/2" diameter take a #56 drill. That maybe slightly large, but the result looks good. Drill the hole, take a toothpick and dip the tip in some CA glue and push into the hole. When dry, clip off the excess toothpick and sand smooth. You get two treenails from each toothpick!

The only precaution is that since the toothpick tip is tapered, make sure the hole you drill is deep enough so the toothpick "sets" in the hole. If not, drill deeper, or cut a little off the extreme tip of the toothpick so it does. The photos show the drill I use. Here's a link to purchase on Amazon :


Yakamoz 0.3mm - 4mm Adjustable Micro Mini Electric Hand Drill Aluminum Portable Handheld Drill for DIY PCB with 5A DC5V-12V Power Supply Control | 10pcs Micro Drill Bits Included


If you need the treenails to be functional, you can try this technique:

https://shipsofscale.com/sosforums/...ner-independence-by-docblake-5-16-scale.1401/


drill.jpg
 
Last edited:
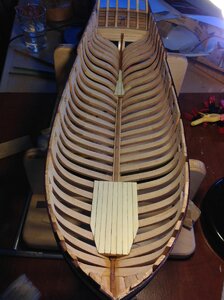
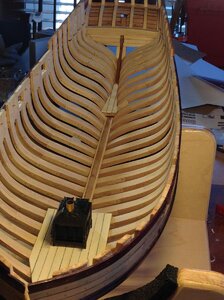
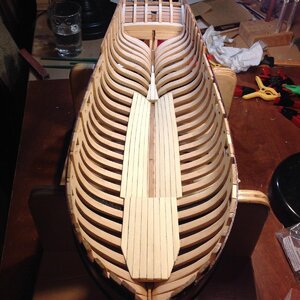
The lower deck planks are in place. I set the stove in it's approximate position on the lower deck. The space between the fore and aft lower decks is the hold. It's separated from the two decks by bulkheads, and another bulkhead divides the hold into a hold/light room and the magazine. The planking in the hold is applied directly to the frames.
Planking of the lower deck s and hold is completed. Next I'll start work on framing the main deck by installing the deck clamps. There are no beams.


70.jpg71.jpg72.jpg
 
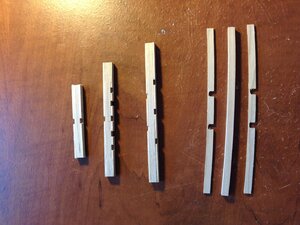
I've started gluing up the main deck beams. There are 12 in all, and each is comprised of three parts: a thicker center part, and two thinner parts, with notches in them that glue to the forward and aft surfaces of the center part. When glued up, the notches form the half-mortises for the carlings and ledges. All in all, a pretty cool system. The photo shows finished beams on the left, and the three components of a beam before glue up on the right.


I started framing the main deck forward. I also built some wooden crates for the hold as cargo. I'm painting the metal bands on the powder kegs copper colored right now. They will go in the magazine. These little details won't be easily seen once the deck s framed in and partially planked, but they are fun to build, and I know they are there!


73.jpg74.jpg
 
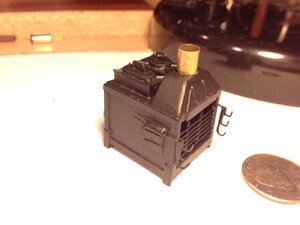
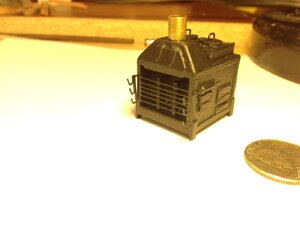
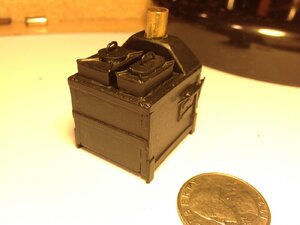
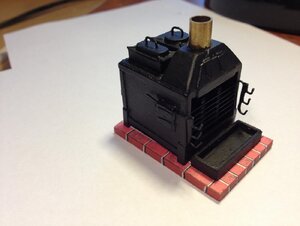
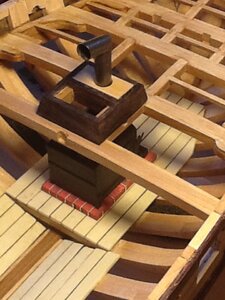
Slow progress. I've installed all the beams, carlings, knees and ledges up to frame 5. Frame 5 is just sitting in place. Because of the bulkhead that will soon be installed, I need to install the stove on it's brick pad next. It's a close fit, and I will likely first make the hatch with the hole for the Charley Noble so that I can glue the pad to the deck and the stove to the pad with epoxy once the alignment of the stack is right. While the long cure epoxy is curing, I'll install beam #5 with it's carlings and ledges, glue the hatch in place and make any final adjustments before the epoxy sets up.

In order to I create a little more contrast on deck, I remade all the hatch coamings in rosewood. I will used boxwood grating in the hatches. I made the Charley Noble (stack) out of brass, blackened it and glued the stove and grease tray to the brick pad. I set the stove in place, along with the stack to test the fit. Perfect. Next is the glue up of the stove and beam 5.


75.jpg76.jpg77.jpg
 
Thanks, Guys!

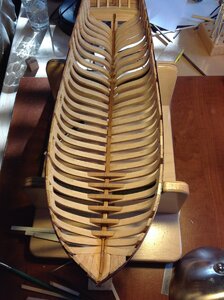
All the full frames for the sloop have been beveled and fit in place. I laid a plank across the framing both inboard and outboard and it looks like there will be very little fairing to be done because of the pre-beveling of the frames before installation. That's a relief!

The only mistake so far: I installed frame H backwards, with the floor facing forward instead of aft. The beveling is all correct...I just got a little confused when laying out the bevel pattern. I'm not rebuilding the frame, because I'm not expecting my build to be examined by an expert in historic naval architecture.


View attachment 164694View attachment 164695
maple is a nice wood have many maple trees ,have sugar shack maple syrup yummy :)
 
I'm thinking seriously about adding a companionway over the main hatch with the doors open to show the ladder leading below I'll especially need to figure out how to secure the doors in an open position.
78.jpg79.jpg80.jpg
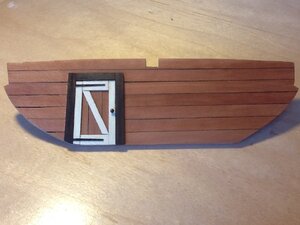
Just finishing up bulkhead #1 which separates the galley from the hold. The wood is pear, holly and rosewood. The hinges are flat end gun port hinges dyed black.

Bulkhead #1 and beam 6 glued in place.
 
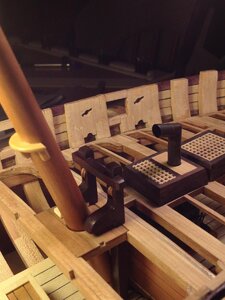
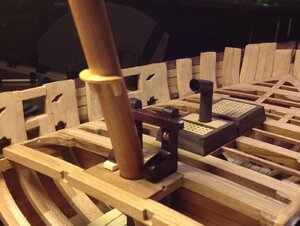
I spent a lot of time on the riding bitt. My first question was whether to leave it cherry, stock with the kit, or make a new one out of rosewood to match the hatch coamings. Believe it or not, the bitt is made up of 11 individual parts (in order to accommodate the sheaves), with some very thin portions that would be a real challenge to cut with a scroll saw. In the end I opted to use the cherry parts and built the bit and fit it to the model. Then I cheated. General Finishes actually makes a rosewood stain! I bought a can and stained and polyed the bitt. I made the mast stub out of cherry and added a boom support made of boxwood to add a little interest. 81.jpg82.jpg83.jpg
 
Thanks, guys!
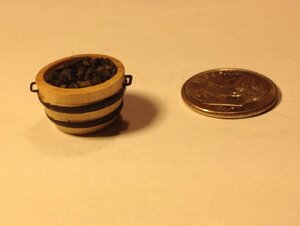
Having a little fun with details. I decided that the stove needed a source of fuel, so I built a little coal scuttle. I sawed one of my powder kegs in half, found the center point of the cut surface, and holding the barrel in the jaws of a pair of pliers to steady it, I used a Forstner bit to hollow out a shallow hole in the barrel's top. I spread some WeldBond glue in there and sprinkled in some coarse black model railroad ballast. The handles are 28 gauge annealed black steel wire. A couple of coats of poly and the coal scuttle was done. Elapsed time: about an hour.


84.jpg
 
Back
Top