Armed Virginia Sloop (Model Shipways) 1:48 [COMPLETED BUILD]

Thank you Grant, and everyone else. Slowly moving along.
Just joined the forum a few weeks ago and came across your wonderful and impressive build. I have also started building the AVS which I purchased in 2007. Your choice of woods for the planking is eyecatching, it brings a unique balance to the ship. Your pictures are the BEST! Keep sending more.
Best, Wayne
 
Thank you Wayne. Since you are new, you may not know there are lots of builds on this site.

HERE is a link to ModelShipBuilder and ShipsofScale build logs. Search on ship name. You will find several AVS builds better than mine which may give you some thoughts about things to add to your ship.
 
Rob - thanks for the info re the build logs site on Ship of Scale, I’m sure it will be a great information source for building my AVS. Best, Wayne
 
Last edited:
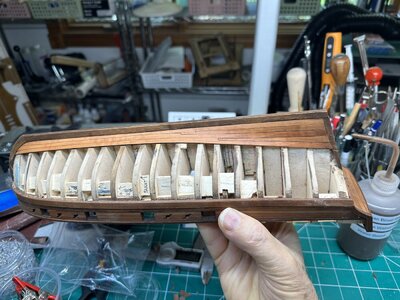
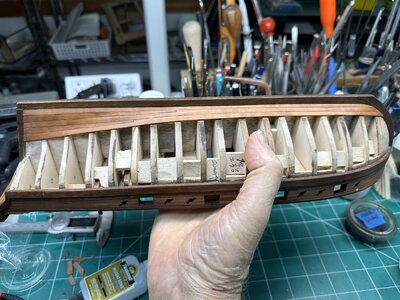
I planked the lower 1/3 of the hull with pear wood per the ship's plans. I also put 2 stealers in per the plans.

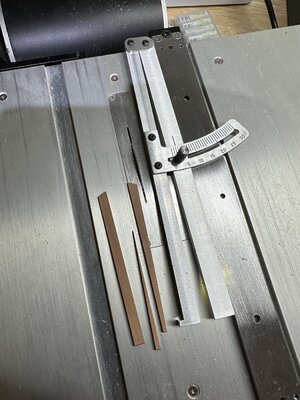
I've had this Byrnes Rip Taper Gage for a long time and have never used it. I used it to cut the 2 stealers on each side. Nice clean cut...
IMG_3283.JPG

I had tried cutting 100mm individual planks and planked the first two rows. Didn't work out too well, so I removed them. Think on my next ship I'll try again using individual planks. But will fill in the spaces between the bulkheads with basswood. I believe this was the problem with this build and individual planks.

Will plank the top 1/3 starting at the Wale next.
IMG_3286.JPGIMG_3287.JPG
 
Very nice work regarding the use of stealers - also, I have used a similar tapering gauge on my own mini table saw,
a gift from my father-in-law, and if you work slow and cautiously it can be a great benefit in your builds. Love the
sheen of the pear wood! Best, wayne
 
Last edited:
Zoly - can this Standing and Running Riggin Chart be used for any 1:48 scale or does this only apply to the
"Armed Virginia Sloop." Also, thanks for providing such valuable information. Best, wayne
Hi

Most likely not far off ,it cannot be wirse than the block sizes,rope diameters/thickness and specs they are providing in most kits,most kits have oversized blocks and ropes so this list is an improvement
 
Double Bingo, Rob! First, I get to congratulate you on the excellent planking job you have done so far, and secondly, on your birthday! May there be many more!
 
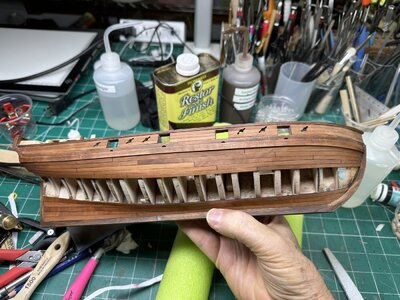
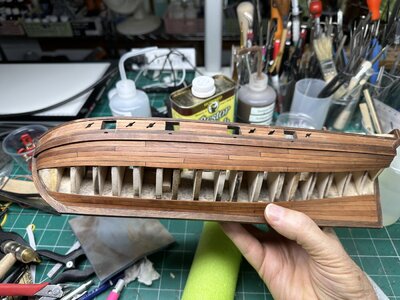
The hull planking was split into 3 sections per the ships plans. I've completed the lower garboard section earlier. Now have just finished the upper section below the main wale. I had cut each strake into individual 100mm boards and spiled the boards when covering the garboard area. Didn't turn out too well so I removed all the planks and replaced with solid 1 piece strakes.

Then I moved to the top area. I really wanted to learn spiling planks. Decided to try spiling again. This time I usesd 124mm pieces. It was pretty rough to start, but I got a little better the more pieces I spiled. It didn't turn out too bad. But I still need a lot more practice to fit the pieces together better. I'll go back later and cut fake butt ends into the solid planks already attached to the hull.

The next, and final section is the open area between the garboard and wale. As I worked the upper area I constantly checked this center (not planked yet) area so they would be the same on both sides of the hull.

There are several good references on spiling... (for those who my want a couple references)
A primer on planking by David Antscherl
Planking the Built Up Ship Model by Jim Roberts
SIMPLE HULL PLANKING TECHNIQUES FOR BEGINNERS

IMG_3336.JPGIMG_3337.JPG
 
Back
Top