Nigel, I'm sitting in the back row looking forward to your build. Magic Mike
-

Win a Free Custom Engraved Brass Coin!!!
As a way to introduce our brass coins to the community, we will raffle off a free coin during the month of August. Follow link ABOVE for instructions for entering.
-

PRE-ORDER SHIPS IN SCALE TODAY!
The beloved Ships in Scale Magazine is back and charting a new course for 2026!
Discover new skills, new techniques, and new inspirations in every issue.
NOTE THAT OUR FIRST ISSUE WILL BE JAN/FEB 2026
You are using an out of date browser. It may not display this or other websites correctly.
You should upgrade or use an alternative browser.
You should upgrade or use an alternative browser.
Hi Nigel, I am in too. I will watch with great interest and curious to know the difference with OcCre ship.
Hi Nigel. I have pulled up a chair too. Hope to learn some new tricks again.
- Joined
- Jun 17, 2021
- Messages
- 3,200
- Points
- 588

Hi NMBrook, please add my to all of the above. You have captured my ongoing interest as well. Happy modeling!
Pete
 to all of the above. You have captured my ongoing interest as well. Happy modeling!
Pete
I take off my hat for your decision to build such a model more or less out of the box
I think, that it will be hard sometimes .....
let us see
I think, that it will be hard sometimes .....
let us see
I take off my hat for your decision to build such a model more or less out of the box
I think, that it will be hard sometimes .....
let us see
Thanks Uwe, almost is the pertinent word. I have made the case that you can build as nice a model from this kit as Caldercraft's Victory using the difference in initial cost for a few choice upgrades.
That is the gauntlet I have set myself
 I thought it would be a fun challenge as I normally through most of the kit in the bin.
Big update postponed to next weekend as I want to keep a structured approach to my updates and by then I will have completed section one of the kit instructions, 122 steps. Focus will be on additional work carried out and deviation from the order of works, in essence every part of the kit has been used for this section.
Very nice, Niegl I admire you for working on so many construction sites, which requires a lot of concentration in order not to get confused. I will follow it with great interest.
- Joined
- Feb 19, 2023
- Messages
- 168
- Points
- 103

Don't worry! Be happy !«Расслабляющая сборка» ???. Я уже напрягся у переборки и настила.:упс:
Hope I'm not too late! just finished getting settled in from moving and the shipyard is almost complete! Nigel, I'm all in!!
Rather than cover each step of the instructions as they are extremely clear, I will focus on where I. have deviated from them.
Firstly, the complete keel was assembled on a flat surface BEFORE installing any bulkheads. Much easier to keep it in line unlike the partwork style assembly they show.
I addition, The complete prow and keel has been fitted. With single planking, I would much rather work with a Rabbet line for the planking, especially in the area where the keel meets the cutwater as the profile is concave here.
After the first level of dummy cannon supports where in place I added pine strip between these to strengthen the skeleton. Two laminated edge to edge strips of the same pine where fitted along the centre of the model and glued to these additional cross braces. This has resulted in extremely stiff assembly.
The inside faces of the beached bulkhead doors were framed in boxwood before fitting the bowsprit support assembly, this made it easier to sand their inside edges flush to the bulkhead.
I am in the process of running an Epoxy fillet on all the joints on the framework. This strengthens everything given how thin the ply framework is.
I have now concluded Section one in the kit instructions and will move on to section two next which covers fitting the Gun deck amidships.
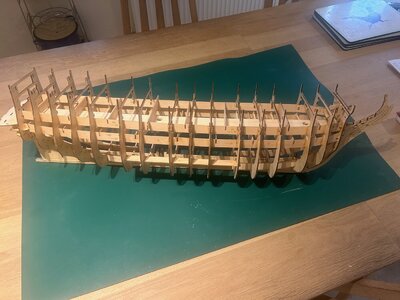
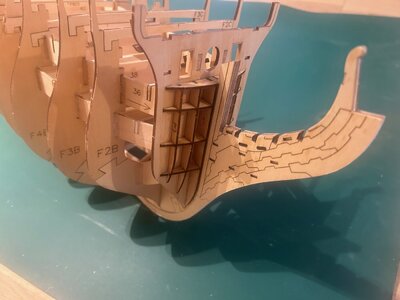
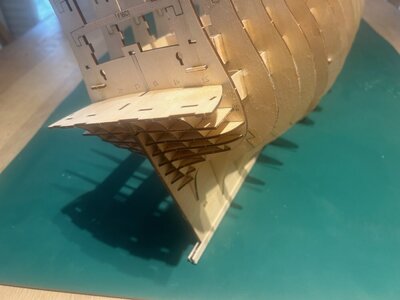
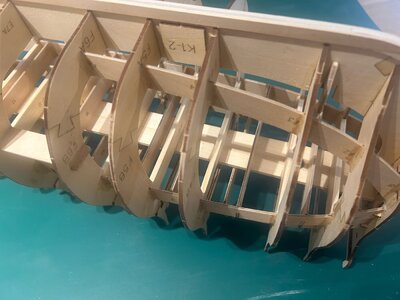
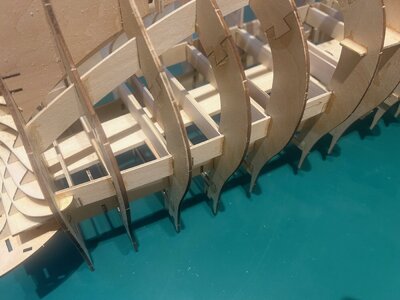
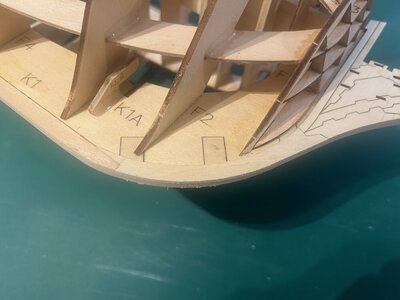
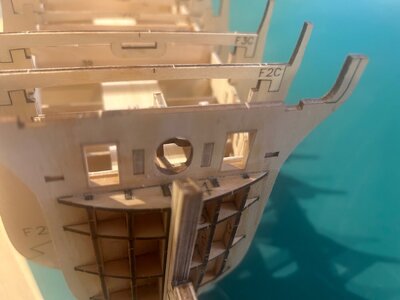


Hi Nigel, everything seem's to fit adequately. May be a winner ship here for Al. You made a great job and this bship is really appealing.
Hi Nigel, everything seem's to fit adequately. May be a winner ship here for Al. You made a great job and this bship is really appealing.
Hi Michel
No surprises so far, I have not had to adjust one slot. Only critique is the slots could do with being a little more snug.
I like the approach of form and function first. And the addition of epoxy to the joints. As always - pragmatic and clean work Nigel!
Nigel, what a great start! You are in the groove! Magic Mike
- Joined
- Jun 5, 2021
- Messages
- 165
- Points
- 88

Beau départ
J'attends la suite avec plaisir
Marco
Nice start
I await the sequel with pleasure
Marco
J'attends la suite avec plaisir
Marco
Nice start
I await the sequel with pleasure
Marco
Thanks Guys
I made a bit of a boobo I looked at the full size plans and immediately assumed the kit deck planks were 2 x 5mm,the same as Santa Ana. They are 5mm wide on the plans.
Cross referencing the instructions and material list, the instructions state 1 x 4mm
Quite how you are supposed to get a decent result planking the deck using 1mm planks with supports up to 60mm apart I don't know, 1mm is a pretty thin edge to edge butt joint.There is one build on YouTube and the builder is only gluing the planks to the support beams not to one another???
Whilst this does not change my approach, it does leave me with the dilemma in that do I sand all deck beams down by 1mm to allow for my 2mm decks, or do I adjust where I put the gunport templates and leave the top edge of the hull 1mm high??????
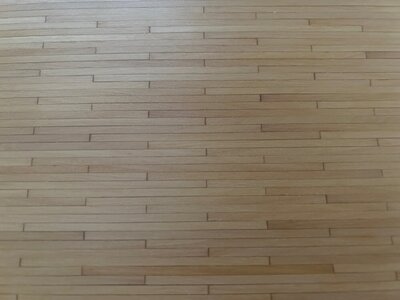
Moving on, I have planked a section of 1.5mm Birch Ply with my boxwood strip. This section is overwide and overlong. This is so I can fully finish the section before cutting to shape. I can cut the shape afterwards as my Bandsaw obviously cuts on the downstroke so I should have no splintering.
The outer planks are continuous as these will be broken up by the bulkhead uprights. There would be no joints in this area. I know this is not historically correct and the Ceiling planks would probably run through without these supports, but the kit approach looks good and I promised myself I would not start any radical bashing
Cutting out after sanding and varnishing prevents the rounding over at the edges and should result in crisp areas that abut the upright structures.
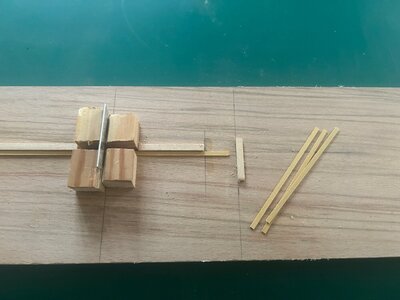
I made a simple jig to cut the planks at 80mm long using a single edge razor blade as my chopper. I have glued all planking using CA. I find PVA introduces too much moisture which leads to warping in operations like this.
The piece is now ready for several coats of spirit based poly with fine sanding between coats. I will ponder my 1mm discrepancy whilst applying varnish and making up the deck grate assembly
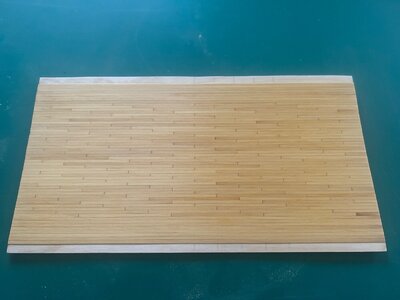
I made a bit of a boobo
 I looked at the full size plans and immediately assumed the kit deck planks were 2 x 5mm,the same as Santa Ana. They are 5mm wide on the plans.
Cross referencing the instructions and material list, the instructions state 1 x 4mm
Quite how you are supposed to get a decent result planking the deck using 1mm planks with supports up to 60mm apart I don't know, 1mm is a pretty thin edge to edge butt joint.There is one build on YouTube and the builder is only gluing the planks to the support beams not to one another???
Whilst this does not change my approach, it does leave me with the dilemma in that do I sand all deck beams down by 1mm to allow for my 2mm decks, or do I adjust where I put the gunport templates and leave the top edge of the hull 1mm high??????
Moving on, I have planked a section of 1.5mm Birch Ply with my boxwood strip. This section is overwide and overlong. This is so I can fully finish the section before cutting to shape. I can cut the shape afterwards as my Bandsaw obviously cuts on the downstroke so I should have no splintering.
The outer planks are continuous as these will be broken up by the bulkhead uprights. There would be no joints in this area. I know this is not historically correct and the Ceiling planks would probably run through without these supports, but the kit approach looks good and I promised myself I would not start any radical bashing
Cutting out after sanding and varnishing prevents the rounding over at the edges and should result in crisp areas that abut the upright structures.
I made a simple jig to cut the planks at 80mm long using a single edge razor blade as my chopper. I have glued all planking using CA. I find PVA introduces too much moisture which leads to warping in operations like this.
The piece is now ready for several coats of spirit based poly with fine sanding between coats. I will ponder my 1mm discrepancy whilst applying varnish and making up the deck grate assembly


Decking looks fantastic Nigel. But you have a puzzle to sort out now...
Decking looks fantastic Nigel. But you have a puzzle to sort out now...
Thanks Paul and indeed I do.
Thinking about this practically, best plan is to dry fit the completed deck and using the gunport template, compare the height to an assembled cannon. That will give me a better idea. I believe AL made two models, the first used in the advertising video and for the plans hence the 5mm wide planks and then one for the instructions. Did they use 2mm thick planks in the advertising model then change to 1mm as the upper cannons appear too high in the gunports??
The longer I watch Miguel's construction videos on YouTube, the more strange this construction becomes to me. You must take into account that when the sheathing - out planking is built, this structure will bend, and in the case of 1x4 boards on the beams themselves, they will also bend.
I also noticed that the surface was very wavy and that it was difficult to sand it evenly - it was too thin...
This construction is too soft, I don't understand its use, especially on 1x4x60mm planks. One mistake and it will all break.
As far as I know, the manual shows the model in the construction phase and a few things have been changed, such as the cannon blocks. I heard that there is also a problem with the height of the cannonholes with template that is included in the set, so think twice before you start making holes.
At the moment, the best solution is to add artificial support beams every 30 mm or to use 1 mm modeling plywood on the entire surface and then arrange 1x4 mm planks. Alternatively, stick these planks onto the beams, but reinforce them from the bottom across.
Santa Ana is undergoing a redesign, and will be of the exact same design as Santissima Trinidad. To be honest, this model will be no longer suitable for conversion, compared to the old Santa Ana. The lack of plywood decks even eliminated the addition of full gun carriages.
It won't be the same anymore...
It's starting to look great for you, best regards.
I am also afraid of the construction of my Santa Ana, I am not planning to build it for now.


