Thanks Guys for your nice comments
-

Win a Free Custom Engraved Brass Coin!!!
As a way to introduce our brass coins to the community, we will raffle off a free coin during the month of August. Follow link ABOVE for instructions for entering.
-

PRE-ORDER SHIPS IN SCALE TODAY!
The beloved Ships in Scale Magazine is back and charting a new course for 2026!
Discover new skills, new techniques, and new inspirations in every issue.
NOTE THAT OUR FIRST ISSUE WILL BE JAN/FEB 2026
You are using an out of date browser. It may not display this or other websites correctly.
You should upgrade or use an alternative browser.
You should upgrade or use an alternative browser.
Nigel, love the decking! Magic Mike
Nigel,
Just catching up - brilliant work indeed.
Just catching up - brilliant work indeed.
Slowly moving along as I have had some chores to do
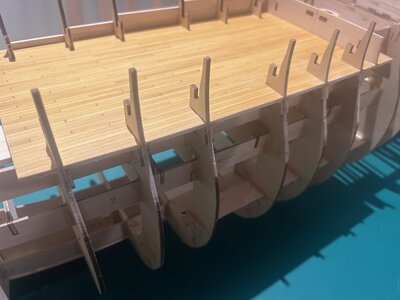
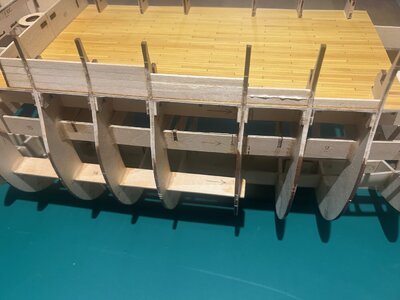
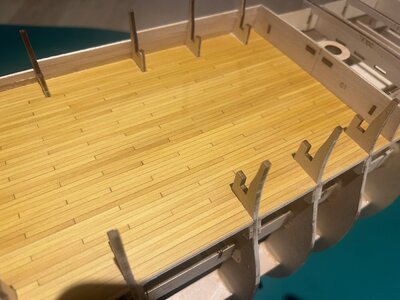
With the deck trimmed and faired, I have started to fit the ceiling planking between the bulkheads using some 5mm X 1.5mm Birch I have spare from the Soleil Royal.
The instructions have you fitting this later after adding some ply supports for the deck edges. I will not be fitting these supports as they are not needed as my upper deck will have a ply sub base and they do make this area look untidy.


Looks superb Nigel.
Hi Nigel,Slowly moving along as I have had some chores to do
With the deck trimmed and faired, I have started to fit the ceiling planking between the bulkheads using some 5mm X 1.5mm Birch I have spare from the Soleil Royal.
The instructions have you fitting this later after adding some ply supports for the deck edges. I will not be fitting these supports as they are not needed as my upper deck will have a ply sub base and they do make this area look untidy.
View attachment 411616View attachment 411617View attachment 411618
I have a question: You have not done any tree nails or simulation of them. Is it a question of scale that they might make them not realistic enough? On the deck planking.
I’ve started my Santisma trinidad and your advices are very interesting.
Patrick
Hi Nigel,
I have a question: You have not done any tree nails or simulation of them. Is it a question of scale that they might make them not realistic enough? On the deck planking.
I’ve started my Santisma trinidad and your advices are very interesting.
Patrick
Hi Patrick
Been there done the whole tree nailing thing to death on other builds.IMHO less is more at this scale.
Personally, if I were going to represent the fixings, I would do so at every deck beam, not like that shown in the instructions with just two dots at the end of each plank
Nigel, I love the birch planking! Nicely done. Magic Mike
Thanks Mike, the planking will be covered inside and outside, it is merely to build the thickness up. The kit has you leaving a void here.
Small update due to the usual pre Christmas social events....
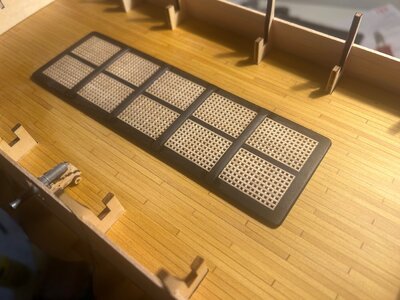
My version of the kit grating has been assembled but still requires the slots milling for the cannonball storage.It is merely placed on the deck for now.
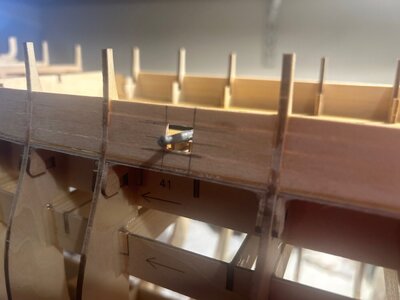
I made a carriage up to suss out how using a 2mm thick deck changed things. The gunport position was measured from the kit template but the height was set using the carriage.
I found that the cut port worked out exactly to the template's position for height.Go figure, can't understand that given my deck is 1mm thicker than the kit supplied planking !! Looks like I haven't got loads of fudgery to do I will stress though, I will be repeating the same exercise on the next deck up, can't see me being that lucky
Small update due to the usual pre Christmas social events....
My version of the kit grating has been assembled but still requires the slots milling for the cannonball storage.It is merely placed on the deck for now.
I made a carriage up to suss out how using a 2mm thick deck changed things. The gunport position was measured from the kit template but the height was set using the carriage.
I found that the cut port worked out exactly to the template's position for height.Go figure, can't understand that given my deck is 1mm thicker than the kit supplied planking !! Looks like I haven't got loads of fudgery to do


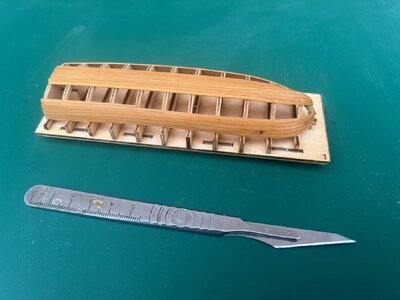
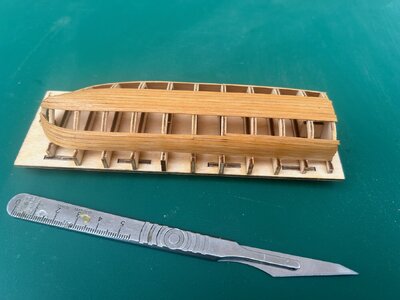
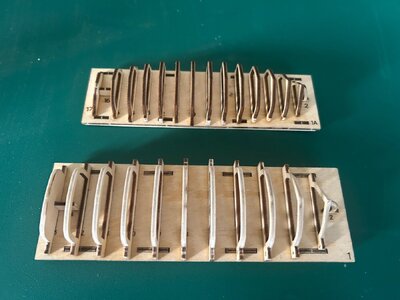
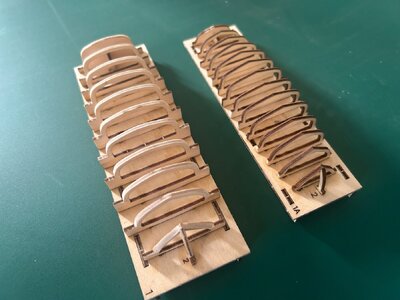
I wish to add chocks to the grating frame to support the large ships boat.I have therefore decided as a side project to build both the boats in tandem whilst working away at the hull.
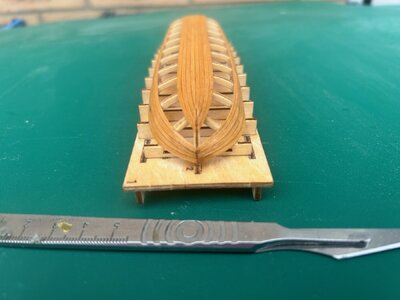
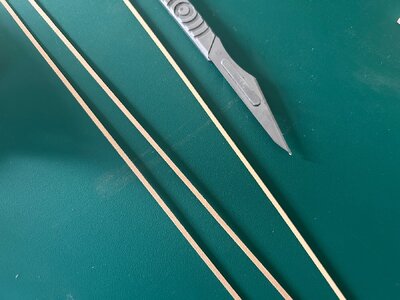
Whilst the framework and jig are good from the kit, the planking supplied is 3mm x 0.5mm birch. This is too wide to conform to contours of the ribs and a point to note is both boats show a pronounced kink due to this issue in the kit instructions.I have some 1.8mm x 0.7mm boxwood in my stash which I propose to use to be able to plank these little boats properly.
The pics show the skeleton of both boats, the larger having been faired for planking along with my Box planking strip


- Joined
- Oct 15, 2017
- Messages
- 1,191
- Points
- 443

Super work, as always Nigel. Is that a #4 blade on your scalpel?A small update in that the large ship's boat's planking is well underway with just 5 strakes per side to fit.
The bow required some severe edge bending which I will cover when I plank the small boat.
View attachment 414553View attachment 414554View attachment 414555
Also, did you supply the wood for the deck planks? It looks too nice to be a kit component. I think this may be the first time I'm seeing birch. It has a nice golden tone and the grain looks pretty tight.
Happy Holidays!
Great work Nigel -- I will also make a long boat for my SotS - I'll save your work as a guide.
Cheers,
Cheers,
Thanks Guys
Ken it is a number 26 blade.The deck is boxwood not supplied in the kit.The kit supplies 4mm wide birch planking for this which is overcall but I do not like the almost white colour of Birch. It is a problematic wood to stain evenly so much easier to swap the timber.
I am still using the birch supplied for everything else that will be painted.
John my Royal Caroline log contained a better step by step but sadly that was lost in the ether.That was a full scratch boat all from Boxwood veneer
Nigel, it is tough going trying to plank such a small boat like this. Nicely done, Magic Mike
Very accurate work
Firstly, Happy New Year everyone. I have not been online much over the holidays as I have been focusing on family time but with some building in the stolen hours.
I have been following the instructions, well almost I will list my departure from the kit build so far rather than cover what is the instructions;
Keel drilled to take M4 steel rod that will be used to secure the model to the stand but also provide +ve and -ve for the 12v supply for the lighting
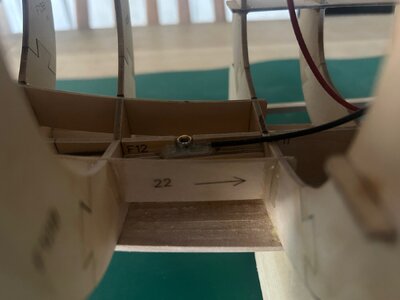
Kit battery tray repurposed to take digital voltage regulator to provide 2.9volt output for the LEDs eliminating resistors- as I side note, I fried two of the flickering LEDs from the light kit soldering the wires on despite using my smaller iron. You MUST use a heatsink between where you are soldering and the LED body. These LEDs contain tiny microchips and they do not like heat.Lesson learned, I will order another kit from AL in Spain, I plan on adding a few extra anyway.
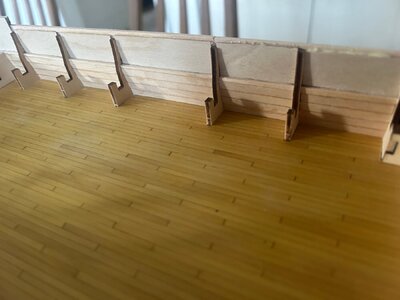
More supports added to the deck beams fore and aft for the next level.
The upper "Bulwarks are being lined with 0.8mm ply from my stash, these will provide a backing for further dummy frame extensions, I do NOT plan on planking these areas but having exposed framing. No plans exist for the ship post refit, I reason as these areas are extensions of the original hull, there is some argument that these were not planked internally. Looking at Artesania's CAD model on You Tube, it is my interpretation that is what they had in mind when designing the kit then took a u-turn deciding to cover these areas with planking inside. If anything, this will add a talking point to the model and differ it from the masses.
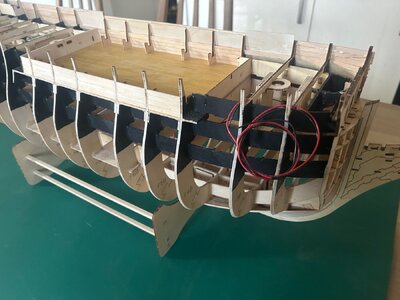
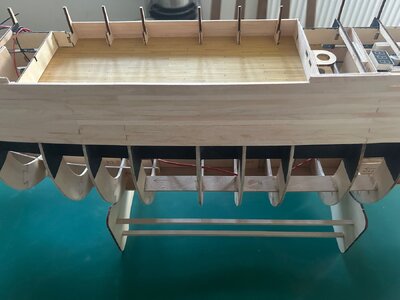
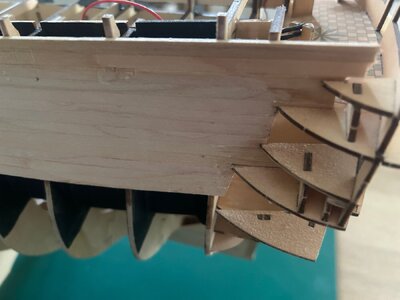
Some pictures of where I am up to.I am working on the planking on the Portside at the moment from the waterline up, then I will revert to the Starboard side. I can get away with not working equally on each side now, the skeleton is so rigid it could withstand a bomb blast.No concerns of pulling it out of shape.
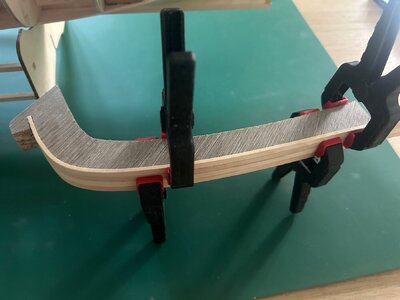
One tip for anyone building this model, I made a shaped former to bend the planks. Soaked them in water for two hours and then clamp in the former.Leave overnight to dry out and they keep their shape when released.My former can take four planks at a time speeding the process up slightly.Every build I have seen so far of this kit, including the one in the instructions exhibits some faceting in the transition of radiuses at the bow, ensuring the planks are accurately preshaped seems to have stopped this so far on my model.
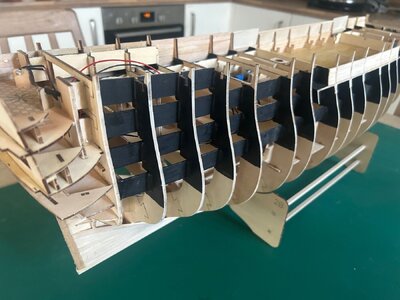
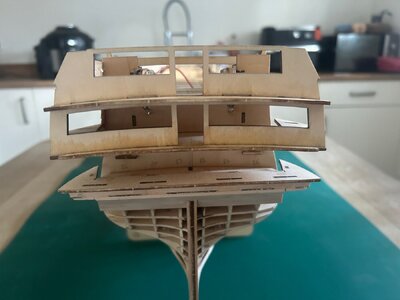
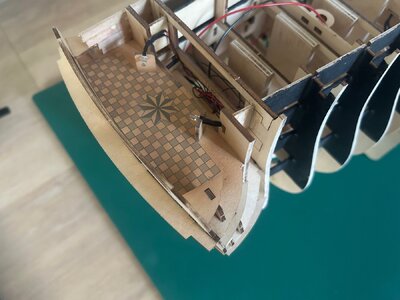
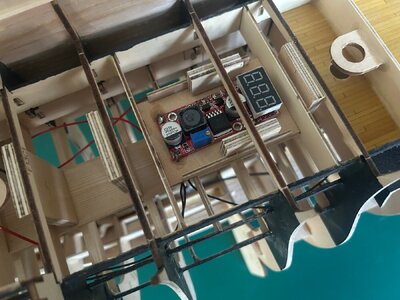
I have been following the instructions, well almost
 I will list my departure from the kit build so far rather than cover what is the instructions;
Keel drilled to take M4 steel rod that will be used to secure the model to the stand but also provide +ve and -ve for the 12v supply for the lighting
Kit battery tray repurposed to take digital voltage regulator to provide 2.9volt output for the LEDs eliminating resistors- as I side note, I fried two of the flickering LEDs from the light kit soldering the wires on despite using my smaller iron. You MUST use a heatsink between where you are soldering and the LED body. These LEDs contain tiny microchips and they do not like heat.Lesson learned, I will order another kit from AL in Spain, I plan on adding a few extra anyway.
More supports added to the deck beams fore and aft for the next level.
The upper "Bulwarks are being lined with 0.8mm ply from my stash, these will provide a backing for further dummy frame extensions, I do NOT plan on planking these areas but having exposed framing. No plans exist for the ship post refit, I reason as these areas are extensions of the original hull, there is some argument that these were not planked internally. Looking at Artesania's CAD model on You Tube, it is my interpretation that is what they had in mind when designing the kit then took a u-turn deciding to cover these areas with planking inside. If anything, this will add a talking point to the model and differ it from the masses.
Some pictures of where I am up to.I am working on the planking on the Portside at the moment from the waterline up, then I will revert to the Starboard side. I can get away with not working equally on each side now, the skeleton is so rigid it could withstand a bomb blast.No concerns of pulling it out of shape.
One tip for anyone building this model, I made a shaped former to bend the planks. Soaked them in water for two hours and then clamp in the former.Leave overnight to dry out and they keep their shape when released.My former can take four planks at a time speeding the process up slightly.Every build I have seen so far of this kit, including the one in the instructions exhibits some faceting in the transition of radiuses at the bow, ensuring the planks are accurately preshaped seems to have stopped this so far on my model.


