Artesania Latina Santisima Trinidad 1/84

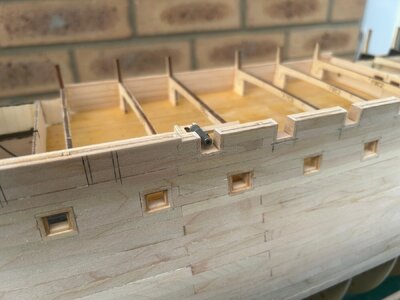
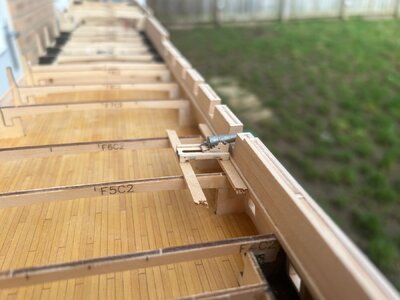
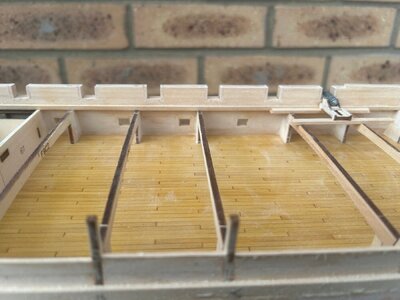
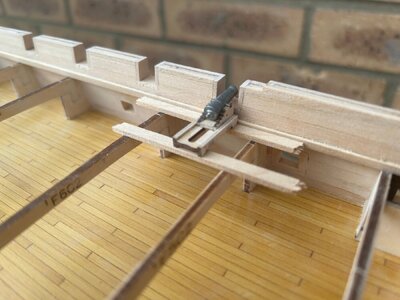
It has been a little while since my last update, not because I haven't been working on the model, but because I needed to "prove" the Gunport height for the upper two decks rather than rely on the templates.
The gunports for the "Opuses"? are too low on the prototype resulting in them dipping down.I have raised the ports 1.5mm which means the top of the port is the Caping rail itself, much more in line with the original drawings.
I decided not to go with exposed internal framing instead planking the insides similar to the instructions but with a waterway fitted now so it will be painted red along with the spirketing etc.
I could write an essay on what work has been done in the last two weeks but they say a picture is worth a thousand words......
IMG_1080.JPGIMG_1081.JPGIMG_1082.JPGIMG_1083.JPGIMG_1084.JPGIMG_1085.JPG
 
Brilliant stuff! Does ST dwarf SL, when they’re placed side by side? That hull looks enormous!

Thanks Marc

I have never had them in the same room together yetROTF I suspect they are a similar length given the scale difference 1/84 vs 1/65.
I will take a picture next weekend with them next to one another because I am curious
 
Hi All

Updates from me have been slow coming for two reasons:

To achieve the results I want is slow going compared to just slapping everything together as per the instructions

Secondly, I hurt my right shoulder ten days ago picking my Dog up! I saw the Physio on Friday and it turns out I have damaged the central muscle in my rotator cuff. I am in a lot of pain and struggle to sleep despite all the painkillers, bottom line, probably another two to three weeks to full recovery.

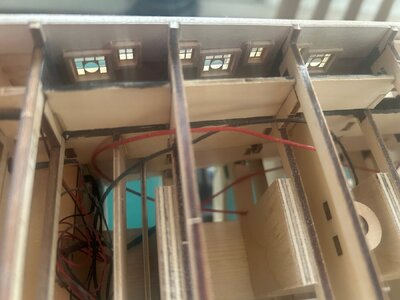
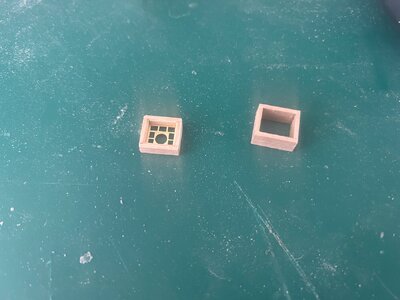
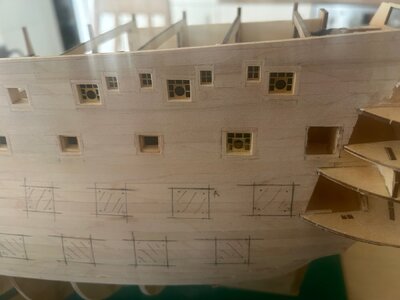
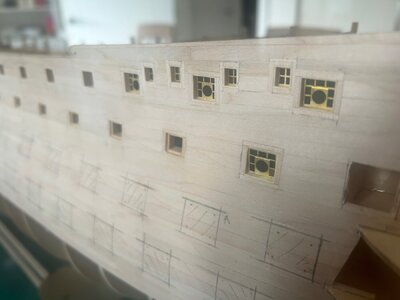
Anyway, a few pics of the Portside gunport/ window area. The kit includes very nice photo etch for this but has you just glue these pieces on the outside of the hull.I have chosen to inset these in the hull sides, first building into Birch "cassettes" then fitting into oversize holes in the hull and sanding flush.

Sorry Marc, no pictures of Santisima and Soleil Royal next to on another yet, no way am I chancing picking Soleil Royal up with my dodgy shoulder:confused:

IMG_1086.JPGIMG_1087.JPGIMG_1088.JPGIMG_1089.JPG
 
Last edited:
Hi All

Updates from me have been slow coming for two reasons:

To achieve the results I want is slow going compared to just slapping everything together as per the instructions

Secondly, I hurt my right shoulder ten days ago picking my Dog up! I saw the Physio on Friday and it turns out I have damaged the central muscle in my rotator cuff. I am in a lot of pain and struggle to sleep despite all the painkillers, bottom line, probably another two to three weeks to full recovery.

Anyway, a few pics of the Portside gunport/ window area. The kit includes very nice photo etch for this but has you just glue these pieces on the outside of the hull.I have chosen to inset these in the hull sides, first building into Birch "cassettes" then fitting into oversize holes in the hull and sanding flush.

Sorry Marc, no pictures of Santisima and Soleil Royal next to on another yet, no way am I chancing picking Soleil Royal up with my dodgy shoulder:confused:

View attachment 430557View attachment 430558View attachment 430559View attachment 430560
THIS dog ?
1708867716774.png
 
From what limited understanding I have, I know the rotator cuff is a slow-healing area. I wish you the best and speedy recovery.

It’s simply amazing what a difference that small alteration of process and substance makes to the kit. The PE mullions are very nice, on their own, but now they have depth and dimension.

Sometimes, though, little changes add up to huge amounts of extra effort. ‘Worth it, though!
 
Looking out the windows of this old crate I call my body that's been carting me around for the last nearly 78 years, I, the passenger in this creaky old hulk, can't POSSIBLY have gotten so dinged up and worn out as the inescapable old chassis and coachwork I'm stuck with :rolleyes: . But, c'est la vie !
Get well asap!
 
Thanks everyone

I apologise for my absence but it has been an eventful time for me. Physio is helping my shoulder which turns out to be a trapped nerve at the base of my neck but a couple of weeks ago I had another blow. My employer announced they were going into administration if they could not find a buyer. Well after a week of being laid off along with all the other staff, everyone was made redundant yesterday.
Thankfully, I am starting a new position with my previous employer on Monday but it has been a real rollercoaster.

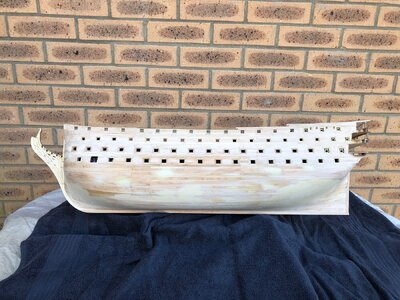
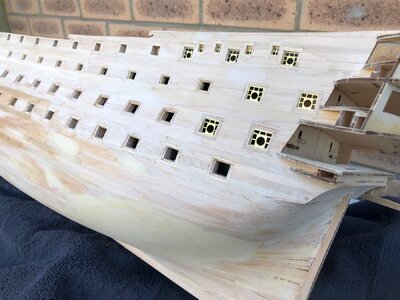
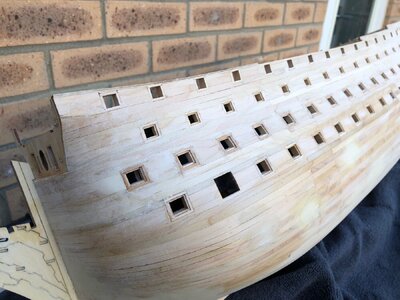
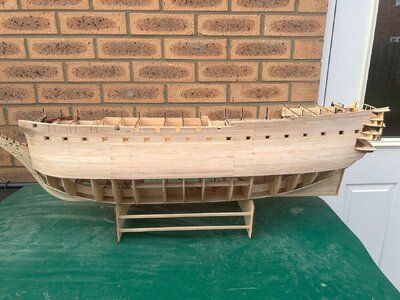
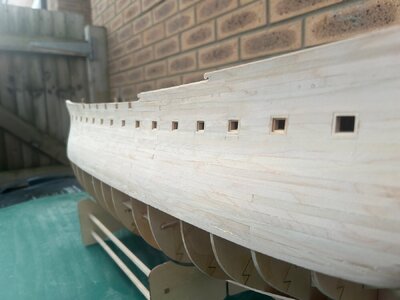
Back to the build. I have slowly completed the Portside planking and Gunport lining. The starboard side is currently part planked but I want to complete one side and use it as a template. I have had to tweak the gunport positions provided by the templates to ensure a nice smooth run.
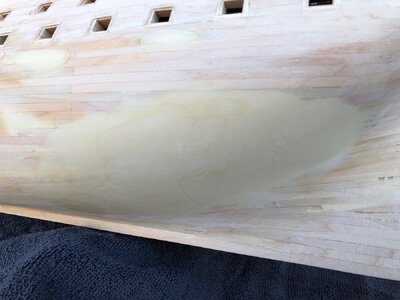
You will also notice the area at the stern with the large area of filling. I barely sanded the bulkheads whilst fairing, but for me this area was a little low for a smooth line resulting in a flat area. This has been corrected with two part wood filler.

Kind Regards

Nigel


IMG_0766.jpgIMG_0767.jpgIMG_0768.jpgIMG_0769.jpg
 
Thanks everyone

I apologise for my absence but it has been an eventful time for me. Physio is helping my shoulder which turns out to be a trapped nerve at the base of my neck but a couple of weeks ago I had another blow. My employer announced they were going into administration if they could not find a buyer. Well after a week of being laid off along with all the other staff, everyone was made redundant yesterday.
Thankfully, I am starting a new position with my previous employer on Monday but it has been a real rollercoaster.

Back to the build. I have slowly completed the Portside planking and Gunport lining. The starboard side is currently part planked but I want to complete one side and use it as a template. I have had to tweak the gunport positions provided by the templates to ensure a nice smooth run.
You will also notice the area at the stern with the large area of filling. I barely sanded the bulkheads whilst fairing, but for me this area was a little low for a smooth line resulting in a flat area. This has been corrected with two part wood filler.

Kind Regards

Nigel


View attachment 440284View attachment 440285View attachment 440286View attachment 440287
Dear Nigel
it's looks very nice work :) Thumbsup
good luck with your new job, and feel better
 
Nigel,
Best of luck with your new job.
And the ship looking beautiful, and with the hull being copperd it doesn't matter if there is wood ,wood patty or dried pasta with ton of CA glue , as long as it's looking great for you

Cheers
Guy
 
Back
Top