-

Win a Free Custom Engraved Brass Coin!!!
As a way to introduce our brass coins to the community, we will raffle off a free coin during the month of August. Follow link ABOVE for instructions for entering.
-

PRE-ORDER SHIPS IN SCALE TODAY!
The beloved Ships in Scale Magazine is back and charting a new course for 2026!
Discover new skills, new techniques, and new inspirations in every issue.
NOTE THAT OUR FIRST ISSUE WILL BE JAN/FEB 2026
You are using an out of date browser. It may not display this or other websites correctly.
You should upgrade or use an alternative browser.
You should upgrade or use an alternative browser.
Hi Nigel, Thoroughly enjoying your build so far. Your doing some excellent work and updates. How did you upgrade the gratings? The ones that came with "San Juan Nepomuceno" AL kit are too big. Would be nice to be able to have better fitting or more acceptable sized ones to fit to the model. Cheers.A small update as it best illustrates "working from a square corner out" when building hatches made up of multiple gratings.
I know I said "no exotic wood" but I did have some bits of Ebony in the scrap bin so sorry I am using that for the framework. It will save masking and painting the framework black, the gratings will be varnished wood. I will mill recesses for the cannon balls once the item is fully assembled
A nice comparison between the kit supplied part and my version. I figured the single expanses of Grating in the kit are too large and would be very weak in reality.
Finally a pic of the deck after the first coat of varnish, it had "cupped" in the middle slightly hence it being clamped to the piece of Pearwood while I apply the finish.
The spirit based Polyurethane has been thinned 20% with white spirit and applied by brush. I expect to have to apply a multitude of coats with sanding to get the finish I am after
View attachment 408018View attachment 408019View attachment 408020
DittoShota couldn't have said it better!
Thanks everyone for comments likes etc
Paul - Old employer, different role, it pays the bills until something more suitable comes up
Guy - I already had 5 packs of Amati photo etch plates in 1/72 in my stash for something else, I was planning on using these on this build. I am not planning on cutting them down, lot of work for minimal gain. They are 5 x 17 mm from memory which I feel is near enough
@ConsNZ - Easy, Caldercraft 1mm Gratings
Loving your work, Nigel.
Get better Nigel ---
As always your work is superlative. And adding lighting to this project great!!
Cheers,
As always your work is superlative. And adding lighting to this project
 great!!
Cheers,
Thank you Nigel. Checked out link(s) but they are a little too expensive (£2 per 30mm square) for us elderly folk way down here. Plus mortgage size shipping/mail.Thanks everyone for comments likes etc
Paul - Old employer, different role, it pays the bills until something more suitable comes up
Guy - I already had 5 packs of Amati photo etch plates in 1/72 in my stash for something else, I was planning on using these on this build. I am not planning on cutting them down, lot of work for minimal gain. They are 5 x 17 mm from memory which I feel is near enough
@ConsNZ - Easy, Caldercraft 1mm Gratings
Good luck with your build. Ships are on hold for me at the minute as I am sorting a spare bedroom outJust purchased this and will be following you log.
In section one, step 27 and 28 it indicates not to use glue on part #9. Did you follow that? I am reluctant not to glue it at some point to reinforce the frame structure which is a little flimsy.
Yes and no

I only glued the internal cross pieces to the inside of the gun mounting strips to start with. I did not glue the Gun strips to the bulkheads until the skeleton was fully assembled and the strips were in position for all the decks. I used a small fillet of glue to the outside face between gun strip and bulkhead when fixing them permanently in place
You need the ability to be able to flex things about until all the gunport strips are in place. I also found wetting the bow end of these lower strips and using the heat from a soldering iron shaft, I could add a little bend. This means the strips do not require a lot of force to follow the insides of the bulkheads.
I just finished the first section and have scrolled through your log. This gives me food for thought on the issues I may have to deal with later on. It looks very impressive at this point.
Thankyou RobertI just finished the first section and have scrolled through your log. This gives me food for thought on the issues I may have to deal with later on. It looks very impressive at this point.
Happy New Year to all
I will start this post with a bit of doom and gloom then move on to some positives....
I have had some sort of virus for the last nine weeks that started out as a constant cough and then moved on to several chest infections. This has meant I have only just enough energy to manage to go to work and up until Christmas had spent the rest of the time including weekends in bed.
I have had a chest x ray which came back ok as I didn't have an infection at the time it was done and I now know I don't have bowel cancer.
I have an appointment next Wednesday with the Docs as my blood results should be back.
My Wife started with the same symptoms the weekend before Xmas. Her Chest Xray showed her heart was enlarged and a subsequent ECG and blood results showed she has some degree of Heart failure and she has been referred to a Cardiologist. She has been off work since that weekend and at the moment we have no idea when or if she will return to work.
Fortunately as she got sick, I have improved a little and have been doing everything as she struggles to climb the stairs resulting her being extremely breathless.
I don't know where this is all going but we are both trying to remain positive.
I have two and a half weeks off work on holiday over Xmas and have had to change my plans as to what I was doing.I was supposed to be finishing a baseboard for my model railroad but had no where near enough the energy to do that.
I did not want to continue with Imara due to adhesives I would need to use with my bad chest so have spent my spare time between shopping and cooking on this build.
I continued on with planking the starboard side to a stage where I can start on the gunports. Whilst waiting for planks or glue to dry, I decided to make a start on the masting as a side job. This would be one less big part of the project done and saved for later fitting.
This is very much work in progress and I am using the kit parts with only slight tweaks and additions along the way.
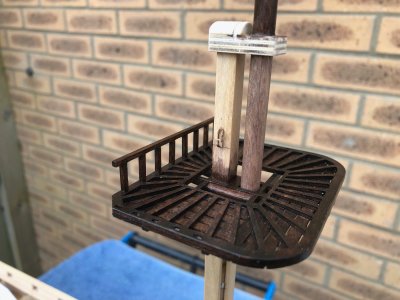
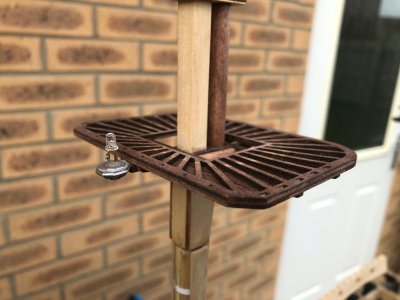
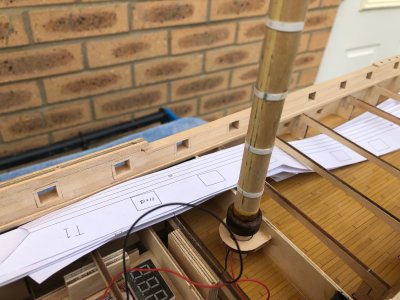
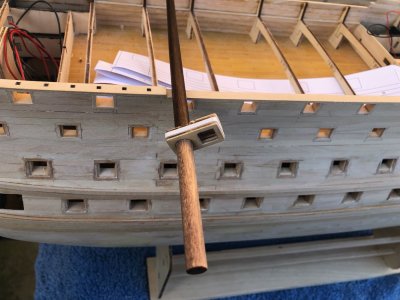
The first picture is just to show the Starboard side ready for gunport marking, cutting and lining. The rest illustrate progress on the bowsprit, foremast and mainmast with work starting on the mizzen today.
I will be returning to work next Wednesday no matter what otherwise we would have no money coming in so I would like to complete the bulk of these assemblies with only final detailing and painting to complete in the subsequent weekends.
Some of the finer points;
I have come up with a way to finish the kits ply and Birch parts to look quite good IMHO as opposed to painting "Chocolate brown" as per the instructions. This is visible on the bowsprit and foremast with the main WIP. It consists of two coats of Walnut spirit based dye, 4 coats of water based satin Walnut wood varnish and one coat of clear water based matt varnish. I cannot get matt Walnut tinted varnish hence the subsequent coat of matt varnish. There is still a slight sheen which I may completely remove with Humbrol spray clear matt once the mast is fully painted. The plan is to mask the varnished areas then paint the black and yellow areas. I am debating adding oil washes to the mast prior to spraying the final layer of varnish but I will see how the masts look when painted.
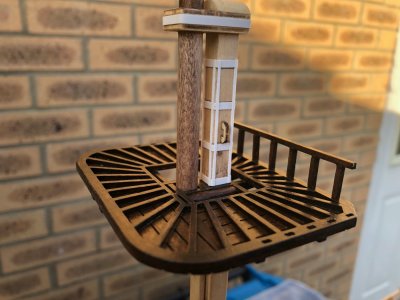
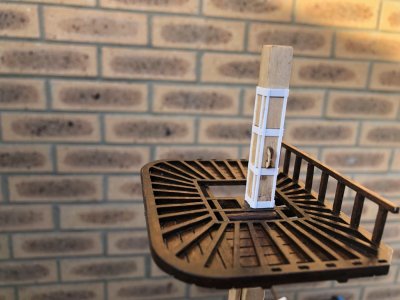
I have added iron mast bands using evergreen styrene strip and these will be painted yellow along with the lower masts. This detail is missing on the kit along with the reinforcement timbers on the front face of the masts.These have been made from scrap lime in my stash.After paint and varnishing there will be rope wolds added around these battens.
The kit is devoid of a lantern on the mainmast top which I wanted to add, my reasoning is a ship of this size may indeed have one but have no historical evidence either way. As I have working lighting, I felt it would add something to the finished model so I raided my stash and found an etched brass and cast metal lantern by Caldercraft for there Victory kit ( these are available to buy separately and come in a set of three ).
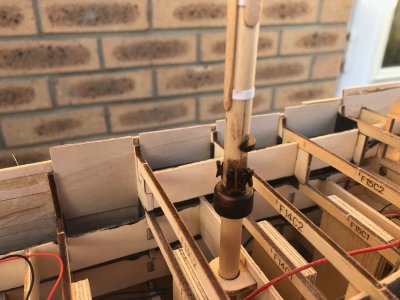
Installation involved cutting a channel with my Dremel up the lower section of the mainmast for the wiring and filling over to conceal the wires. The wiring can be connected when the deck is on as there is a removable section of grating over my voltage regulator ( this is where Artesania have you put the battery)
A flickering candle LED has been fitted, the base of which has been epoxied into the much hollowed out Caldercraft casting. I used tweezers on the Led legs as a heat sink to protect the LED's microchip as I was soldering only a few millimetres from the LED body (lesson learnt from fitting the previous LEDS). I have tested it and thankfully it works
I did not like the rails on the tops as per the kit design. They consisted of 1mm brass rod uprights with a flat piece of Birch glued to the sides of these rods. I am replacing these with railings made entirely from 2mm square birch (unused material from Soleil royal)
I have added the radius block on top as the lower mast cap. foremast is done, others to follow. This is missing on the kit and there is a groove in it to take a rope whereas the kit has the rope sat on the flat top riding on the square edges. The kit is also missing the radiused cheeks that sit inside the tops to prevent the Shrouds from chaffing, these have been added., both these small details are made from material in my scrap box.
That is about where I am at now and hope to continue work on a regular basis until such time as I feel able to tackle that model railroad baseboard.
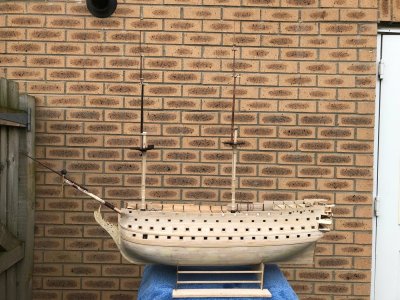
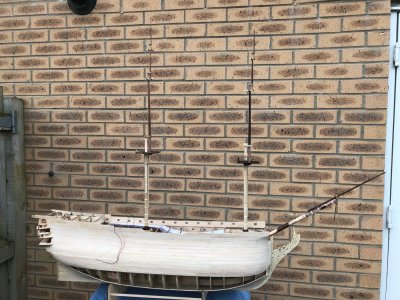
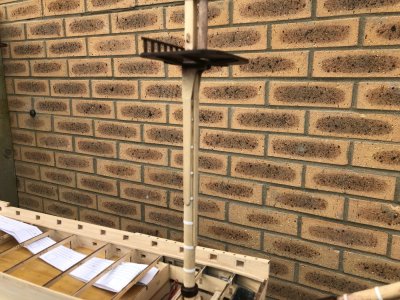


Last edited:
I'm so sorry to hear about your (and your wife's) challenges. When we are not healthy everything else gets harder to do or gets set aside in favor of caring for ourselves and those we love. I pray that you and she will recover soon!
I hope both of you are getting well soon.
Hello Nigel, sorry to hear that you and your wife have been struck by illness. I hope you both recover soon.
Sincerely Thank You Paul,Jim and Herman. Only time will tell, worst part is not knowing what we are dealing with.
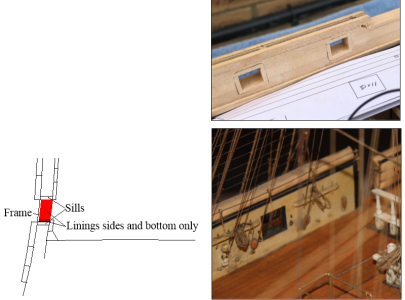
Very observant of you Allan and you are quite correct. However this is a deliberate deviation from full size practice. If you look at earlier pictures in my log you will see all ports are double lined. This is intentional on my part and is designed to bring the "messy " bits outside of the hull lines to enable me to achieve near perfect consistency in size and shape of the many ports on this vessel.Both inner and outer faces will be fully painted on this build so no-one will know apart from those following this log
Very observant of you Allan and you are quite correct. However this is a deliberate deviation from full size practice. If you look at earlier pictures in my log you will see all ports are double lined. This is intentional on my part and is designed to bring the "messy " bits outside of the hull lines to enable me to achieve near perfect consistency in size and shape of the many ports on this vessel.Both inner and outer faces will be fully painted on this build so no-one will know apart from those following this log
Hi all
Just an update before I return to work tonight after 3.5 weeks off
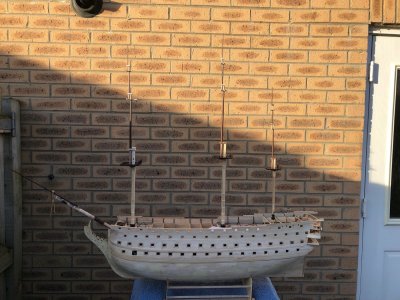
Everything provided in the kit is fitted, I am now focusing on fitting the remaining additional detail then it is on to applying the colours after first masking the natural wood areas. The job was made a little harder as some of the details to the base of the mizzen had been left until later in the instructions. I will do a final check that nothing is missed by looking at the last files of the instructions which must run to a thousand pages!
I will also drill all eyebolt holes before paint but not fit them, it is much easier to rig the blocks to the eyebolts then fit complete to the masts.
On the subject of drilling holes, I have asked in the rigging section if Euproe blocks and crows feet would be fitted to the tops of this vessel, they aren't in the instructions but then again a few details have been missed off elsewhere in the kit design.
If anyone has any thoughts, please chime in.
The current status is a bit random regarding detail as I have been working around drying varnish, currently the Foremast is the most complete with only the detail above the top to finish. Two coats of matt poly on this got the shine of the wood areas down to an acceptable level. I shall follow suit on the remaining parts.
Note all three masts can be split for adding the shrouds as in the last pictures.


Last edited:


