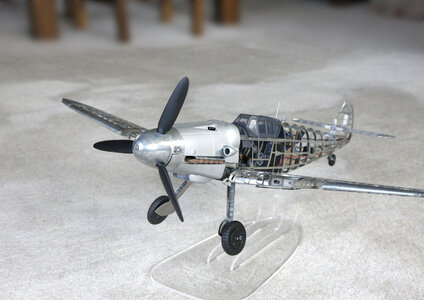
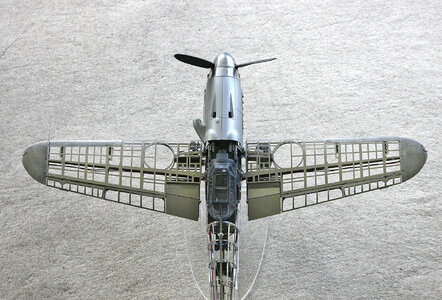
Artesania Messerschmitt BE 109G [COMPLETED BUILD]

As the war progressed, the German fighters had different missions than the Allied fighters. Their main task became more and more the fight against the Allied heavy bombers. Therefore, more and more heavy armament became necessary. The 20mm guns in pods under the wings for example, pianoforte mentioned. However, these pods reduced the performance markedly and the Me109s equipped in this way were no match for the Mustangs. The latter, in turn, had mostly only fighters as opponents, for which the lighter .050 MGs were quite sufficient. Together with the newly developed sights, which could calculate the lead angle, the concentration of firepower was also not such an issue.
But I am going off topic, sorry ;)
 
Hello Everyone. Thank you to those who’ve taken an interest in my log, Gebirgsmarine your input was very welcome, I’d not considered some of the points that you made, they certainly made sense.

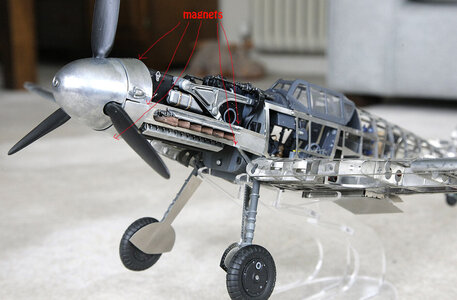
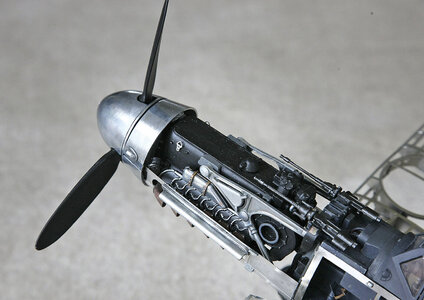
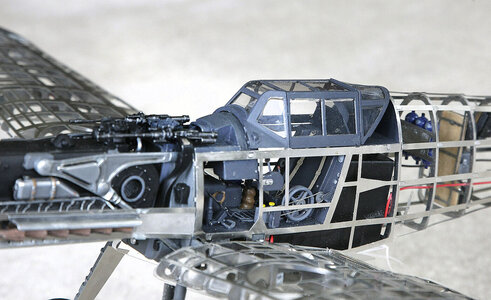
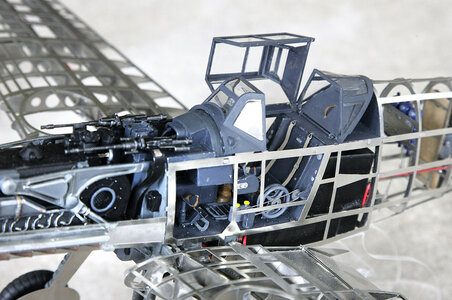
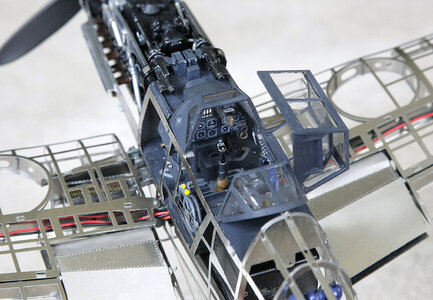
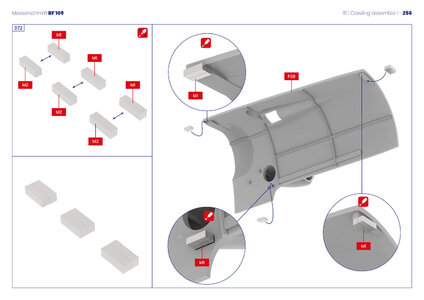
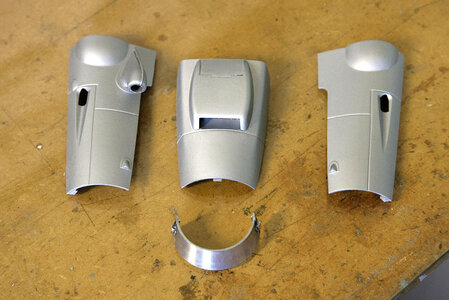
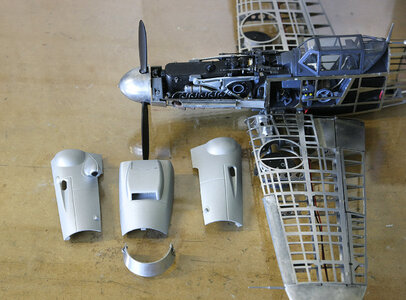
Today’s post is the make up and fitting of the canopy, no issues with that, and the top front part of the metal cowling. I also made up and fitted the manifold shield. I’m preparing to paint the removable engine panels, using Tamiya aluminium. The cowl and panels are secured in place by small magnets, and I mean small! They are 1mm x 1mm x3mm, they are too small for me to hold, my fingers overwhelm them and because of the magnetic nature you can’t use your tweezers, I tried plastic medical tweezers but they were too fat. The magnets were fitted to both the cowl and their adjacent place on the chassis, there were about thirty to fit. I really had issues with them, if you dropped one whilst fitting it would disappear into the bowls of the model, attach itself to some metal part never to be seen again. When I’d fitted them all and attempted to trial fit the panels I found that they had needed the polarity to be correctly aligned, half mine were wrong and instead of holding the panels they repelled some of them. The polarity wasn’t at the ends but radiated from the sides so it was a problem determining when gluing them in place. I think that it would have been much better if they had used some sort of locating pin, although for their size they were quit strong they didn’t feel as if they held the panels tightly to each other.

128.jpg

129.jpg

130.jpg

131.jpg

133.jpg

127.jpg

256.jpg
 
Hello Everyone. Thank you to those who’ve taken an interest in my log, Gebirgsmarine your input was very welcome, I’d not considered some of the points that you made, they certainly made sense.

Today’s post is the make up and fitting of the canopy, no issues with that, and the top front part of the metal cowling. I also made up and fitted the manifold shield. I’m preparing to paint the removable engine panels, using Tamiya aluminium. The cowl and panels are secured in place by small magnets, and I mean small! They are 1mm x 1mm x3mm, they are too small for me to hold, my fingers overwhelm them and because of the magnetic nature you can’t use your tweezers, I tried plastic medical tweezers but they were too fat. The magnets were fitted to both the cowl and their adjacent place on the chassis, there were about thirty to fit. I really had issues with them, if you dropped one whilst fitting it would disappear into the bowls of the model, attach itself to some metal part never to be seen again. When I’d fitted them all and attempted to trial fit the panels I found that they had needed the polarity to be correctly aligned, half mine were wrong and instead of holding the panels they repelled some of them. The polarity wasn’t at the ends but radiated from the sides so it was a problem determining when gluing them in place. I think that it would have been much better if they had used some sort of locating pin, although for their size they were quit strong they didn’t feel as if they held the panels tightly to each other.

View attachment 233240

View attachment 233241

View attachment 233242

View attachment 233243

View attachment 233244

View attachment 233245

View attachment 233246
Looking good Ken! Growing up I built WW2 plastic model airplanes. I had too many to list, but loved them all. Then later as an adult I built fighter jets in 1/48 scale. Once again I had around 30 airplanes, which I eventually sold. This is making me want to get into building airplanes again. ;) For something different, I may just build one of the wooden airplanes I mentioned before.
 
Looking good Ken! Growing up I built WW2 plastic model airplanes. I had too many to list, but loved them all. Then later as an adult I built fighter jets in 1/48 scale. Once again I had around 30 airplanes, which I eventually sold. This is making me want to get into building airplanes again. ;) For something different, I may just build one of the wooden airplanes I mentioned before.
Hi Dean, Thanks for sharing a brief insight into your past modelling history, it’s interesting to know how others evolve in their modelling. I agree with you on your choice of model planes, it’s probably better value and building experience than mine, but as I’ve mentioned, I was offered the chance of building this without it costing me anything, I wasn’t going to turn the chance down. It’s been a very different building experience and a very enjoyable one, both my friend and I feel we’re getting the best out of the deal. He’s had on order for a while a Pocher Ducati, seeing how I have made the 109 he’s asked if I would like to make the Ducati for him, not a very difficult decision for me.
 
Hi Dean, Thanks for sharing a brief insight into your past modelling history, it’s interesting to know how others evolve in their modelling. I agree with you on your choice of model planes, it’s probably better value and building experience than mine, but as I’ve mentioned, I was offered the chance of building this without it costing me anything, I wasn’t going to turn the chance down. It’s been a very different building experience and a very enjoyable one, both my friend and I feel we’re getting the best out of the deal. He’s had on order for a while a Pocher Ducati, seeing how I have made the 109 he’s asked if I would like to make the Ducati for him, not a very difficult decision for me.
I certainly understand, I would build it too, if I were in your shoes. ;)
I built so many planes, cars and motorcycles in my past, that I am now concentrating on ships. But other models still have my interest. I think it’s great to keep your options open, model wise!
 
If these models ever become your life's passion there are non-magnetic tweezers... :)
Hi Paul, Thanks but fiddling with minute magnets is never going to grab me. If ever needed I’ll do what I ended doing, and that was gluing the magnets using contact glue to toothpicks, then a dab of cyno on the magnets, a touch of accelerator on the other surface and then put them into place, worked a treat.
 
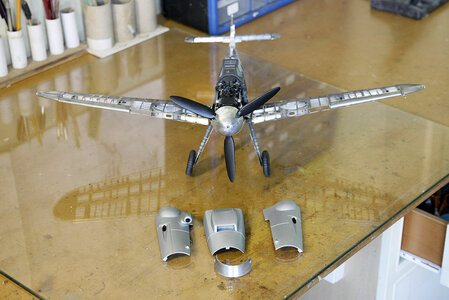
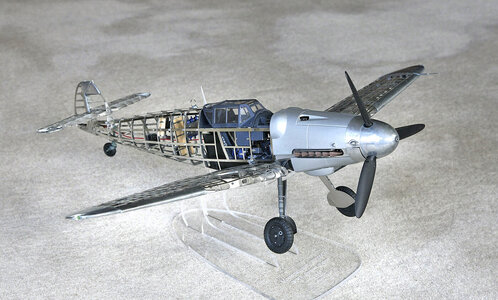
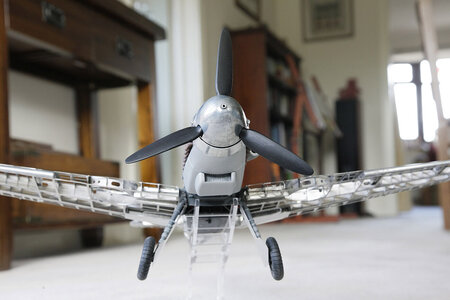
Hello everyone. Thanks again for your likes and comments. It’s officially finished so this will be my final post. I’m delighted with the result, better than I’d expected.

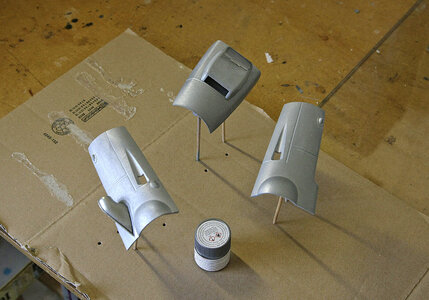
I finished preparing the engine panels ready for painting then had another go at the magnets to get as close a fit as I could. The fit was influenced by the flow of the magnetic field, when in place they moved slightly to align with the natural flow of the field, only a very small amount but enough not to be a tight butt against each other. What I did was remove the magnets from one panel and placed them against the magnets on the other panel and let them find their natural position. I fitted this panel into place, I put a dab of cyno on the opposite panel then fitted that one pressing it onto its magnet holding it tightly into place until the glue set. Now when the panels are put on they settle into the natural pull of the magnets which is tight against each other, I hope you understand that explanation.

The next job was painting. I use an airbrush and for the paint I chose Tamiya acrylic aluminium and for the primer I used Vallejo, again acrylic. I got a good surface but the colour looked wrong, it was light and too bright. I rummaged through my old stash and found a tin of silver Humbrol enamel which must be about 25 years old but after a good stir it looked ok. I’d never sprayed with enamel before, I only ever use it with a brush but thought that I had nothing to loose so I gave it a try. I thinned it with an enamel thinner about 50/50 and gave it two light coats leaving about four hours in between. I was surprised at the result, I ended up with probably the most perfect finish that I’ve ever had, it’s the right shade, not shiny but not matt either, don’t you feel good when you get something exactly right that you hadn’t quite expected.

This has been a very different type of build for me and an enjoyable one. It is a very good kit and Artesania must be congratulated on taking on what must have been a risky and expensive project to give the modeling fraternity something like this.

Anyway this will be my last post, I’m going to now take a short break.

134.jpg

135.jpg

136.jpg

137.jpg

138.jpg

139.jpg

140.jpg
 
Last edited:
Hi Ken,.
It was a pleasure to follow this build. I had not sean such a building technic. Your friend would be delighted. Building a Ducati will give you also much pleasure.
And old paint never ever d(r)ies ;).
Regards, Peter
 
Last edited:
Thanks for sharing. I looked forward to your almost daily articulate posts, now I will miss them. :confused: Good job.
 
  • Like
Reactions: Ken
Congratulations on this awesome model it's been a very informative build. If it wasn't for the fact I've been making aircraft parts for the last 20 years I would seriously consider buying one. Here's hoping AL will follow up with a Spitfire.
 
  • Like
Reactions: Ken
Hello everyone. Thanks again for your likes and comments. It’s officially finished so this will be my final post. I’m delighted with the result, better than I’d expected.

I finished preparing the engine panels ready for painting then had another go at the magnets to get as close a fit as I could. The fit was influenced by the flow of the magnetic field, when in place they moved slightly to align with the natural flow of the field, only a very small amount but enough not to be a tight butt against each other. What I did was remove the magnets from one panel and placed them against the magnets on the other panel and let them find their natural position. I fitted this panel into place, I put a dab of cyno on the opposite panel then fitted that one pressing it onto its magnet holding it tightly into place until the glue set. Now when the panels are put on they settle into the natural pull of the magnets which is tight against each other, I hope you understand that explanation.

The next job was painting. I use an airbrush and for the paint I chose Tamiya acrylic aluminium and for the primer I used Vallejo, again acrylic. I got a good surface but the colour looked wrong, it was light and too bright. I rummaged through my old stash and found a tin of silver Humbrol enamel which must be about 25 years old but after a good stir it looked ok. I’d never sprayed with enamel before, I only ever use it with a brush but thought that I had nothing to loose so I gave it a try. I thinned it with an enamel thinner about 50/50 and gave it two light coats leaving about four hours in between. I was surprised at the result, I ended up with probably the most perfect finish that I’ve ever had, it’s the right shade, not shiny but not matt either, don’t you feel good when you get something exactly right that you hadn’t quite expected.

This has been a very different type of build for me and an enjoyable one. It is a very good kit and Artesania must be congratulated on taking on what must have been a risky and expensive project to give the modeling fraternity something like this.

Anyway this will be my last post, I’m going to now take a short break.

View attachment 233586

View attachment 233587

View attachment 233588

View attachment 233589

View attachment 233590

View attachment 233591

View attachment 233592
Great job Ken!
 
Congratulations for this very interesting model and also your detailed log - Many Thanks for sharing with us
 
Hello. I am about halfway through a build log of a Euromodel kit, HMS Ajax and I’ve decided to take a break from it for a few weeks and do something completely different. I’ve chosen to build the Artesania Messerschmitt BE 109 G, and have been asked to do a build log on it, I was initially reluctant to do so, firstly as this was supposed to be down time and secondly because I have never done anything like this before and at present haven’t a clue about this type of build or fine scaling. You must accept that this build won’t be a very detailed step by step account but rather a sort of progress report on how a complete novice to this type of build manages just following the step by step instructions, all 295 pages of them.

On opening the box I was pleasantly surprised at the superb quality and detail of the photo etch, I have never seen the likes of before. It is made from some sort of steel which I soon learned was like building with razor blades, I need to be very careful and buy some more plasters. The metal cast parts are very good quality with hardly any flash but with good detail. The instructions and part list comes on disc, I’ve printed them out for convenience all 295 pages. I have never seen instructions this detailed before, good for a novice like me, they assume you know nothing and lead you through each part step at a time, even showing you the order of bending the holding tabs when there is a line of them. The whole package instils confidence that you will end up with a successful build.

I had already started before I decided to do this log so the pictures show the early stages of the build. The open frame is held together by tabs on one surface which pass through slots in the part to be joined then bent flat, the accuracy of fit is very impressive. I did have one slight issue and that was some of the slots were a tight fit and as with all photo etch if you use too much force the whole thing buckles and is difficult to get perfectly back into shape again, I did it once on a frame and learned my lesson. To avoid this I slightly opened every slot. The width of a scalpel blade was just right, I filed one to size, covered the handle with heat shrink for grip, to support the thin PE. I cut a slot in a piece of wood laid the PE over the slot and just pushed my scalpel through, it worked a treat and the tabs now pass through easily but are still snug. See photo. The other photos show what’s in the kit and where I’m up to at the moment.

View attachment 225287

View attachment 225288

View attachment 225289

View attachment 225290

View attachment 225292

View attachment 225293

View attachment 225294

View attachment 225295

View attachment 225296

View attachment 225297


View attachment 225291
Hallo @Ken
we wish you all the BEST and a HAPPY BIRTHDAY
Birthday-Cake
 
Back
Top