Avro Anson Mk.1 - Plastic by Airfix in 1/48 Scale - Build by Smithy

My goodness Graham, you're right! Thanks for the timely warning.

Here's a thought - how about making it more 'interesting' instead of more perfect. A.bit of repaired battle damage perhaps, or the mud and dust that arises from operations from grass airfields?
Ooh, ooh - a line of bullet holes from a failed strafing run!
 
Ooh, ooh - a line of bullet holes from a failed strafing run!

And cotton wool smoke! Those were the days.

Since the Anson depicted saw service over Dunkirk it almost certainly collected a few holes from ground fire - the British Army (understandably) didn't discriminate and shot at anything overhead. Only last week I read a memoir of a Blenheim pilot who was shot down onto the beach there by friendly fire.
 
how about making it more 'interesting'

Yes indeed. Find that compromise between sterile and perfect. Interesting can as simple as a bit of wear and tear or like the very nice pilots manual and maps on the navigators table. A bit of crumbled up paper on the floor or tucked in somewhere.

cheers Graham
 
Hello chaps. I've been away for a while but I have not been idle. The Anson book has required some serious study and I propose to show you some edited highlights, a mere 1% of the photographs in this marvellous volume. There was a lot of text too about the aircraft's development and operational career but since SOS is mostly ON the water rather than above it, I'll let that pass. I'll concentrate on the photos that are of most use to me in this project.

P4030051.JPG

The hundreds of photographs I'm not showing you make it clear that Ansons were generally clean machines. They were 'light aircraft' with oil tight engines which didn't fly high enough for much UV damage to the paintwork. Think of those flying club Cessnas that buzz around only on sunny summer days and you'll get the picture. So heavy weathering would be inappropriate. This shot is the only one that shows noticeable modulation of the camouflage scheme.

From left to right we see a distinct difference in the shade of the paint across a panel line on the wing. I take it that the panel had been replaced with an item robbed from a hangar queen, possibly a battle damage story or maybe someone dropped the heavy brass refueller nozzle on it and put a hole in the wing?

I note the 'stick' on the nose. This is the ring and bead gunsight for the pilot's machine gun. So primitive it's laughable - but those three Me109 pilots weren't laughing, were they?

There's a wind deflector at the aft end of the windows to prevent draughts upsetting the gunner who fired from the open window right aft. I note that this is one of the rare occasions when a dry-brushing of aluminium paint is called for. It's something that's very over-used on model aircraft and makes them look more like well worn bulldozers than delicate aluminium aircraft.

At the top of the picture there's the aerial wire running from the mast to the tail. Except you can't really see it from a distance. I'm torn between adding it for interest or leaving it off for scale representation. My model is bigger than the photo and you can see the insulator so I'm going to include it.

There are three definite dark marks around the fabric covered rear fuselage. They seem to follow the line of the frames and there's another dark line that sweeps down from the top of the rear window, below the turret to the roundel. That curved line runs from the metal or wood cabin roof area onto the fabric part. I think I know what all these marks are because I've seen similar many times when working the early shift on a variety of flight lines in the RAF. I think it's dew/frost which even on metal aircraft appears on the surface where there's frames and stringers below to chill the surface by conduction, allowing moisture to condense. So, do I incorporate this transient effect when I paint the model? It's a bit of a talking point so, yes.

P4030052.JPG

I was delighted to see this picture. It's 20mm cannon, a local modification added by a single pilot to cause heartache to the E-Boat crews of the Kriegsmarine in 1940 but that's not the interesting part.

My Anson has 'silver' undersurfaces which I has assumed would be the dull, monotone silver dope which was so popular in the thirties RAF. But just hold on a moment! That red arrow points to a fabric section which is silver doped but the blue arrow and the green surely show a far more interesting natural metal finish which authorised me to paint each panel in a slightly different colour and shine. Excellent!

The green arrow also shows how some of the panels, in this case one of the bomb bay doors, 'fit where they touch'. It seems I needn't worry about that slight misalignment in my cabin roof when there are gaps in the airframe that you could hide a pork pie in.

P4030053.JPG

This is an Australian Anson, much later in the war. It is showing some signs of wear, no doubt due to the Ozzie weather. I'm not planning to make the engine area of mine look so battered because this is such an exception to the usual 1940 standard. Pity.

I would like to draw your attention to the side windows though. Not glass nor even perspex, that looks to me like the celluloid rear windows that you see in the canvas roofs of classic sports cars. If Airfix had moulded the kit windows that way, everyone would have hated them. They did mould the 'oil-canning' distortion of the metal wing surfaces and many on-line reviewers have slated the kit for having "unrealistic fabric effects" - that's because it ain't fabric you dummies!

Also of interest is the way the wheels protrude under the wing. The Anson was the first RAF aircraft with retractable undercarriage and it was not uncommon for absent minded wheels-up landings to be made. Apart from bending the props, this wasn't a problem because there was enough wheel sticking out to take the weight of the aircraft. In fact, the Avro demonstrator pilot, showing off a prototype to the RAF in 1935 made exactly this error. I wonder whether he claimed to have done it on purpose to show of the 'safety feature'?
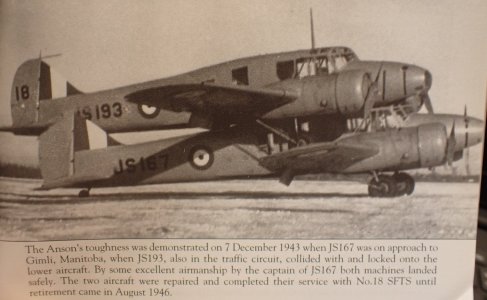
P4030055.JPG

The Anson was a tough bird, capable of landing when 100% overloaded. And some of its pilots were outstanding.

And now, my model...
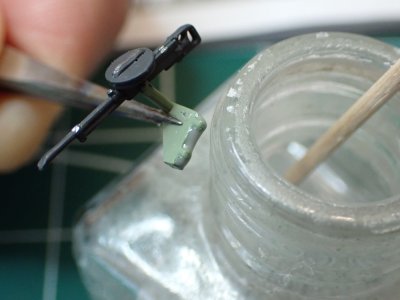
P4030056.JPG

Those missing MGs were easily attached though the windows using Goop - styrene dissolved in cement. It's very sticky and useful for its instant grab feature. Just drop some chips of sprue into a half empty bottle of thin cement and stir.
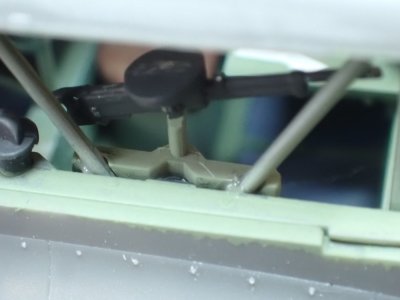
P4030057.JPG

You can see the 'squeeze-out', darn it! I have a tendency to use too much glue on every occasion - a fault I'm trying to avoid.
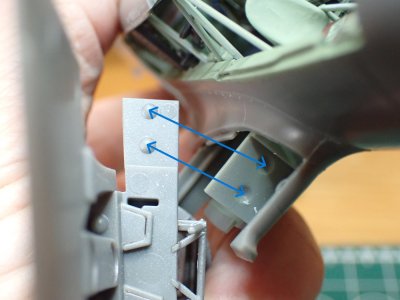
P4030058.JPG

I glued the wings on this morning. Those round bumps/dents were very good at forcing the complex join to line up. It snapped into place and was held with a few pegs while I applied cement by capillary action.

P4030059.JPG

See that glue squeezing out? I did that on purpose (honest!) so that you could see where the join goes around the various panel lines and lines up so well. ;)

P4030060.JPG

'Faithful Annie' will now rest overnight while that important join sets hard.
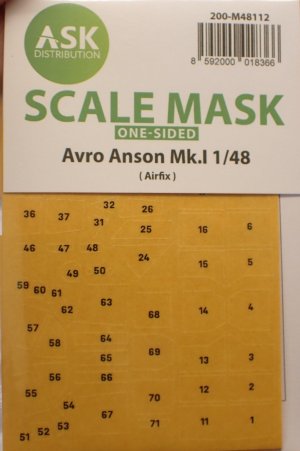
P4030061.JPG

I have one more thing to show you. This is a pre-cut mask set for the windows. Yes, I know I could make my own masks but there are over a hundred of them in this set so I think I can forgive myself for the extravagance of aftermarket luxuries in this case.
 
Smithy,
Brilliant. Love it all. In addition to those weathering details you noted, I would also point out in the second photo the aluminum (aluminium?) tape used to seal the wing root failing, which could be easily replicated with a bit of clever masking.

Would also like to thank you for sharing the fourth photo, which shows how little Ansons were made (cover your eyes, Children!)
 
As you could tell from all the foul language last night, things have gone awry.

P4030062.JPG

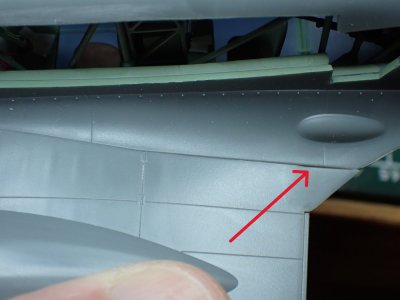
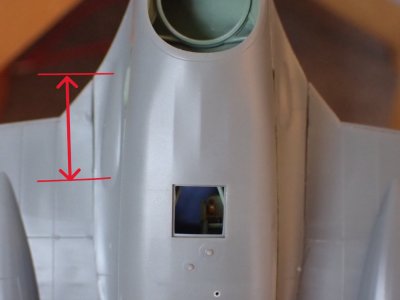
When I dry-fitted the wing upper surfaces, both sides had a slight misalignment with the lower wing surface at the wingtip. The inboard foward part of the wing was fine. It was as though the top surface was rotated forward fractionally around the front part of the wing root. I looked for the cause and found this this unusual gap at the rear 10mm of the wing root.

The wing root join is always one of the tricky bits for plastic model designers and gaps there are immediately noticed by the cognoscenti so it's important to me to get this right - especially as everything else has been spot on so far. I thought that the gap at the back was rotating the wingtip forward. With hindsight, since the wingroot join was PERFECT all the way along, apart from that last tiny portion, this was a mistaken assumption.

Why, oh why did I decide to do this last thing at night after a busy and tiring day, when I was only half awake?

P4030063.JPG

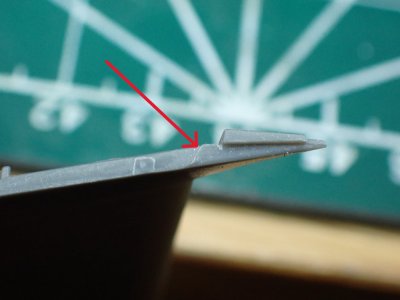
It seemed to me at the time that the problem was related to this point where the mould parting line crosses over from one side to the other of the piece. I'd cleaned it up but there was still a witness mark so I scraped more plastic away and dry-fitted once again. It seemed to be a little better and I decided to whack the thing together and hope the glue would melt everything into place. That's the judgement call of a tired old bloke!

P4040066.JPG

Pegs and cement and swearing and BFI (Brute Force and Ignorance) notwithstanding, I still had the misalignment at the tip. In plastic aircraft terms 0.5mm is way out of line. I'll be able to fix it, and in truth no-one but me (and now you) would ever have noticed it anyway but it's annoying me like a jagged fingernail.

I still don't know what went wrong. It's the same both sides which suggests that either Airfix or I made the same mistake twice over. I now think the original little gap was either was a sinkage or a short shot at the point where the parting line crossover obstructed the flow of plastic in the mould. This used to be a big problem for Airfix but I thought they'd fixed it by switching to harder plastic and higher temps and pressures in the injection process. Even Homer nods and I should have simply filled the 10mm gap with putty and not made it three times bigger by hacking away at it trying to solve a completely unrelated problem.

P4040067.JPG

The gap is now 30mm long and the wingtip misalignment is still there for me to fix later today. Pshaw!

Am I downhearted? No, of course not. Solving tiny problems is what makes modelling interesting to me. I'm a bit narked that I never found the cause of this particular one, even though I can fix both the original symptom and the mess I made, but there's no real harm done. I'd like to think that I learned not to work on impulse when it's late and I'm tired but I know that's a lesson I'll never learn. Ha!

P4040068.JPG

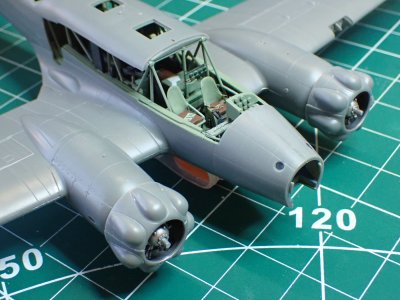
The main thing is that it's beginning to look a lot like an Anson. :)

P4040064.JPG

In the low morning sunshine (YES! The sun is shining in England today!) I managed to photograph the oh-so-delicate moulding of the 'oil-canning' effect of the thin metal surface of the wing. If the misaligning problem was the fault of Airfix, I forgive them in the light of this detail that I've never seen done better. If the fault was mine, I'll forgive myself and enjoy the minor fixings required.

I'm still a happy bunny.

Nought point five millimeters? On Le Coquin I'll cheerfully accept a gap of a quarter of an inch!
 
Last edited:
P4050006.JPG

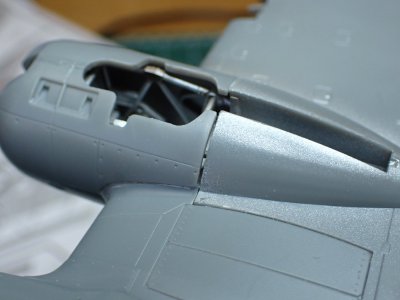
She look a LOT more like Annie today. I've built up the remainder of the engine fairings behind the actual engine cowlings. Like the cowlings, the fairings are built up of three pieces split at 120 degrees and like the cowlings, the fit is a little tricky. This is always a tricky area on any aircraft model and this time I'm fairly sure the problem is down to Airfix rather than me. So despite my earlier praise for the kit, it does still need a bit of filler here and there. No problem.

P4050004.JPG

That's the worst part; a gap through which you could insert a (scale) pork pie, a family sized one at that! I'll fill that parallel sided gap with a shim of plastic and use putty where required. The slight misalignments in that area, as we have seen on the photos above, are representative of the fit of the real aircraft so I'm going to leave them as they are. The sanding and puttying phase (the boring bit) begins tonight.

I've been slowing down on the construction lately due to other commitments in the SCReW (So Called Real World). Sorry about that, chaps. Normal service should be resumed as soon as poss because I'm keen to begin the painting phase. It's been so long since I airbrushed something like this that I can barely remember what to do.

P4050001.JPG

Another incentive is this morning's find of my next aircraft project in the local second hand market. Can you tell what it is yet?

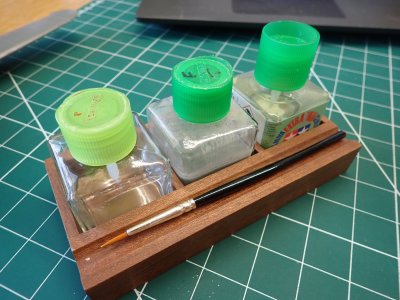
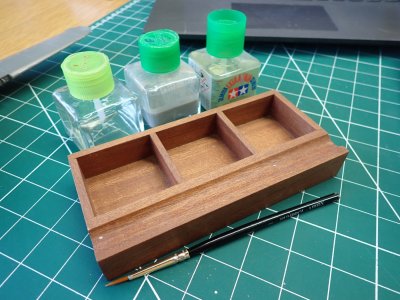
Finally, for today, may I show off my cement cruet?

P4050002.JPGP4050003.JPG

My son made this for me years ago. It holds Tamiya Extra Thin Cement (regular and quick drying) and a pot of dissolved sprue-goo. Perhaps you think it's a pointless affectation but in that case you've never suffered the disaster of tipping a bottle of this stuff over and having to evacuate the house while the fumes clear. ROTF
 
Last edited:
Hello Smithy,

Would your next project be a Fairey Firefly? Your work is looking great.

Bill

Firefly? I see why you think that. That big chin radiator looks just like the early(?) Firefly before they moved the cooling system into the wing leading edges. Good guess but not a winner.

Clue:

Like the Fairey Firefly, this aircraft was once intended to be used at sea but the relevant carrier project was never completed.
 
Ok, you’ve got me going now. Could it be the Hawker Fury 1. It was the predecessor to the Tempest.
View attachment 511663

I guess you are thinking that the carrier connection might be the Sea Fury? However the Sea Fury did become operational at sea, even shooting down a MiG in the Korean War.

Clue:

You are a little out in your timeline. The Fury first flew almost exactly nine years after the first flight of our mystery bird.
 
Last edited:
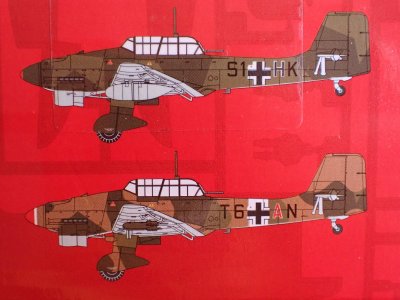
Why, it's clearly the Junkers Ju87R-2/B-2 Stuka. Anyone can see that! ROTF

Hey, I gained my 3rd chevron with this message! :D

But which one? Is it the Ju87R-2 or the Ju87B-2?

I can tell that you identified the new Airfix kit which makes either variant so you win the prize. My photo is of the box art which depicts an R-2 over Greece in 1941 (with a Hurricane in hot pursuit). I haven't made up my mind yet but I'm drawn to the desert camouflaged B-2, a three colour scheme.

P4050007.JPG

This is a major change of direction for me. I haven't built a model of a machine from any totalitarian regime for perhaps twenty years. I noted how over-represented they always are in availability and the numbers on show on line and at model shows. It pleased me to avoid the glorification of the bad guys. So why did I buy this kit? It was on sale at the market stall in my town for nearly two months and I would see it each Saturday and be tempted. Today the trader saw me looking and we chatted about it for a while. I count him a friend and I kinda wanted to help him out a bit but that wasn't the real reason. The full price of the kit is around £44 and he offered it for £25. Yes my friends, I sold my principles for £19. For very shame!

It is a very nice kit though. It even has an engine! I shan't lose any sleep over it. ROTF
 
Back
Top