• LUCZORAMA SHIPWRECK SCAVENGER HUNT GIVEAWAY. 4 Weeks of Fun • 1 Legendary Prize ((OcCre’s Fram Ship)) • Global Crew Welcome!
    **VIEW THREAD HERE**

Avro Anson Mk.1 - Plastic by Airfix in 1/48 Scale - Build by Smithy

P5060008.JPG

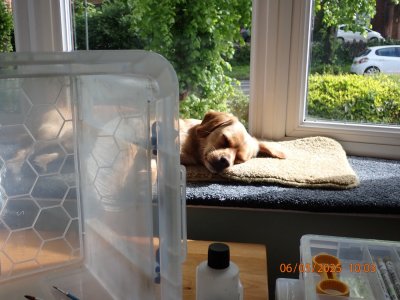
Flushed with excitement after this morning's viewing, I determined to get on with the painting ASAP (as soon as permitted). It won't take long, the morning sun soon moves out of that window.
P5050001.JPG

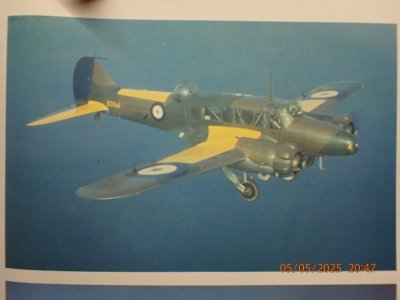
While waiting I refreshed my fading memory with a look at a book called RAF Aircraft of WWII in Colour. I found an Anson and an explanation, probably apocryphal, for the choice of yellow to designate trainer aircraft. It ain't the brightness, red is as bright and modern RAF trainers are black for max visibility. No, apparently it was based on the international flag signals. Yellow = Quarantine = Keep away! RAF aircrew trainees were as welcome to operational pilots as the plague!

Isn't that Anson shiny? Typical training command.
P5050002.JPG

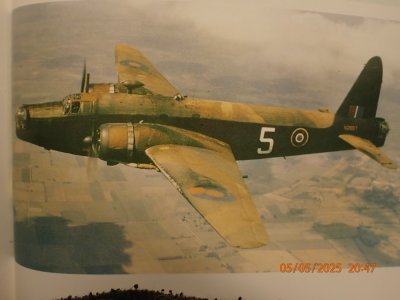
But I digress. This Wellington is a good example of tired paint in the period. It's blotchy, streaked and there are several different colours of green and of brown. I've never been able to reproduce this in 50 years of modelling aircraft. Maybe this time I'll get a bit closer.
P5050003.JPG

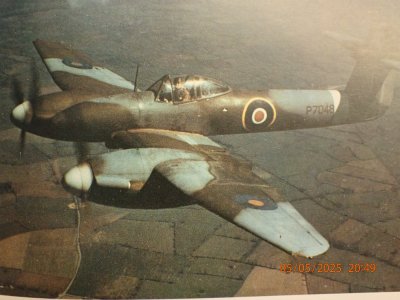
I wanted to draw your attention to that demarcation line on the port wing. No masks were used there; that is freehand with a spraygun and then fill in the area behind almost up to the line.

Although many models are masked to give the hard edge specified in Air Ministry Instructions, the real things were not neccessarily as sharp. Even when the aircraft were painted in the factory, the masks were thick rubber mats. If the painters were daft enough to spray right up to the point where rubber met metal, paint would flow underneath and make a mess. No, they sprayed obliquely, leaving a feathered edge of varying width.
P5050004.JPG

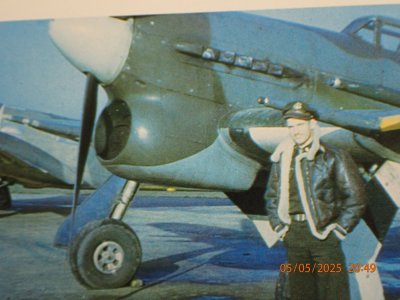
Except when they didn't.

See the line on this Typhoon's chin radiator. The line between upper and lower surface colours seems to have been masked with tape in this case. I think because part of it is overhanging and a rubber mat type mask would be difficult to hold in place.

Essentially, the paintwork was variable in application, colour, durability, sheen, cleanliness and everything else you can think of. The only 'weathering technique' missing from these photographs seems to be those ridiculous black panel lines that are so fashionable in the model aircraft world these days - where modellers refer to each other's models instead of historical photographs. Idiotic!
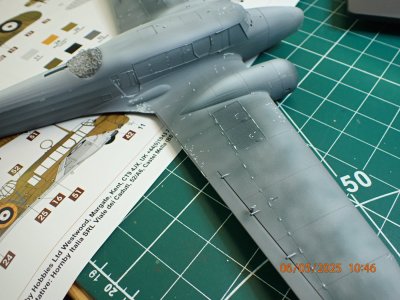
P5060010.JPG

The windowsill was still sunny so I played with some more highlights and modulations until His Majesty moved into the other room, following the light.
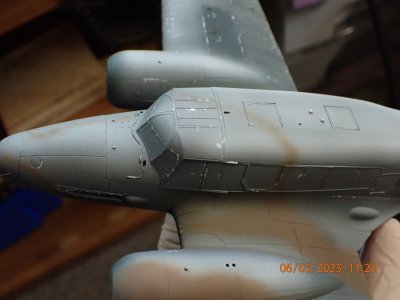
P5060011.JPG

I sketched in the outlines following the Airfix plans. They are contradictory in places where the plan varies from the profiles, but I see them only as a guide to the general style anyway.
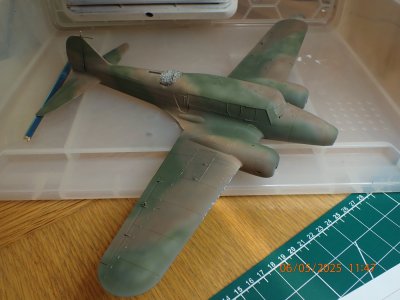
P5060012.JPG

Then I filled in the rest with a thin, thin, thin, layer of paint. There is more to come but now it's time for walkies. Buddy likes to patrol the streets of town and hunt down any scraps of flakey pastry, the odd biscuit, the very occasional sausage which has rolled off someone's tray and those wonderful pavement pizzas left from last night's revels. And to think he licks me with that tongue.
 
Last edited:
Great work with the paint. How clean a demarcation line is varies greatly depending on painter and method.

Look at the D-Day strips painted on many aircraft, from neat even clean lines to rough hand or roller brushed blotched markings, done with what they had on hand and time to get it done.
 
Great work with the paint. How clean a demarcation line is varies greatly depending on painter and method.

Look at the D-Day strips painted on many aircraft, from neat even clean lines to rough hand or roller brushed blotched markings, done with what they had on hand and time to get it done.

That's right. Some larger aircraft had those stripes painted on with brooms used for sweeping the floor. The squadrons only had one night to complete the job, though of course, units which were committed later had ample time to paint them beautifully tidy.

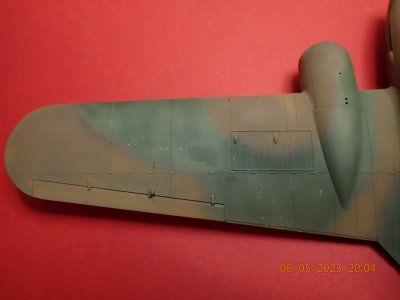
The paint on my Anson looks very good to me, it's possibly my best ever result. I think this was because I didn't try to complete it in one go. Now my dilemma is whether to leave it as it is or to continue with the plan for even more variations in hue and risk messing up what I already have. "Striving to better, oft we mar what's well." (Shakespeare)

I think I should go on because even if I do ruin it, I'll have learned something though maybe only where to stop. ROTF "If you don't mess up from time to time, you aren't trying hard enough." (Me)
 
What type of paint are you using? if acrylic, water based, you can apply a seal to current paint, and then if new work looks bad, you can then wash it back off with some work.

I think a new clean paint job is for factory fresh model, a model of a in use aircraft should have some minor defects, chips, wear, stains and dulling from sun exposure.

Remember do a little at a time, and check effect. Add more if needed.
 
you can apply a seal to current paint, and then if new work looks bad, you can then wash it back off with some work.

Unfortunately, you can't. Well, you can, but then blending the different layers becomes almost impossible because of the clear layer of varnish.

Anyway, what's wrong with a bit of courage? ROTF Model bravely, my friend.

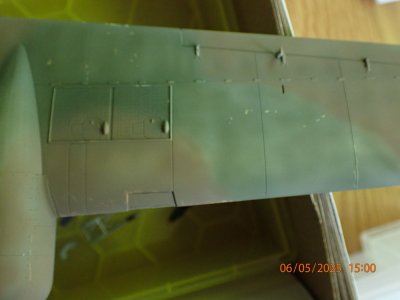
P5060014.JPG

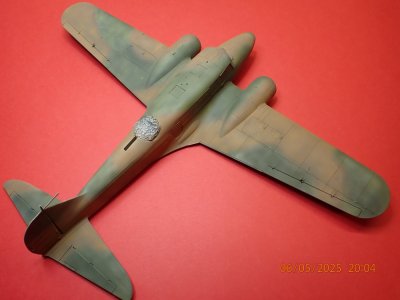
I've done a couple more passes with lighter and more vivid paints. I like it but these LED lit pictures are quite poor. I'll try to take sunlit ones in the morning.

P5060015.JPG

I think that's it for the paint. There's more weathering to come - because I like doing that stuff.
 
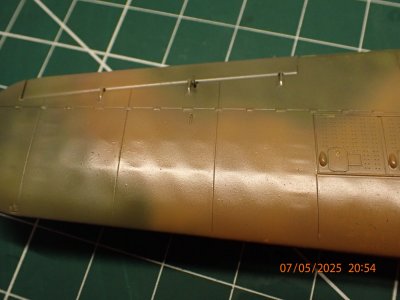
I took a natural light photo for you this morning.

P5060013.JPG

This moment is the first time I've seen the picture. The difference between the green and brown is much more marked in real life which leads me to suspect that the many photos of similar aircraft with the colours appearing very similar, may all be down to camera limitations.

All I've done today has been to confirm that I'm happy with it so far.

P5070050.JPG

And then to gloss it all up for protection from scuffing while I flip it over and paint the underneath. It's also good and shiny for decal application with little risk of silvering.

I have a busy day tomorrow with a visitor, so I'm unlikely to be doing much on the bench apart from tidying it up for inspection. Catch you later!
 
The difference between the green and brown is much more marked in real life which leads me to suspect that the many photos of similar aircraft with the colours appearing very similar, may all be down to camera limitations.

I have realised since yesterday that the light entering my flat through that window is filtered and reflected by the new pale spring leaves of a huge lime tree. That’s why the earth brown looked so green!
 
IMG_2223.jpeg

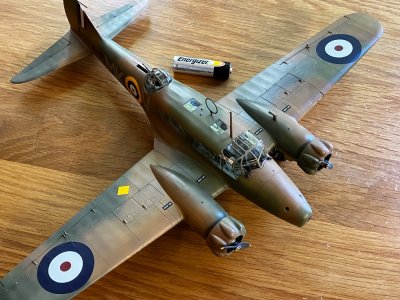
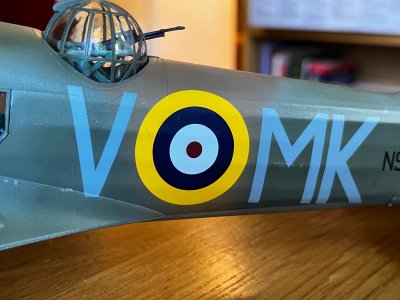
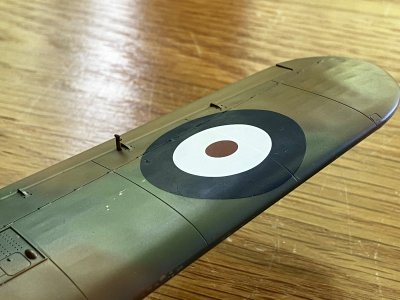
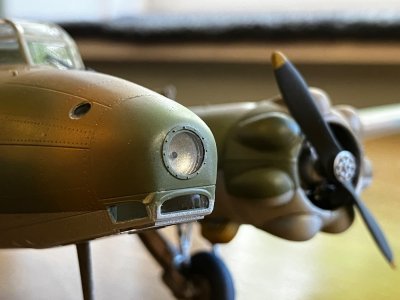
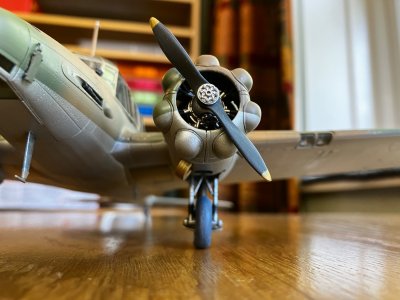
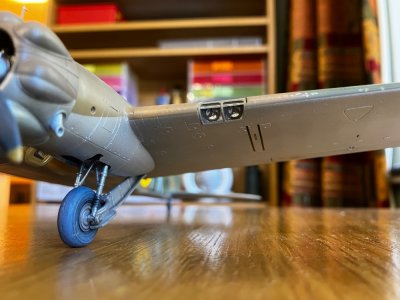
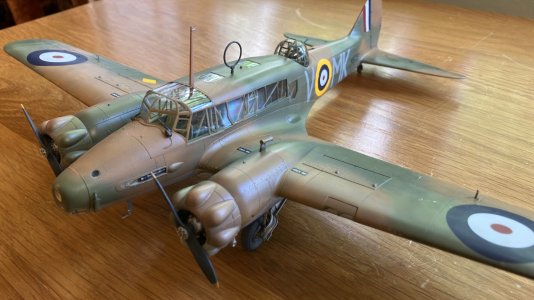
Faithful Annie is finally finished. (AA battery for scale)

IMG_2222.jpeg

I was impressed by the surface detail. The decals were excellent. I kept the weathering to a minimum.

IMG_2221.jpeg

Important to get the sheen right on the decals and the paint. I left it satin to show that oil-canning more clearly.

IMG_2220.jpeg

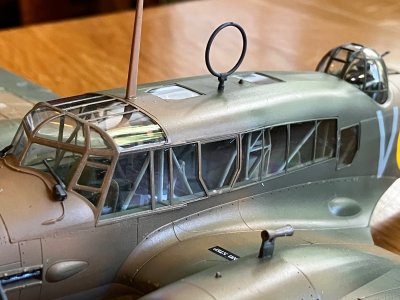
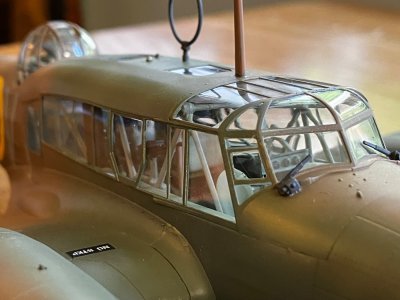
The view must have been marvellous, and necessary for finding submarines to bomb.

IMG_2219.jpeg

This is OOB, Out Of the Box modelling. I avoided bogging myself down with more advanced techniques since I haven't made a plastic aircraft for at least 3 years, maybe 4.

I was very glad of the pre-cut paint masks for all those windows, more than a hundred separate panes. (Today I ordered a set for the Ju-87, which I will be starting soon, though not with a build log.)

IMG_2218.jpeg

Big searchlight in the nose.

IMG_2217.jpeg

Clean and tidy engines. Copper oil cooler underneath - I can't escape coppering below!

IMG_2216.jpeg

As an ex aircraft electrician, I loved the landing light details.

22B978EF-17E1-4074-8265-329B809AC553.jpeg

Here on Ships of Scale I'm ashamed to say that I didn't even rig the HF aerial wire. ROTF

In summary, it was a fine kit of a great little aeroplane and I enjoyed building it. I'm very pleased with the result and will definitely be building more plastic models alongside the longer term wooden ships.
 
Last edited:
Very nicely done.

Not too much nor too little.

I particularly liked your example of the masterful art of stretched sprue in your control yoke. I struggle every time I try and use stretched sprue - too big, too small, too much black smoke, and burnt finger tips. It is something I need to practice more often.

Next up is Herr Junkers Stuka?

cheers, Graham

Thanks Graham.

Here's a sprue stretching tip for you. Don't let it cool down under tension. You can feel when it begins to solidify and at that instant, bring your hands back together 1/4". The finished material won't be so springy and brittle and will be a lot easier to work with.


Yes, the Stuka is next. I liked using the Anson paint masks so much that I've sent away for the Ju-87 set as well as some resin crew seats with harnesses attached. (And some swastika decals which are omitted from the Airfix kits.) Apart from those aftermarket items I'll be going old school but this time I'll use all the tricks and techniques I can remember, particularly on the kit supplied engine, which already has 20 parts! I hope to add all the pipes and wires.

The paint scheme is very interesting. It's the standard splinter camouflage in greens but partially oversprayed in Libya (1942) in desert tan. One is reminded of Op Desert Storm. I'll be chipping and weathering that tan colour with the salt and or hairspray methods to reveal the greens underneath.
 
Last edited:
Beautiful job Smithy! Window masking kits, the only way to go!

Thanks Daniel,

Absolutely right about the masks, definitely worth a tenner! You can often get ready made masks for the actual camouflage and I'll try them one day when I come up against a particularly curvy scheme. My next project, the Stuka, has straight line demarcations between colours so that's easy enough to do with simple (cheap) tape.
 
Back
Top