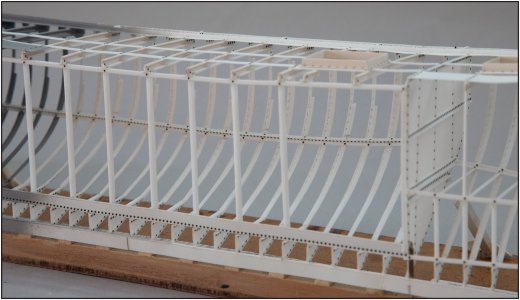
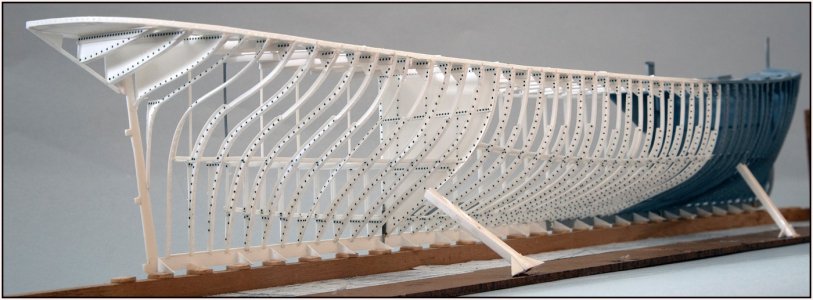
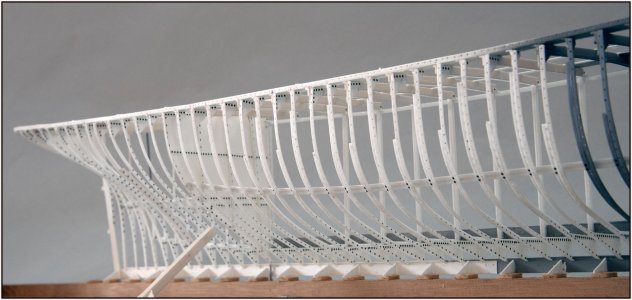
BALDER, Vlaardingen Herring Lugger from 1912, scratch build scale 1:50 Plate-On-Frame

A masterclass in plastic fabrication. Thank you so much for showing us.
A major accomplishment Peter. I don't think there are too many modelers who could have done what you have done here. The level of 3 dimensional thinking is unthinkable - and to do it all from reading 2D plans. Just wow!
Yes sir, exactly what Paul said.
You guys are always ahead and nothing to add, then...
But I always said that your build Peter is one of the unique, if not the unique build I've ever seen! And if one thinks, I am no longer wonder, let them think twice! I still don't know how this is possible... Obviously, it is, as I see her! Bravo, mon ami!
I agree with all above... They took the words right of my mouth. I'm seen this build in real and I can tell it is more impressive what he shows us when you see it in real. These parts ware small and so accurate.
Absolute eye candy Peter. Good thing you are only covering one side! This is going to be another museum piece! ;)
Thanks you for those very very very nice words, Alan, Paul, Daniel, Jim, Stephan and Dean. And all the members who showed their appreciation with the Thumbs-Up.
I definitely appreciate this, but it also leaves me (almost) speechless.
Regards, Peter
 
Peter is a master at small scale builds.
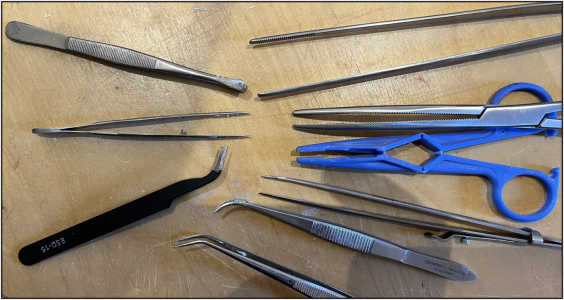
I was holding my hand next to his. And those fingers of him would paste 3 times in mine. I think that's the secret. Or I just have to big fingers. ROTF
You are right, a lot of small fingers .......
1729842537110.png
Without those I would be nowhere. :)
Regards, Peter
 
Last edited:
Either he has elf’s chained up somewhere or he has a ray gun to shrink himself to work on it!
a deeply troubling thought...
Not if you watch Disney!!
Actually, that is troubling too
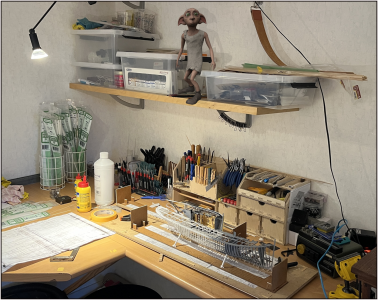
Perhaps you guys don't know, but Dobby (from Harry Potter) is not dead ........
1729842718060.png
He keeps an eye on everything and from time to time he takes out his magic wand.
And ..... besides you, my dearly beloved friends, he is also my friend.:)
Regards, Peter
 
Perhaps you guys don't know, but Dobby (from Harry Potter) is not dead ........
View attachment 479974
He keeps an eye on everything and from time to time he takes out his magic wand.
And ..... besides you, my dearly beloved friends, he is also my friend.:)
Regards, Peter
Good morning Peter. What they all say….a unique and incredible model which shows off your skill set. Wonderful Peter.

Unfortunately you now let the “elf” out the bag so to speak. Having Dobby the house elf to use his magic as an assistant will always produce magical models ;) .

Cheers Grant
 
Good morning Peter. What they all say….a unique and incredible model which shows off your skill set. Wonderful Peter.
Thanks, Grant. Also from you much appreciated.
Unfortunately you now let the “elf” out the bag so to speak. Having Dobby the house elf to use his magic as an assistant will always produce magical models ;) .
Cheers Grant
I suspect that several other members on this forum have something similar at home. You are one of them ……. ;) (Not included the ‘Cape Docter’ ROTF)
Regards, Peter
 
Perhaps you guys don't know, but Dobby (from Harry Potter) is not dead ........
View attachment 479974
He keeps an eye on everything and from time to time he takes out his magic wand.
And ..... besides you, my dearly beloved friends, he is also my friend.:)
Regards, Peter
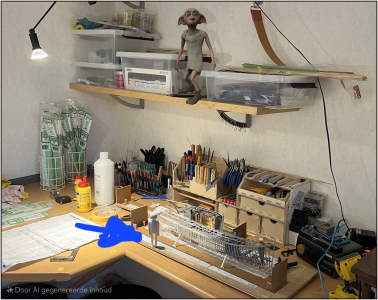
Finally the truth is out there, but who is this droid in the front?
20241025_120949.png

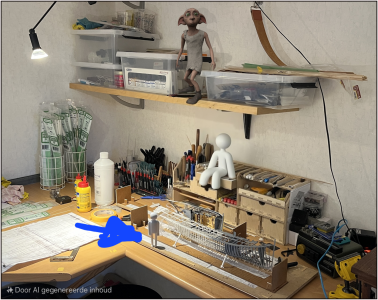
Seems you have a complete army.
20241025_121507.png
 
Last edited:
Finally the truth is out there, but who is this droid in the front?
View attachment 479987

Seems you have a complete army.
View attachment 479988
Haha ..... that little droid in de spotlight left above him is waiting to do the paint job in the narrow corners. But he has to wait a while. ;)
The big sitting one ruins my toolbox and is fired.:mad:
Regards from a old-fashion handjob PS user, Peter
 
Hello Peter,
I have spent hours looking at your beautiful photos. Is there a post somewhere that describes your equipment? I am particularly interested in the lenses and lighting.
 
Hello Peter,
I have spent hours looking at your beautiful photos. Is there a post somewhere that describes your equipment? I am particularly interested in the lenses and lighting.
Hi Espen. Thanks for taking so much time and interest in my photos.
I was thinking about answering in a PM but perhaps it's also useful for others.
I'll tell you 'the complete picture' of how I make my photos because it's like 'the chain with the weakest link ...".

I am using a Canon EOS 6D Mark II with the 24-105mm 1:4 IS II USM.
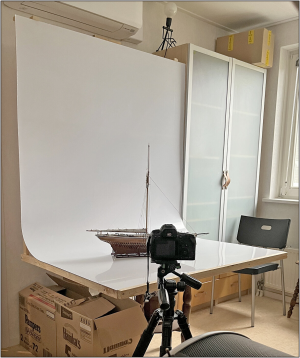
Most of the pictures where taking on my --> Home Made Photo Table <--
1730016149939.png

Here still with the white plastic covers but shortly after that I hung a 18% grey piece of photo cardboard over the white perspex. It is the same (18%) grey as you use to calibrate your white balance with a grey card.

The common specs on the camera:
-the lens between 50 and 80mm, then you get the least distortions;
-in AV aperture priority, between 11 and 16, the get a usable depth of field;
-in daylight without other light sources. That's why I always use a tripod because you get longer shutter speeds. The table stands now under a
window with light from behind/above and a window with light from the left.
-with ISO100. I am from the 'old school' with different negative material with different (ASA) crystals. A digital camera has only 1 sensor, so the high ISO values are just a technical trick to get shorter shutter speeds. But with much more noise. And then they have new software like Topaz to remove that again ....... But that's just a crazy whim of me ...... ;)

Because of the 'think before you shote' principle I have not much to do with the picture in Photoshop.
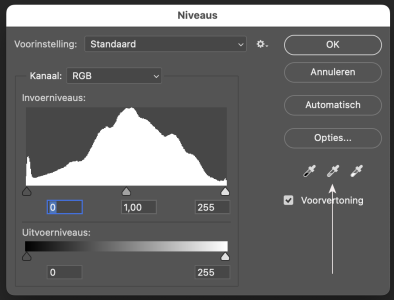
I mostly only use ‘Levels' (Ctrl+L) to make the histogram in balance and use the 'grey pipet' on the grey back ground paper to get lost of a color shift (of the different sunlight colors).
1730017384675.png
Because of most of the daylight from the left, I can use the grey-pipet (above in the middle, see the arrow) also for adjusting the light of the picture. If it's to dark, I click on the lighter part of the background grey. If it's to light, I click on de darker side of the background grey.
Another 'crazy whim' from me: A photo must have a frame...... :)

Sometimes I use my iPhone for a quick picture. But the software is ‘very creative’ with colors. Then I have to make more adjustments to get a acceptable result.
Perhaps this will answer your question, Espen.
Regards, Peter
 
Last edited:
Hi Espen. Thanks for taking so much time and interest in my photos.
I was thinking about answering in a PM but perhaps it's also useful for others.
I'll tell you 'the complete picture' of how I make my photos because it's like 'the chain with the weakest link ...".

I am using a Canon EOS 6D Mark II with the 24-105mm 1:4 IS II USM.
Most of the pictures where taking on my --> Home Made Photo Table <--
View attachment 480424

Here still with the white plastic covers but shortly after that I hung a 18% grey piece of photo cardboard over the white perspex. It is the same (18%) grey as you use to calibrate your white balance with a grey card.

The common specs on the camera:
-the lens between 50 and 80mm, then you get the least distortions;
-in AV aperture priority, between 11 and 16, the get a usable depth of field;
-in daylight without other light sources. That's why I always use a tripod because you get longer shutter speeds. The table stands now under a
window with light from behind/above and a window with light from the left.
-with ISO100. I am from the 'old school' with different negative material with different (ASA) crystals. A digital camera has only 1 sensor, so the high ISO values are just a technical trick to get shorter shutter speeds. But with much more noise. And then they have new software like Topaz to remove that again ....... But that's just a crazy whim of me ...... ;)

Because of the 'think before you shote' I have not much to do with the picture in Photoshop.
I mostly only use "Levels' to make the histogram in balance and use the 'grey pipet' on the grey back ground paper to get lost of a color shift (of the different sunlight colors).
View attachment 480425
Because of most of the daylight from the left, I can use the grey-pipet also for adjusting the light of the picture. If it's to dark, I click on the lighter part of the background grey. If it's to light, I click on de darker side of the background grey.
Another 'crazy whim' from me: A photo must have a frame...... :)
Perhaps this will answer your question, Espen.
Regards, Peter
Thank you very much for your detailed answer. You put as much care into your photos as you put into building your models. It clearly shows.
 
Excellent setup! And good settings. I'm too lazy to take photos with a camera, although I have a good one. I take them with a phone, it's faster. But when I get to slightly more complex assembly units, I will definitely do it with a camera. I have a Fujifilm XT-4. I have a bipolar flash and all the things for a studio. I can also borrow softboxes from friends. But I will do this later, and for now the phone is our everything)))))
 
Excellent setup! And good settings. I'm too lazy to take photos with a camera, although I have a good one. I take them with a phone, it's faster. But when I get to slightly more complex assembly units, I will definitely do it with a camera. I have a Fujifilm XT-4. I have a bipolar flash and all the things for a studio. I can also borrow softboxes from friends. But I will do this later, and for now the phone is our everything)))))
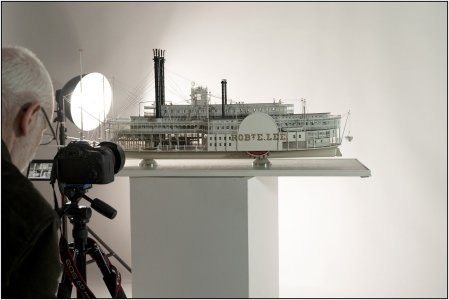
Thanks for the reply, Sergey. For the final pictures of a completed model I also take more equipment. As shown in the log of the Robt. E. Lee:
IMG_4270.jpeg
But then I prefer the direct light above flash light. With the direct light and direct view on you camera you see direct what it will be. That’s no ‘check, check, double check’ but a ‘triple direct’. :)
Regards, Peter
 
Back
Top