Black Pearl 1:50 ZHL All-Scenario version

Captain's Log ~~~ May 1, 2021
Build time today: 2 hours
Total build time: 95 hours

Construction for the Black Pearl (All-Scenario version)

Build guidelines:
Steps 105-134

Secure the following parts:
Parts: 13C, 14C & 15C, H1-H3, J11-J20, L1-17, LC1-17, P2, P4, Q2, R2 & R3, #29


Note: I was hoping to document this build in parallel with the written manual and up to this point, our plan was pretty much on target. However, all Captain’s don’t sail alike and I can see its better to follow their chosen paths through experience, rather than to follow a Chinese map that has me talking to myself! The Pole #1 manual at this stage leaves a lot to the imagination! So, I’ll do my best to navigate the turbulent waters ahead and give you the paths I chose to follow!

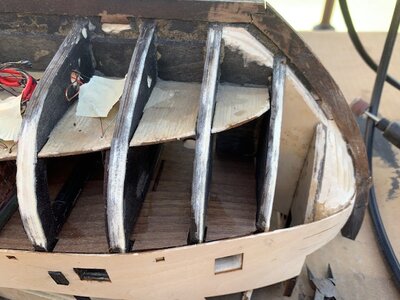
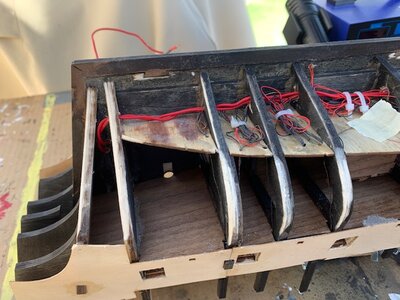
Step 105 shows the placement of Parts 13C-15C and P2, P4, & Q2. I decided to go with 15C but did not glue in 13 & 14C because it would make it a bit harder to panel the inside deck walls. Since 15C was the highest bulkhead, it serves as a stabilizer when flipping the ship upside down.

I was a bit nervous with attaching Part P2 because of the empty space in the bow and wondering if the side plywood panel would locate properly in relation to the bow deck. I recall Jodie's thread (@MystRacing
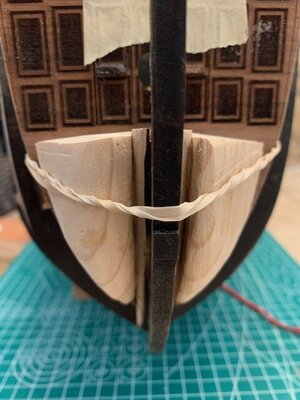
) showed that he deferred to his own way of closing in the front of the bow when he was not happy with how the panel laid up. I really didn't have any styrofoam laying around to fill in the dead space in the bow like Jodie used so I cut a few small pieces from a 2"x3" that was laying around the garage. Shaped it some and glued it in.
05-01A.JPG

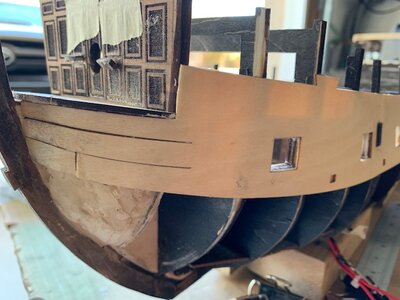
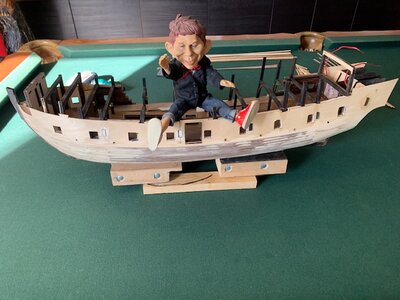
Now mates, this is where I really started treading water because I have never done this before. I just wasn't confident in what I was doing as far as sanding the bulkheads and shaping the curve of the bow. I really was winging it. So, I dry fit the P2 panel and was pleasantly surprised that it fit pretty good.
05-01B.JPG

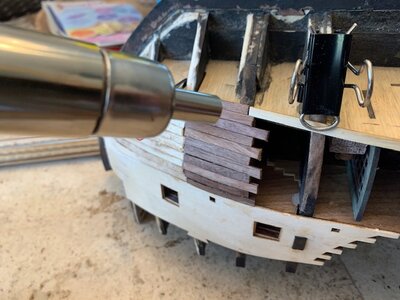
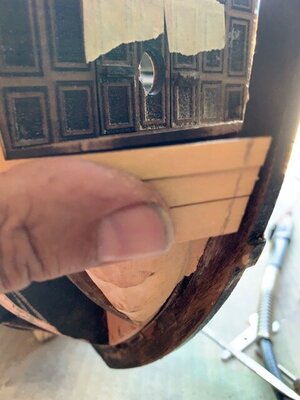
I was lucky that it fell in right under the bow deck and I assumed this was the proper location...although I did bend the third strip a bit too much and too fast and broke it. I used a heat gun and it worked pretty good in shaping the panel.....I soaked the front part for a few minutes and then used the heat gun as it dried out into shape. The second time around was a bit easier, as you can see below.
05-01C.JPG
I trimmed them up and glued in the panel. Panels P4 & Q4 fit in fine and I glued them next.
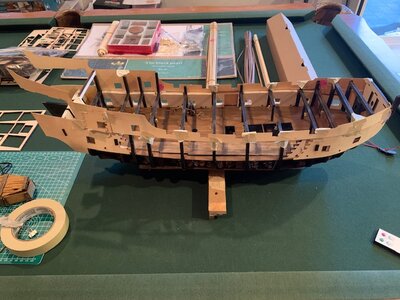
Now, onto the L (4mm) and (3mm) LC parts to add support to the panel plywood sidewall. The pieces fit together almost perfectly, with a bit of light sanding just to clean up the laser marks. Yet, despite the nice fit, things didn't look to well once placed into their respective places.
05-01D.JPG

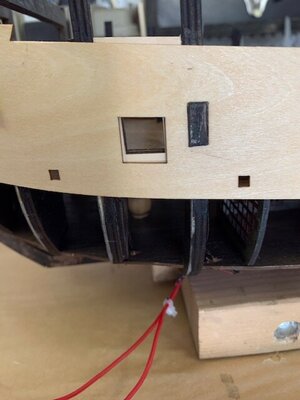
Every piece required a good deal of sanding.....and I really didn't know why they were off so much...was it the Captain's faulty build or was it a poor laser cut? Luckily, I bought a new 1" belt sander that has a 5" disc sander on the side too.
05-01E.JPG


Almost every cannon port had this amount of off-center, requiring a lot of sanding. So, I marked them up and started squaring things up, one-by-one.
05-01F.JPG

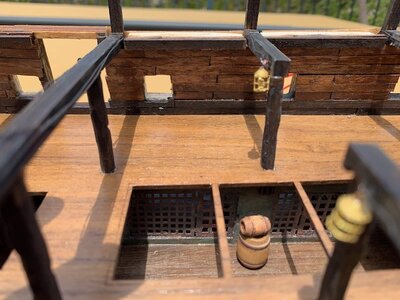
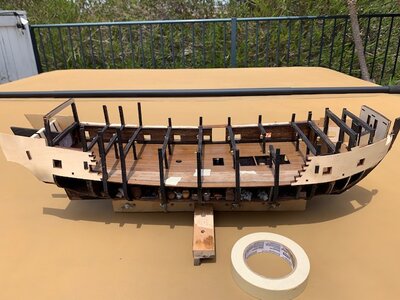
So, I worked several hours getting these pieces glued in and found myself digging through the kit trying to figure out if I identified Part 29 correctly. Even though this deck will be sealed up and not quite visible, I decided to not panel over the cannon ports and trim later. Instead, I cut strips to 2.5" length, and planned to panel and cut as I laid the strips from bottom to top. Since my gun deck is a lighter deck, I wanted to create some contrast so I laid the first two layers of panel (stained Ebony) the next 7 rows were stained Golden Oak. Finally, I laid a piece of what we now call Crown molding on the top layer and matched it in Ebony stain to the lower two layers. I finished the paneling of the gun deck and feel it contrasts OK with the lighter deck. I just have to do some light sanding to clean up a few gun ports. Here's how it looks:
05-01H.JPG

05-01G.JPG

The Starboard side is plywood pieces R2 & R3. They were glued in and paneled and stained the same as the port side. In regard to Step 120, I have played around with a prototype of a cannon design which I shared earlier. While I have made some hammocks and have some pieces to place on the gun deck, I think this is where I have to take a breather and study my next steps.

Again, I have to agree with Jodie @MystRacing, it doesn't seem that it makes sense to glue in cannons and ornaments now.....Steps 121-126 detail the LED soldering. Those steps are not necessary in my plan because I am using my own lighting design and pre-wired LED's. Steps 128-134 can be completed now too. (Parts H1-H3, J11-J20). Steps 133 & 134 (ladder assembly can be completed now or later).

So, looking ahead my next steps would be to secure some of the stern, run my wire out the stern for the stern lamps, Captain's Quarters and masts. Do a bit more study on planking......it's likely that's going to happen before laying the main deck. Steps 135-185 will not follow the kit plan, as I do not feel comfortable going that route. So, this part of the build becomes the uncharted waters we will pursue.....

Hopefully, my greatest fear of planking will be conquered within the next few weeks....
134 0f 268 Steps completed in the 1st Pole. (50% completion.)

Ahoy all.
 
Congratulations on reaching the 50% mark! Of course some steps take three minutes and others take three days so who really knows. I like your innovative solutions and work arounds when the instructions leave you wanting. As I am fond of saying - every ship really needs to be built twice...
 
Hi just caught up with your build. Fine progress good to see how you are getting round the issues with the kit, unfortunately it's wise to check everything. I'm on a roadtrip at the moment so no work on my build this week, driving home tomorrow.
 
Hi just caught up with your build. Fine progress good to see how you are getting round the issues with the kit, unfortunately it's wise to check everything. I'm on a roadtrip at the moment so no work on my build this week, driving home tomorrow.
Thanks Tony....it means a lot to me when guys like Paul, Jodie, Vic and you offer up your comments! Others too, but I have more closely followed your builds and have learned from you mates.
Travel home safely!
 
Captain's Log ~~~ May 7, 2021
Build time today: 5 hours
Total build time: 109 hours

Construction for the Black Pearl (All-Scenario version)


Build guidelines:
At this point, I have abandoned the instruction manual and decided to do my own thing.
So, I guess you can say I'm somewhere between Step 135 and will finish up to Step 174. This would bring me up to the point where I would start the application of the 2nd and final skin of the hull.

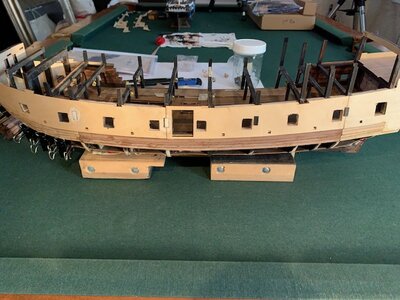
I have been doing other odds and ends as well....made 5 hammocks, started preparing my assembly line to complete my cannons, painted the grates on the gun deck etc...As mentioned earlier, I decided to not place any of the objects on the gun deck until after I finish the hull past the gun ports. Onward!

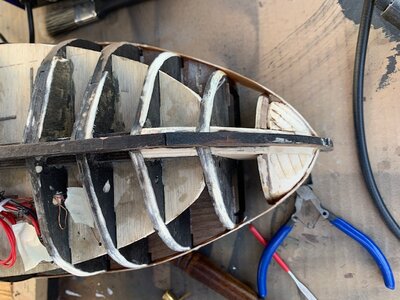
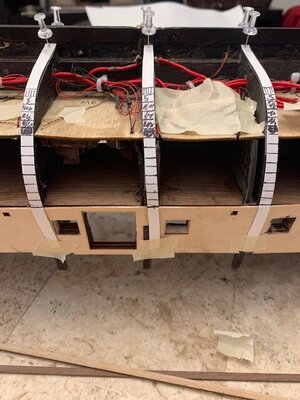
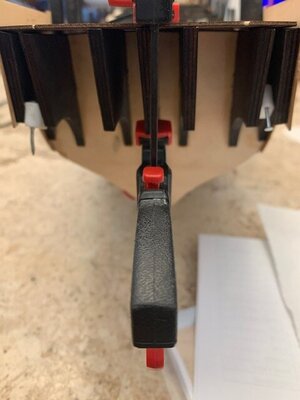
Fairing the ribs:

a.JPG

b.JPG


c.JPG

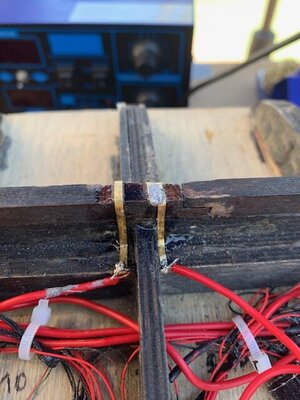
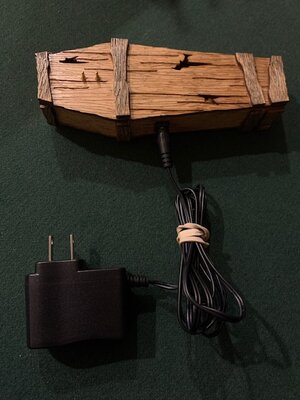
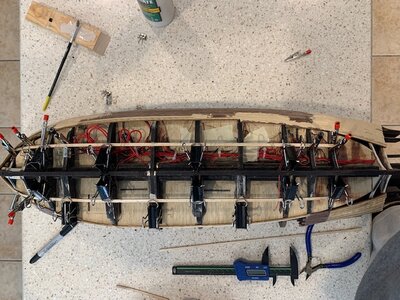
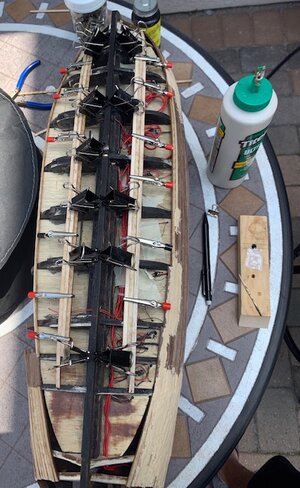
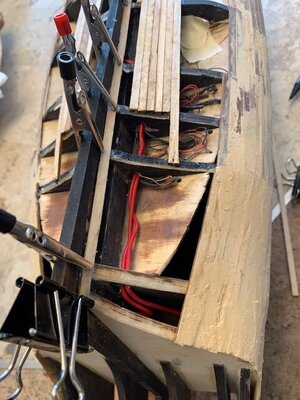
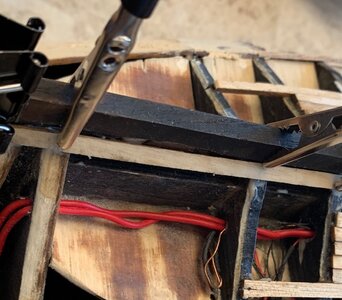
Attached copper strips to the ship's keel for the (+) and (-) poles, which will contact pins that I positioned on top of the coffin that will be attached to the ship's display base. Powered by a 3V AC adapter. Remote with two wired-in receivers can handle up to 30 LED's each.

d.JPG

j.jpg

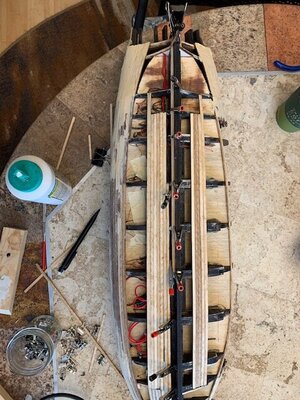
I really have no experience with planking a model ship and I have read so many opinions and procedures that the whole thing is a bit too confusing. As you can see, I was just trying to get a visual of how the planks would lay out. Truth be told, it's like that old NIKE ad, "Just do it."

e.JPG

Before starting, I decided to firm up the stern some, so I placed the stern supports into their positions, while dry fitting the floor of the Captain's quarters.

f.JPG

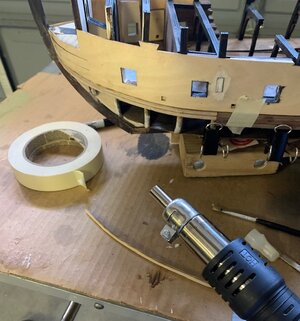
My hot air gun is a big help in shaping the planks.

g.jpg

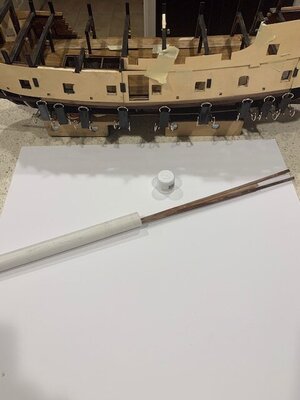
I'm also using a piece of 1/2" PVC cut to length with two end caps so I can pre-soak any planks as needed.

i.JPG

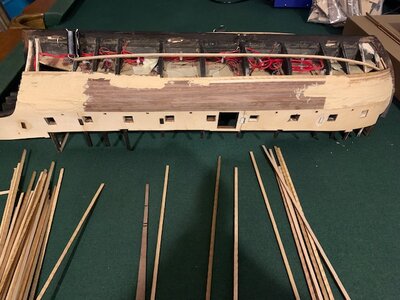
I decided to work all areas of the planking on both Starboard and Port sides at the same time. Taking it one course at a time. Today, I finished the first four plank layers around the ship. Hopefully, if all goes well, by the end of next week the first layer of skin will be completed and I will be able to lay down wood filler, as needed, so I can completely sand the hull smooth. For a novice, I was pleased that things lined up pretty well. I pretty much fitted each plank and used my 1" belt sander to taper, fit and bevel as necessary.

h.JPG

Have a great weekend shore leave mates.
Ahoy!
 
I think you're doing a great job. The inner wall looks fantastic, as do the canons. Planking is definately one of those things you just have to do it. Fortunately the second layer is easier with the thinner planks and you'll have the experience from the first layer to help.

The issue with the inner wall pieces you described is a design error. ZHL didn't take into account the fact that the parts need to be leaned back and therefore beveled.
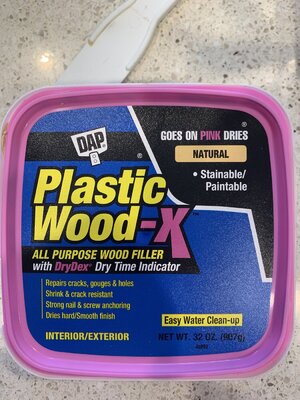
Thanks Jodie. Really appreciate your input! I’m more than half way through the 1st planking and it is getting better as I move forward! Likely will be done before the weekend if other “honey do“ projects go smoothly!;) I’m hoping to do the sanding when finished and apply DAP plastic wood as needed! Re-sand and get it smooth for the 2nd round! I like the DAP wood filler...goes on pink, dries tan! Sands easy!

I figured as much when I read your build on the inner wall pieces! I’m winging it through the instruction Steps now! Just figure to take my time through the second planking....once I get it above the cannon ports, I’ll finish the cannons and odds and ends for the gun deck, install them and lay that deck and move on!

Be well, and keep an eye toward my build to keep me on course. Greatly appreciate!

Ahoy!
Rick
 
I used the elmers wood putty and it worked well. Sanded easily and appears to take both super glue and regular wood glue with no problems. Your ship is looking great.
Larry
 
I used the elmers wood putty and it worked well. Sanded easily and appears to take both super glue and regular wood glue with no problems. Your ship is looking great.
Larry
Hi Larry. I’m also using a combo of titebond ultimate wood glue along with some super glue mostly in the pesky bow area! I really appreciate your work and how easily you have moved forward to where you are now! I enjoy your log and also appreciate any comments for me too!
Ahoy, mate!
 
Hi Larry. I’m also using a combo of titebond ultimate wood glue along with some super glue mostly in the pesky bow area! I really appreciate your work and how easily you have moved forward to where you are now! I enjoy your log and also appreciate any comments for me too!
Ahoy, mate!
Thanks for the kind words. Without your post and the others on this forum, it would be almost impossible for me to finish the ship. The first planking was a huge challenge. I am really enjoying the challenge and this forum.

Larry
 
I was wondering how those wires connect to the bottom of the ship.
Your picture above shows me what I need to do.

Keep them coming.
Working now on finishing up 1st layer of planking....hopefully will be done by the end of the week! Will do more pics by then! Ahoy, mate!
 
Pirate Lore, Myths, & Legends #6

Source: Mysteries by Joe Drury

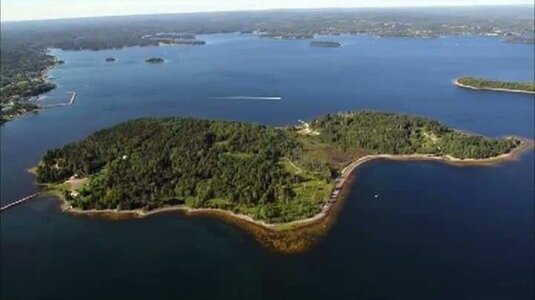
The Treasure Of Oak Island​

46A755D2-639B-4734-BCAC-AB8DC22F1352.jpeg

A small island lies off the shore of Nova Scotia, Canada. This place is known as Oak Island, and it is home to an age-old pirate mystery. In 1795, Daniel McGinnis discovered a large, unnatural depression in the ground while crossing the island. When the area was dug into, a layer of oak planks was found every 3 meters (10 ft) below the surface. Below a certain number of planked layers lay a stone with symbols carved into it. These carvings are said to tell of a great treasure buried deep beneath the ground. The planks buried deeper down collapsed when reached, leading to the pit filling with water. This find has lead generations of excavators to attempt to access whatever is at the bottom of the pit, but nearly every attempt has ended in disaster. So far, seven have died while endeavoring to uncover the mystery, leading some to believe that the area is cursed.

What lies at the bottom of this traitorous pit is still unknown and possibly always will be. However, a great number believe that it is the treasure of Captain Kidd, a pirate known to have been operating in the area at the time, who famously stated that his fortune was buried “where none but Satan and myself can find it.” It is still a mystery as to how anyone could have secured the contents so well, leaving even 21st-century excavators clueless about how to uncover whatever is down there.

The Cryptogram Of Olivier Levasseur​

9B78B59E-36D8-4BE4-8382-0E081C3D6092.jpeg

In the late 18th century, pirate captain Olivier Levasseur, also known as La Buse, was one of the last great pirates roaming the Indian Ocean. He was known to have stolen many items of value and was thought to have a huge haul of treasure. However, he was captured and sentenced to death by hanging. Allegedly, he spoke his final words, “Find my treasure, the one who may understand it,” and threw a cryptogram into the crowd.

To this day, people are still trying to decipher the instructions, with many having given up long ago, believing that the cryptic message was just a joke to lead people on a wild goose chase. However, in the mid–20th century, a breakthrough was made by an Englishman named Reginald Herbert Cruise-Wilkins. He had been actively searching for the treasure for years, certain that it was buried on the small island of Mahe and was worth around £100 million.[5] A number of years earlier, Cruise-Wilkins had unearthed a number of pirate statues that were buried beneath the ground, but he was adamant that they weren’t just statues but rather a map to where the real treasure was located.

Reginald finally found the exact location he thought to be the treasure cave and began exploring, although it required very complex engineering work to ensure that the cave did not get flooded by the ocean water above. While in the cave, he was nearly killed by a rockslide, but he did manage to get away with a flintlock pistol, carved figurines, a 17th-century wine jug, and a few coins. This was enough evidence to suggest that it was in fact, the location of the treasure. However, no one was willing to further fund his project, leaving the treasure’s existence a mystery.

Pirate Utopia

0FD9D6AF-56E2-4F8B-82CD-DC4E4A921BD8.jpeg

Legend tells of a pirate utopia named Libertalia on a small island off Madagascar.[6] This haven was a pirate republic/anarchist colony founded in the late 17th century by pirate captain James Misson. Other founders included the famous pirates Henry Avery and Thomas Tew, the latter being the admiral of Libertalia’s fleet of ships.

The politics of the haven were generally socialist, with all food and resources being shared as well as all viewpoints being listened to and laws being created by the people. The pirates went off the motto “for God and liberty” and flew a white flag in protest to the Jolly Roger, which typically supports violence. They also were strongly against slavery and freed any slaves they came across, treating them as equals and allowing them to join the enclave.

The pirate territory was said to have a fort, a market, and housing covering the island. It was also said that the community thrived on the lands, building a full range of buildings, including great halls, places of worship, and taverns. Charles Johnson’s A General History of the Pyrates claims that the pirates, renouncing their nationalities, named themselves “Liberi” and created a new language. Johnson also said that Avery decided on the area of settlement as soon as he saw the bay, for it was an area with fertile soil, fresh water, and friendly natives.

The utopia was said to have fallen when Tew became stranded, leaving the haven effectively defenseless and leading to it being attacked. Misson and 45 other men were said to have escaped, but they never returned to Libertalia.
 
Captain's Log ~~~ May 14, 2021
Build time today: 3 hours
Total build time: 130 hours

Construction for the Black Pearl (All-Scenario version)

Build guidelines: My last log left us with 4 layers of the 1st planking completed around the hull. I had to laugh when I read Tony's comment, "Now the fun starts, take it easy try not to rush." First, I must admit that I really had no idea what I was doing. While my earlier thoughts were, "Just do it", its not like you want to blow up a $500 ship model because of stupidity. Please forgive me for the novice approach and the actual results of my planking. While I did work on all areas of the hull this week, I focused on completing the port side first. Since this was a full side of the ship, I wanted to do my experimenting there and learn as I moved through the process. In the end, while I am thankful for plastic wood to cover up my mistakes, I can see that it will all work out in the end. So, for the newbies out there, don't be afraid to build a ship of your choosing, because I don't think any one modeler has a perfect way of doing things. It really is more art than science.

1.JPG

In my case mates, I found the hot air gun worked pretty good for me. I only soaked two planks and that was to lay the garboard plank on both sides of the keel. The bend from the stern toward the bow went a full 90 degrees and almost back again. I needed two pieces of plank because one wasn't long enough. I found that if I took the soaked plank and positioned it with clips and used the heat gun to dry it out, it formed close to the desired fit. More on that later.

2.JPG

Once I got planks laid above the lower deck, I reached a point that I felt that I had to split the remaining space to the keel into two sections. I believe you pro's call these planking bands, battens. Through all the study about planking. I read that these bands should run about 18-20mm wide around the hull, depending on plank width. Since the Pearl is opened to the Starboard side, I figured that after my planking reached the lower deck level, I would just run one band. (between the keel and the lower deck) The planks were 4.5 mm wide and I measured down 40.5mm, which equals nine planks. I laid two planks equidistant from the keel on both sides. See pic below:

3.jpg

IMG_5003.jpg

The above pic shows the first three planks (of the nine to the keel) laid. Once I laid six planks, I decided to try to lay the Garboard Plank. Whether this really makes a difference or not on this type of model ship kit, I do not know. Or whether it really matters???? The pic below shows the twist from the stern toward the bow.

DGar1.JPG

A closer look at the stern.

EGar2.jpg

FGar3.JPG

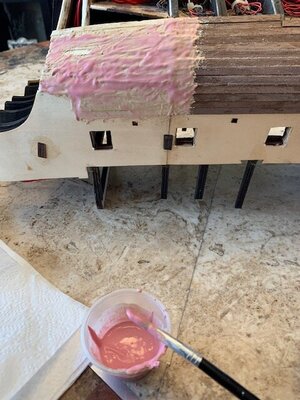
Plank #7 had to be sanded slightly to allow plank #8 to fit into the Garboard plank. I missed by 1 mm so I used my 1" belt sander to trim the plank. Along the way mates, I didn't wait until all planking was done before I applied some of the Plastic wood filler. I wanted to see how it sanded out and if it could be watered down or just troweled on. The pic below looks messy because I thinned out the filler some and brushed it on. Since I found it goes on pink and dries out tan, it sands easy. None of the sanding is complete to this point, but it was really me getting used to how to get things looking smooth. So, I tried it out first in this area of the stern.

5.JPG

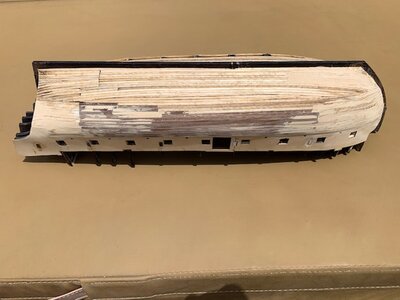
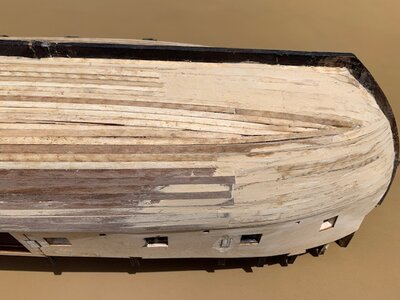
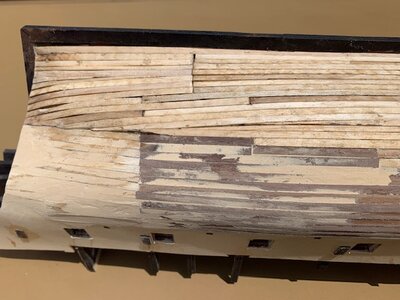
Here is the Portside planking completed.

A.JPG

I am not finished with the wood filler or the sanding, I just wanted to get this out in my log to show you how I'm progressing. Here's bow and stern pics:

B.JPG

C.JPG
The upper left stern area will need plastic wood and I'll have to finish sanding and give it a final go over before calling it game, set, match for the final planking.

So, its time for shore leave mates! The weekend is upon us. Again, I apologize to those of you who have found my planking execution an abomination to the hobby of model ship building. Hopefully, by next week, I will have the Starboard side completed and the hull completely sanded and prepped. From there, I will take a look at things and likely sure up the stern and the Captain's Quarters floor as well as the second remote receiver. We'll have to start working on cannons, parts of the Captain's Quarters and other odds and ends. Then, most likely will do the 2nd layer of planking before laying the main deck.

Red sky at night....."what me worry?"

IMG_5019.JPG

Mates, have a great weekend.
Ahoy all.
Rick
 
Last edited:
Captain's Log ~~~ May 14, 2021
Build time today: 3 hours
Total build time: 130 hours

Construction for the Black Pearl (All-Scenario version)

Build guidelines: My last log left us with 4 layers of the 1st planking completed around the hull. I had to laugh when I read Tony's comment, "Now the fun starts, take it easy try not to rush." First, I must admit that I really had no idea what I was doing. While my earlier thoughts were, "Just do it", its not like you want to blow up a $500 ship model because of stupidity. Please forgive me for the novice approach and the actual results of my planking. While I did work on all areas of the hull this week, I focused on completing the port side first. Since this was a full side of the ship, I wanted to do my experimenting there and learn as I moved through the process. In the end, while I am thankful for plastic wood to cover up my mistakes, I can see that it will all work out in the end. So, for the newbies out there, don't be afraid to build a ship of your choosing, because I don't think any one modeler has a perfect way of doing things. It really is more art than science.

View attachment 233305

In my case mates, I found the hot air gun worked pretty good for me. I only soaked two planks and that was to lay the garboard plank on both sides of the keel. The bend from the stern toward the bow went a full 90 degrees and almost back again. I needed two pieces of plank because one wasn't long enough. I found that if I took the soaked plank and positioned it with clips and used the heat gun to dry it out, it formed close to the desired fit. More on that later.

View attachment 233306

Once I got planks laid above the lower deck, I reached a point that I felt that I had to split the remaining space to the keel into two sections. I believe you pro's call these planking bands, battens. Through all the study about planking. I read that these bands should run about 18-20mm wide around the hull, depending on plank width. Since the Pearl is opened to the Starboard side, I figured that after my planking reached the lower deck level, I would just run one band. (between the keel and the lower deck) The planks were 4.5 mm wide and I measured down 40.5mm, which equals nine planks. I laid two planks equidistant from the keel on both sides. See pic below:

View attachment 233308

View attachment 233312

The above pic shows the first three planks (of the nine to the keel) laid. Once I laid six planks, I decided to try to lay the Garboard Plank. Whether this really makes a difference or not on this type of model ship kit, I do not know. Or whether it really matters???? The pic below shows the twist from the stern toward the bow.

View attachment 233313

A closer look at the stern.

View attachment 233314

View attachment 233315

Plank #7 had to be sanded slightly to allow plank #8 to fit into the Garboard plank. I missed by 1 mm so I used my 1" belt sander to trim the plank. Along the way mates, I didn't wait until all planking was done before I applied some of the Plastic wood filler. I wanted to see how it sanded out and if it could be watered down or just troweled on. The pic below looks messy because I thinned out the filler some and brushed it on. Since I found it goes on pink and dries out tan, it sands easy. None of the sanding is complete to this point, but it was really me getting used to how to get things looking smooth. So, I tried it out first in this area of the stern.

View attachment 233317

Here is the Portside planking completed.

View attachment 233318

I am not finished with the wood filler or the sanding, I just wanted to get this out in my log to show you how I'm progressing. Here's bow and stern pics:

View attachment 233319

View attachment 233320
The upper left stern area will need plastic wood and I'll have to finish sanding and give it a final go over before calling it game, set, match for the final planking.

So, its time for shore leave mates! The weekend is upon us. Again, I apologize to those of you who have found my planking execution an abomination to the hobby of model ship building. Hopefully, by next week, I will have the Starboard side completed and the hull completely sanded and prepped. From there, I will take a look at things and likely sure up the stern and the Captain's Quarters floor as well as the second remote receiver. We'll have to start working on cannons, parts of the Captain's Quarters and other odds and ends. Then, most likely will do the 2nd layer of planking before laying the main deck.

Red sky at night....."what me worry?"

View attachment 233321

Mates, have a great weekend.
Ahoy all.
Rick
Congratulations on your planking it's never easy the first time but the only way to learn is by practice and it'll be always be better next time. One thing I noticed that I would have done differently, is to stagger the joints on the planks as sometimes a ridge forms where the joints are. I also try to join the planks on flat parts of the hull (middle half).
Well done.
Tony
Greatly appreciate your input...will apply as much as possible the rest of Starboard side! Thanks Tony! Also, I followed the plan pics because I was afraid that I would run out of planking material! Next ship, I will know better!
 
Last edited:
I'm doing a Soleil Royal and almost done with the first planking. This is my 9th build and I am exploring other options for the filler. If you wouldn't mind, what brand of filler did you use. Normally, I use Dap plastic wood. Comes in a tube. I would like to try something else. Don't mind sticking with a Dap product, just something else besides what came in the tube, thanks.
 
I'm doing a Soleil Royal and almost done with the first planking. This is my 9th build and I am exploring other options for the filler. If you wouldn't mind, what brand of filler did you use. Normally, I use Dap plastic wood. Comes in a tube. I would like to try something else. Don't mind sticking with a Dap product, just something else besides what came in the tube, thanks.
Ken,
I think I use the same DAP plastic wood, only in a tub not a tube.57BC3A30-AA54-4F9C-9C02-95AD5611C1D0.jpeg
Ahoy mate!
 
Back
Top