Black Pearl 1:50 ZHL

Okay so I spent a few minutes doing some things while I’m working on another dead eye project. Early in this thread I said I would give people an idea of how to do things with the basic tools when I did weird stuff. So this is going to be one of those posts.

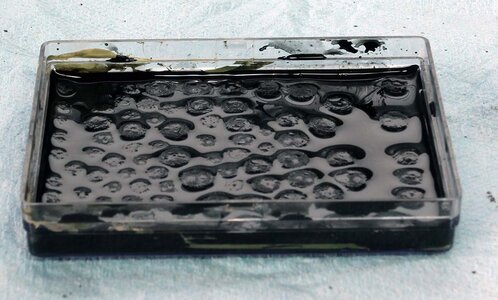
Here’s how the manual recommends doing the deadeyes. First I dyed the deadeyes black with the same water based black stain I’ve been using all along.

BP618.jpg

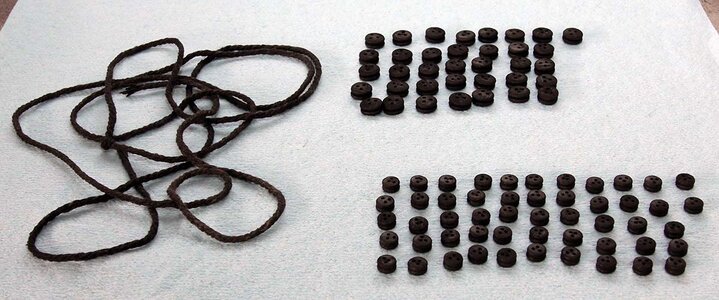
Here’s the first batch of dyed deadeyes, when I did these I also blackened the anchor rope.

BP619.jpg

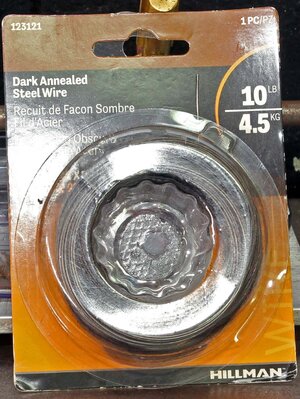
Instead of using the brass wire I would use 0.73mm annealed dark wire. I got this from Model Expo. It’s stronger than the brass wire and you don’t need to make it black.

BP620.jpg

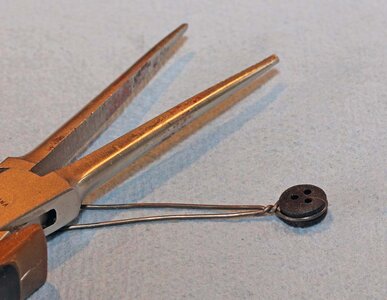
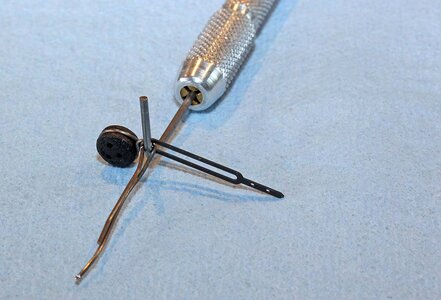
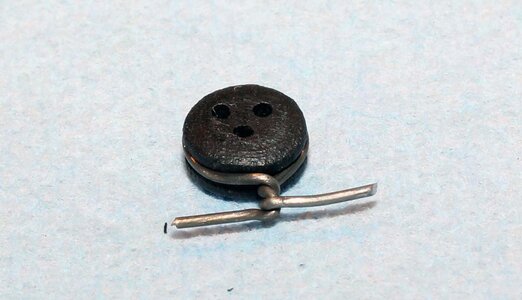
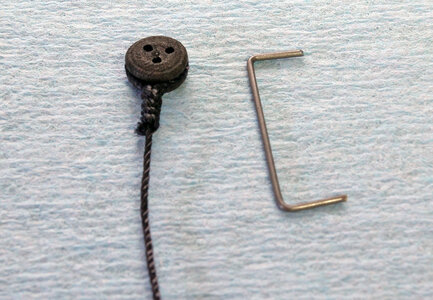
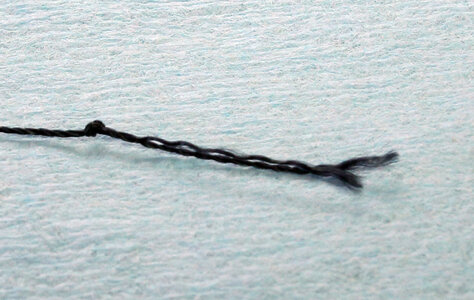
So I start by wrapping the deadeye with the wire and then hold the ends in the pliers and twist the deadeye. I use three different numbers of twists on the wire based on the location. Also this is the time to make sure you have the deadeyes oriented correctly. The one center hole should be furthest away with the other two eyes even with each other. If they are all over the place the ropes will look really messy.

I should mention the distance from the deadeye where you grab the wire makes it easier or harder to get the twists nice and neat. If you're too close to the deadeye it'll get really tight and you'll likely break the wire in the pliers. If you're too far away you'll have to do a lot of turns to get a tight stack of the winds and it'll likely be crooked. It takes a little fiddling to get it right the first time, but once you get the distance about right it's pretty easy to do.

BP621.jpg

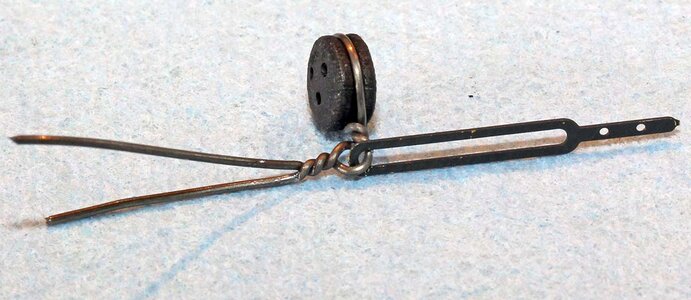
For the deadeyes with the chain plates attached I used 1.75 turns. This placed the loop perpendicular to the deadeye as seen below. I use a pin vise with a bent piece of piano wire to twist the loop.

BP622.jpg

Here it is after twisting

BP623.jpg

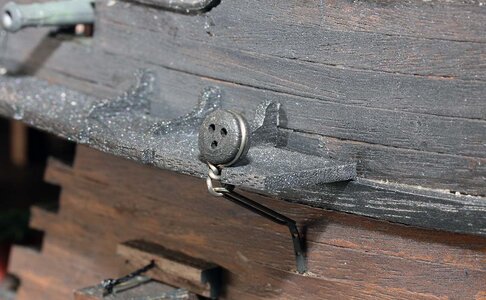
And a photo of the part in place. I used the 90 degree angle to place the little tail to the rear so it doesn’t show so much.

BP624.jpg

Where there is no chain plate under it, I just stretched the lower wires out straight. For the lower parts on the side of the hull I used 1.5 turns.

BP625.jpg

Here is one in place.

BP626.jpg

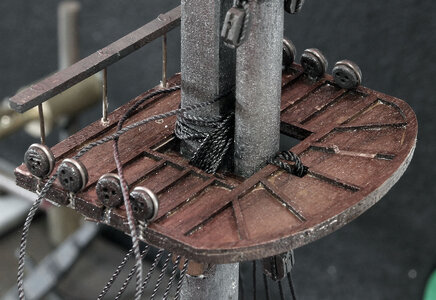
For the upper ones on the mast I used 2 full turns because the wood is thicker. If I was going to use these I would epoxy the deadeyes with the wire as pictured into the slots where the deadeyes go. I would let that cure, then attach the chain plates where applicable and add the strips along the outside. The reason I would epoxy the deadeyes in is because the deadeyes like to twist around if the groove is overly large. Making sure the lower eyes are solid really helps with getting a consistent look on the deadeye linkages.

I’m not using those but if I was that is how I would do it.

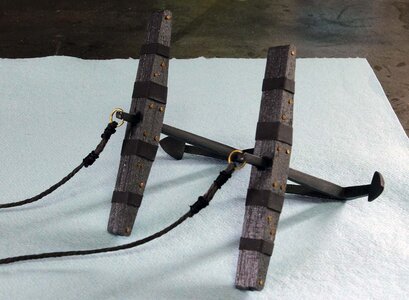
The one thing I did to move my effort forward this weekend was to tie the rope to the anchor.

BP627.jpg
 
Last edited:
Okay so I spent a few minutes doing some things while I’m working on another dead eye project. Early in this thread I said I would give people an idea of how to do things with the basic tools when I did weird stuff. So this is going to be one of those posts.

Here’s how the manual recommends doing the deadeyes. First I dyed the deadeyes black with the same water based black stain I’ve been using all along.

View attachment 248924

Here’s the first batch of dyed deadeyes, when I did these I also blackened the anchor rope.

View attachment 248925

Instead of using the brass wire I would use 0.73mm annealed dark wire. I got this from Model Expo. It’s stronger than the brass wire and you don’t need to make it black.

View attachment 248926

So I start by wrapping the deadeye with the wire and then hold the ends in the pliers and twist the deadeye. I use three different numbers of twists on the wire based on the location. Also this is the time to make sure you have the deadeyes oriented correctly. The one center hole should be furthest away with the other two eyes even with each other. If they are all over the place the ropes will look really messy.

View attachment 248927

For the deadeyes with the chain plates attached I used 1.75 turns. This placed the loop perpendicular to the deadeye as seen below. I use a pin vise with a bent piece of piano wire to twist the loop.

View attachment 248928

Here it is after twisting

View attachment 248929

And a photo of the part in place. I used the 90 degree angle to place the little tail to the rear so it doesn’t show so much.

View attachment 248930

Where there is no chain plate under it, I just stretched the lower wires out straight. For the lower parts on the side of the hull I used 1.5 turns.

View attachment 248931

Here is one in place.

View attachment 248932

For the upper ones on the mast I used 2 full turns because the wood is thicker. If I was going to use these I would epoxy the deadeyes with the wire as pictured into the slots where the deadeyes go. I would let that cure, then attach the chain plates where applicable and add the strips along the outside. The reason I would epoxy the deadeyes in is because the deadeyes like to twist around if the groove is overly large. Making sure the lower eyes are solid really helps with getting a consistent look on the deadeye linkages.

I’m not using those but if I was that is how I would do it.

The one thing I did to move my effort forward this weekend was to tie the rope to the anchor.

View attachment 248933
Jodie, did I understand correctly? You are not using the kit deadeyes on the masts??? I plan to order the wire from MicroExpo and was thinking about getting some blocks and deadeyes too!
 
I've been doing some experamenting with other ideas and have a bit of a different solution but don't want to put it up here if it doesn't work. If it doesn't work out I'll do it the traditional way.
 
Okay so I spent a few minutes doing some things while I’m working on another dead eye project. Early in this thread I said I would give people an idea of how to do things with the basic tools when I did weird stuff. So this is going to be one of those posts.

Here’s how the manual recommends doing the deadeyes. First I dyed the deadeyes black with the same water based black stain I’ve been using all along.

View attachment 248924

Here’s the first batch of dyed deadeyes, when I did these I also blackened the anchor rope.

View attachment 248925

Instead of using the brass wire I would use 0.73mm annealed dark wire. I got this from Model Expo. It’s stronger than the brass wire and you don’t need to make it black.

View attachment 248926

So I start by wrapping the deadeye with the wire and then hold the ends in the pliers and twist the deadeye. I use three different numbers of twists on the wire based on the location. Also this is the time to make sure you have the deadeyes oriented correctly. The one center hole should be furthest away with the other two eyes even with each other. If they are all over the place the ropes will look really messy.

View attachment 248927

For the deadeyes with the chain plates attached I used 1.75 turns. This placed the loop perpendicular to the deadeye as seen below. I use a pin vise with a bent piece of piano wire to twist the loop.

View attachment 248928

Here it is after twisting

View attachment 248929

And a photo of the part in place. I used the 90 degree angle to place the little tail to the rear so it doesn’t show so much.

View attachment 248930

Where there is no chain plate under it, I just stretched the lower wires out straight. For the lower parts on the side of the hull I used 1.5 turns.

View attachment 248931

Here is one in place.

View attachment 248932

For the upper ones on the mast I used 2 full turns because the wood is thicker. If I was going to use these I would epoxy the deadeyes with the wire as pictured into the slots where the deadeyes go. I would let that cure, then attach the chain plates where applicable and add the strips along the outside. The reason I would epoxy the deadeyes in is because the deadeyes like to twist around if the groove is overly large. Making sure the lower eyes are solid really helps with getting a consistent look on the deadeye linkages.

I’m not using those but if I was that is how I would do it.

The one thing I did to move my effort forward this weekend was to tie the rope to the anchor.

View attachment 248933

I didn't even think about blackening the deadeyes!
Now I have more work ahead of me, ROTF.

How thick is that wire; .3mm , .5mm, .8mm ?
 
I used the 0.73mm wire for wrapping these deadeyes. I did mention that above. I highly recommend getting some of the 0.41, 0.58, and 0.73. It comes in handy for a lot of things and it's nice to just have it on the shelf.
 
Vic, I wouldn't specifically say I used the wire a lot with my trains but I often find uses around the house.

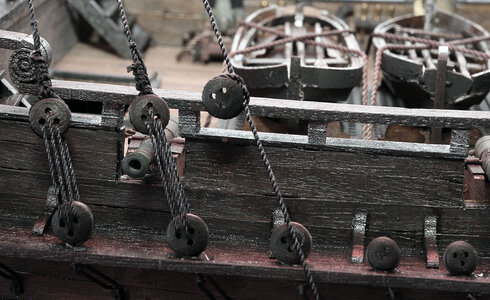
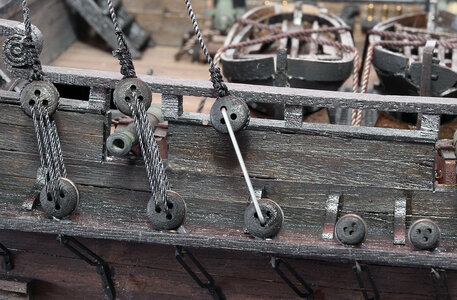
So I got home from my vacation on Friday all excited to try a new way of doing the deadeyes on the ship and after a couple hours of work I figured out that my plan wasn’t going to work. So I’m not going to talk about that experiment here as it would just confuse things. So on Saturday afternoon I decided to move forward with the kit parts. I epoxied the previously wired up deadeyes into the slots on the boards glued on the outer strips and let it dry. Then I tried using one of the provided nails to attach the brass strip to the side of the hull. When there was enough pressure to push the blunt end of the nail in it went in so hard I almost put a hole clear into the inside of the ship. At this point I decided to just glue the chain plates to the side of the ship and put the nails in later.

BP628.jpg

After touching up the paint, I decided to not bother with the nails. Even though the holes show up pretty well in a macro photo in person you can’t even see they aren’t there without really examining it so I may not put them in at all. Either way I can do it later if I want to. I need some real nails with a sharp tip, or to pre drill if I’m going to do it.

BP629.jpg

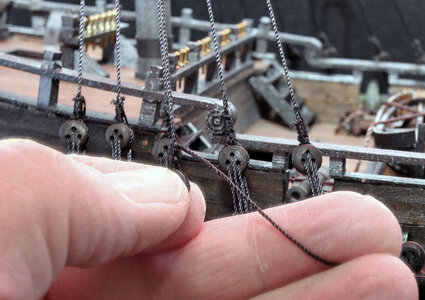
At any rate I decided to go ahead and go to work on the rigging. This is the item I most miserably failed at on my first couple of attempts. So I’m going to try and explain how I do the shrouds now. This is a method that I find to be acceptable. Once again this is not the correct way it’s how I do it. The correct way is a lot more work and the people that will see this ship as I mentioned earlier will never no the difference. This explanation is not as good as a video but might be of some help.

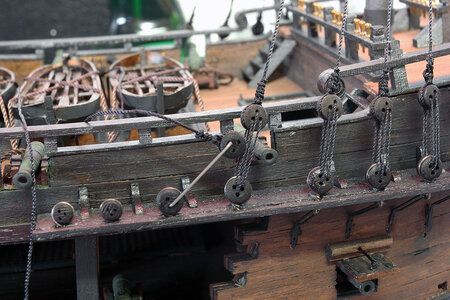
First I go ahead and tie one dead eye to the shroud line off the model. I do this as I showed using a block earlier in this build log. Secondly I take piano wire that will fit in the hole in the dead eye and make a C shape with it as shown below.

I read somewhere a long time ago that the distance between the deadeyes after they are rigged should allow the placement of 2 or 3 dead eyes in the middle. I bent the wire so that I had about 2 ½ dead eyes of space between the outer deadeyes. When you do this make sure you have the outer deadeyes oriented correctly.

BP630.jpg

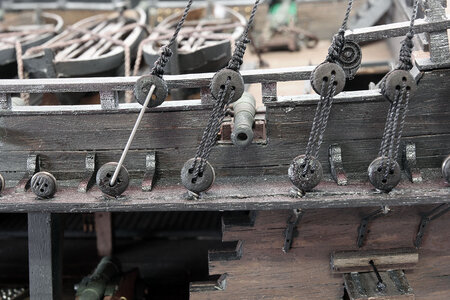
Next I place the wire on the side of the ship with the tied dead eye as shown below. Notice the center holes in the dead eyes are the farthest apart.

BP631.jpg

Then I pull the shroud up over the top and the wire sets the distance for the deadeyes.

BP634.jpg

Now this is what I do wrong. I just wrap the line around the mast and go back down to the opposite side. When I do this I’m careful to neatly wrap each successive line to the rear of the previous one and place a drop of CA as I go along.

BP632.jpg

The reason is to space the shrouds evenly under the mast. If you just wrap them without doing this you end up with a wad of lines at the top instead of nice spacing. It doesn’t hurt anything it just doesn’t look as nice.

BP633.jpg

Next comes the hardest part of doing it this way. I then on the opposite side tie the opposite deadeye on. There are a couple ways to approach this. I start with the deadeye at about the location shown below and then slide it up and down Then I tie a square knot like I showed in the block tying earlier in the thread.

BP635.jpg

Once I have this at the length I want. I actually use my index finger and thumb to pull the shroud tight, and wrap the end of the line around it 4 times like I did in the jig earlier. Then hold the tail between my middle and ring finger as shown below and glue it with a drop of CA.

BP636.jpg

This does take quite a bit of finger dexterity to do but with a little practice it isn’t all that hard.

If that doesn’t work for you there are other things you can try. One is tying the line with the deadeye on the spacer wire. That is a bit of a trick with one wire because the dead eye wants to flip upside down. But you might find it easier than my method. If that is still too frustrating you can use two pieces of bent wire in the outer holes instead of the one in the center and the dead eye will not rotate. I’ve even seen where people have attached the two wires together to make a single part with two pins on each end. Check out post #224 on @Tony H build to see a nice double wire solution.

Once tied on you should have a shroud with the spacer in place on each side of the ship.

BP637.jpg

One issue people have with the deadeyes, are the lines wanting to twist around after they are tied. There are several things I do to keep this from being a major issue. The first is as I mentioned before I always glue the lower deadeye so it can’t turn in the board. The second is I let the dead eye hang free before I start to tie it. This will take any twist out of the shroud line. And finally I make sure the line between the dead eyes isn’t twisted.

I take the smaller line and tie 2 knots in it. One, is often enough but two together gives a little insurance. I don’t know why this thread frayed it usually doesn’t.

BP638.jpg

Then the thread goes through from the back side on the upper eye, in the far left hole, and down to the lower far left hole.

BP639.jpg

Then the center top, center bottm, right top, and right bottom. Notice in the photo below this isn’t tied but still holds its shape. That shows there isn’t any weird stress on it.

BP640.jpg

Lastly I pull the tail straight up and tension the lines to where I like them. I then hold the tail on the back of the upper deadeye with the dead eye between my thumb and index finger. This holds everything tight. Finally I tie a knot on the top of the existing knot where you can see the tail coming from in the photo below.

BP641.jpg

I then put a drop of CA on the knot on the top and the knot on the back of the dead eye. Wait a minute and cut the tails off.

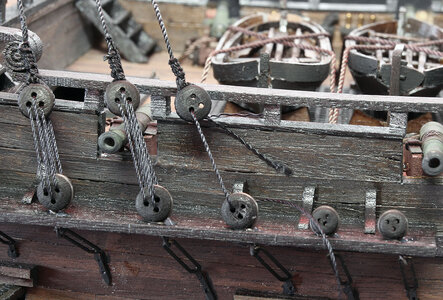
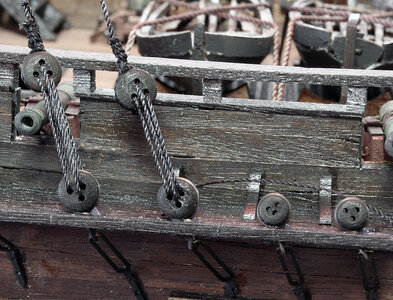
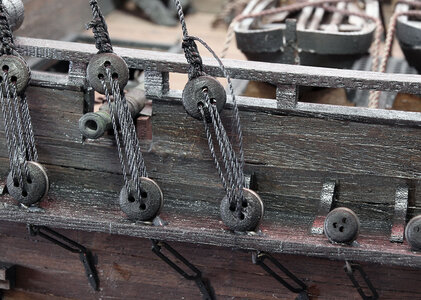
Here’s how it looks when I’m done. It’s not exactly the way it would be on a real ship but it’s adequate for me. It took me about 5 hours to do all of the shrouds for the lower ratlines.

BP642.jpg

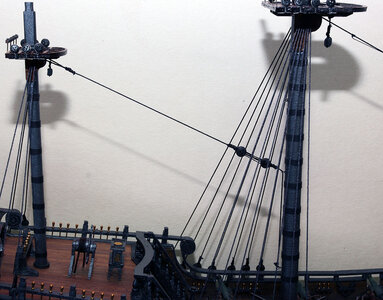
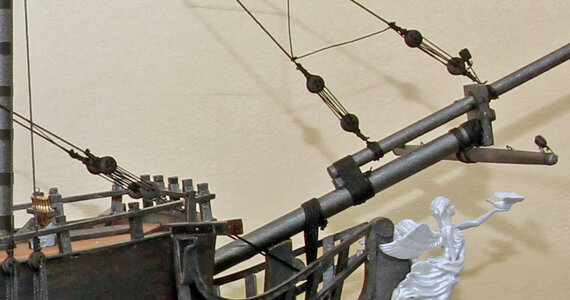
I then used the same basic process to do the lower stays because I didn’t feel like tying rat lines. I embellished the foremast and mainmast stays by tying a smaller line between them. My constitution has the stays this way and I liked the way it looked. On the main mast the two lines are horizontal to each other and on the fore mast the lines are vertical to each other.

BP643.jpg

I also added a stay to the mizzen mast that is attached to eyelets I placed in the main mast.

BP646.jpg

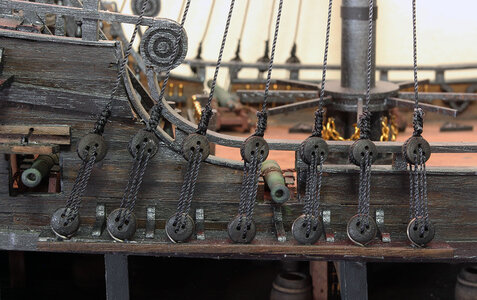
Here’s a closer view of the dead eyes on the main and fore mast stays.

BP645.jpg

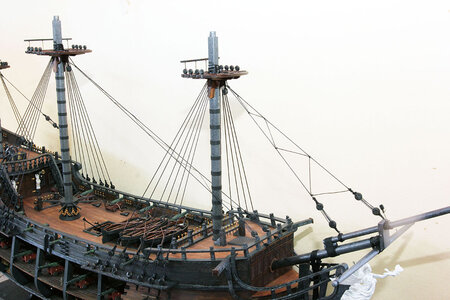
And here is an overall of the shrouds ready to start tying rat line. I still haven’t attached the upper mast portions because I tend to bang them into the cabinet over my work bench. Waiting to attach them will hopefully keep me from breaking them.

BP644.jpg
 
Nice progress. I just viewed a new for me way of seizing the shrouds above the deadeyes. This Canadian modeler wrapped the line around a small bit and glued it using white glue. Then he cut the seizing to the desired sizes and slipped them over the two shroud lines. Voila! Instant seizing.
 
Vic, I wouldn't specifically say I used the wire a lot with my trains but I often find uses around the house.

So I got home from my vacation on Friday all excited to try a new way of doing the deadeyes on the ship and after a couple hours of work I figured out that my plan wasn’t going to work. So I’m not going to talk about that experiment here as it would just confuse things. So on Saturday afternoon I decided to move forward with the kit parts. I epoxied the previously wired up deadeyes into the slots on the boards glued on the outer strips and let it dry. Then I tried using one of the provided nails to attach the brass strip to the side of the hull. When there was enough pressure to push the blunt end of the nail in it went in so hard I almost put a hole clear into the inside of the ship. At this point I decided to just glue the chain plates to the side of the ship and put the nails in later.

View attachment 252252

After touching up the paint, I decided to not bother with the nails. Even though the holes show up pretty well in a macro photo in person you can’t even see they aren’t there without really examining it so I may not put them in at all. Either way I can do it later if I want to. I need some real nails with a sharp tip, or to pre drill if I’m going to do it.

View attachment 252254

At any rate I decided to go ahead and go to work on the rigging. This is the item I most miserably failed at on my first couple of attempts. So I’m going to try and explain how I do the shrouds now. This is a method that I find to be acceptable. Once again this is not the correct way it’s how I do it. The correct way is a lot more work and the people that will see this ship as I mentioned earlier will never no the difference. This explanation is not as good as a video but might be of some help.

First I go ahead and tie one dead eye to the shroud line off the model. I do this as I showed using a block earlier in this build log. Secondly I take piano wire that will fit in the hole in the dead eye and make a C shape with it as shown below.

I read somewhere a long time ago that the distance between the deadeyes after they are rigged should allow the placement of 2 or 3 dead eyes in the middle. I bent the wire so that I had about 2 ½ dead eyes of space between the outer deadeyes. When you do this make sure you have the outer deadeyes oriented correctly.

View attachment 252253

Next I place the wire on the side of the ship with the tied dead eye as shown below. Notice the center holes in the dead eyes are the farthest apart.

View attachment 252255

Then I pull the shroud up over the top and the wire sets the distance for the deadeyes.

View attachment 252256

Now this is what I do wrong. I just wrap the line around the mast and go back down to the opposite side. When I do this I’m careful to neatly wrap each successive line to the rear of the previous one and place a drop of CA as I go along.

View attachment 252257

The reason is to space the shrouds evenly under the mast. If you just wrap them without doing this you end up with a wad of lines at the top instead of nice spacing. It doesn’t hurt anything it just doesn’t look as nice.

View attachment 252258

Next comes the hardest part of doing it this way. I then on the opposite side tie the opposite deadeye on. There are a couple ways to approach this. I start with the deadeye at about the location shown below and then slide it up and down Then I tie a square knot like I showed in the block tying earlier in the thread.

View attachment 252259

Once I have this at the length I want. I actually use my index finger and thumb to pull the shroud tight, and wrap the end of the line around it 4 times like I did in the jig earlier. Then hold the tail between my middle and ring finger as shown below and glue it with a drop of CA.

View attachment 252260

This does take quite a bit of finger dexterity to do but with a little practice it isn’t all that hard.

If that doesn’t work for you there are other things you can try. One is tying the line with the deadeye on the spacer wire. That is a bit of a trick with one wire because the dead eye wants to flip upside down. But you might find it easier than my method. If that is still too frustrating you can use two pieces of bent wire in the outer holes instead of the one in the center and the dead eye will not rotate. I’ve even seen where people have attached the two wires together to make a single part with two pins on each end. Check out post #224 on @Tony H build to see a nice double wire solution.

Once tied on you should have a shroud with the spacer in place on each side of the ship.

View attachment 252261

One issue people have with the deadeyes, are the lines wanting to twist around after they are tied. There are several things I do to keep this from being a major issue. The first is as I mentioned before I always glue the lower deadeye so it can’t turn in the board. The second is I let the dead eye hang free before I start to tie it. This will take any twist out of the shroud line. And finally I make sure the line between the dead eyes isn’t twisted.

I take the smaller line and tie 2 knots in it. One, is often enough but two together gives a little insurance. I don’t know why this thread frayed it usually doesn’t.

View attachment 252262

Then the thread goes through from the back side on the upper eye, in the far left hole, and down to the lower far left hole.

View attachment 252263

Then the center top, center bottm, right top, and right bottom. Notice in the photo below this isn’t tied but still holds its shape. That shows there isn’t any weird stress on it.

View attachment 252264

Lastly I pull the tail straight up and tension the lines to where I like them. I then hold the tail on the back of the upper deadeye with the dead eye between my thumb and index finger. This holds everything tight. Finally I tie a knot on the top of the existing knot where you can see the tail coming from in the photo below.

View attachment 252265

I then put a drop of CA on the knot on the top and the knot on the back of the dead eye. Wait a minute and cut the tails off.

Here’s how it looks when I’m done. It’s not exactly the way it would be on a real ship but it’s adequate for me. It took me about 5 hours to do all of the shrouds for the lower ratlines.

View attachment 252266

I then used the same basic process to do the lower stays because I didn’t feel like tying rat lines. I embellished the foremast and mainmast stays by tying a smaller line between them. My constitution has the stays this way and I liked the way it looked. On the main mast the two lines are horizontal to each other and on the fore mast the lines are vertical to each other.

View attachment 252267

I also added a stay to the mizzen mast that is attached to eyelets I placed in the main mast.

View attachment 252268

Here’s a closer view of the dead eyes on the main and fore mast stays.

View attachment 252269

And here is an overall of the shrouds ready to start tying rat line. I still haven’t attached the upper mast portions because I tend to bang them into the cabinet over my work bench. Waiting to attach them will hopefully keep me from breaking them.

View attachment 252270
Wow, that is some detailed description, well done.
Those are some excellent close up pictures, are you using a camera on your phone or a real camera?
I'll come back to this post when I get around to the shrouds.
The ship looks beautiful.
 
I'm using a real camera. It's a Canon 60D. The photos are reduced in resolution by about 70% before I upload them. The real close shots were taken with a 60mm L series Macro lens. Most of the photos I post are taken with a 18-40mm L series zoom.
 
Vic, I wouldn't specifically say I used the wire a lot with my trains but I often find uses around the house.

So I got home from my vacation on Friday all excited to try a new way of doing the deadeyes on the ship and after a couple hours of work I figured out that my plan wasn’t going to work. So I’m not going to talk about that experiment here as it would just confuse things. So on Saturday afternoon I decided to move forward with the kit parts. I epoxied the previously wired up deadeyes into the slots on the boards glued on the outer strips and let it dry. Then I tried using one of the provided nails to attach the brass strip to the side of the hull. When there was enough pressure to push the blunt end of the nail in it went in so hard I almost put a hole clear into the inside of the ship. At this point I decided to just glue the chain plates to the side of the ship and put the nails in later.

View attachment 252252

After touching up the paint, I decided to not bother with the nails. Even though the holes show up pretty well in a macro photo in person you can’t even see they aren’t there without really examining it so I may not put them in at all. Either way I can do it later if I want to. I need some real nails with a sharp tip, or to pre drill if I’m going to do it.

View attachment 252254

At any rate I decided to go ahead and go to work on the rigging. This is the item I most miserably failed at on my first couple of attempts. So I’m going to try and explain how I do the shrouds now. This is a method that I find to be acceptable. Once again this is not the correct way it’s how I do it. The correct way is a lot more work and the people that will see this ship as I mentioned earlier will never no the difference. This explanation is not as good as a video but might be of some help.

First I go ahead and tie one dead eye to the shroud line off the model. I do this as I showed using a block earlier in this build log. Secondly I take piano wire that will fit in the hole in the dead eye and make a C shape with it as shown below.

I read somewhere a long time ago that the distance between the deadeyes after they are rigged should allow the placement of 2 or 3 dead eyes in the middle. I bent the wire so that I had about 2 ½ dead eyes of space between the outer deadeyes. When you do this make sure you have the outer deadeyes oriented correctly.

View attachment 252253

Next I place the wire on the side of the ship with the tied dead eye as shown below. Notice the center holes in the dead eyes are the farthest apart.

View attachment 252255

Then I pull the shroud up over the top and the wire sets the distance for the deadeyes.

View attachment 252256

Now this is what I do wrong. I just wrap the line around the mast and go back down to the opposite side. When I do this I’m careful to neatly wrap each successive line to the rear of the previous one and place a drop of CA as I go along.

View attachment 252257

The reason is to space the shrouds evenly under the mast. If you just wrap them without doing this you end up with a wad of lines at the top instead of nice spacing. It doesn’t hurt anything it just doesn’t look as nice.

View attachment 252258

Next comes the hardest part of doing it this way. I then on the opposite side tie the opposite deadeye on. There are a couple ways to approach this. I start with the deadeye at about the location shown below and then slide it up and down Then I tie a square knot like I showed in the block tying earlier in the thread.

View attachment 252259

Once I have this at the length I want. I actually use my index finger and thumb to pull the shroud tight, and wrap the end of the line around it 4 times like I did in the jig earlier. Then hold the tail between my middle and ring finger as shown below and glue it with a drop of CA.

View attachment 252260

This does take quite a bit of finger dexterity to do but with a little practice it isn’t all that hard.

If that doesn’t work for you there are other things you can try. One is tying the line with the deadeye on the spacer wire. That is a bit of a trick with one wire because the dead eye wants to flip upside down. But you might find it easier than my method. If that is still too frustrating you can use two pieces of bent wire in the outer holes instead of the one in the center and the dead eye will not rotate. I’ve even seen where people have attached the two wires together to make a single part with two pins on each end. Check out post #224 on @Tony H build to see a nice double wire solution.

Once tied on you should have a shroud with the spacer in place on each side of the ship.

View attachment 252261

One issue people have with the deadeyes, are the lines wanting to twist around after they are tied. There are several things I do to keep this from being a major issue. The first is as I mentioned before I always glue the lower deadeye so it can’t turn in the board. The second is I let the dead eye hang free before I start to tie it. This will take any twist out of the shroud line. And finally I make sure the line between the dead eyes isn’t twisted.

I take the smaller line and tie 2 knots in it. One, is often enough but two together gives a little insurance. I don’t know why this thread frayed it usually doesn’t.

View attachment 252262

Then the thread goes through from the back side on the upper eye, in the far left hole, and down to the lower far left hole.

View attachment 252263

Then the center top, center bottm, right top, and right bottom. Notice in the photo below this isn’t tied but still holds its shape. That shows there isn’t any weird stress on it.

View attachment 252264

Lastly I pull the tail straight up and tension the lines to where I like them. I then hold the tail on the back of the upper deadeye with the dead eye between my thumb and index finger. This holds everything tight. Finally I tie a knot on the top of the existing knot where you can see the tail coming from in the photo below.

View attachment 252265

I then put a drop of CA on the knot on the top and the knot on the back of the dead eye. Wait a minute and cut the tails off.

Here’s how it looks when I’m done. It’s not exactly the way it would be on a real ship but it’s adequate for me. It took me about 5 hours to do all of the shrouds for the lower ratlines.

View attachment 252266

I then used the same basic process to do the lower stays because I didn’t feel like tying rat lines. I embellished the foremast and mainmast stays by tying a smaller line between them. My constitution has the stays this way and I liked the way it looked. On the main mast the two lines are horizontal to each other and on the fore mast the lines are vertical to each other.

View attachment 252267

I also added a stay to the mizzen mast that is attached to eyelets I placed in the main mast.

View attachment 252268

Here’s a closer view of the dead eyes on the main and fore mast stays.

View attachment 252269

And here is an overall of the shrouds ready to start tying rat line. I still haven’t attached the upper mast portions because I tend to bang them into the cabinet over my work bench. Waiting to attach them will hopefully keep me from breaking them.

View attachment 252270
For small lower deadeyes or those fairly tight against something, what is your method to thread the lanyard from the back/blind side outboard if the lower deadeye is fixed in place and cannot be rotated outboard. This is particularly a problem with small thread lanyards having to pass through extremely small holes. Always looking for suggestions. Rich (PT-2)
 
Great tutorial on the shrouds Jodie! Thank you - I will incorporate your method.
 
Vic, I wouldn't specifically say I used the wire a lot with my trains but I often find uses around the house.

So I got home from my vacation on Friday all excited to try a new way of doing the deadeyes on the ship and after a couple hours of work I figured out that my plan wasn’t going to work. So I’m not going to talk about that experiment here as it would just confuse things. So on Saturday afternoon I decided to move forward with the kit parts. I epoxied the previously wired up deadeyes into the slots on the boards glued on the outer strips and let it dry. Then I tried using one of the provided nails to attach the brass strip to the side of the hull. When there was enough pressure to push the blunt end of the nail in it went in so hard I almost put a hole clear into the inside of the ship. At this point I decided to just glue the chain plates to the side of the ship and put the nails in later.

View attachment 252252

After touching up the paint, I decided to not bother with the nails. Even though the holes show up pretty well in a macro photo in person you can’t even see they aren’t there without really examining it so I may not put them in at all. Either way I can do it later if I want to. I need some real nails with a sharp tip, or to pre drill if I’m going to do it.

View attachment 252254

At any rate I decided to go ahead and go to work on the rigging. This is the item I most miserably failed at on my first couple of attempts. So I’m going to try and explain how I do the shrouds now. This is a method that I find to be acceptable. Once again this is not the correct way it’s how I do it. The correct way is a lot more work and the people that will see this ship as I mentioned earlier will never no the difference. This explanation is not as good as a video but might be of some help.

First I go ahead and tie one dead eye to the shroud line off the model. I do this as I showed using a block earlier in this build log. Secondly I take piano wire that will fit in the hole in the dead eye and make a C shape with it as shown below.

I read somewhere a long time ago that the distance between the deadeyes after they are rigged should allow the placement of 2 or 3 dead eyes in the middle. I bent the wire so that I had about 2 ½ dead eyes of space between the outer deadeyes. When you do this make sure you have the outer deadeyes oriented correctly.

View attachment 252253

Next I place the wire on the side of the ship with the tied dead eye as shown below. Notice the center holes in the dead eyes are the farthest apart.

View attachment 252255

Then I pull the shroud up over the top and the wire sets the distance for the deadeyes.

View attachment 252256

Now this is what I do wrong. I just wrap the line around the mast and go back down to the opposite side. When I do this I’m careful to neatly wrap each successive line to the rear of the previous one and place a drop of CA as I go along.

View attachment 252257

The reason is to space the shrouds evenly under the mast. If you just wrap them without doing this you end up with a wad of lines at the top instead of nice spacing. It doesn’t hurt anything it just doesn’t look as nice.

View attachment 252258

Next comes the hardest part of doing it this way. I then on the opposite side tie the opposite deadeye on. There are a couple ways to approach this. I start with the deadeye at about the location shown below and then slide it up and down Then I tie a square knot like I showed in the block tying earlier in the thread.

View attachment 252259

Once I have this at the length I want. I actually use my index finger and thumb to pull the shroud tight, and wrap the end of the line around it 4 times like I did in the jig earlier. Then hold the tail between my middle and ring finger as shown below and glue it with a drop of CA.

View attachment 252260

This does take quite a bit of finger dexterity to do but with a little practice it isn’t all that hard.

If that doesn’t work for you there are other things you can try. One is tying the line with the deadeye on the spacer wire. That is a bit of a trick with one wire because the dead eye wants to flip upside down. But you might find it easier than my method. If that is still too frustrating you can use two pieces of bent wire in the outer holes instead of the one in the center and the dead eye will not rotate. I’ve even seen where people have attached the two wires together to make a single part with two pins on each end. Check out post #224 on @Tony H build to see a nice double wire solution.

Once tied on you should have a shroud with the spacer in place on each side of the ship.

View attachment 252261

One issue people have with the deadeyes, are the lines wanting to twist around after they are tied. There are several things I do to keep this from being a major issue. The first is as I mentioned before I always glue the lower deadeye so it can’t turn in the board. The second is I let the dead eye hang free before I start to tie it. This will take any twist out of the shroud line. And finally I make sure the line between the dead eyes isn’t twisted.

I take the smaller line and tie 2 knots in it. One, is often enough but two together gives a little insurance. I don’t know why this thread frayed it usually doesn’t.

View attachment 252262

Then the thread goes through from the back side on the upper eye, in the far left hole, and down to the lower far left hole.

View attachment 252263

Then the center top, center bottm, right top, and right bottom. Notice in the photo below this isn’t tied but still holds its shape. That shows there isn’t any weird stress on it.

View attachment 252264

Lastly I pull the tail straight up and tension the lines to where I like them. I then hold the tail on the back of the upper deadeye with the dead eye between my thumb and index finger. This holds everything tight. Finally I tie a knot on the top of the existing knot where you can see the tail coming from in the photo below.

View attachment 252265

I then put a drop of CA on the knot on the top and the knot on the back of the dead eye. Wait a minute and cut the tails off.

Here’s how it looks when I’m done. It’s not exactly the way it would be on a real ship but it’s adequate for me. It took me about 5 hours to do all of the shrouds for the lower ratlines.

View attachment 252266

I then used the same basic process to do the lower stays because I didn’t feel like tying rat lines. I embellished the foremast and mainmast stays by tying a smaller line between them. My constitution has the stays this way and I liked the way it looked. On the main mast the two lines are horizontal to each other and on the fore mast the lines are vertical to each other.

View attachment 252267

I also added a stay to the mizzen mast that is attached to eyelets I placed in the main mast.

View attachment 252268

Here’s a closer view of the dead eyes on the main and fore mast stays.

View attachment 252269

And here is an overall of the shrouds ready to start tying rat line. I still haven’t attached the upper mast portions because I tend to bang them into the cabinet over my work bench. Waiting to attach them will hopefully keep me from breaking them.

View attachment 252270
Hi Jodie, Great work. I haven't had a chance to review your recap here yet but it looks fascinating. I have been a bit on hold lately...Hope to get started again soon. I'll study up later and will continue to follow the great work Tony and you are doing on the rigging. Be well.
 
I've been steadily moving along but not taking a lot of pictures it's just more of the same. The good news is I'm done with the basic rigging. The bad news is I still have to do the sails and I really feel like throwing this thing in the trash. That won't happen because the admiral wants it finished, but at least I don't have to build another wood sailing ship model in the future. The lights quit working again. I need to pull the crappy electronics ZHL sends with the kit out and toss them; then figure out what to use to trun the lights on transformer wise, and just hard wire them without any controls other than a on off switch.

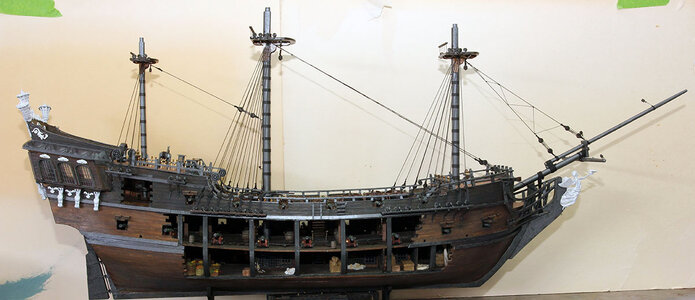
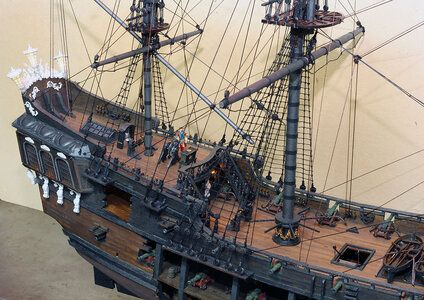
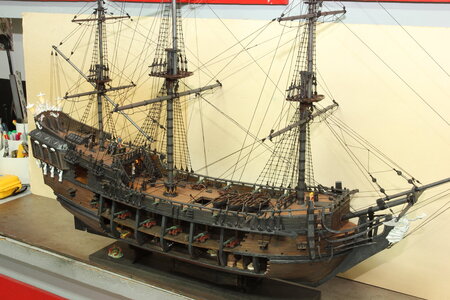
At any rate here's a few photos I was going to take more but when the lights quit working I just gave up. There are figures on the lower decks now. Here's Jack at the wheel.

bp900.jpg

And a lower overall view.

IMG_7181.JPG

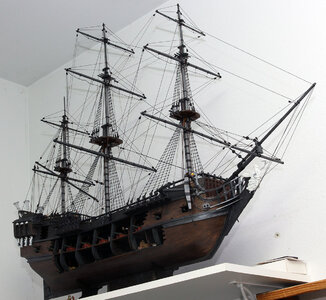
This is up oon the shelf where it usually sits.

bp901.jpg
 
You’re doing a great job, Jodie! I understand what you mean about the lights. Even the best bought lights only last about 200 hours. With the kit lights…. I got them to work after hours of fiddling with them, only to have them break or malfunction in some other way. Even the Evans lights had problems. My daughter broke one of the big lanterns and I broke another. We wound up having only one that worked. I was terribly disappointed and frustrated. It was fun when it lasted though. You’ve got a fine ship with good workmanship. I wish I had your talent and expertise. I like the way you modified size of spars to make the ship look better. My bowsprit was a couple of centimeters too short. It looks funny and out of proportion. My masts weren’t aligned properly either. But it was a good learning experience. I think I’m a better modeler as a result. What’s your next project? Are you still working with Mike Shanks on some details?
 
I've been steadily moving along but not taking a lot of pictures it's just more of the same. The good news is I'm done with the basic rigging. The bad news is I still have to do the sails and I really feel like throwing this thing in the trash. That won't happen because the admiral wants it finished, but at least I don't have to build another wood sailing ship model in the future. The lights quit working again. I need to pull the crappy electronics ZHL sends with the kit out and toss them; then figure out what to use to trun the lights on transformer wise, and just hard wire them without any controls other than a on off switch.

At any rate here's a few photos I was going to take more but when the lights quit working I just gave up. There are figures on the lower decks now. Here's Jack at the wheel.

View attachment 256475

And a lower overall view.

View attachment 256476

This is up oon the shelf where it usually sits.

View attachment 256477
That is a great model with the interior views provided by ambient lighting. I think that an actual ship would be very dark at best with dim lantern illumination. Interior LED or other lighting would commercialize and cheapen the ship in my mind. Well done. Rich (PT-2)
 
That is a great model with the interior views provided by ambient lighting. I think that an actual ship would be very dark at best with dim lantern illumination. Interior LED or other lighting would commercialize and cheapen the ship in my mind. Well done. Rich (PT-2)
It has been nice to see all the wonderful work he has done on the interior, though, Rich. It wouldn't be possible without the help of lighting.
 
That is a great model with the interior views provided by ambient lighting. I think that an actual ship would be very dark at best with dim lantern illumination. Interior LED or other lighting would commercialize and cheapen the ship in my mind. Well done. Rich (PT-2)
Hi Rich, I respectfully disagree. The All-Scenario version of the Black Pearl offers much detail for display and discussion. I know how much hard work guys like Jodie and Vic put into the lighting execution within their builds. When you hit the switch or remote it would kind of knock the wind out of my sails if/when the LED’s fail. While I agree with your comments about how these ships would look in real life, ZHL makes a version that is not a cut away for that type of presentation. JMHO. Have a great day!
 
Back
Top