I had trouble keeping the symmetry going too because of the open side.Morning mates,
Work continues on the first planking and I have pictures to prove it.
Here's the starboard side, about half way done with the first planking.
I've broken 2 planks, so not to bad.
I use a cotton swab to apply water to both sides of any area on the planks that will undergo bending.
This technique works pretty good for this type of wood.
Once the initial swabbing has soaked in I apply a saturating layer to the planks.
That is, I apply water until it starts to bead up on the plank.
I think this works because no planks fit the full length of the ship.
So I'm usually only twisting or bending one end of the plank.
I slowly tighten the pins down until I finally get the bend I need.
I let it dry in place and come back later for the gluing.
View attachment 271057
The port side is complete!
View attachment 271060
Random pics of the work follow ....
View attachment 271059View attachment 271058
These little pins work great for this build as the hull frames are thick enough to hold the pin without cracking the frame.
I initially only had 10 and was doing 1 plank a day.
I ordered another set of 10 after finishing the port side, wish I had done it earlier.
View attachment 271056
View attachment 271054
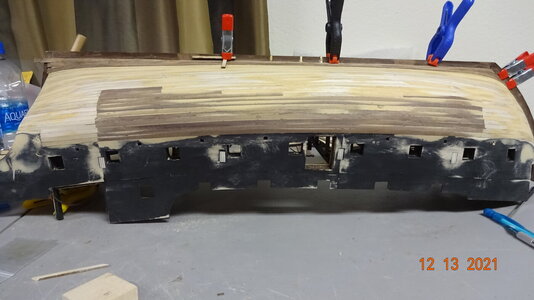
The walnut plank in the middle of the picture below is attached so that it matches the curve of the deck.
This is for the open side of the ship.
This threw off my planking as I didn't need to do it like that on the port side planking.
View attachment 271061
Here you can see how the symmetry of the planks, port to starboard, is off on the lower bow portion of the ship, which is the upper part of the picture. This is acceptable for the first planking but I'll need a better fix for the final planking.
View attachment 271062
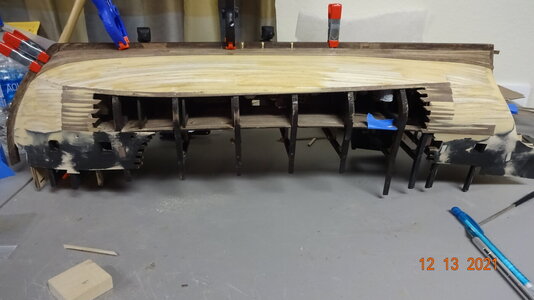
I've had to glue in support shims to be able to glue the end planks down.
Here you see a support glued to the bottom decking, which I will later attach planks to.
It's located between the 3rd and 4th frames.
View attachment 271058
IN the pic below, looking closely you might see the support piece glued down and the plank
being attached to it. It's between the first and second hull frame just above the single middle white plank.
View attachment 271059
The stern symmetry looks to be okay.
View attachment 271063
Maybe another week or two on the first planking left.
Later.....
-

Win a Free Custom Engraved Brass Coin!!!
As a way to introduce our brass coins to the community, we will raffle off a free coin during the month of August. Follow link ABOVE for instructions for entering.
-

PRE-ORDER SHIPS IN SCALE TODAY!
The beloved Ships in Scale Magazine is back and charting a new course for 2026!
Discover new skills, new techniques, and new inspirations in every issue.
NOTE THAT OUR FIRST ISSUE WILL BE JAN/FEB 2026
You are using an out of date browser. It may not display this or other websites correctly.
You should upgrade or use an alternative browser.
You should upgrade or use an alternative browser.
Black Pearl - Zhl 1:50 by Rowboat
- Thread starter Rowboat
- Start date
- Watchers 12
-
- Tags
- black pearl zhl
Wow, last post was November 23rd!
Well, it was a great Christmas spent with the family in Texas.
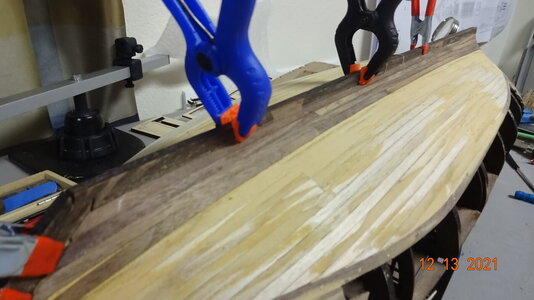
I am on to 2nd planking and it is time consuming.
Difficult to lay down full strips of planking so cutting some into 7-8 inch pieces.
I took a members advice and started the first plank at the tops of the cannon holes as well as starting at the keel.
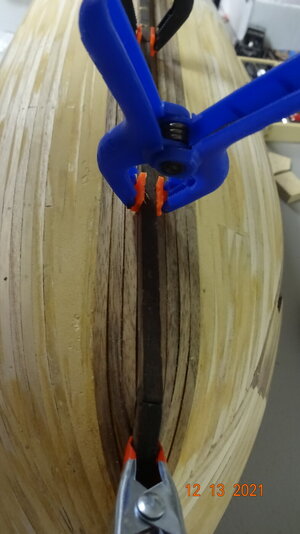
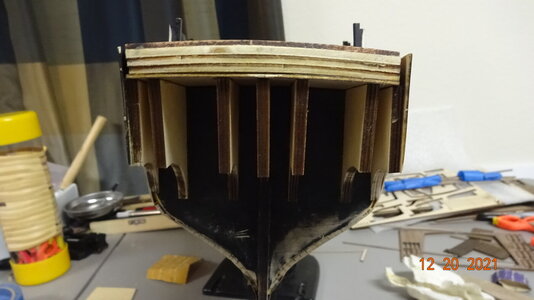
Oops, I for got to load my pics of completing the stern.
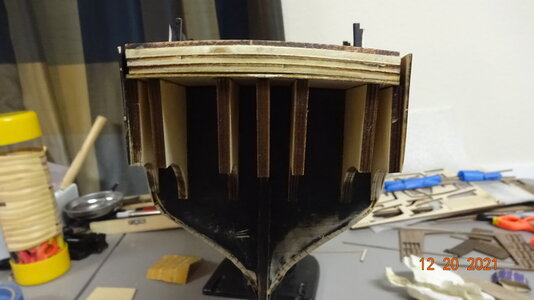
That top curved piece in the above pic needed to be cut and sanded to fit in place. This is because the two hull beams it laid next to were not straight. I think I mention this earlier how those beams shifted in the build process. To resolve the out of alignment, I put that top piece in and found it's center which I marked. Then I found the center line of the ships deck and aligned the two as best I could, you can see the center line drawn in the pic below.
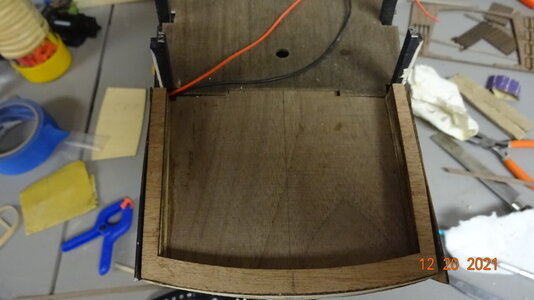
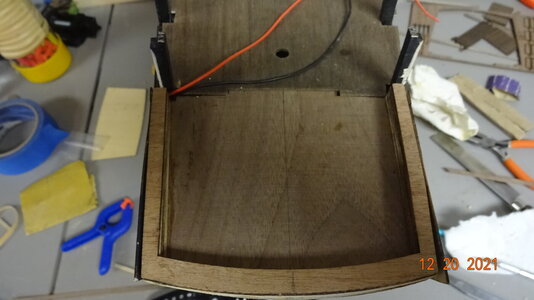
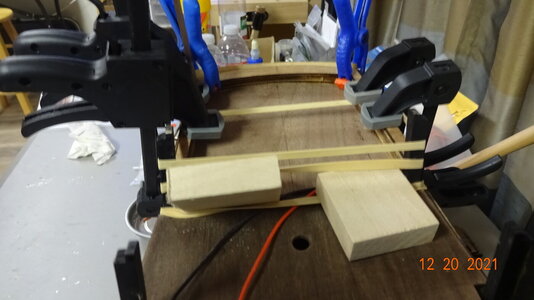
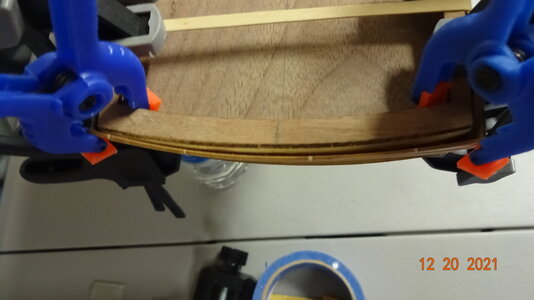
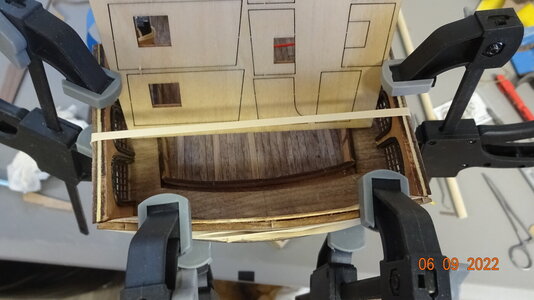
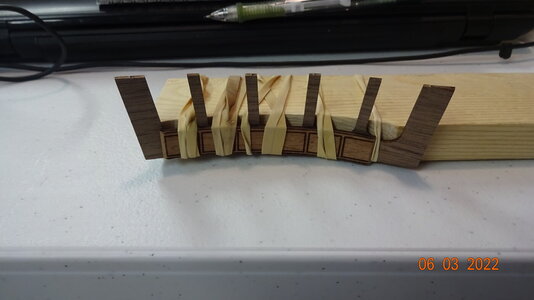
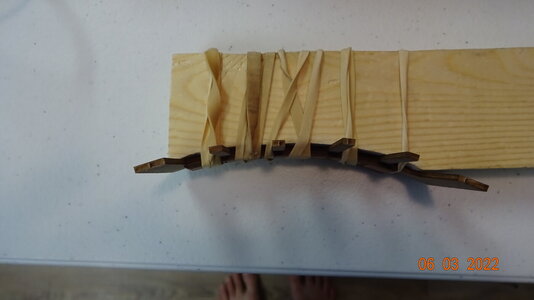
Next up was gluing the two stern sheets of wood. I did wrap one piece around a water bottle to get the curve I needed as was suggested by another member.
Here's everything glued in place.
Te back ...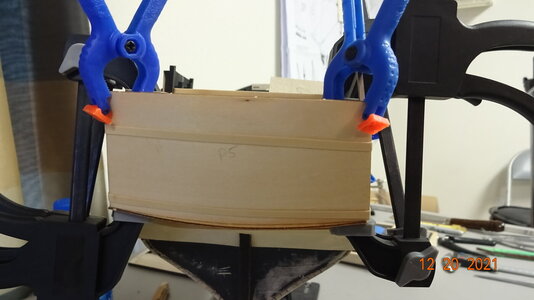
Underneath, this was the part I had wrapped around the water bottle to get the curve.
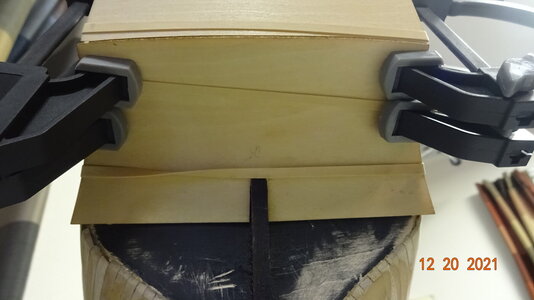
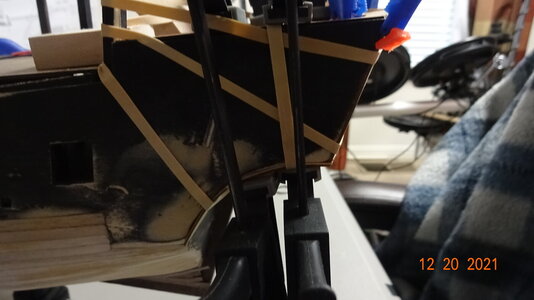
Finally, everything is strapped in.....
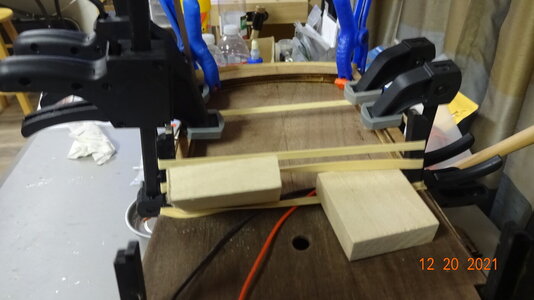
 , back to the 2nd planking.
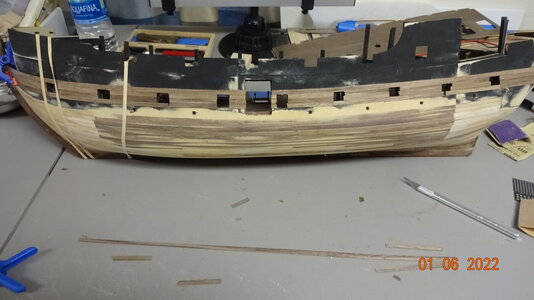
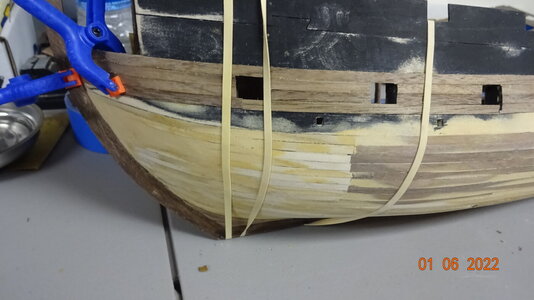
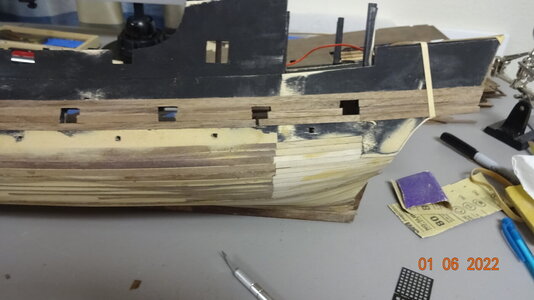
That's where I am at currently.
I needed to soak a few pieces of planking.
I had an old tube that held alignment sticks for golf.
Cutting it to my preferred length and "walaa" I had made a plank soaking tube.
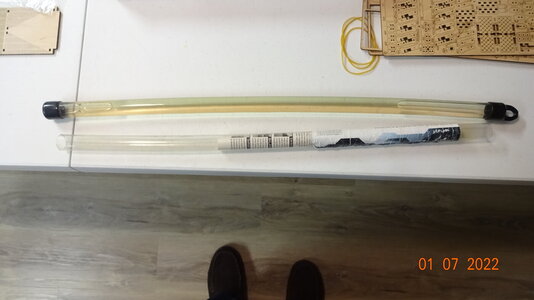
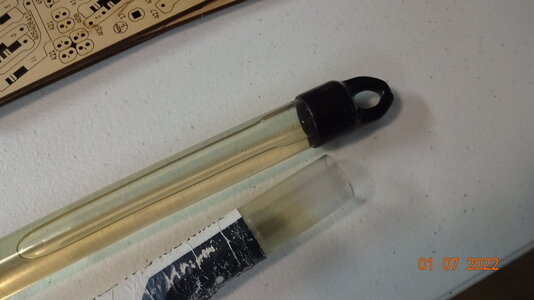
The rubber tips that came with the tube turned out to be water tight!
That's it for now.
Rowboat out.
Well, it was a great Christmas spent with the family in Texas.
I am on to 2nd planking and it is time consuming.
Difficult to lay down full strips of planking so cutting some into 7-8 inch pieces.
I took a members advice and started the first plank at the tops of the cannon holes as well as starting at the keel.


Oops, I for got to load my pics of completing the stern.

That top curved piece in the above pic needed to be cut and sanded to fit in place. This is because the two hull beams it laid next to were not straight. I think I mention this earlier how those beams shifted in the build process. To resolve the out of alignment, I put that top piece in and found it's center which I marked. Then I found the center line of the ships deck and aligned the two as best I could, you can see the center line drawn in the pic below.

Next up was gluing the two stern sheets of wood. I did wrap one piece around a water bottle to get the curve I needed as was suggested by another member.
Here's everything glued in place.
Te back ...

Underneath, this was the part I had wrapped around the water bottle to get the curve.

Finally, everything is strapped in.....


 , back to the 2nd planking.


That's where I am at currently.
I needed to soak a few pieces of planking.
I had an old tube that held alignment sticks for golf.
Cutting it to my preferred length and "walaa" I had made a plank soaking tube.


The rubber tips that came with the tube turned out to be water tight!
That's it for now.
Rowboat out.


- Joined
- Mar 1, 2021
- Messages
- 315
- Points
- 168

Happy New Year Rowboat! I see the shipyard is back in operation! You’re doing a fine job! My matey helpers have been on strike since October! (Doesn’t seem that long ago, but the time away was needed to refresh my motivation) Hopefully, contract negotiations will allow for startup in the next few weeks! Since, I’m almost ready to start rigging, (which I fear I am not talented or patient enough to tackle like others before me) I will limit myself to only two hours per session once construction commences! The remainder of the day under the new contract will be spared for rum consumption to settle my nerves from the many anticipated f-ups! Happy New Year mates!
I'm back with a little report on progress.
I took off 2 1/2 months to build a guitar kit, ES335, that's my excuse and I'm sticking to it. If anyone interested in pics let me know and I'll post some of the guitar.
I finished the 2nd planking for everything below the main deck.
Finished and mounted the cannons, except on the main deck.
Not sure if I'm going to have hammocks, still undecided. But time is running out as I'm ready to mount the main deck.
Sanded down the aft mast hole area so the mast will fit correctly. There was an issue with the deck holes lineing up which caused the aft mast to lean aft a few degrees. I mentioned this a few posts back.
Here are pics of the ship..
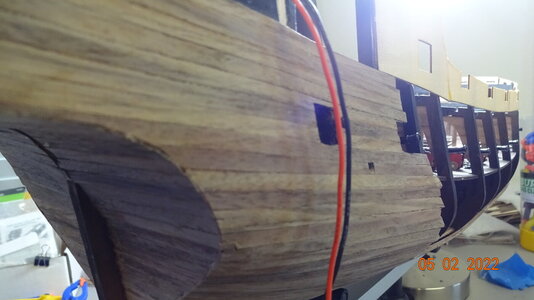
A look from port side , aft view.
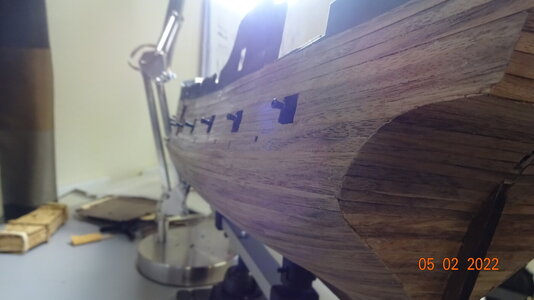
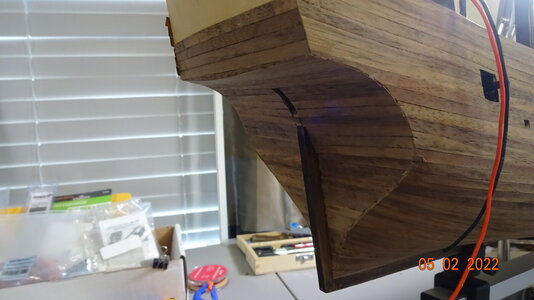
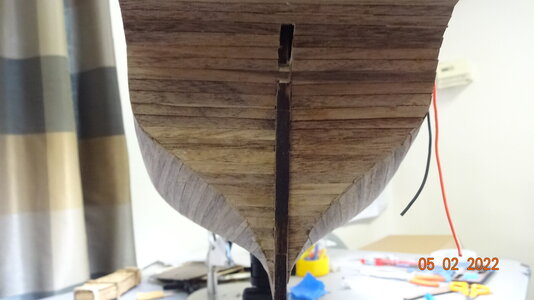
..aft .... notice I did cutout the section for the rudder as others suggested

I took off 2 1/2 months to build a guitar kit, ES335, that's my excuse and I'm sticking to it. If anyone interested in pics let me know and I'll post some of the guitar.
I finished the 2nd planking for everything below the main deck.
Finished and mounted the cannons, except on the main deck.
Not sure if I'm going to have hammocks, still undecided. But time is running out as I'm ready to mount the main deck.
Sanded down the aft mast hole area so the mast will fit correctly. There was an issue with the deck holes lineing up which caused the aft mast to lean aft a few degrees. I mentioned this a few posts back.
Here are pics of the ship..
A look from port side , aft view.


..aft .... notice I did cutout the section for the rudder as others suggested


Last edited:
- Joined
- Mar 1, 2021
- Messages
- 315
- Points
- 168

Great job rowboat! The colors of the puppets and guns really set off nice against the wood tones! I haven’t worked on my Pearl since last October. Trying to get around to it again but so many other projects are keeping me distracted from devoting any real time to it right now! I’ll get on it though! Keep sailing mate!
Glad to see you back, Rowboat!Now for all the fun stuff ... actually it's all fun, so funner
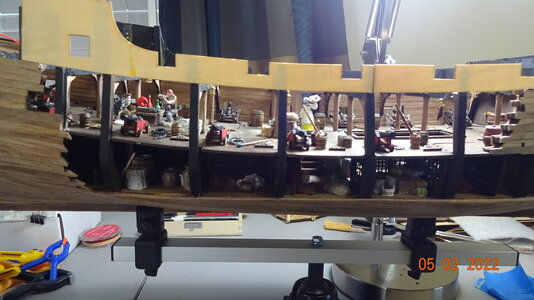
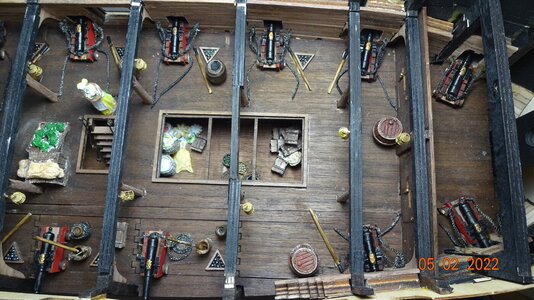
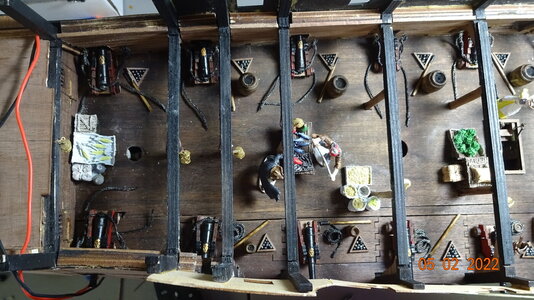
View attachment 306882View attachment 306883View attachment 306884View attachment 306885
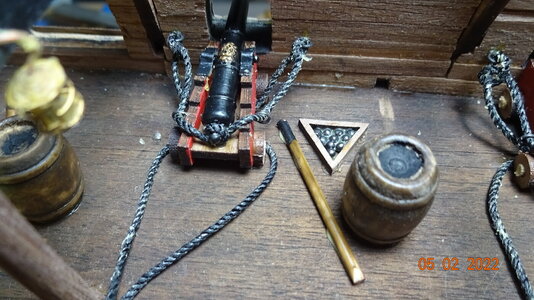
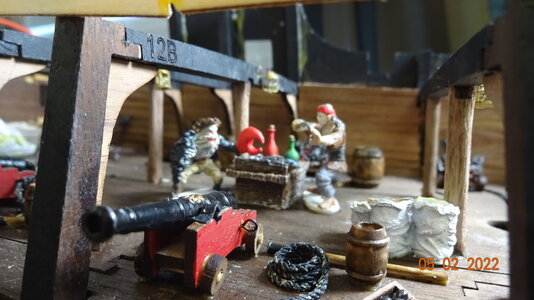
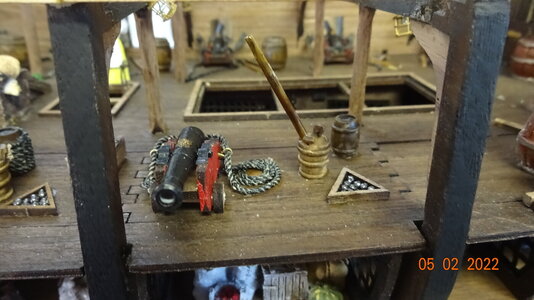
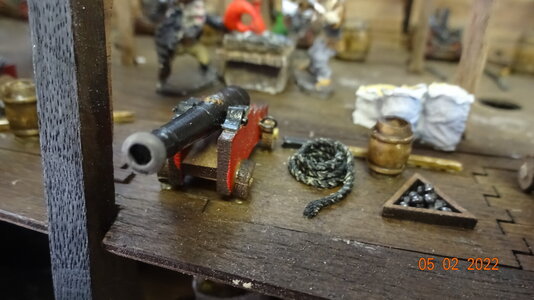
The above cannons "pop" out with the deck as designed.
View attachment 306886View attachment 306887View attachment 306888
So far one light is not working. Hopefully the rest will survive.
Missed you, Rick!Great job rowboat! The colors of the puppets and guns really set off nice against the wood tones! I haven’t worked on my Pearl since last October. Trying to get around to it again but so many other projects are keeping me distracted from devoting any real time to it right now! I’ll get on it though! Keep sailing mate!
Thanks for the replies gentlemen.
I am wondering about mounting the masts on the ship.
Since there will be lots of deck work on the main deck when did you guys glue your masts in?
Seems like I could wait till the end of module one , maybe two ,, before needing to glue in the masts.
I am wondering about mounting the masts on the ship.
Since there will be lots of deck work on the main deck when did you guys glue your masts in?
Seems like I could wait till the end of module one , maybe two ,, before needing to glue in the masts.
Interesting breech rope. I don’t remember its coming with the kit. I waited on the masts until I was almost ready to rig. When you do, you might want to make sure they line up vertically. You will still be tensioning with shrouds and backstays, so keep an eye on them. Doesn’t the mizzenmast have to go on before the poop deck? I think it runs through a little round table or something. That’s the one I had to watch.
My recommendation is don't put the masts on till you have to. You do need to make sure the table in the captain's cabin is lined up correctly, but the masts will be in the way for a long time before you need them if you do it any time soon. I didn't glue the masts in until I was ready to start doing ratlines. And even then, I just put in the lower portion of the mast until after the lower ratlines were done.
Thank you guys, I'll follow your advice.
About ready to lay down the main deck and hope all my mast holes line up

About ready to lay down the main deck and hope all my mast holes line up
- Joined
- Mar 1, 2021
- Messages
- 315
- Points
- 168

Hi Vic….I’ve been on a long hiatus from doing any more Pearl work! Doing so much work inside and outside the home! I’ll get back to it as I’m almost ready to start Ratlines!Missed you, Rick!
Oh boy, Ahoy!Hi Vic….I’ve been on a long hiatus from doing any more Pearl work! Doing so much work inside and outside the home! I’ll get back to it as I’m almost ready to start Ratlines!
Time to put on the main deck!
Nothing new to offer on techniques or ideas that haven't already been posted by other members (thanks by the way).
Did some cutting and sanding to make it fit but finally I got it to lay down.
Found a small anvil to hold it down while it glued.
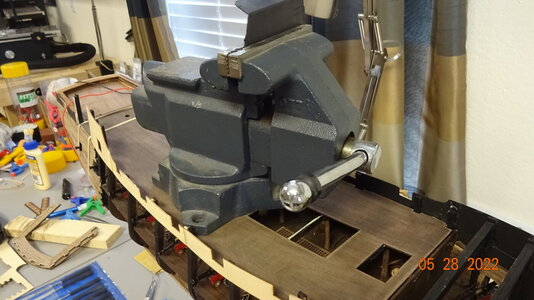
Unfortunately the model was not centered correctly and eventually the ship tumbled over snapping the keel right off.
Seems like I've seen this issue on other members logs .
Re-glued and added some screws to the keel for xtra support. Reattached and kept moving forward.
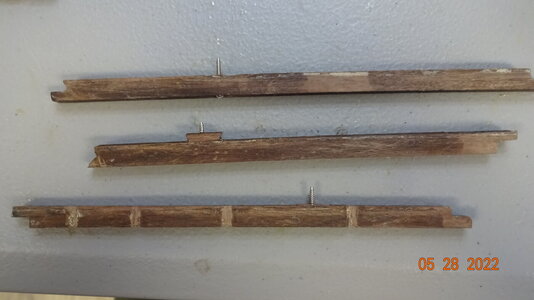
Worked on the poop deck using some member's ideas on how to bend the wood to match the ship's curve.
Centered the planking for the poop deck best I could, the back was slightly off center but some sanding and carving fixed the problem.
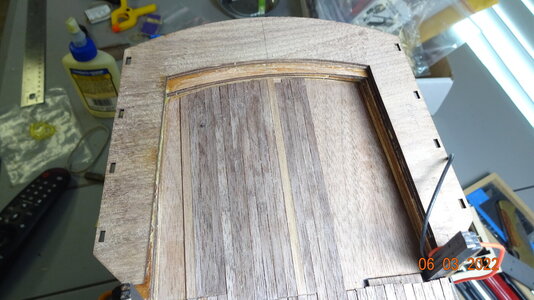
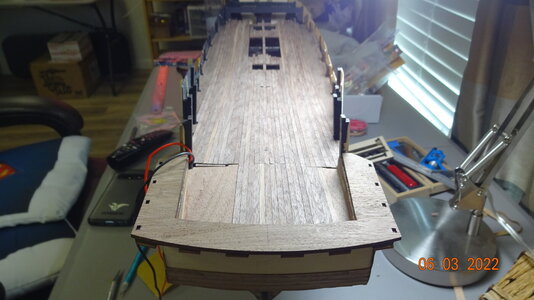
Test fitted the captains quarters.
As it turns out I don't glue in the sides (lighter color wood) till I put on the top of the poop deck.
Read some members post that test fitting the assembled captains quarters is best before doing any gluing.
I recommend this also as parts don't line up initially.
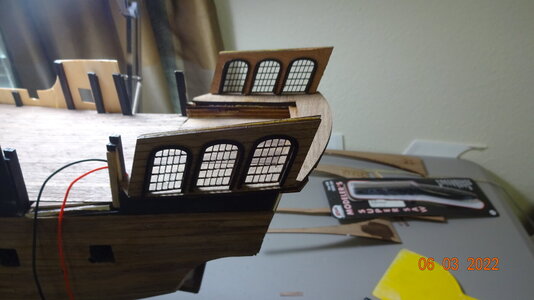
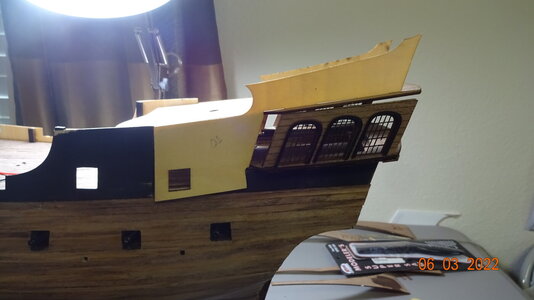
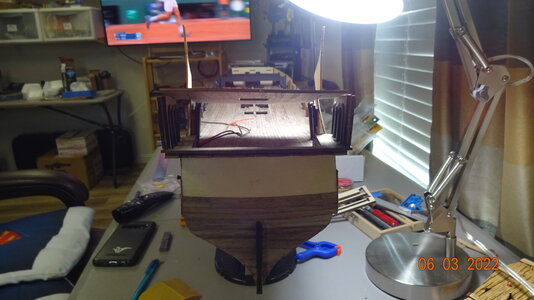
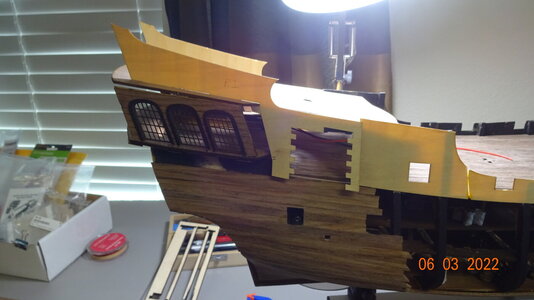
Once I was happy with the fittings' I started building.
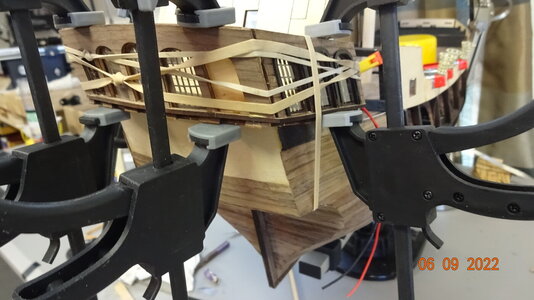
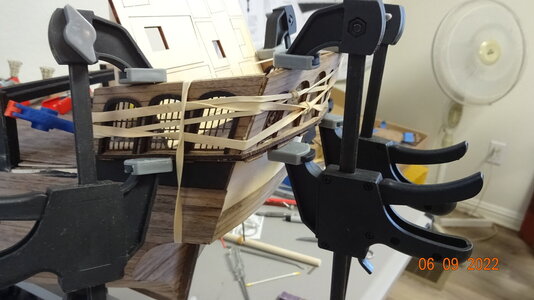
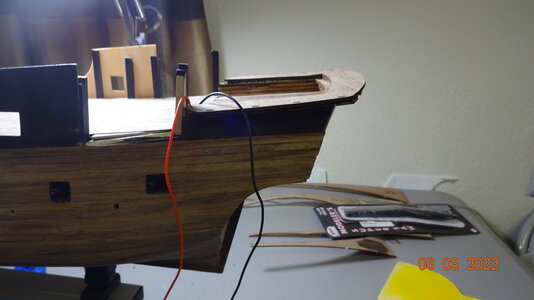
After this I spend a great deal of time working on a wiring system for the captains quarters and the 3 exterior aft lights.
Went through many ideas before deciding on a workable one. I'll leave that for the next post.
Later
Nothing new to offer on techniques or ideas that haven't already been posted by other members (thanks by the way).
Did some cutting and sanding to make it fit but finally I got it to lay down.
Found a small anvil to hold it down while it glued.

Unfortunately the model was not centered correctly and eventually the ship tumbled over snapping the keel right off.
Seems like I've seen this issue on other members logs .
Re-glued and added some screws to the keel for xtra support. Reattached and kept moving forward.

Worked on the poop deck using some member's ideas on how to bend the wood to match the ship's curve.
Centered the planking for the poop deck best I could, the back was slightly off center but some sanding and carving fixed the problem.


Test fitted the captains quarters.
As it turns out I don't glue in the sides (lighter color wood) till I put on the top of the poop deck.
Read some members post that test fitting the assembled captains quarters is best before doing any gluing.
I recommend this also as parts don't line up initially.


Once I was happy with the fittings' I started building.


After this I spend a great deal of time working on a wiring system for the captains quarters and the 3 exterior aft lights.
Went through many ideas before deciding on a workable one. I'll leave that for the next post.
Later


As soon as I saw the picture with the anvil I thought to myself: that's not going to turn out well. Glad you were able to make simple repairs...
Next up is the wiring.
I ran only 1 wire from the lower deck and I would be attaching 9 lights.
Only thing is I had no more lanterns so I borrowed the neighbors 3d printer and made some.
They are a little rough but they work.

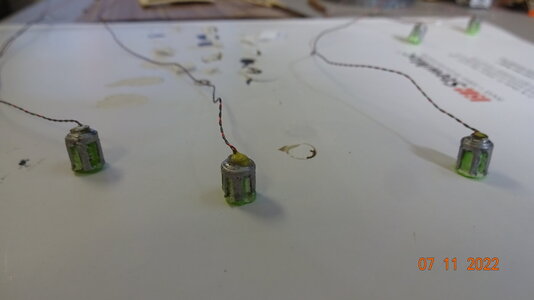
I also attached the led wiring to the 3 lanterns.
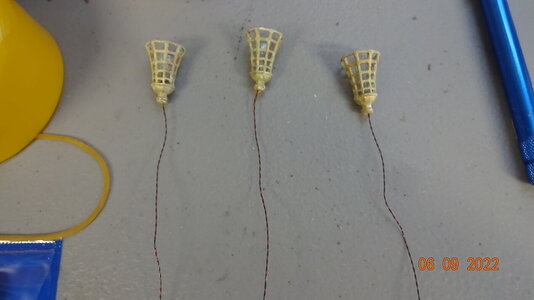
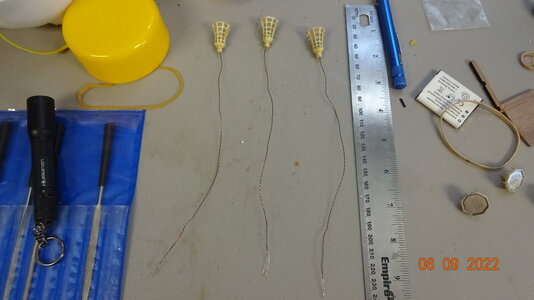
I intend to run 1 wire from the 2nd deck to the 3 lights and connect those on the top of the aft section.
here's some pics of the framing and wiring for the captains quarters.
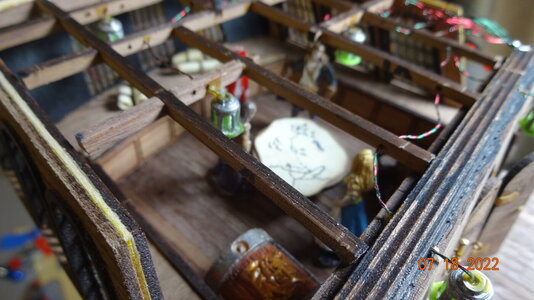
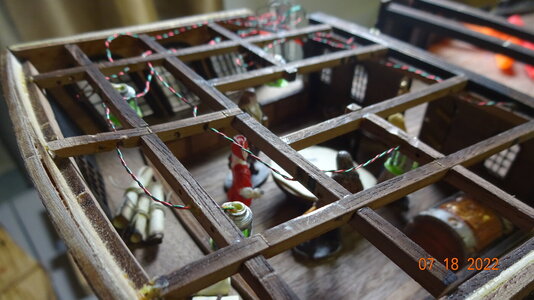
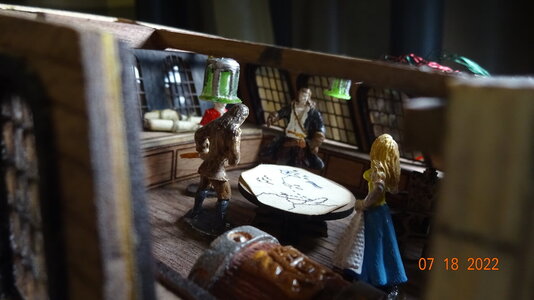
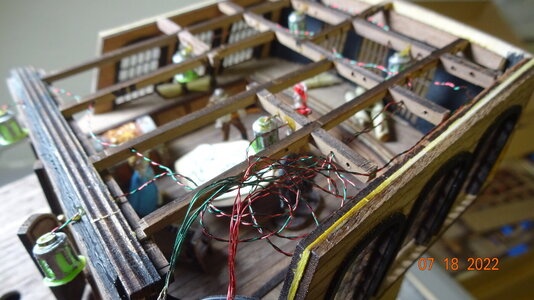
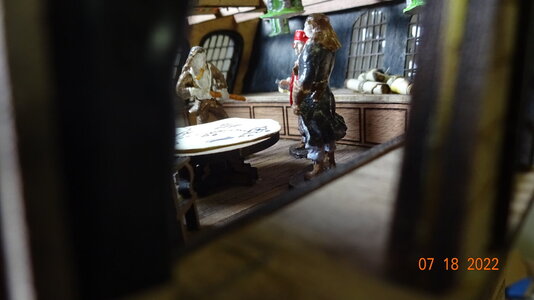
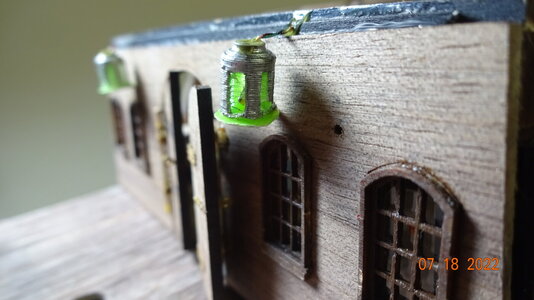
Next I'll solder all the wiring for the 2nd deck and finally be ready to lay down the poop deck itself.
Seems like I'll never get there
Later,
Rowboat.
I ran only 1 wire from the lower deck and I would be attaching 9 lights.
Only thing is I had no more lanterns so I borrowed the neighbors 3d printer and made some.
They are a little rough but they work.


I also attached the led wiring to the 3 lanterns.


I intend to run 1 wire from the 2nd deck to the 3 lights and connect those on the top of the aft section.
here's some pics of the framing and wiring for the captains quarters.


Next I'll solder all the wiring for the 2nd deck and finally be ready to lay down the poop deck itself.
Seems like I'll never get there
Later,
Rowboat.
- Joined
- Mar 1, 2021
- Messages
- 315
- Points
- 168

Ahoy Rowboat! Nice progress! I found pre-fitting was absolutely necessary for me on the Captain’s Quarters! My Pearl has been in Dry Dock for almost a year! Just too many other things keeping me for jumping back in….but she’s looking pretty from where she sits even though there’s much more to accomplish! Good cheers and keep on Sailing!
Looks good, Rowboat! Lots of trial and error. And maybe looking at someone else’s mistakes…


