Kurt Konrath
Kurt Konrath
SoS helps improve the art of learning what we don't know from those who do!
That is what I like best.
That is what I like best.
 |
As a way to introduce our brass coins to the community, we will raffle off a free coin during the month of August. Follow link ABOVE for instructions for entering. |
 |
 |
The beloved Ships in Scale Magazine is back and charting a new course for 2026! Discover new skills, new techniques, and new inspirations in every issue. NOTE THAT OUR FIRST ISSUE WILL BE JAN/FEB 2026 |
 |
Indeed, if not for SOS members help and their encouragement I would have used my first build for kindlingSoS helps improve the art of learning what we don't know from those who do!
That is what I like best.
Thank you for following my build. The Tug is a fun project, I’ve been able to customize the Deckhouse and Pilot house to give them a “Jan” personality.Jan, excellent work. I'm just catching up on your wonderful build log. cheers.
One of my favorite woodworking authors said that when he was an apprentice he asked the master woodworker 'whatever do yo do if you are working on a rare, expensive piece of wood and you make a mistake?' The answer was 'we don't make mistakes, we make corrections.'Hmmm, good weather and summer chores decrease the amount of time spent in the boatyard.
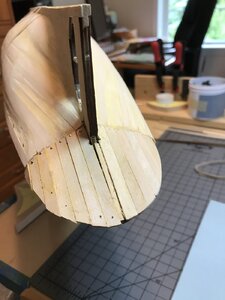
Todays time was spent on repairing some of the mistakes I made on the Tug’s hull. In my enthusiastic sanding, filling voids and more sanding of the hull I managed to break off every one of the bulkhead extension. Those have all been replaced by 3/32“ square Maple pieces.
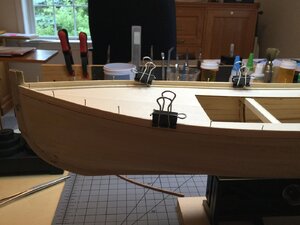
The scribed deck was temporarily held in place with glue from an Elmers glue stick while I fitted the pieces of the waterway between the new bulkhead extensions . When I was satisfied that the waterway and the deck were a good fit, the waterway pieces were soaked and then glued and pinned to the false deck.
View attachment 154409
The waterway is used to eliminate the gap between the scribed deck and the edge of the first plank.
View attachment 154410
The rubber bands work great holding everything together for a test fit.
Jan

Looks like pewter. Brass black won't blacken it, but there are some products out there for blackening pewter. Love the skylight.Fore and Aft Bitts:
How does one finish these? I've not worked much with metal like this.
View attachment 156515
I've read various techniques on the Forum, but I'm still not sure how to go about making the Bitts look as they should.
Jan
The Bitts are made out of Britannia (spelling ?).Looks like pewter. Brass black won't blacken it, but there are some products out there for blackening pewter. Love the skylight.


