Thanks. It definitely helpsIf you can still access the inside of the hull, you can get a disposable brush and brush the wood glue on the inside to glue all the planks to one another. Basically paint the inside with wood glue!
On a double plank hull, the better the first layer is, the better the second planking will be. It’s always a good idea to treat each planking as a single plank, that way you create good habits and it’s good practice for when you do a single plank.
In addition, even though you may be painting the hull, often times paint shows surface imperfections more than stain. Especially when using darker colors. And using a lot of putty is just more work you can avoid if you do a better planking job. So more work up front, beveling edges, tapering and pre bending, results in less work later. Ideally you just want sand the hull to a nice smooth finish. Adding excessive amounts of putty can lead to cracks and other issues, not to mention it creates a lot of extra sanding. So no matter what, it is work. So it’s better to do more work up front for a better result. Hope that helps.
-

Win a Free Custom Engraved Brass Coin!!!
As a way to introduce our brass coins to the community, we will raffle off a free coin during the month of August. Follow link ABOVE for instructions for entering.
-

PRE-ORDER SHIPS IN SCALE TODAY!
The beloved Ships in Scale Magazine is back and charting a new course for 2026!
Discover new skills, new techniques, and new inspirations in every issue.
NOTE THAT OUR FIRST ISSUE WILL BE JAN/FEB 2026
You are using an out of date browser. It may not display this or other websites correctly.
You should upgrade or use an alternative browser.
You should upgrade or use an alternative browser.
Bluenose 1:64 by Model Shipways - Build log
- Thread starter HughLo
- Start date
- Watchers 25
-
- Tags
- bluenose model shipways
- Joined
- Jun 17, 2021
- Messages
- 3,199
- Points
- 588

Sage advice. Critical tips!
5/21 to 5/29
Last time I worked on my Bluenose was on 5/3, before going to Vallarta. I kept myself busy in Mexico by starting the Molino, a pirate ship. Feel free to check out my build log on it, listed as Buccaneer. I’m still leaning the parts of a ship so PLEASE let me know if I’m referring to something incorrectly.
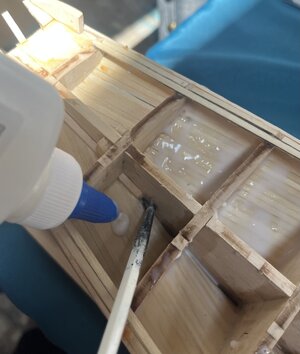
First up was “painting” the inside of the hull with glue since I originally only glued the planks to the bulkheads and not to each other (thanks for the tip Dean62). Hopefully this will help keep the planks together when I get to sanding.
After 2 coats of glue, I attacked the dried glue drops on the outside of the hull from when I glued the planks to the bulkheads. Next time I know to remove the excess glue before it dries.
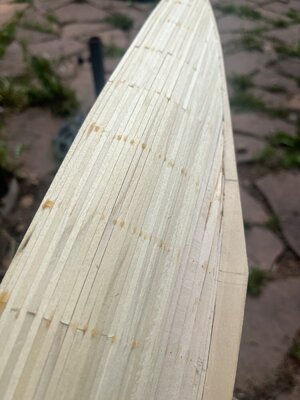
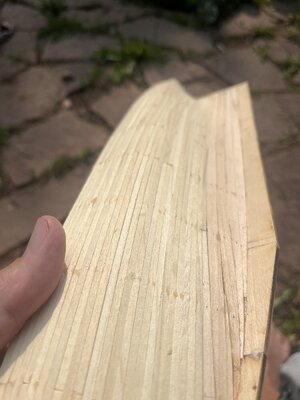
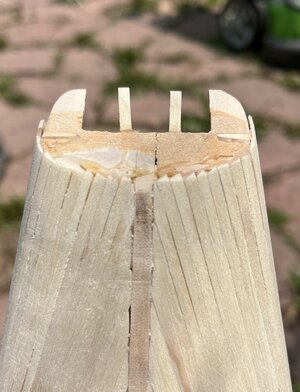
I glued planks horizontally across the transom plus a few more planks on the inside. I used nail clippers to trim the majority of the excess planks off and then used a sanding block.
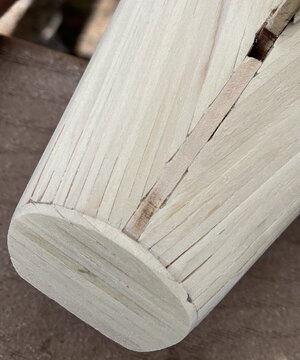
We went to the mountains for the holiday weekend so the Bluenose went with me to as I’ll have plenty of time for sanding.
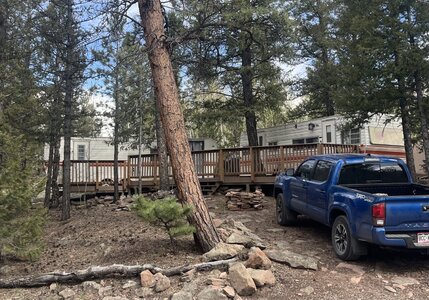 I think I sanded for approximately 7 hours over the course of the holiday weekend, mostly in the mornings while family was sleeping or in the afternoon when they we napping.
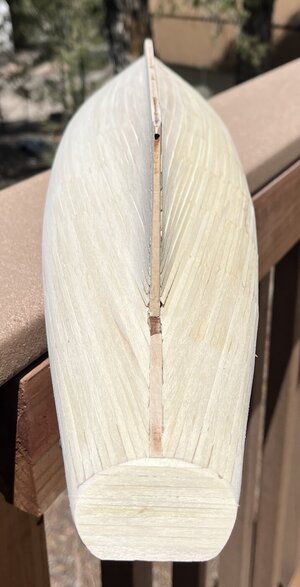
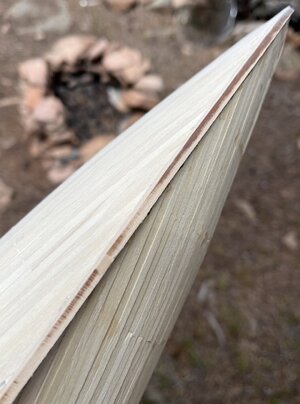
I think taking pictures helps the overall sanding process as the camera doesn’t lie. In good light, imperfections seem to jump out. Sure they might not be as bad as they look in a picture but it gives you a place to start (or continue) sanding.
The hull is really beginning to look nice, even without puddy which will have to wait until I get home as I purposely didn’t bring any.
Next up, puddy and more sanding.
Work time: 10 hours
Total work time: 72 hours
Last time I worked on my Bluenose was on 5/3, before going to Vallarta. I kept myself busy in Mexico by starting the Molino, a pirate ship. Feel free to check out my build log on it, listed as Buccaneer. I’m still leaning the parts of a ship so PLEASE let me know if I’m referring to something incorrectly.
First up was “painting” the inside of the hull with glue since I originally only glued the planks to the bulkheads and not to each other (thanks for the tip Dean62). Hopefully this will help keep the planks together when I get to sanding.

After 2 coats of glue, I attacked the dried glue drops on the outside of the hull from when I glued the planks to the bulkheads. Next time I know to remove the excess glue before it dries.


I glued planks horizontally across the transom plus a few more planks on the inside. I used nail clippers to trim the majority of the excess planks off and then used a sanding block.


We went to the mountains for the holiday weekend so the Bluenose went with me to as I’ll have plenty of time for sanding.
 I think I sanded for approximately 7 hours over the course of the holiday weekend, mostly in the mornings while family was sleeping or in the afternoon when they we napping.

I think taking pictures helps the overall sanding process as the camera doesn’t lie. In good light, imperfections seem to jump out. Sure they might not be as bad as they look in a picture but it gives you a place to start (or continue) sanding.
The hull is really beginning to look nice, even without puddy which will have to wait until I get home as I purposely didn’t bring any.
Next up, puddy and more sanding.
Work time: 10 hours
Total work time: 72 hours
- Joined
- Jun 17, 2021
- Messages
- 3,199
- Points
- 588

Looks good! Really patient too!  I've never found counting the hours to be anything but a distraction for me, and always quickly lost track. But I've always had the attention span of a flea for that aspect of the work.
 When people ask me " How long did that take ya?' my answer is always "Huh?"
Keep up the good work! I am following with great interest. Ever since seeing "Captains Courageous" (1937) That class of fishing schooner has always been one of my favorite Boats.
 When people ask me " How long did that take ya?' my answer is always "Huh?"
Keep up the good work! I am following with great interest. Ever since seeing "Captains Courageous" (1937) That class of fishing schooner has always been one of my favorite Boats.
Thank you for pointing out this movie, Peter. Found it on YouTube and just sat and watched. Beautiful images of schooners with many recognizable details.Ever since seeing "Captains Courageous" (1937)
Regards, Peter.
Hi Hugh. The hull is going to look better and better.5/21 to 5/29
Last time I worked on my Bluenose was on 5/3, before going to Vallarta. I kept myself busy in Mexico by starting the Molino, a pirate ship. Feel free to check out my build log on it, listed as Buccaneer. I’m still leaning the parts of a ship so PLEASE let me know if I’m referring to something incorrectly.
First up was “painting” the inside of the hull with glue since I originally only glued the planks to the bulkheads and not to each other (thanks for the tip Dean62). Hopefully this will help keep the planks together when I get to sanding.
View attachment 377123
After 2 coats of glue, I attacked the dried glue drops on the outside of the hull from when I glued the planks to the bulkheads. Next time I know to remove the excess glue before it dries.
View attachment 377124
View attachment 377125
I glued planks horizontally across the transom plus a few more planks on the inside. I used nail clippers to trim the majority of the excess planks off and then used a sanding block.
View attachment 377126
View attachment 377127
We went to the mountains for the holiday weekend so the Bluenose went with me to as I’ll have plenty of time for sanding.
View attachment 377130I think I sanded for approximately 7 hours over the course of the holiday weekend, mostly in the mornings while family was sleeping or in the afternoon when they we napping.
View attachment 377128
View attachment 377129
I think taking pictures helps the overall sanding process as the camera doesn’t lie. In good light, imperfections seem to jump out. Sure they might not be as bad as they look in a picture but it gives you a place to start (or continue) sanding.
The hull is really beginning to look nice, even without puddy which will have to wait until I get home as I purposely didn’t bring any.
Next up, puddy and more sanding.
Work time: 10 hours
Total work time: 72 hours
Regards, Peter.
- Joined
- Jun 17, 2021
- Messages
- 3,199
- Points
- 588

You made my day! So glad you watched that movie! The "We're Here" in the movie was "portrayed" by the Schooner "Oretha F. Spinney" She was in San Diego In early 1942, having been purchased by the actor, author and avid sailor, Sterling Hayden. He subsequently sailed her from San Diego, down the west coast, through the Panama Canal, up and through the Caribbean to the Bahamas and Fla. Since this was the first full month of the war she was charged with keeping an eye out for prowling German subs. Later she was commandeered by the US Coast Guard (as were many civilian craft of her type) for that very purpose.
A record of the Journey was written by a crewman and father of a customer of mine (whose name has escaped me) and published in the Jan. 1942 issue of "Yachting Magazine"
For my second model I bought a kit of the "Bluenose" and was working on it when my customer came to my workshop, saw the model in progress and told me the story. My customer loaned me his precious copy of the magazine, loaded with pictures of the schooner. The model, being a fin keel Grand Banks Nova Scotia fisherman, she was practically a dead ringer for the "Oretha F. Spinney"! So I kit bashed her into that boat. I'll Post pictures sometime.
I know this sounds like a fairy tale or a sailor story. But I swear it's true. You know the difference between a fairy tale and a sailor story?
A fairy tale starts with "Once upon a time..."
A sailor story begins with "This ain't no $:#+!!!"
Pete
Last edited:
Good morning Hugh. Play a little catch up on your build. Thanks for sharing your process with us. Wow the hull is transforming wonderfully. It’s amazing what careful and patient sanding does to a hull. Always good to see. Cheers Grant5/21 to 5/29
Last time I worked on my Bluenose was on 5/3, before going to Vallarta. I kept myself busy in Mexico by starting the Molino, a pirate ship. Feel free to check out my build log on it, listed as Buccaneer. I’m still leaning the parts of a ship so PLEASE let me know if I’m referring to something incorrectly.
First up was “painting” the inside of the hull with glue since I originally only glued the planks to the bulkheads and not to each other (thanks for the tip Dean62). Hopefully this will help keep the planks together when I get to sanding.
View attachment 377123
After 2 coats of glue, I attacked the dried glue drops on the outside of the hull from when I glued the planks to the bulkheads. Next time I know to remove the excess glue before it dries.
View attachment 377124
View attachment 377125
I glued planks horizontally across the transom plus a few more planks on the inside. I used nail clippers to trim the majority of the excess planks off and then used a sanding block.
View attachment 377126
View attachment 377127
We went to the mountains for the holiday weekend so the Bluenose went with me to as I’ll have plenty of time for sanding.
View attachment 377130I think I sanded for approximately 7 hours over the course of the holiday weekend, mostly in the mornings while family was sleeping or in the afternoon when they we napping.
View attachment 377128
View attachment 377129
I think taking pictures helps the overall sanding process as the camera doesn’t lie. In good light, imperfections seem to jump out. Sure they might not be as bad as they look in a picture but it gives you a place to start (or continue) sanding.
The hull is really beginning to look nice, even without puddy which will have to wait until I get home as I purposely didn’t bring any.
Next up, puddy and more sanding.
Work time: 10 hours
Total work time: 72 hours
5/31
Short post as I have a question that I don’t want to get buried. This was my first time using wood filler (in ship building) so I’m sure I have a lot to learn. From reading logs, I tried to not use “lots” of filler, just enough to cover the hull.
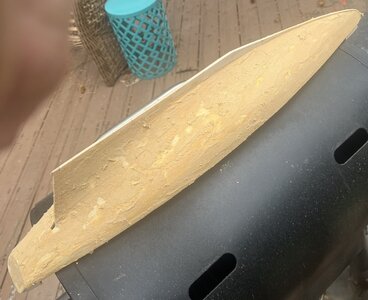
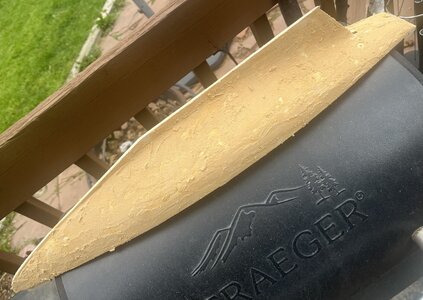
Although it’s too late this time, is it better to sand less (or not at all) prior to applying the filler as I think if I gave the filler more texture to hold on to, the better the end result will be. Thoughts?
Work time: 1 hours
Total work time: 73 hours
Short post as I have a question that I don’t want to get buried. This was my first time using wood filler (in ship building) so I’m sure I have a lot to learn. From reading logs, I tried to not use “lots” of filler, just enough to cover the hull.


Although it’s too late this time, is it better to sand less (or not at all) prior to applying the filler as I think if I gave the filler more texture to hold on to, the better the end result will be. Thoughts?
Work time: 1 hours
Total work time: 73 hours
Hi Pete. It are this kind of stories that make this forum so great. Because of 'something' it comes up and is happily shared. And Hugh has the luck it’s in his build-log.You made my day! So glad you watched that movie! The "We're Here" in the movie was "portrayed" by the Schooner "Oretha F. Spinney" She was in San Diego In early 1942, having been purchased by the actor, author and avid sailor, Sterling Hayden. He subsequently sailed her from San Diego, down the west coast, through the Panama Canal, up and through the Caribbean to the Bahamas and Fla. Since this was the first full month of the war she was charged with keeping an eye out for prowling German subs. Later she was commandeered by the US Coast Guard (as were many civilian craft of her type) for that very purpose.
A record of the Journey was written by a crewman and father of a customer of mine (whose name has escaped me) and published in the Jan. 1942 issue of "Yachting Magazine"
For my second model I bought a kit of the "Bluenose" and was working on it when my customer came to my workshop, saw the model in progress and told me the story. My customer loaned me his precious copy of the magazine, loaded with pictures of the schooner. The model, being a fin keel Grand Banks Nova Scotia fisherman, she was practically a dead ringer for the "Oretha F. Spinney"! So I kit bashed her into that boat. I'll Post pictures sometime.
I know this sounds like a fairy tale or a sailor story. But I swear it's true. You know the difference between a fairy tale and a sailor story?
A fairy tale starts with "Once upon a time..."
A sailor story begins with "This ain't no $:#+!!!"
Pete
Regards, Peter
Building up with thin layers is the best. Sand a layer till the wood of the highest parts of the wood came through the layer. Then you can feel and see where the dents are. Do sand the filler in the deeper parts a bit, because then the new layer adheres better.5/31
Short post as I have a question that I don’t want to get buried. This was my first time using wood filler (in ship building) so I’m sure I have a lot to learn. From reading logs, I tried to not use “lots” of filler, just enough to cover the hull.
View attachment 377205
View attachment 377206
Although it’s too late this time, is it better to sand less (or not at all) prior to applying the filler as I think if I gave the filler more texture to hold on to, the better the end result will be. Thoughts?
Work time: 1 hours
Total work time: 73 hours
You need less for the next layer, only in the imperfections. And a little bit on the places where the wood already came through.
It’s sand, feel, sand, feel, fill, sand, feel, sand, feel, fill etc etc etc.
At the end you have only a thin layer on your whole hull to sand a bit. Perfect for the paint job.
Regards, Peter
Last edited:
Your hull is looking good! Absolutely true statement about the pictures revealing things that we don't seem to see immediately.5/21 to 5/29
Last time I worked on my Bluenose was on 5/3, before going to Vallarta. I kept myself busy in Mexico by starting the Molino, a pirate ship. Feel free to check out my build log on it, listed as Buccaneer. I’m still leaning the parts of a ship so PLEASE let me know if I’m referring to something incorrectly.
First up was “painting” the inside of the hull with glue since I originally only glued the planks to the bulkheads and not to each other (thanks for the tip Dean62). Hopefully this will help keep the planks together when I get to sanding.
View attachment 377123
After 2 coats of glue, I attacked the dried glue drops on the outside of the hull from when I glued the planks to the bulkheads. Next time I know to remove the excess glue before it dries.
View attachment 377124
View attachment 377125
I glued planks horizontally across the transom plus a few more planks on the inside. I used nail clippers to trim the majority of the excess planks off and then used a sanding block.
View attachment 377126
View attachment 377127
We went to the mountains for the holiday weekend so the Bluenose went with me to as I’ll have plenty of time for sanding.
View attachment 377130I think I sanded for approximately 7 hours over the course of the holiday weekend, mostly in the mornings while family was sleeping or in the afternoon when they we napping.
View attachment 377128
View attachment 377129
I think taking pictures helps the overall sanding process as the camera doesn’t lie. In good light, imperfections seem to jump out. Sure they might not be as bad as they look in a picture but it gives you a place to start (or continue) sanding.
The hull is really beginning to look nice, even without puddy which will have to wait until I get home as I purposely didn’t bring any.
Next up, puddy and more sanding.
Work time: 10 hours
Total work time: 72 hours
- Joined
- Jun 17, 2021
- Messages
- 3,199
- Points
- 588

You made my day! So glad you watched that movie! The "We're Here" in the movie was "portrayed" by the Schooner "Oretha F. Spinney" She was in San Diego In early 1942, having been purchased by the actor, author and avid sailor, Sterling Hayden. He subsequently sailed her from San Diego, down the west coast, through the Panama Canal, up and through the Caribbean to the Bahamas and Fla. Since this was the first full month of the war she was charged with keeping an eye out for prowling German subs. Later she was commandeered by the US Coast Guard (as were many civilian craft of her type) for that very purpose.
A record of the Journey was written by the father of a customer of mine (whose name has escaped me) and published in the Jan. 1942 issue of "Yachting Magazine"
For my second model I bought a kit of the "Bluenose" and was working on it when my customer came to my workshop, saw the model in progress and told me the story. My customer loaned me his precious copy of the magazine, loaded with pictures of the schooner. The model, being a fin keel Grand Banks Nova Scotia fisherman, she was practically a dead ringer for the "Oretha F. Spinney"! So I kit bashed her into that boat. I'll Post pictures sometime.
I know this sounds like a fairy tale or a sailor story. But I swear it's true. You know the difference between a fairy tale and a sailor story?
A fairy tale starts with "Once upon a time..."
A sailor story begins with "This ain't no s*#t!!!"
Pete
- Joined
- Jun 17, 2021
- Messages
- 3,199
- Points
- 588

Hughlo, Looks like you used Elmer's( or similar) brand filler. If this is the case, you can just lightly sand off the peaks and high points of the filler and since ,if it is indeed Elmer's or a water soluble brand of filler, you can smooth out, reduce, and level your coating of filler with a damp smooth cloth or even some water judiciously applied with your fingertip. You can repeat this process as often as you like, reducing and adding a little more filler as desired until you achieve your desired effect. You will find the water soluble filler to be very maleable. You can achieve a very smooth even coating, filling all the gaps, and leave a nice even surface for painting (with proper prep) or a second planking overlay.
Pete
Pete
It is water soluble, but it’s “Minwax Stainable Wood Filler”. Too late for this time, but what brand/type do you recommend?Hughlo, Looks like you used Elmer's( or similar) brand filler. If this is the case, you can just lightly sand off the peaks and high points of the filler and since ,if it is indeed Elmer's or a water soluble brand of filler, you can smooth out, reduce, and level your coating of filler with a damp smooth cloth or even some water judiciously applied with your fingertip. You can repeat this process as often as you like, reducing and adding a little more filler as desired until you achieve your desired effect. You will find the water soluble filler to be very maleable. You can achieve a very smooth even coating, filling all the gaps, and leave a nice even surface for painting (with proper prep) or a second planking overlay.
Pete
- Joined
- Jun 17, 2021
- Messages
- 3,199
- Points
- 588

If, as you say, the Minwax brand is water soluble, make a test to see if you can re-dissolve and/or soften the dried filler with water with a smooth soft cloth like a piece an old cotton t shirt, or your finger tip. Sand off the rough lumpy bits first. I use Elmer's brand in the white tub with the orange top. Even if it dries in the tub you can always add water and revive it with a stir stick. Don't buy it in squeeze tubes, as it will dry out inside the tube and become a useless waste of money.
Let me know if the Minwax brand can be revived with water. As long as it is not solvent based, I believe it can be revived and made workable. I believe you will be amazed and pleased with the control you will have over the medium, and the subtle effect you can achieve. Elmer's brand is stainable as well and can be sealed and painted, or veneered over with a second decorative planking of a variety of attractive hard wood strips, such as those available from Model Shipways.
Hope this helps, Pete
Last edited:
I am a bit more frugal with my use of filler. I sand out the obvious high spots and then use a pencil to circle the low spots which I fill with putty along with any obvious gaps between planks. Once I have a reasonably smooth finish, I spray on a primer coat (assuming I am painting the hull) which really helps show the high and low areas. Here's my BN after the primer and a round of putty. https://shipsofscale.com/sosforums/...ipways-ms2130-1-64-by-jefft.11478/post-3073995/31
Short post as I have a question that I don’t want to get buried. This was my first time using wood filler (in ship building) so I’m sure I have a lot to learn. From reading logs, I tried to not use “lots” of filler, just enough to cover the hull.
View attachment 377205
View attachment 377206
Although it’s too late this time, is it better to sand less (or not at all) prior to applying the filler as I think if I gave the filler more texture to hold on to, the better the end result will be. Thoughts?
Work time: 1 hours
Total work time: 73 hours
This is followed by however many rounds of "mark, fill and sand" I need to do until I get the final smoothness I want.
Last edited:
- Joined
- Jun 17, 2021
- Messages
- 3,199
- Points
- 588

Good advice , Jeff T
I may have jumped the gun as it says is water clean-up. Once the grand daughter goes down for a nap, I’ll see what water does to it in a dried state.If, as you say, the Minwax brand is water soluble, make a test to see if you can re-dissolve and/or soften the dried filler with water with a smooth soft cloth like a piece an old cotton t shirt, or your finger tip. Sand off the rough lumpy bits first. I use Elmer's brand in the white tub with the orange top. Even if it dries in the tub you can always add water and revive it with a stir stick. Don't buy it in squeeze tubes, as it will dry out inside the tube and become a useless waste of money.
Let me know if the Minwax brand can be revived with water. As long as it is not solvent based, I believe it can be revived and made workable. I believe you will be amazed and pleased with the control you will have over the medium, and the subtle effect you can achieve. Elmer's brand is stainable as well and can be sealed and painted, or veneered over with a second decorative planking of a variety of attractive hard wood strips, such as those available from Model Shipways.
Hope this helps, Pete
Ahh, when reviewing your log I didn’t catch the text saying primer and filler and didn’t realize the small spots were the filler.I am a bit more frugal with my use of filler. I sand out the obvious high spots and then use a pencil to circle the low spots which I fill with putty along with any obvious gaps between planks. Once I have a reasonably smooth finish, I spray on a primer coat (assuming I am painting the hull) which really helps show the high and low areas. Here's my BN after the primer and a round of putty. https://shipsofscale.com/sosforums/...ipways-ms2130-1-64-by-jefft.11478/post-307399
This is followed by however many rounds of" mark, fill and sand" I need to do until I get the final smoothness I want.


