Bluenose 1/72 POF [COMPLETED BUILD]

Well I’m excited about an idea I have for a stand. I don’t want a plain painted or stained stand, nor do I care for the round pedestal mounts. So…I have something in the works that will be very different. Problem is it will become a project in and of itself! I hope to finish within a week or less. Then I can permanently mount the ship and move forward with rigging! :)
 
Last edited:
Well I’m excited about an idea I have for a stand. I don’t want a plain painted or stained stand, nor do I care for the pedestal mounts. So…I have something in the works that will be very different. Problem is it will become a project in and of itself! I hope to finish within a week or less. Then I can permanently mount the ship and move forward with rigging! :)
This sounds like it is right out of your artistic creative mind. For months I have been toying with an idea of some kind of plexiglass surging wave top and bow wake to cradle the hill within visible both above and below that cresting surface. Don't know quite how to model the water surface and have that supported from below as well as a cover which would be separate. I'm looking forward to your creation "out of the box" !!!! Rich
 
This sounds like it is right out of your artistic creative mind. For months I have been toying with an idea of some kind of plexiglass surging wave top and bow wake to cradle the hill within visible both above and below that cresting surface. Don't know quite how to model the water surface and have that supported from below as well as a cover which would be separate. I'm looking forward to your creation "out of the box" !!!! Rich
I have seen people make translucent waves out of fiberglass resin that has green dye in it. ;)
But now they have water kits for sale to use in scenery like on railroad track displays. It’s a mix and you form while it’s setting up and then paint to get the desired effect.
If you made a large enough plexiglass container, you could fill it and set your ship in there and push it forward to make a wake and the waves would form around the bow. Then while it’s setting up you use a brush to make smaller wakes and waves on the bow. Then you can dry brush white caps and the high surfaces of the waves. It’s a practiced art. You would obviously start small and practice with a small amount. Maybe get a small plastic toy boat and practice, prior to committing on a full scale ship. Then you would frame the plexiglass container with wood for your base. And of course you could make a top, and then have it become a display case.
 
Last edited:
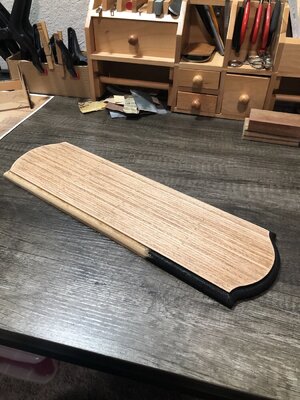
Ok…here is a peek at what I’m doing…
C7BDCDB8-4523-440B-922D-D79B8ABABA33.jpeg2C500A89-5750-438B-ABB9-94F6ADEEA6DB.jpeg
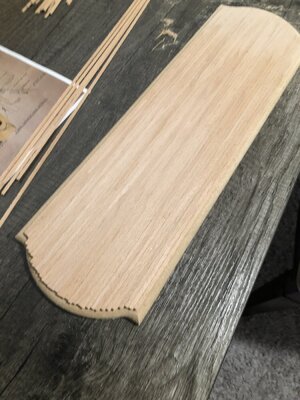
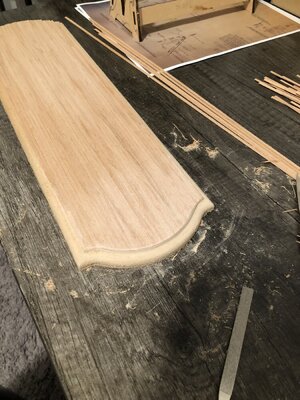
planking with staggered joints on top, then will stain and paint the border black!
4FEBA945-19C6-4559-A073-727C5E61957C.jpeg
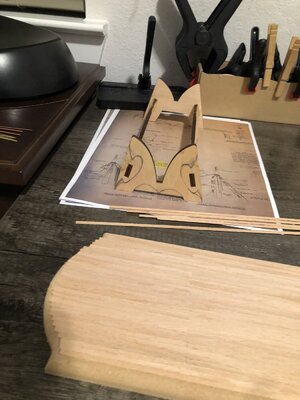
Then I am using the ends of the temporary stand as pedestals, after they are highly modified and painted black. I am going to add material to the feet and sculpt, to make them more stable without the cross supports.
Going to be unique! ;)
 
Last edited:
Ok…here is a peak at what I’m doing…
View attachment 241768View attachment 241769
planking with staggered joints on top, then will stain and paint the edges black!
View attachment 241770
Then I am using the ends of the temporary stand as pedestals, after they are highly modified and painted black. I am going to add material to the feet and sculpt, to make them more stable without the cross supports.
Going to be unique! ;)
Very clever. A 'planked' display base!
 
Ok…here is a peak at what I’m doing…
View attachment 241768View attachment 241769
planking with staggered joints on top, then will stain and paint the edges black!
View attachment 241770
Then I am using the ends of the temporary stand as pedestals, after they are highly modified and painted black. I am going to add material to the feet and sculpt, to make them more stable without the cross supports.
Going to be unique! ;)
That is going to be a nice and solid base!
Indeed unique.
Regards, Peter
 
Ok…here is a peak at what I’m doing…
View attachment 241768View attachment 241769
planking with staggered joints on top, then will stain and paint the edges black!
View attachment 241770
Then I am using the ends of the temporary stand as pedestals, after they are highly modified and painted black. I am going to add material to the feet and sculpt, to make them more stable without the cross supports.
Going to be unique! ;)
Oh heck yes Dean! That's going to be beautiful.
 
Ok…here is a peek at what I’m doing…
View attachment 241768View attachment 241769
planking with staggered joints on top, then will stain and paint the border black!
View attachment 241770
Then I am using the ends of the temporary stand as pedestals, after they are highly modified and painted black. I am going to add material to the feet and sculpt, to make them more stable without the cross supports.
Going to be unique! ;)
Nice idea here. DId you use a router to get the perfectly rounded edges and ends of the board and planks? I know you prefer hand tools and see the file but getting those compound curved ends' edges seems stretching a straight file beyond its limits. This will be all yours! Rich
 
Nice idea here. DId you use a router to get the perfectly rounded edges and ends of the board and planks? I know you prefer hand tools and see the file but getting those compound curved ends' edges seems stretching a straight file beyond its limits. This will be all yours! Rich
Thanks Rich.
The base edge is done with a router. That will be painted black. The planked boards were filed flush with the edges, and will be hand sanded to knock off any sharp edges.
The pedestal ends will be cut with a scroll saw and then pieces added at the feet and then sanded and painted black. And of course the planked wood top will be stained and clear coated. So a lot of work ahead of me. ;)
 
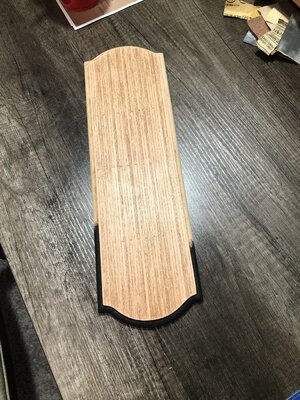
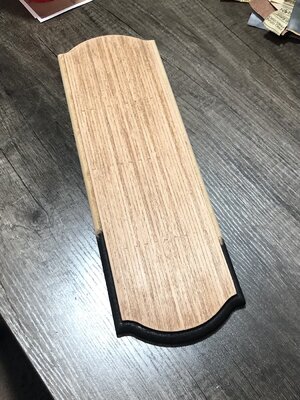
Tonight I sanded the beechwood planks. Then I stained them, sanded again and then used steel wool. My arms about to fall off…did it by hand!
The look I’m after is an old pier or equivalent.
I started painting the border black.
Trying to get this finished because I know the pedestals are going to be a lot of work!
The black pedestals will tie it all in. ;)
The feet on the pedestals are going to look similar to the old style chairs.


A2F04C9E-5DC7-4764-893B-4458AADA1CA3.jpeg464F45BF-38B1-4E13-91D1-912475CB0E2C.jpeg30FB41B9-129B-4EFB-B2AE-ACAB05F97010.jpeg
 
Last edited:
Tonight I sanded the beechwood planks. Then I stained them, sanded again and then used steel wool. My arms about to fall off…did it by hand!
The look I’m after is an old pier or equivalent.
I started painting the border black.
Trying to get this finished because I know the pedestals are going to be a lot of work!
The black pedestals will tie it all in. ;)
The feet on the pedestals are going to look similar to the old style chairs.


View attachment 241910View attachment 241911View attachment 241912
Very nice, Dean.
It will make a perfect fitt with the same style as the color contours of your BN.
Regards, Peter
 
Last edited:
when trying to get smooth and weathered/scrubbed decks I finish with a sharp ended steel tool, like the end of a one foot ruler, and scrape along the grain direction with the tool held nearly perpendicular to the surface. works a treat.
 
Back
Top