-

Win a Free Custom Engraved Brass Coin!!!
As a way to introduce our brass coins to the community, we will raffle off a free coin during the month of August. Follow link ABOVE for instructions for entering.
-

PRE-ORDER SHIPS IN SCALE TODAY!
The beloved Ships in Scale Magazine is back and charting a new course for 2026!
Discover new skills, new techniques, and new inspirations in every issue.
NOTE THAT OUR FIRST ISSUE WILL BE JAN/FEB 2026
- Home
- Forums
- Ships of Scale Group Builds and Projects
- Bluenose PoF Group Build
- Bluenose Group Build Logs
You are using an out of date browser. It may not display this or other websites correctly.
You should upgrade or use an alternative browser.
You should upgrade or use an alternative browser.
Bluenose by Mallacoota [COMPLETED BUILD]
- Thread starter mallacoota
- Start date
- Watchers 11
-
- Tags
- completed build
Well I managed to have a bit of drama with the keel but all OK now.
re - Parts 20 and 21
20 is the front lower keel cheek and 21 is the aft lower keel cheek. A couple of thoughts on these.
1. You bevel just the end thin forward tip of 20 and the bevel goes on the inside when installed so the pair of 20s form a small cradle for the bowsprit. Heinrich covers this in his "must follow" build log. I chose to do the small bevel after installation on the keel and that turned out well as 20 is very fragile.
2. I allowed a small amount of the forward tip of 20 to stand proud above 17 where the bowsprit will sit. By doing this I opened a small gap between 20 and 21 amidships. I filled the gap with small pieces of the same material and quite happy with that, certainly better than tearing 20 off which it is much too fragile to allow. I probably allowed the forward end of 20 to stand too proud ( gave it about 4mm) , but I suspect that you can only close the 20/21 gap by setting that forward end of 20 flush with the underlying part 17.......and that would not create the bowsprit cradle..??? So it is not a big thing, but I am a little puzzled by the outcome. I reckon I must have installed 20 too high at the front and it should only stand above 17 by the very small amount of the bevel...I have certainly over allowed for it .....Mistake no. 1. Many more to come I am sure.
3. There is a line full length on 21 implying that you should bevel the top of 21 to this line. By doing so, you would abruptly terminate the clear rabbet created forward by the square top edge of 20.... and that doesnt feel right to me, I picture it looking a little odd..? so I have not bevelled the top of 21. That might or might not be Mistake no. 2.
Plenty of keel building photos already posted so I will spare you mine. Happy with the end result notwitstanding the self inflicted injury above. On to the frames starting with no. 8 which seems to be a popular place to start ( it is the first full page pattern.?).
I am fitting the bottom sections of the frames (actually the ground futtocks..?) to the keel before assembling the frames with their other bits (upper futtocks) . I reckon with someone as ham fisted as me that is a much safer approach than working on the completed frame more than necessary. Can anyone tell me whether it is appropriate to remove the char from the inside of the frames.? If so I might think about doing that before assembly as well.
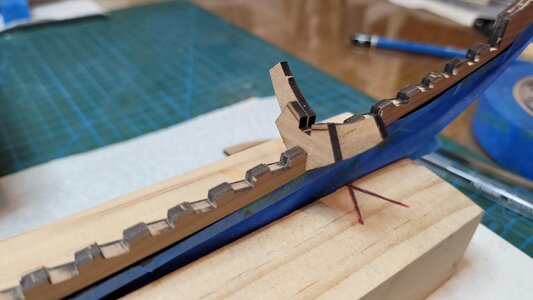
I am fitting the bottom sections of the frames (actually the ground futtocks..?) to the keel before assembling the frames with their other bits (upper futtocks) . I reckon with someone as ham fisted as me that is a much safer approach than working on the completed frame more than necessary. Can anyone tell me whether it is appropriate to remove the char from the inside of the frames.? If so I might think about doing that before assembly as well.

Hi John.
Nice to see your build.
About the char on the frames: you remove it from the inside and outside when you have all the parts glued.
Because the bevel is over both (front and back) frame. By most of the frames there is a laser line in the front and in the back witch indicates from where the bevel leads to the top on the other end. 1 picture shows more then 100 words. And for shure by Dutch English.
In several build-logs is shown how the bevel rubs. Please take a look. For sure, it will help you.
Regards, Peter
Thanks a lot Peter
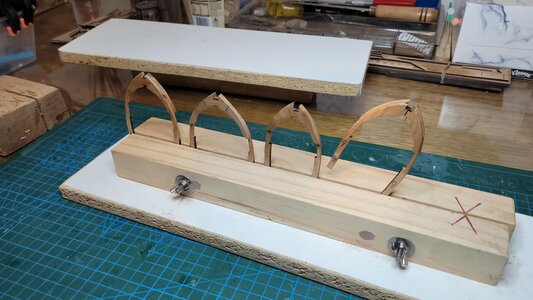
I have changed my mind about the building base being screwed down to my heavy flat board. I think it will prove too difficult for me to install the frames without some access from underneath...so I have reverted to the standard kit setup before any frame work. ( after all what would they know..? duh..!) I can see the scale of the frame building and cleaning char...good grief. Hope I live long enough.....LOL
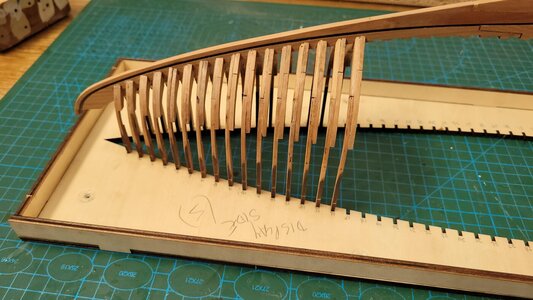
Well 6 frames completed and installed. This frame making is certainly a character building experience. I broke a few learning the best way for me to do it, and while I know this has not suited others I find my hands wont work safely with completed frames to bevel and de-char....so I am doing that to the components before assembly. The other elementary mistake I made with several was to clamp them and allowed the parts to move under the clamping (even though Heinrich warned against this)... all recovered quite well so all is good, but now that I have had all that learning from the first six frames I reckon I have a process that works for me.....hope so anyway.
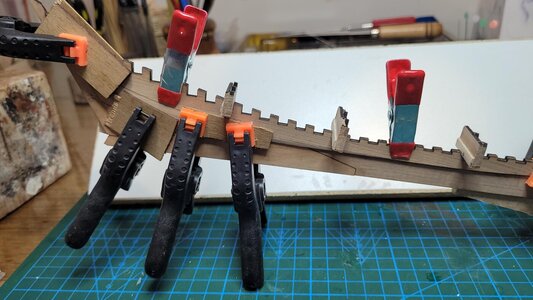
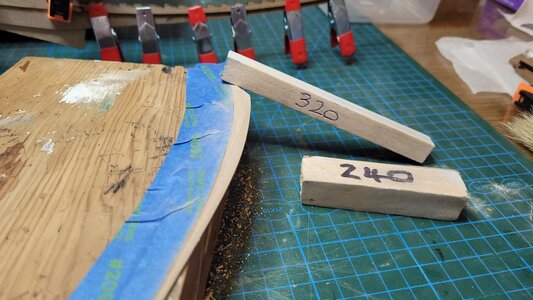
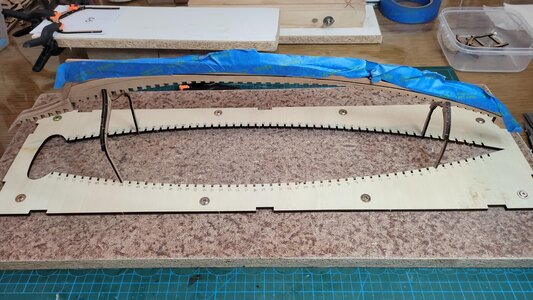
removed the base board for better access
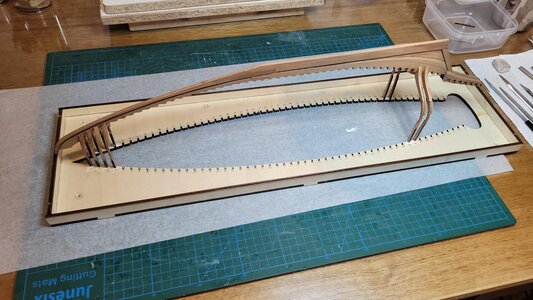


removed the base board for better access

Hi John,
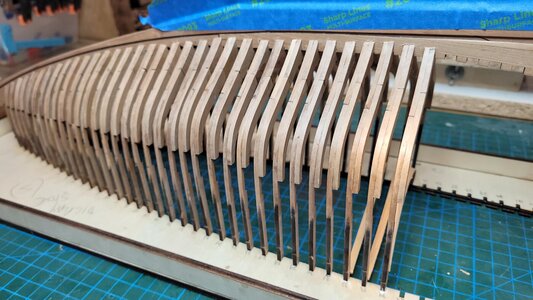
It is good to see the amount of frames is growing in the jig and on the keel.
When will you make the bevel on the frames? So the hull planks will lay on the whole surface of the frames and the flow of the frames will follow the line of the hull? (Just interested.)
Regards, Peter
It is good to see the amount of frames is growing in the jig and on the keel.
When will you make the bevel on the frames? So the hull planks will lay on the whole surface of the frames and the flow of the frames will follow the line of the hull? (Just interested.)
Regards, Peter
Hi Peter
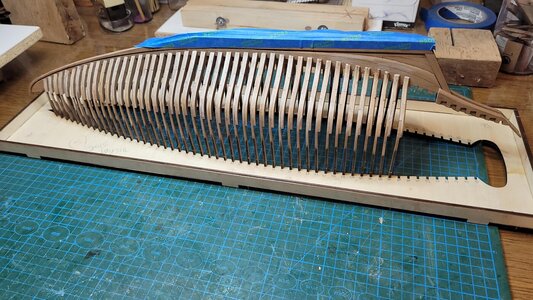
I am bevelling the frames before assembly but after the framing is complete will go over it as a finished hull. I am finding it much easier for me to bevel before building the frame. It might be a bit hard to see as they have been painted with clear matt.
I am bevelling the frames before assembly but after the framing is complete will go over it as a finished hull. I am finding it much easier for me to bevel before building the frame. It might be a bit hard to see as they have been painted with clear matt.
Well I am trying to pace myself as it is to see me through the year, no longer breaking frames as my hands have obviously got used to handling them.
j
If I can make a suggestion, I recommend fully gluing the frames together prior to beveling them. If you bevel individual pieces separately, you will never be able to accurately average the bevel angle from one piece to another, as the bevel angle changes around the profile of the frame.
I used a file in the beginning, and then I switched to a Dremel tool to get it close, and then finished with a file.
Regardless of how you bevel the frames, the angle of the bevel changes as you go around the perimeter of the frame. Doing this after it is fully glued together, ensures a nice transition, or averaging of the bevel. It will also save you a lot of sanding later, when you fair the hull, and when you fair the inside, prior to adding the internal beams and supports.
Bottom line is that these frames are very time consuming, and I recommend you work slowly and carefully and strive for accuracy. This is the foundation upon which the entire ship will be built. This will determine the final outcome of your ship! Unlike plank on bulkhead, you will see this work on the finished ship, it will not be covered up. So you must remember to treat these frames as external components, to be viewed and admired on the final presentation of your model!
John,Hi Peter
I am bevelling the frames before assembly but after the framing is complete will go over it as a finished hull. I am finding it much easier for me to bevel before building the frame. It might be a bit hard to see as they have been painted with clear matt.
If I can make a suggestion, I recommend fully gluing the frames together prior to beveling them. If you bevel individual pieces separately, you will never be able to accurately average the bevel angle from one piece to another, as the bevel angle changes around the profile of the frame.
I used a file in the beginning, and then I switched to a Dremel tool to get it close, and then finished with a file.
Regardless of how you bevel the frames, the angle of the bevel changes as you go around the perimeter of the frame. Doing this after it is fully glued together, ensures a nice transition, or averaging of the bevel. It will also save you a lot of sanding later, when you fair the hull, and when you fair the inside, prior to adding the internal beams and supports.
Bottom line is that these frames are very time consuming, and I recommend you work slowly and carefully and strive for accuracy. This is the foundation upon which the entire ship will be built. This will determine the final outcome of your ship! Unlike plank on bulkhead, you will see this work on the finished ship, it will not be covered up. So you must remember to treat these frames as external components, to be viewed and admired on the final presentation of your model!
I know I am doing the frames in an unconventional way but after breaking three of the first four with arthritic hands I had to find an alternative to the standard approach of build the frame, then de-char, then bevel. This approach works well for me but may not suit anyone else.
Break out the components in the normal way and write the frame number on both upper futtocks above the cutoff line. Also mark the display side (starboard)
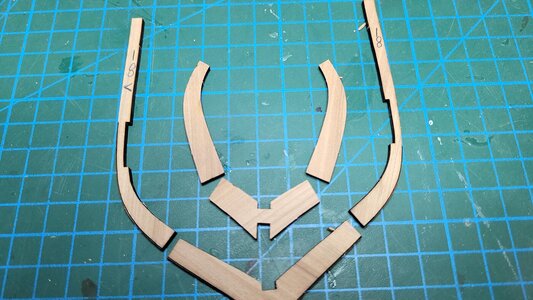
Remove the char from the parts as far up as the breakoff point. I used a small flat diamond file to remove most followed by 240 grit paper to finish.
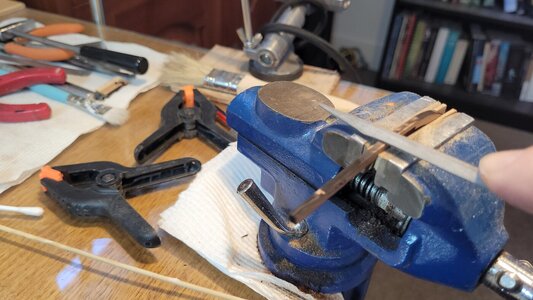
Concave edges are easily done with a dowel glued with sandpaper
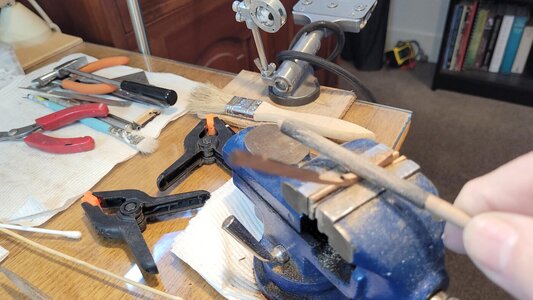
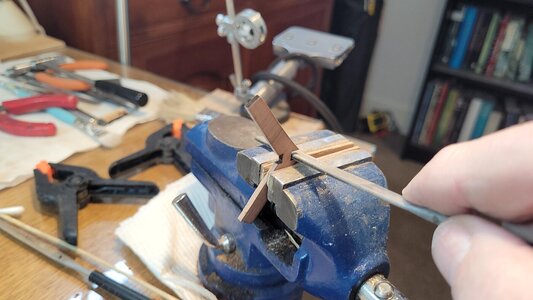
Enlarge both the keel and keelson slots in the bottom futtock with a flat file. After filing and testing a few you can gauge the amount easily.
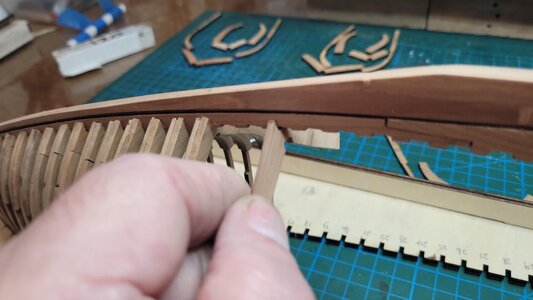
Test fit on the keel and on a piece of the keelson material (4mm) broken off the keelson parts sheet
Yeah I know this pic shows the piece of 4mm in the wrong hole..!
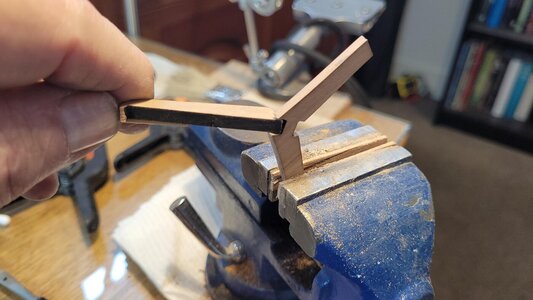
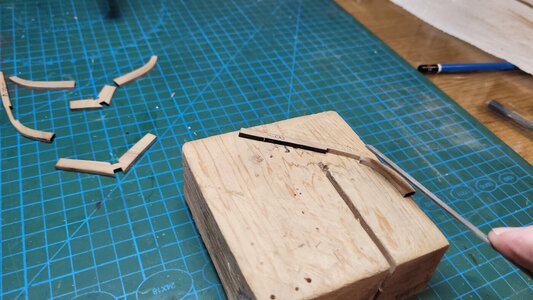
Bevel the edges as shown on the parts. I do the bulk of the material to be removed leaving the final bevelling for when the frames are all installed and it can be done with a longer sanding stick.
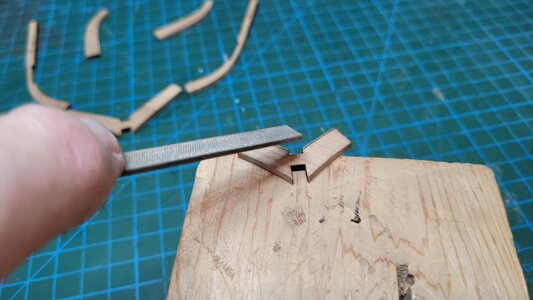
Clamp the upper futtocks tightly over the pattern. Make many small adjustments until the bottom futtock will sit exactly in it's position.
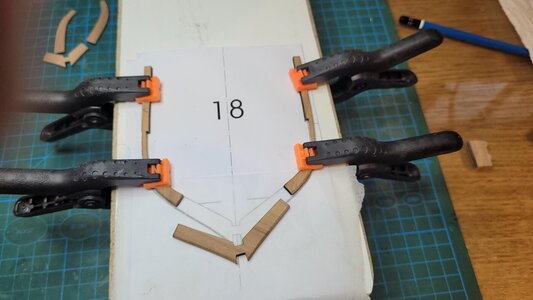
Apply a small amount of medium CA to the joins and push into place holding for 30 secs. Be very careful to have the outer edges aligned, especially the display (starboard) side. I have a small piece of oven paper under the joins to stop the CA from grabbing the pattern. These two joints only have to hold the futtocks in their correct relative positions until you apply PVA in the next step below. This join is certainly not structural.
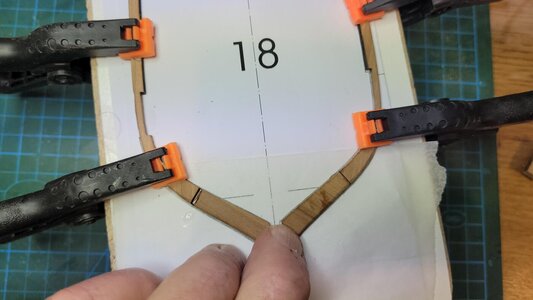
Turn the front frame you have just made over , and paint a thin coat of PVA on the section to be glued. Work it into the wood. Do the same to the rear parts which you are about to stick in place. Be very careful to keep aware of the back and front side of the two sections of the frame. You should be ending up with the upper edge bevelled on the aft part and the lower edge on the forward part.
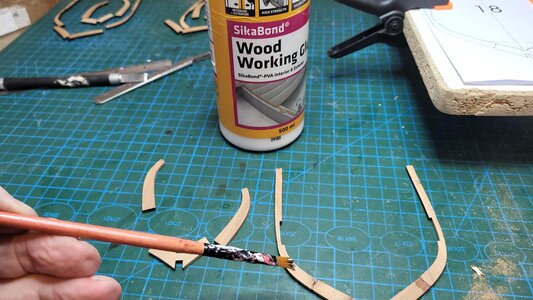
Leave for a few minutes only and the thin coat of PVA will have sealed the wood and you can add a little fresh glue to make the join.
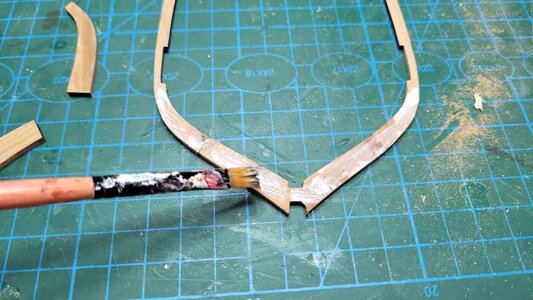
Position the aft bottom futtock using a dummy block same thinkness as keel and getting outer edge just right. Add the other pieces again being sure to align the outer edges perfectly. Do not clamp. Doing PVA this way does noes not need it and the futtocks will most likely move. The join made this way is super strong.
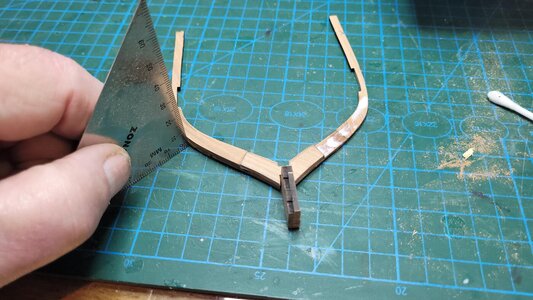
Finished....emphasise again this is a method that works very well for me but may not suit anyone else. Vive la difference...!
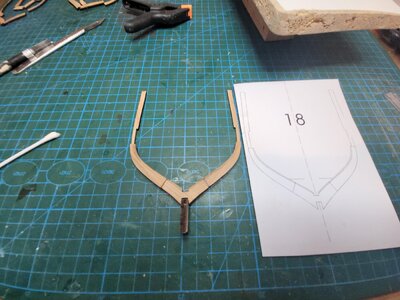
Break out the components in the normal way and write the frame number on both upper futtocks above the cutoff line. Also mark the display side (starboard)

Remove the char from the parts as far up as the breakoff point. I used a small flat diamond file to remove most followed by 240 grit paper to finish.

Concave edges are easily done with a dowel glued with sandpaper

Enlarge both the keel and keelson slots in the bottom futtock with a flat file. After filing and testing a few you can gauge the amount easily.

Test fit on the keel and on a piece of the keelson material (4mm) broken off the keelson parts sheet

Yeah I know this pic shows the piece of 4mm in the wrong hole..!

Bevel the edges as shown on the parts. I do the bulk of the material to be removed leaving the final bevelling for when the frames are all installed and it can be done with a longer sanding stick.


Clamp the upper futtocks tightly over the pattern. Make many small adjustments until the bottom futtock will sit exactly in it's position.

Apply a small amount of medium CA to the joins and push into place holding for 30 secs. Be very careful to have the outer edges aligned, especially the display (starboard) side. I have a small piece of oven paper under the joins to stop the CA from grabbing the pattern. These two joints only have to hold the futtocks in their correct relative positions until you apply PVA in the next step below. This join is certainly not structural.

Turn the front frame you have just made over , and paint a thin coat of PVA on the section to be glued. Work it into the wood. Do the same to the rear parts which you are about to stick in place. Be very careful to keep aware of the back and front side of the two sections of the frame. You should be ending up with the upper edge bevelled on the aft part and the lower edge on the forward part.

Leave for a few minutes only and the thin coat of PVA will have sealed the wood and you can add a little fresh glue to make the join.

Position the aft bottom futtock using a dummy block same thinkness as keel and getting outer edge just right. Add the other pieces again being sure to align the outer edges perfectly. Do not clamp. Doing PVA this way does noes not need it and the futtocks will most likely move. The join made this way is super strong.

Finished....emphasise again this is a method that works very well for me but may not suit anyone else. Vive la difference...!

Last edited:
That’s an interesting approach, and I would only point out that the bevel starts at the line of the frame on one side, and ends at the furthest edge of the opposite frame. Therefore attempting to bevel one frame side, prior to gluing to the other side, won’t result in the proper bevel angle. I hope that makes sense. If not I can draw an illustration for you.I know I am doing the frames in an unconventional way but after breaking three of the first four with arthritic hands I had to find an alternatrive to ther standard approach of build the frame, then de-char, then bevel. This approach works well for me but may not suit anyone else.
Break out the components in the normal way and write the frame number on both upper futtocks above the cutoff line. Also mark the display side (starboard)
View attachment 233176
Remove the char from the parts as far up as the breakoff point. I used a small flat diamond file to remove most followed by 240 grit paper to finish.
View attachment 233177
Concave edges are easily done with a dowel glued with sandpaper
View attachment 233178
Enlarge both the keel and keelson slots in the bottom futtock with a flat file. After filing and testing a few you can gauge the amount easily.
View attachment 233179
Test fit on the keel and on a piece of the keelson material (4mm) broken off the keelson parts sheet
View attachment 233187
Yeah I know this pic shows the piece of 4mm in the wrong hole..!
View attachment 233188
Bevel the edges as shown on the parts. I do the bulk of the material to be removed leaving the final bevelling for when the frames are all installed and it can be done with a longer sanding stick.
View attachment 233189
View attachment 233190
Clamo the upper futtocks tightly over the pattern. Make many small adjustments until the bottom futtock will sit exactly in it's position.
View attachment 233191
Apply a small amount of medium CA to the joins and push into place holding for 30 secs. Be very careful to have the outer edges aligned, especially the dis[play side. I have a small piece of oven paper under the joins to stop the CA from grabbing the pattern.
View attachment 233192
Turn the front frame you have just made over , and paint a thin coat of PVA on the section to be glued. Do the same to the rear parts which you are about to stick in place. Be very careful to keep aware of the back and front side of the two sections of the frame. You should be ending up with the upper edge bevelled on the aft part and the lower edge on the forward part.
View attachment 233193
Leave for a few minutes only and the thin worked in coat of PVA will have sealed the wood and you can add a little fresh glue to make the join.
View attachment 233194
Position the aft bottom futtock using a dummy block same thinkness as keel and getting outer edge just right. Add the other pieces again being sure to align the outer edges perfectly. Do not clamp. Doing PVA this way does noes not need it and the futtocks will most likely move.
View attachment 233195
Finished....emphasise again this is a method that works very well for me but may not suit anyone else. Vive la difference...!
View attachment 233196
Last edited:
Thanks Dean...Yes I realised that but decided to make some notional allowance when bevelling but not to worry too much. I will correct my bevelling sins when the frames are in place to the extent I need to.
Hi John,I know I am doing the frames in an unconventional way but after breaking three of the first four with arthritic hands I had to find an alternatrive to ther standard approach of build the frame, then de-char, then bevel. This approach works well for me but may not suit anyone else.
Break out the components in the normal way and write the frame number on both upper futtocks above the cutoff line. Also mark the display side (starboard)
View attachment 233176
Remove the char from the parts as far up as the breakoff point. I used a small flat diamond file to remove most followed by 240 grit paper to finish.
View attachment 233177
Concave edges are easily done with a dowel glued with sandpaper
View attachment 233178
Enlarge both the keel and keelson slots in the bottom futtock with a flat file. After filing and testing a few you can gauge the amount easily.
View attachment 233179
Test fit on the keel and on a piece of the keelson material (4mm) broken off the keelson parts sheet
View attachment 233187
Yeah I know this pic shows the piece of 4mm in the wrong hole..!
View attachment 233188
Bevel the edges as shown on the parts. I do the bulk of the material to be removed leaving the final bevelling for when the frames are all installed and it can be done with a longer sanding stick.
View attachment 233189
View attachment 233190
Clamp the upper futtocks tightly over the pattern. Make many small adjustments until the bottom futtock will sit exactly in it's position.
View attachment 233191
Apply a small amount of medium CA to the joins and push into place holding for 30 secs. Be very careful to have the outer edges aligned, especially the display (starboard) side. I have a small piece of oven paper under the joins to stop the CA from grabbing the pattern. These two joints only have to hold the futtocks in their correct relative positions until you apply PVA in the next step below. This join is certainly not structural.
View attachment 233192
Turn the front frame you have just made over , and paint a thin coat of PVA on the section to be glued. Work it into ther wood. Do the same to the rear parts which you are about to stick in place. Be very careful to keep aware of the back and front side of the two sections of the frame. You should be ending up with the upper edge bevelled on the aft part and the lower edge on the forward part.
View attachment 233193
Leave for a few minutes only and the thin coat of PVA will have sealed the wood and you can add a little fresh glue to make the join.
View attachment 233194
Position the aft bottom futtock using a dummy block same thinkness as keel and getting outer edge just right. Add the other pieces again being sure to align the outer edges perfectly. Do not clamp. Doing PVA this way does noes not need it and the futtocks will most likely move. The join made this way is super strong.
View attachment 233195
Finished....emphasise again this is a method that works very well for me but may not suit anyone else. Vive la difference...!
View attachment 233196
Nice to see your approach where you are comfortable with.
Regards, Peter


