• Win a Free Custom Engraved Brass Coin!!!
    As a way to introduce our brass coins to the community, we will raffle off a free coin during the month of August. Follow link ABOVE for instructions for entering.

Bluenose I - YuanQuin 1:72 - Loracs (in progress)

Assembly line: Both jigs are quite useful and the magnets are doing their jobs. One step at a time, glue two pieces > it creates a step > check with plan, > glue two others, etc. Slow but steady... not in a rush. I started to square the edge ever so slightly. 1/2 a turn of the wheel with grit 400.IMG_3449.jpeg
 
Lights - Lantern: Down the road I would like to add small LED lights to the build. The bluenose used mostly lanterns for on board lightning and navigation. The easy path would be to buy Photo-etched lanterns... but could not find any. I came across this simple solution. I'm posting it now because it will get lost and maybe of general interest here.
 
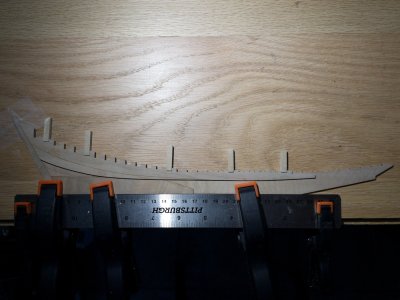
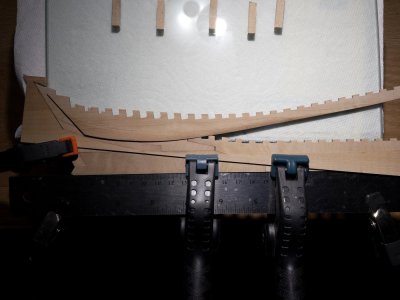
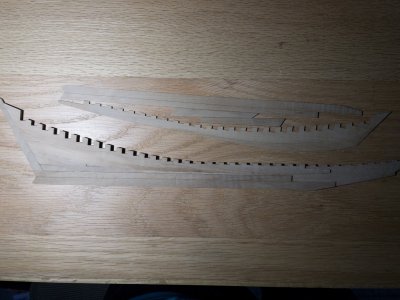
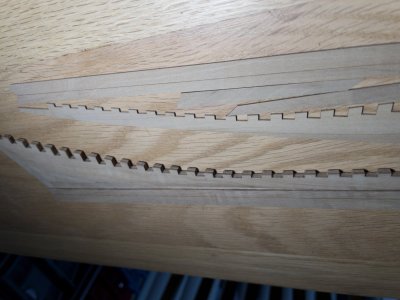
Keel Assembly: While working on the frames, I started on the keel. Dry fit each part and sand when needed. The parts are fitted with a straight back edge and glued one at a time. Use a sheet of wax paper underneath so it does not get glue on the table. Here is the partial assembly.
IMG_3467.jpeg
 
Keel assembly (part 2): <<A WORD OF CAUTION HERE >> I came across a small set back. Something I should have thought about but did not. I dry fit parts 10-15 thinking that the following with be then ok. Wrong... once dry, I tried to align part 18 and, of course it was off. The junction allows for a little bit of play. If not very careful the assembly at the far end could be ever so slightly off (upward by even couple mm), which will throw off the alignment down the road. I'm not happy with the work so far... so decided to go back to square one.

Luckily, the whole thing could be disassembled easily with hide glue. Hot steam vapor is enough to loosen the bound and separate the parts without any damage. The glue is them wipe off with a hot water rag and the parts back under press until fully dry. I will be going back to dry fit (including part 18-22) and deciding on another gluing strategy.
 
Last edited:
Keel assembly (part 2): <<A WORD OF CAUTION HERE >> I came across a small set back. Something I should have thought about but did not. I dry fit parts 10-15 thinking that the following with be then ok. Wrong... once dry, I tried to align part 18 and, of course it was off. The junction allows for a little bit of play. If not very careful the assembly at the far end could be ever so slightly off (upward by even couple mm), which will throw off the alignment down the road. I'm not happy with the work so far... so decided to go back to square one.

Luckily, the whole thing could be disassembled easily with hide glue. Hot steam vapor is enough to loosen the bound and separate the parts without any damage. The glue is them wipe off with a hot water rag and the parts back under press until fully dry. I will be going back to dry fit (including part 18-22) and deciding on another gluing strategy.
It’s good that you got the (little) misalignment in view at this early stage. And can start with the build again.
A few point from my experience during the build:
Be aware that the laser cuts gives a bit off square cutting lines.
I quickly became convinced to always think a few steps ahead. I used dry-fit components from subsequent steps to ensure the fit of the parts to be bonded. (As well as for any adjustments I had in mind.)
Perhaps use the same kind of fitting blocks as you use at the bottom parts of the frames and place 3 of them in a front, middle and aft notches by the keel assembling.
Regards, Peter
 
Greeting Peter, I "almost" had a premonition that hide glue would be quite useful with this build. However, it has limitation too and cannot replace forward thinking. I was indeed thinking about those small blocks as guide. Thanks again, for the comments... really useful.
 
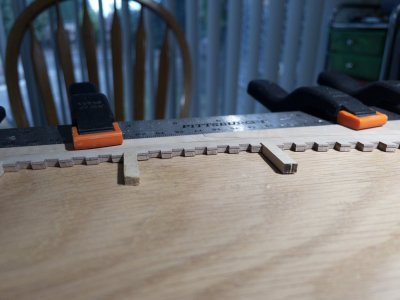
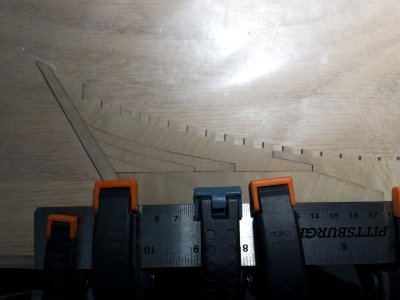
Keel (2nd attempt): With the experience above, I pulled part 18 to use as a guide. Dry fit shows that the misalignment was indeed from the assembly. Using the small tabs, I could align the parts perfectly. Once aligned and clamped I carefully removed part 8 to see underneath.

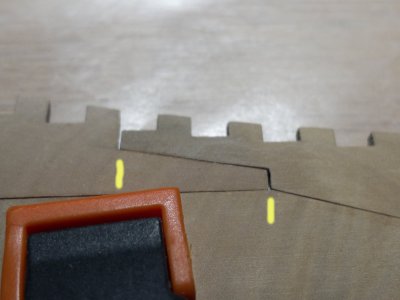
At first sight, everything seems fine... but something caught my eye. You can see in the last picture the issue to the problem earlier. Two 1mm gaps at the junction of two parts (highlighted in yellow). I will need to keep that spacing (retain the 2mm overall gap), otherwise the keel frame will be too short, and Part 8 won't align with the underlying body of the keel. Knowing that... on to gluing...

IMG_3511.jpegIMG_3512.jpegIMG_3517.jpegIMG_3516.jpeg
 
Last edited:
Keel assembly: The initial assembly of the keel is glued. I'm just waiting for the hide glue to fully cure before moving to the next step. Well, it's just an excuse to take a day or two break. ;-)
IMG_3520.jpeg
 
It's quite a while ago I build the keel assembly, but what I do remember is the char removal. Apparently you did quite a bit already, but the laser cuts were not really perpendicular and need attention.
I reread my build log, but I stepped over the keel assembly pretty quickly, so it must have been rather straightforward.
 
@Rob444 Absolutely, any ways that can be used to deal with charring is very welcome. I'm sure many will appreciate your input. This remind me that I do have a rotary similar to that from DSPIAE (see below). I did not though about it... will look into it too. I was using it with plastic model. May still be difficult in hard-to-reach areas with sharp corners.... but a file can complement it. We just cannot get enough options; this allows us to find what good for each of us and/or better deal with the unforeseen.
View attachment 546679
These small drills with a sandpaper disc attached are really good for the preliminary shaping and fairing imho
 
greeting all, I'm a slow builder... However, it happens that I'm building in the footsteps of great modelers. "The Revenge" build, that last a couple years, did used my early steam reserve. I'm now working on battery, that need recharging from time to time.

In fact, the keel is not bad at all. Lack of foresight (not looking closely at the dry fit first) and making assumption, was my downfall. Don't get me wrong, the kit is quite good but even the best one as little quirks here and there.

Pleased to meet you all... I recognized quite a number of you from your own build logs. Thanks for that! In fact, I barely look at the manual. My go to are, more often than not, your logs. I may just oversee some details or forgot about it.. Hehe!
 
Last edited:
Back
Top